
Hardware
Cooler Master H500M Case Review
Introduction
In line with MasterCase’s commitment to unparalleled customization and flexibility, Cooler Master has added another case to the H500 series with the MasterCase H500M.
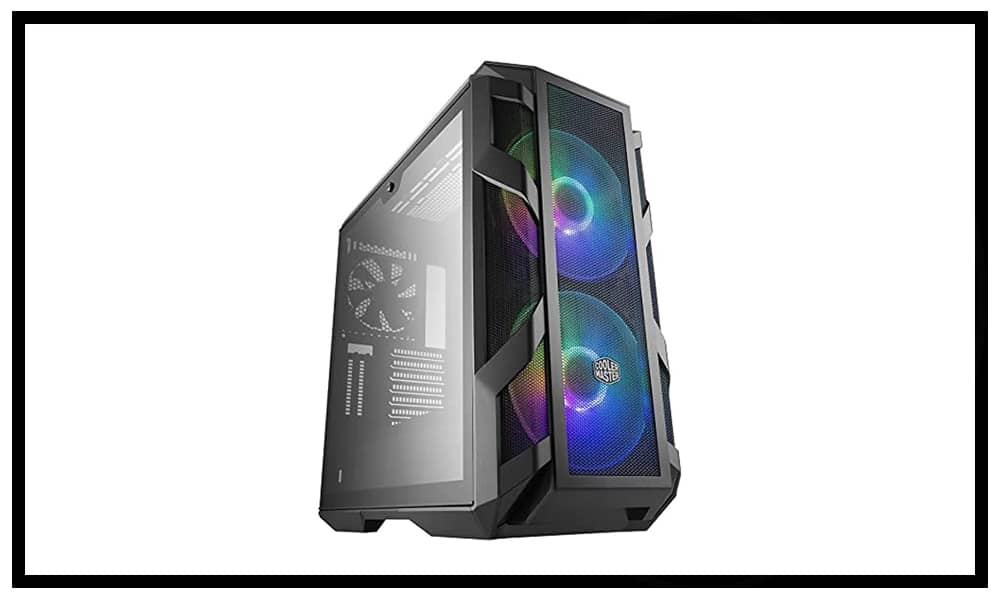
At first glance, the H500M may resemble its older brother, the H500P. But, Cooler Master has gone the extra mile with the H500M and added tempered glass panels to the top and back side as well as added the ability to easily change out the front mesh panel to one made of tempered glass. Other features include a fully removable PSU shroud, additional cables for ARGB support, and a GPU support arm. In addition, you will find 2 x 200mm ARGB fans, a Rear 140mm 1200RPM fan, and an ARGB controller. Coming in at an MSRP of $200, the H500M definitely lands itself on the premium side of mid-tower cases and is about $50 more than its counterpart, the H500P Mesh.
We would like to thank Cooler Master for providing us with this case to look at.
About Cooler Master
Back in 1992, when the internet was in its early stages and CPU’s were measured in MHz rather than GHz, a company called ORYX was born. ORYX later became Cooler Master, which we know the company as today. Started by a rogue product manager who had no funding and no support except a single administrative secretary, he set out to create, innovate and improve products for the PC industry. Starting with its first product, a Socket 7 CPU heat sink in 1993, its product line has since grown to Cases, Peripherals, Fans, and much more.
Over the past 25+ years they brought many advancements and firsts to the PC industry (such as the first all copper heat sink) and today, they continue to innovate by bringing new and exciting products to market.
Features & Specifications
Notable features of the H500M are:
- 4 sides of tempered glass
- Swappable mesh from panel for extra airflow
- GPU support for longer GPUs
- ARGB controller included
- Fully removable PSU shroud
- 9 covers for you to hide your cables/PSU
- USB 3.1 (Gen) Type-C port on the front IO
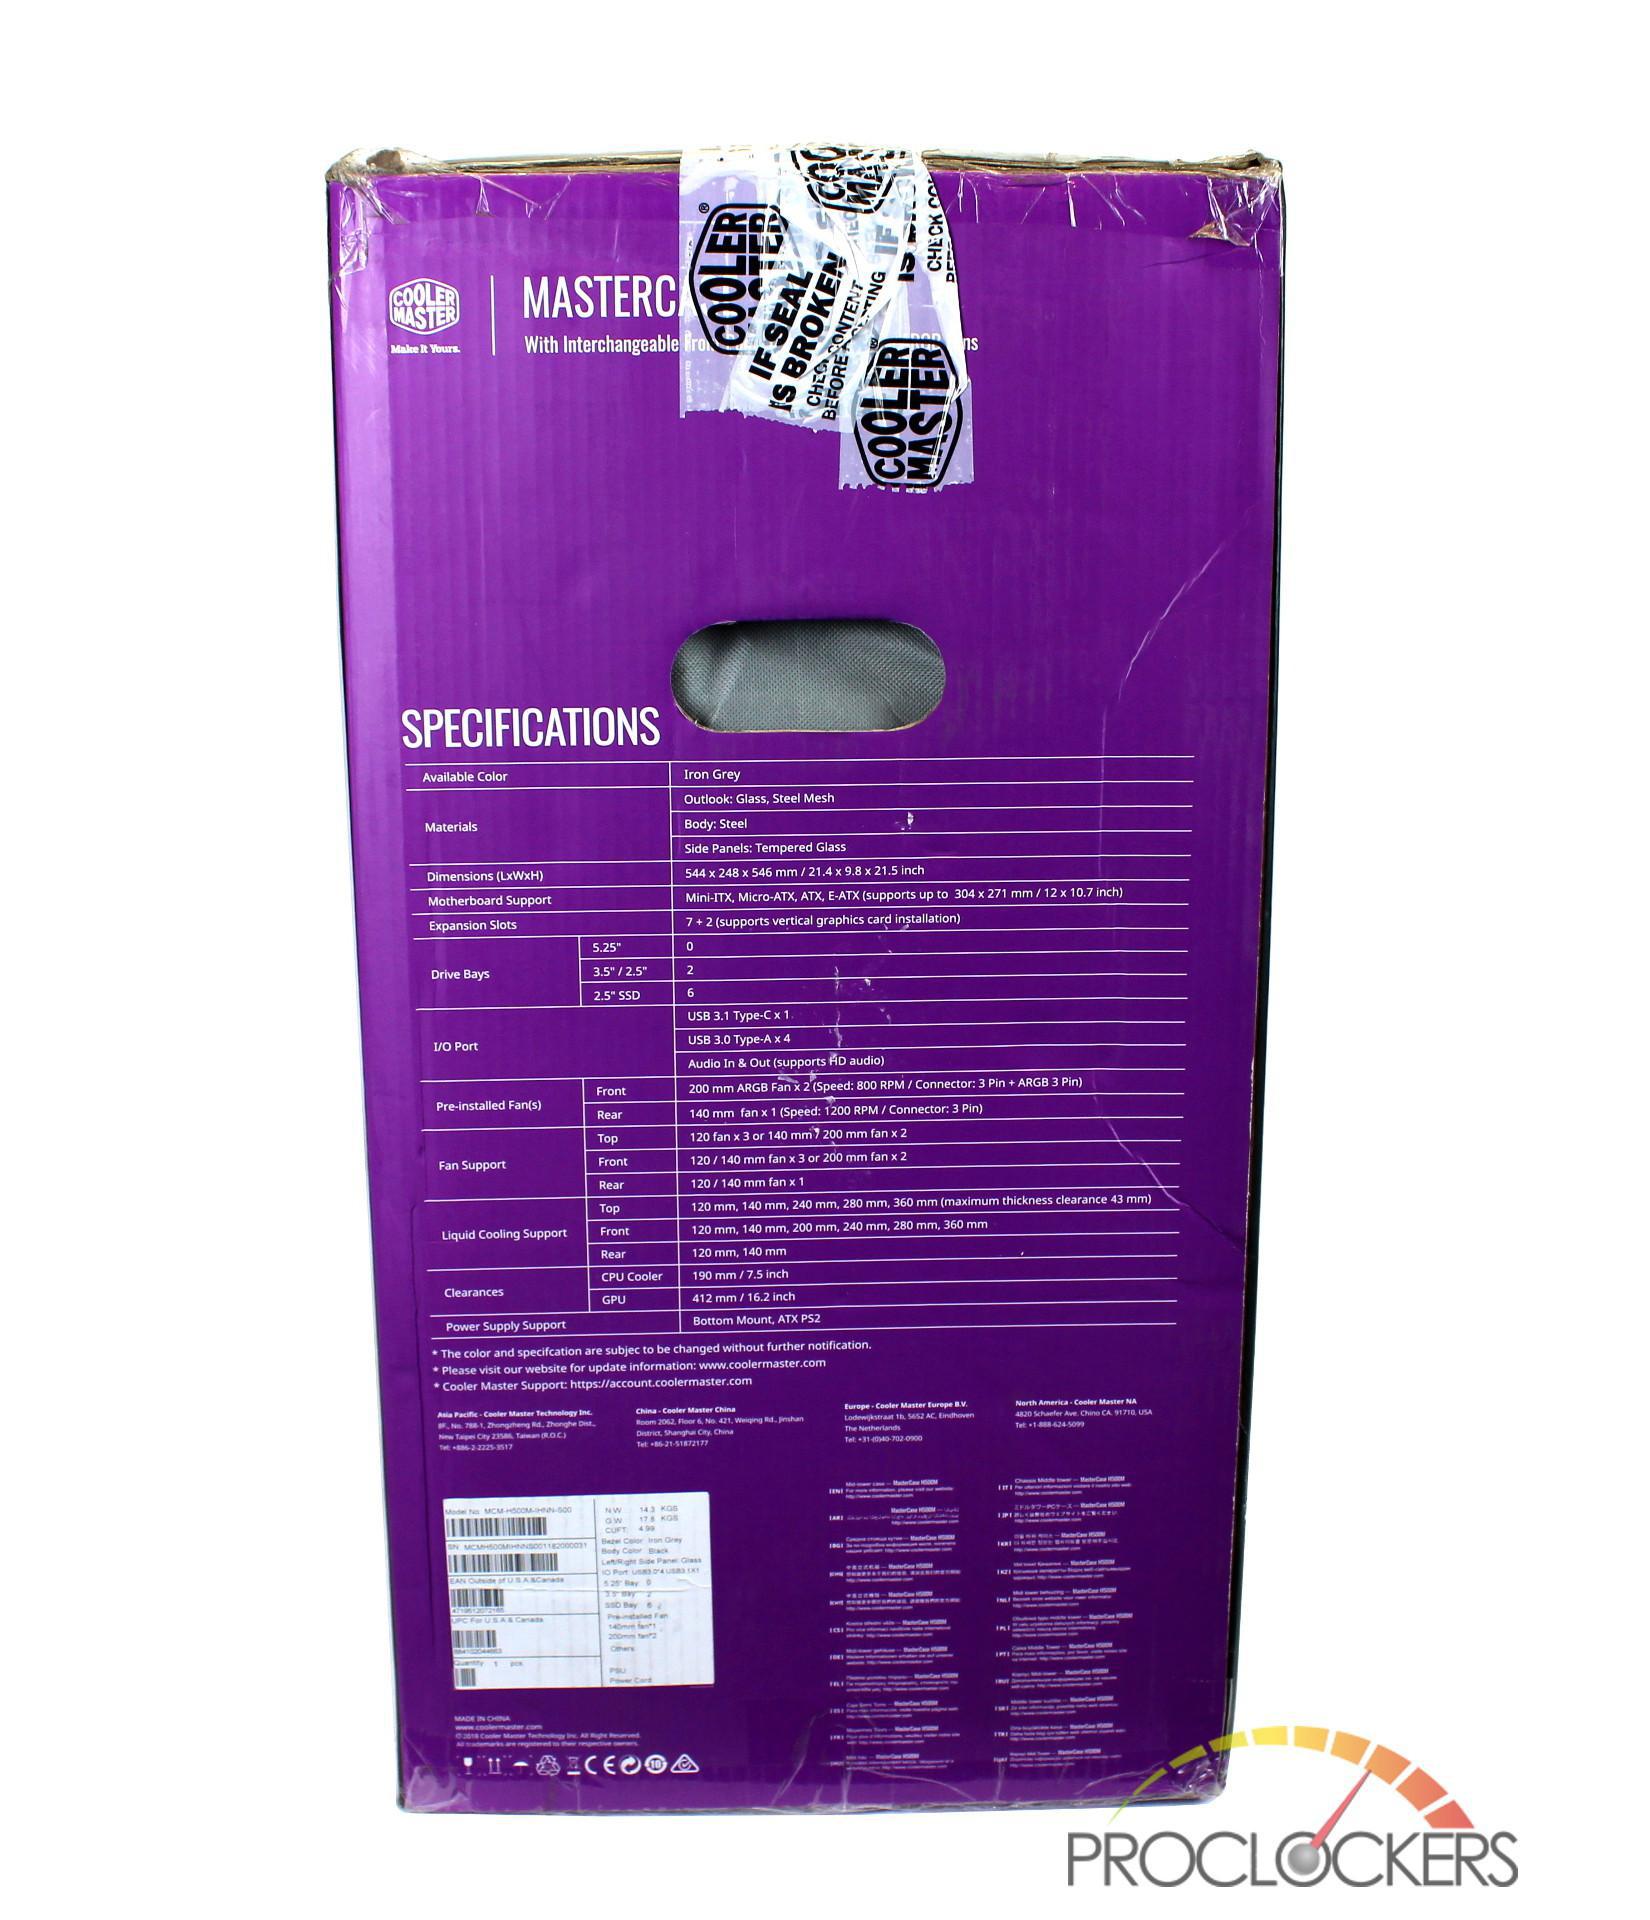
Technical specifications are as follows:
| Product Name | MasterCase H500M |
| Model Number | MCM-H500M-IHNN-S00 |
| Available Color | Iron Grey |
| Materials | Outlook: Steel Mesh, Glass Body: Steel Side panel: Tempered Glass |
| Dimensions (LxWxH) | 544 x 248 x 546mm / 21.4 x 9.8 x 21.5 inch |
| Motherboard Support | Mini-ITX, Micro-ATX, ATX, E-ATX (support up to 12″ x 10.7″) |
| Expansion Slots | 7 + 2 (Support vertical graphics card installation) |
| 5.25″ Drive Bays | 0 |
| 2.5″ / 3.5″ Drive Bays | 2 |
| 2.5″ SSD Drive Bays | 6 |
| I/O Port | USB 3.1 Type-C x 1 USB 3.0 Type-A x 4 Audio In & Out (supports HD Audio) |
| Pre-installed Fan(s) – Front | 200mm ARGB Fan x 2 (Speed: 800RPM / Connector: 3Pin + ARGB 3pin) |
| Pre-installed Fan(s) – Rear | 140mm fan x 1 (Speed: 1200RPM / Connector: 3Pin) |
| Fan Support – Top | 120 fan x 3 or 140mm/200mm fan x 2 |
| Fan Support – Front | 120/140mm fan x 3 or 200mm fan x 2 |
| Fan Support – Rear | 120/140mm fan x 1 |
| Liquid Cooling Support – Top | 120mm, 140mm, 240mm, 280mm, 360mm (maximum thickness clearance 43mm) |
| Liquid Cooling Support – Front | 120mm, 140mm, 200mm, 240mm, 280mm, 360mm (70mm clearance w/radiator lid & M.portremoved) |
| Liquid Cooling Support – Rear | 120mm, 140mm |
| Clearance – CPU Cooler | 190mm |
| Clearance – Graphics Card | 412mm |
| Clearance – Power Supply | 200mm |
| Power Supply Support | Bottom Mount, ATX PS2 |
| EAN Code | 4719512072165 |
| UPC Code | 884102044663 |
Packaging & Unboxing
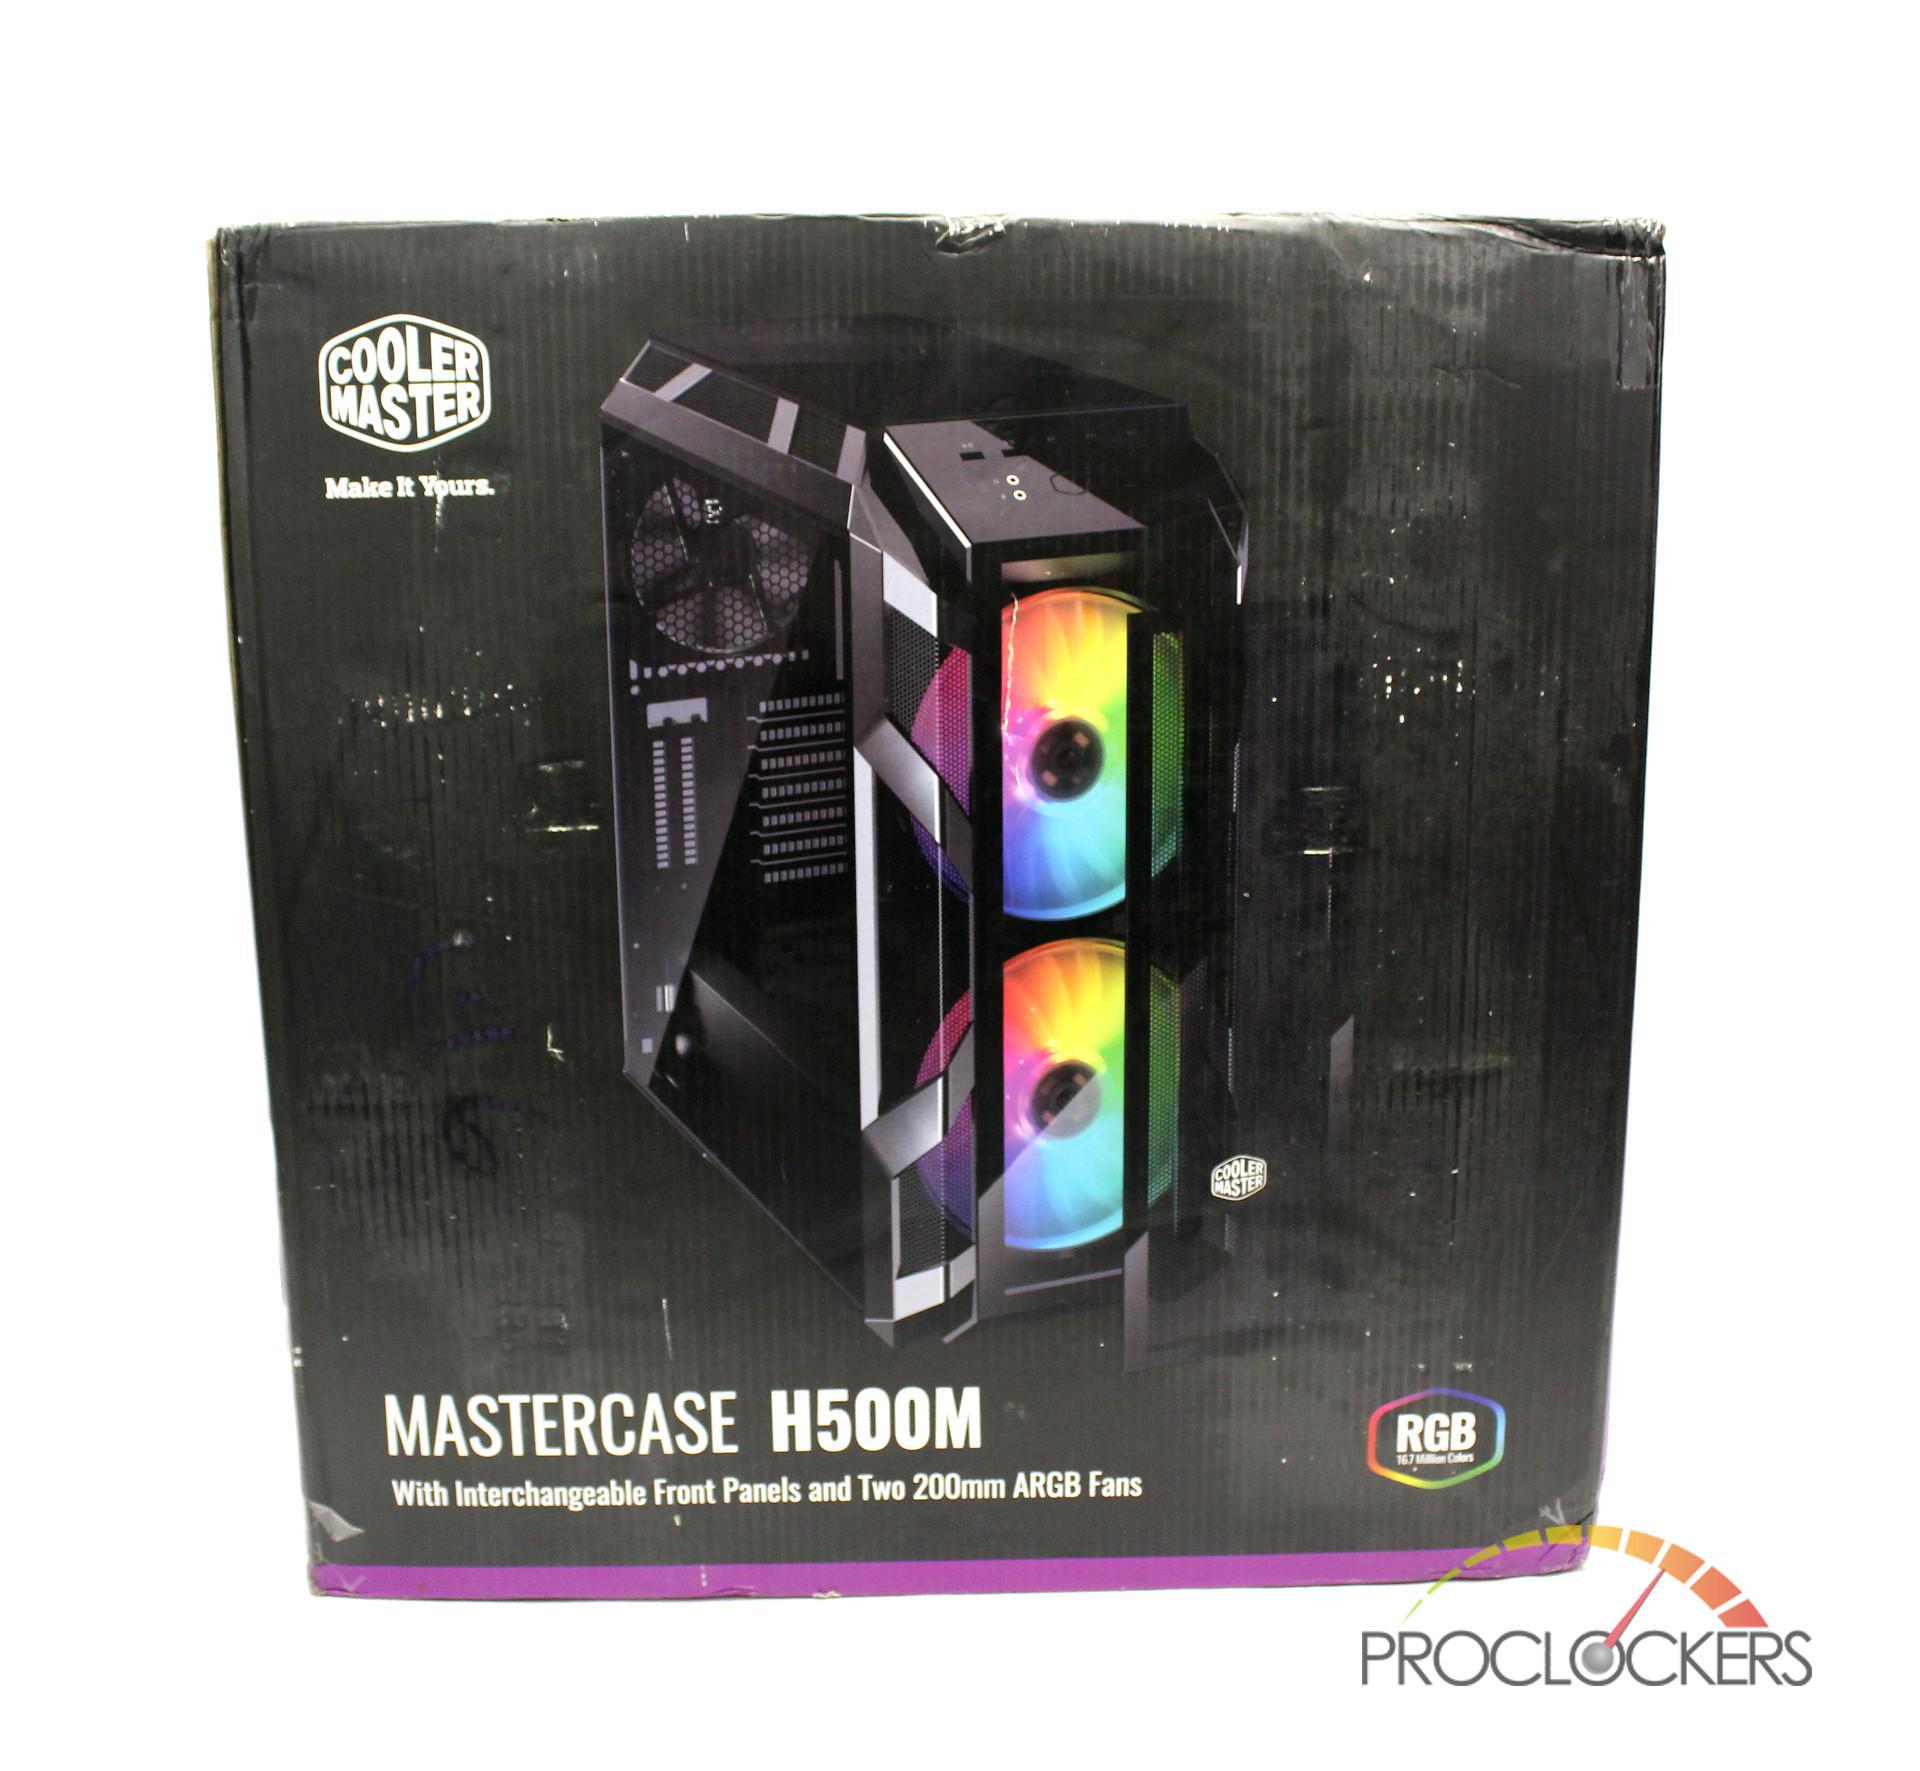
Upon receiving your MasterCase H500M, you’re presented with a full colored box that displays the H500M as well as its technical specifications. On one side you see an angled view of the case with both front 200mm fans showing off there RGB flair.
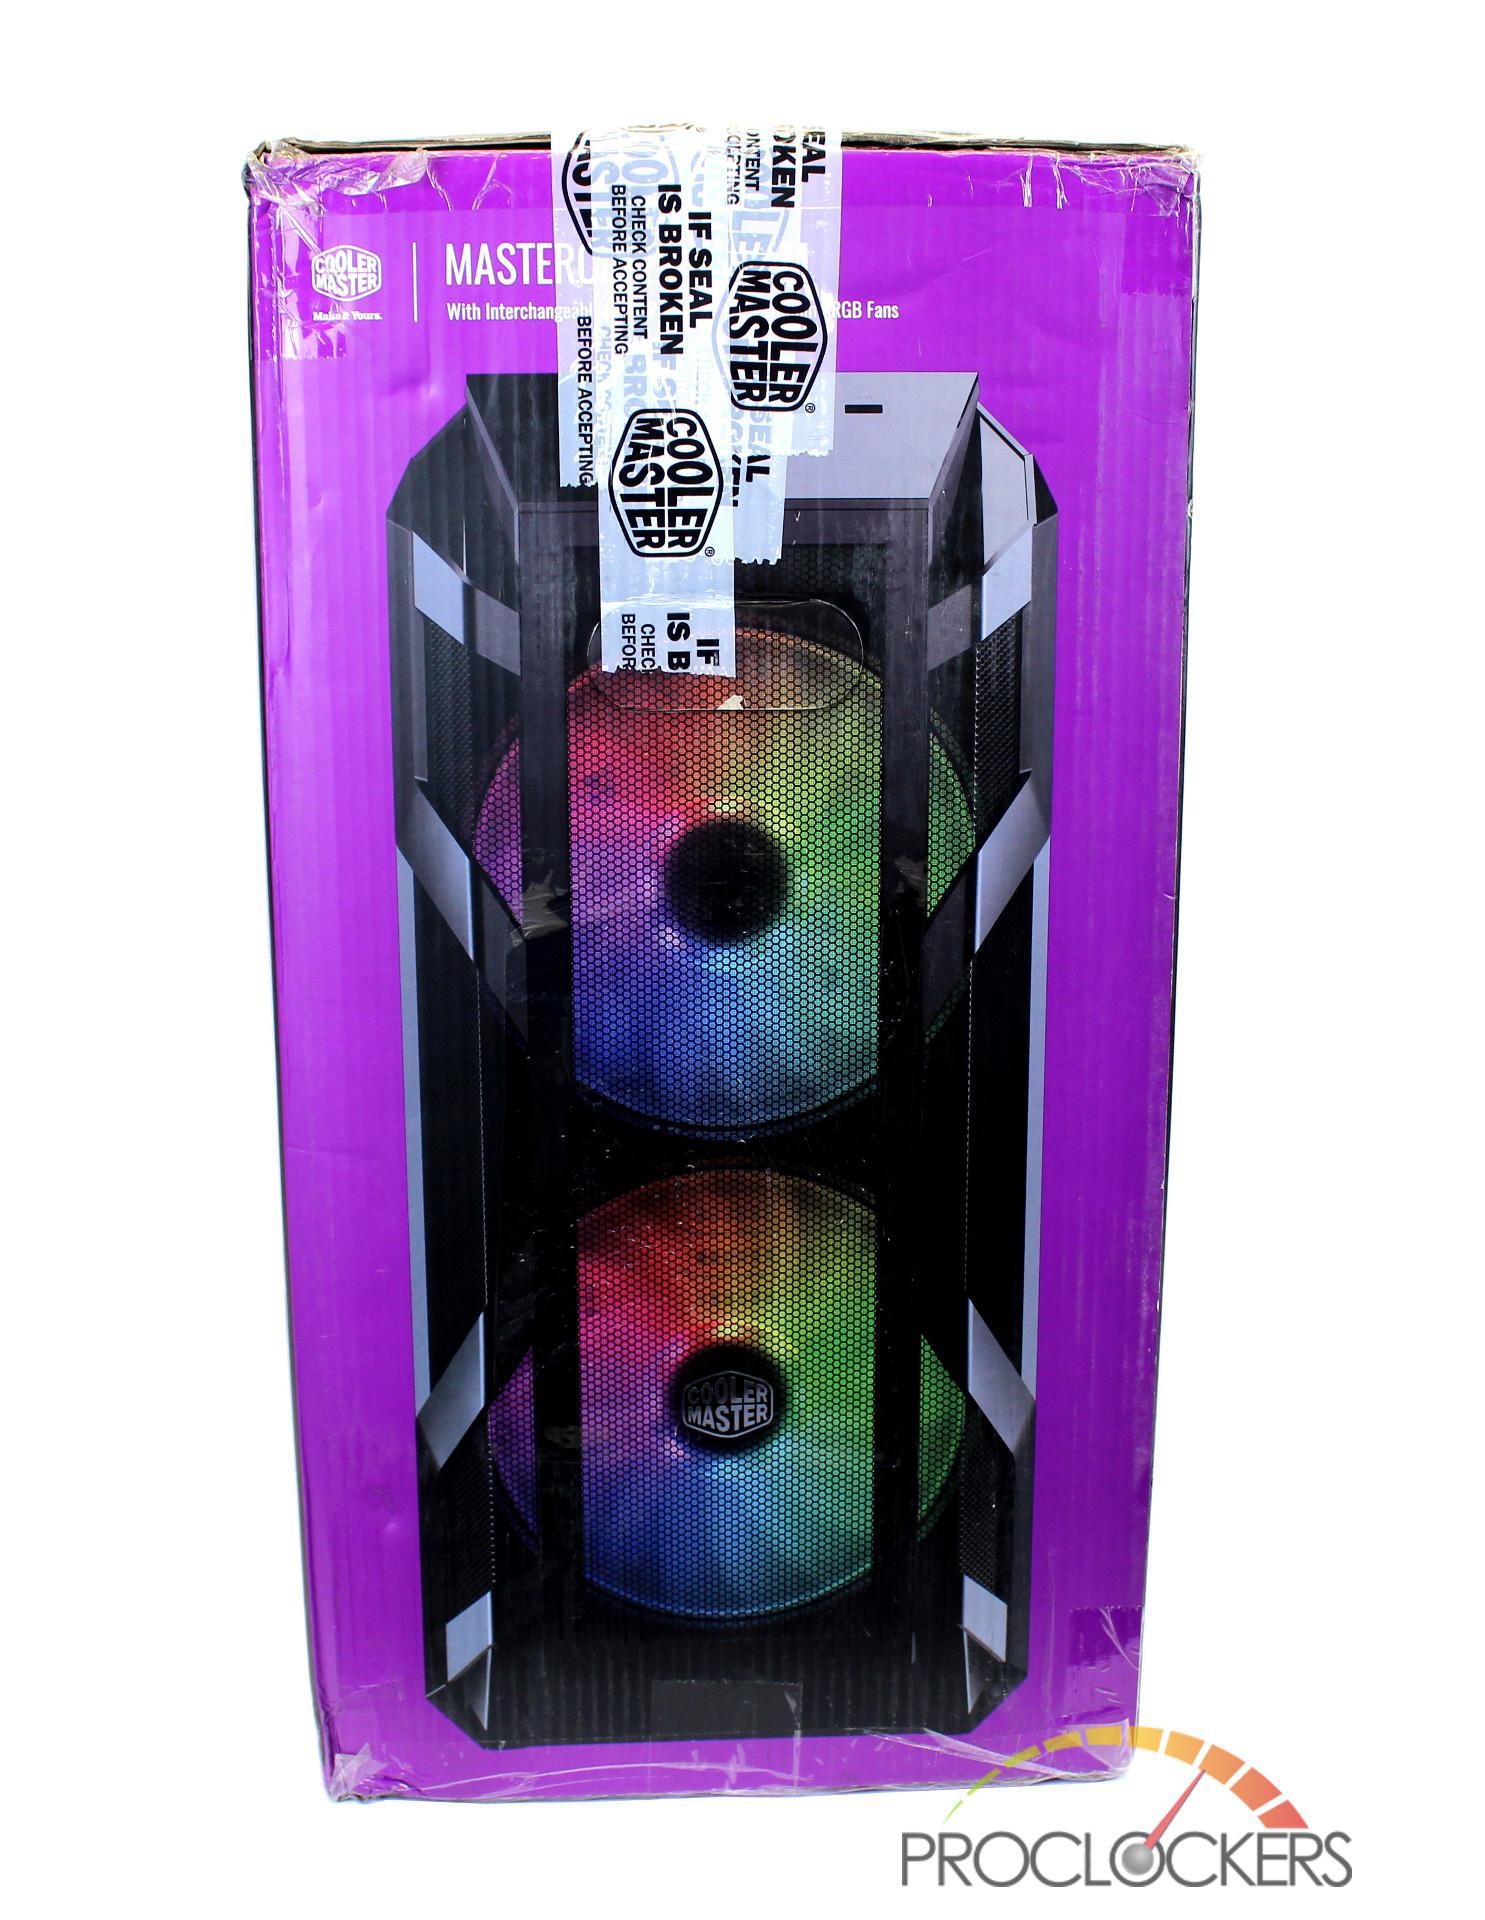
Moving to the front of the box you get a front view of the chassis with the RGB fans illuminated.
Moving to the other side of the case, you’re presented with a written overview of the case as well as a set of notable features in a variety of languages.
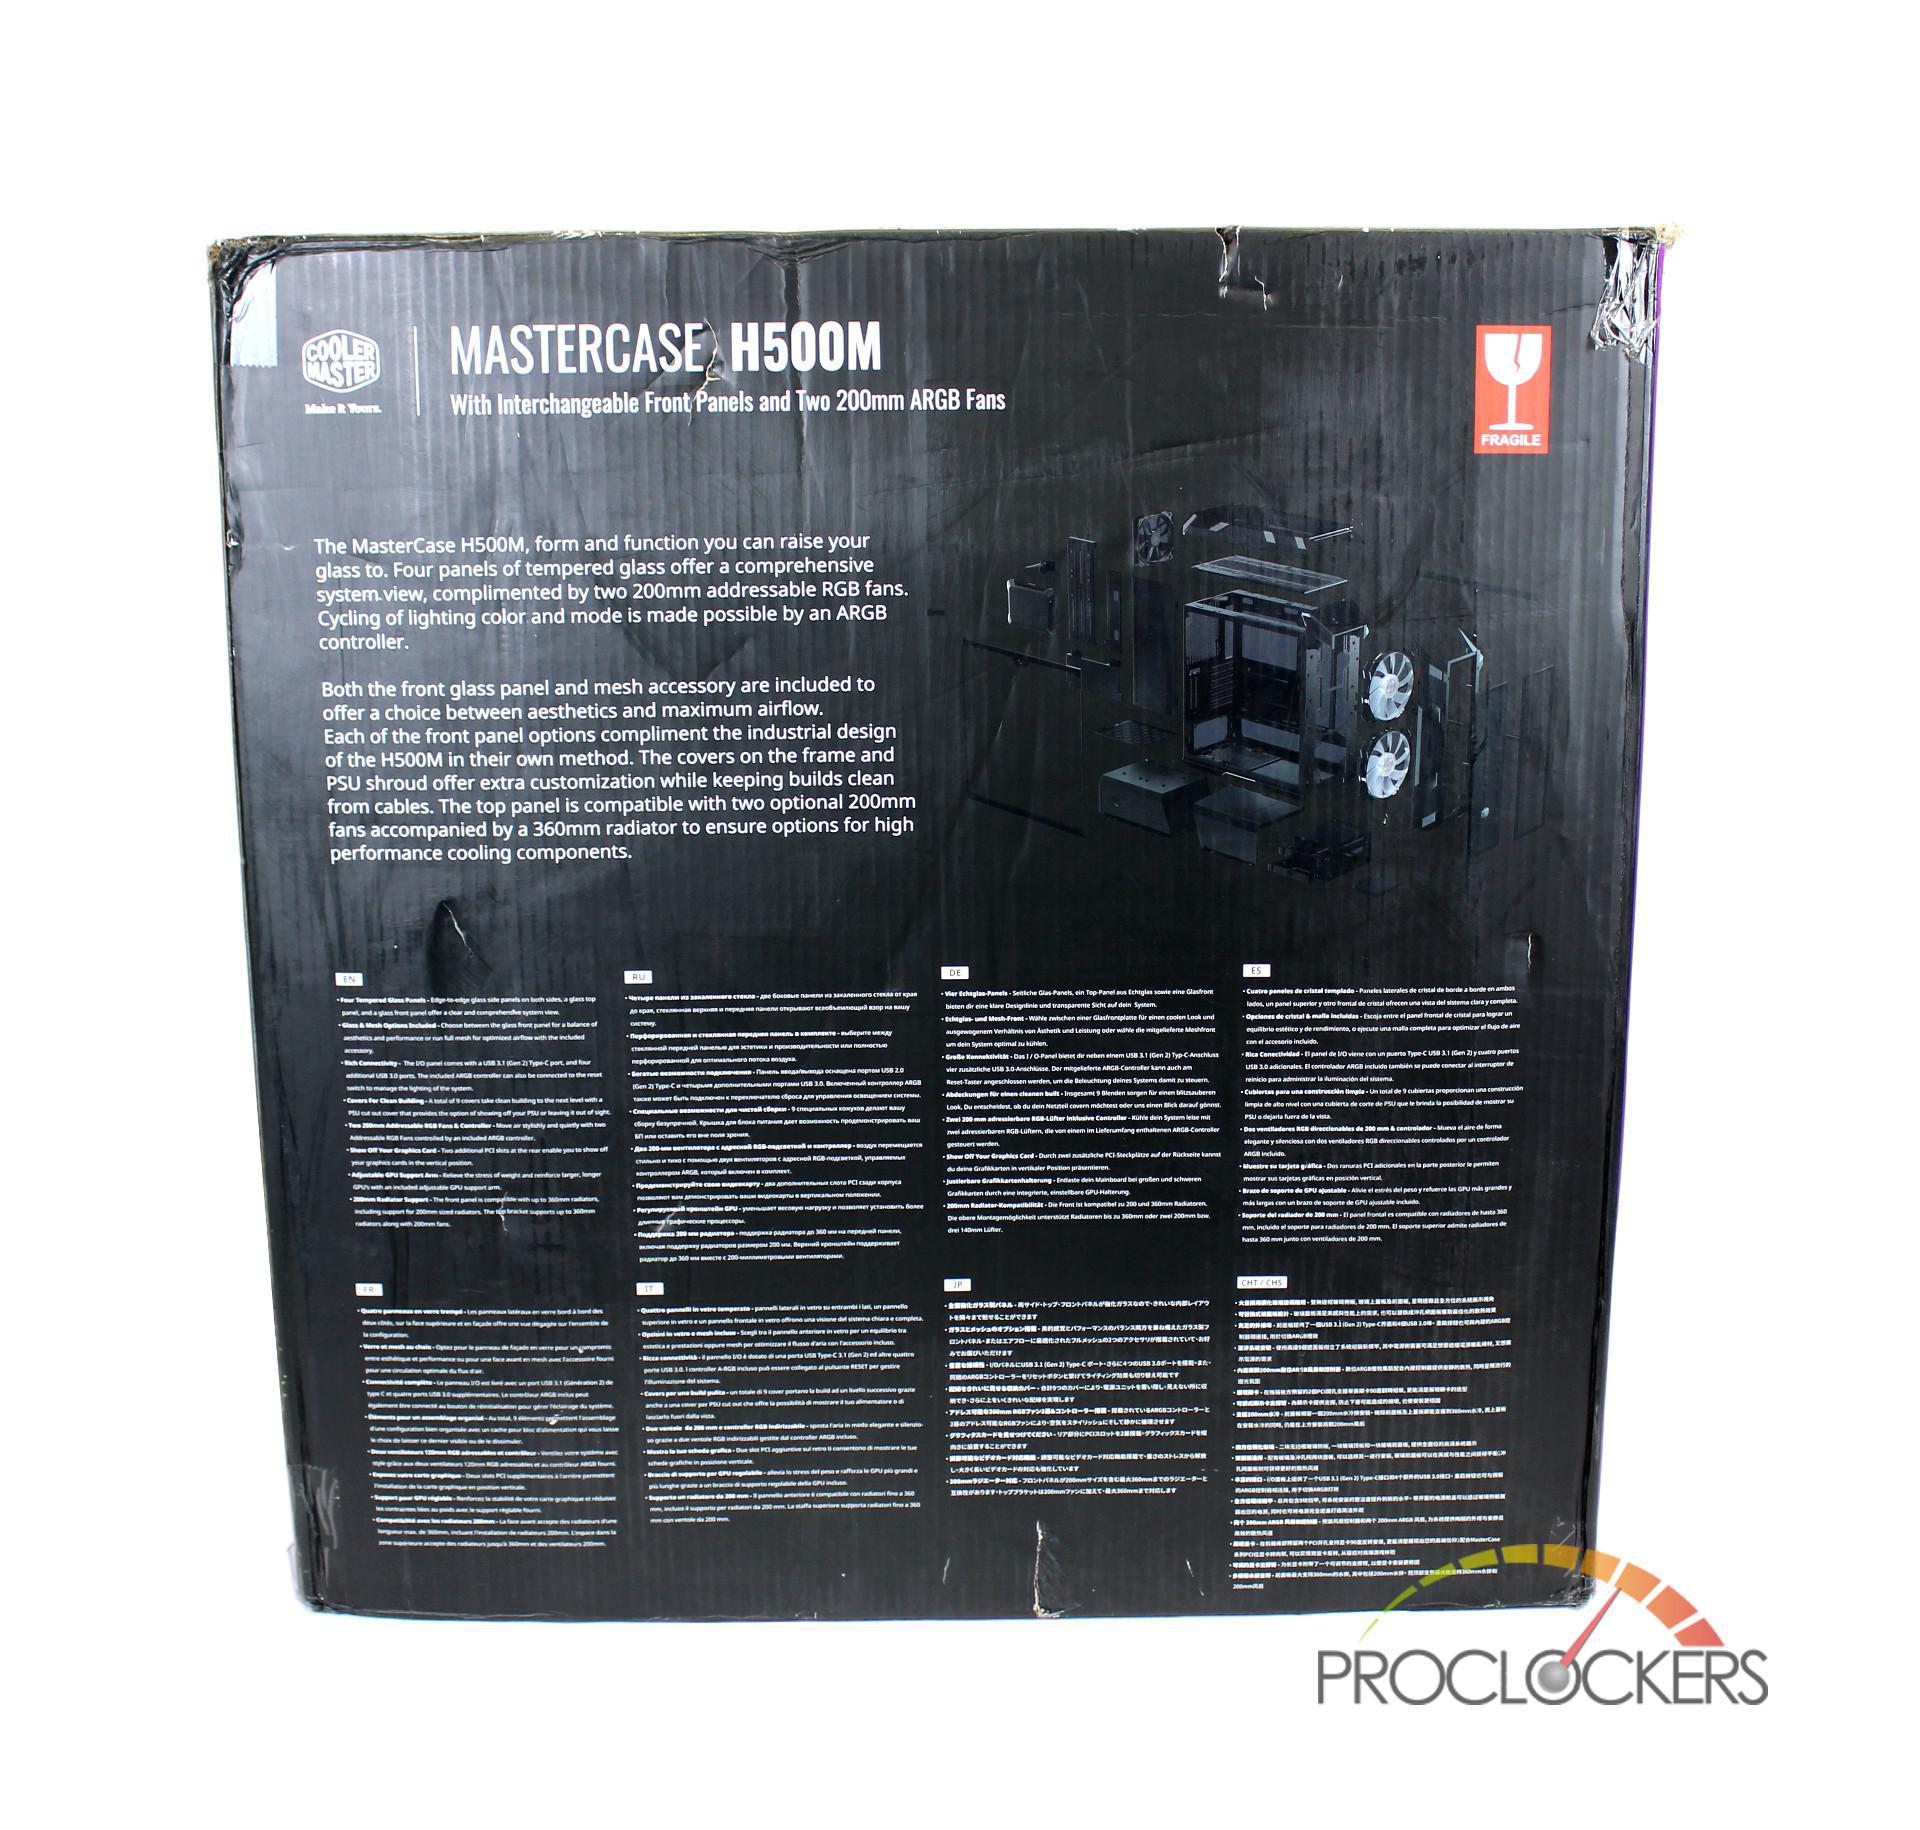
All technical specifications of the H500M are provided on the back on the box.
Upon opening the box, you will find that the case is securely encased in foam, which is also placed into a grey bag with two handles.
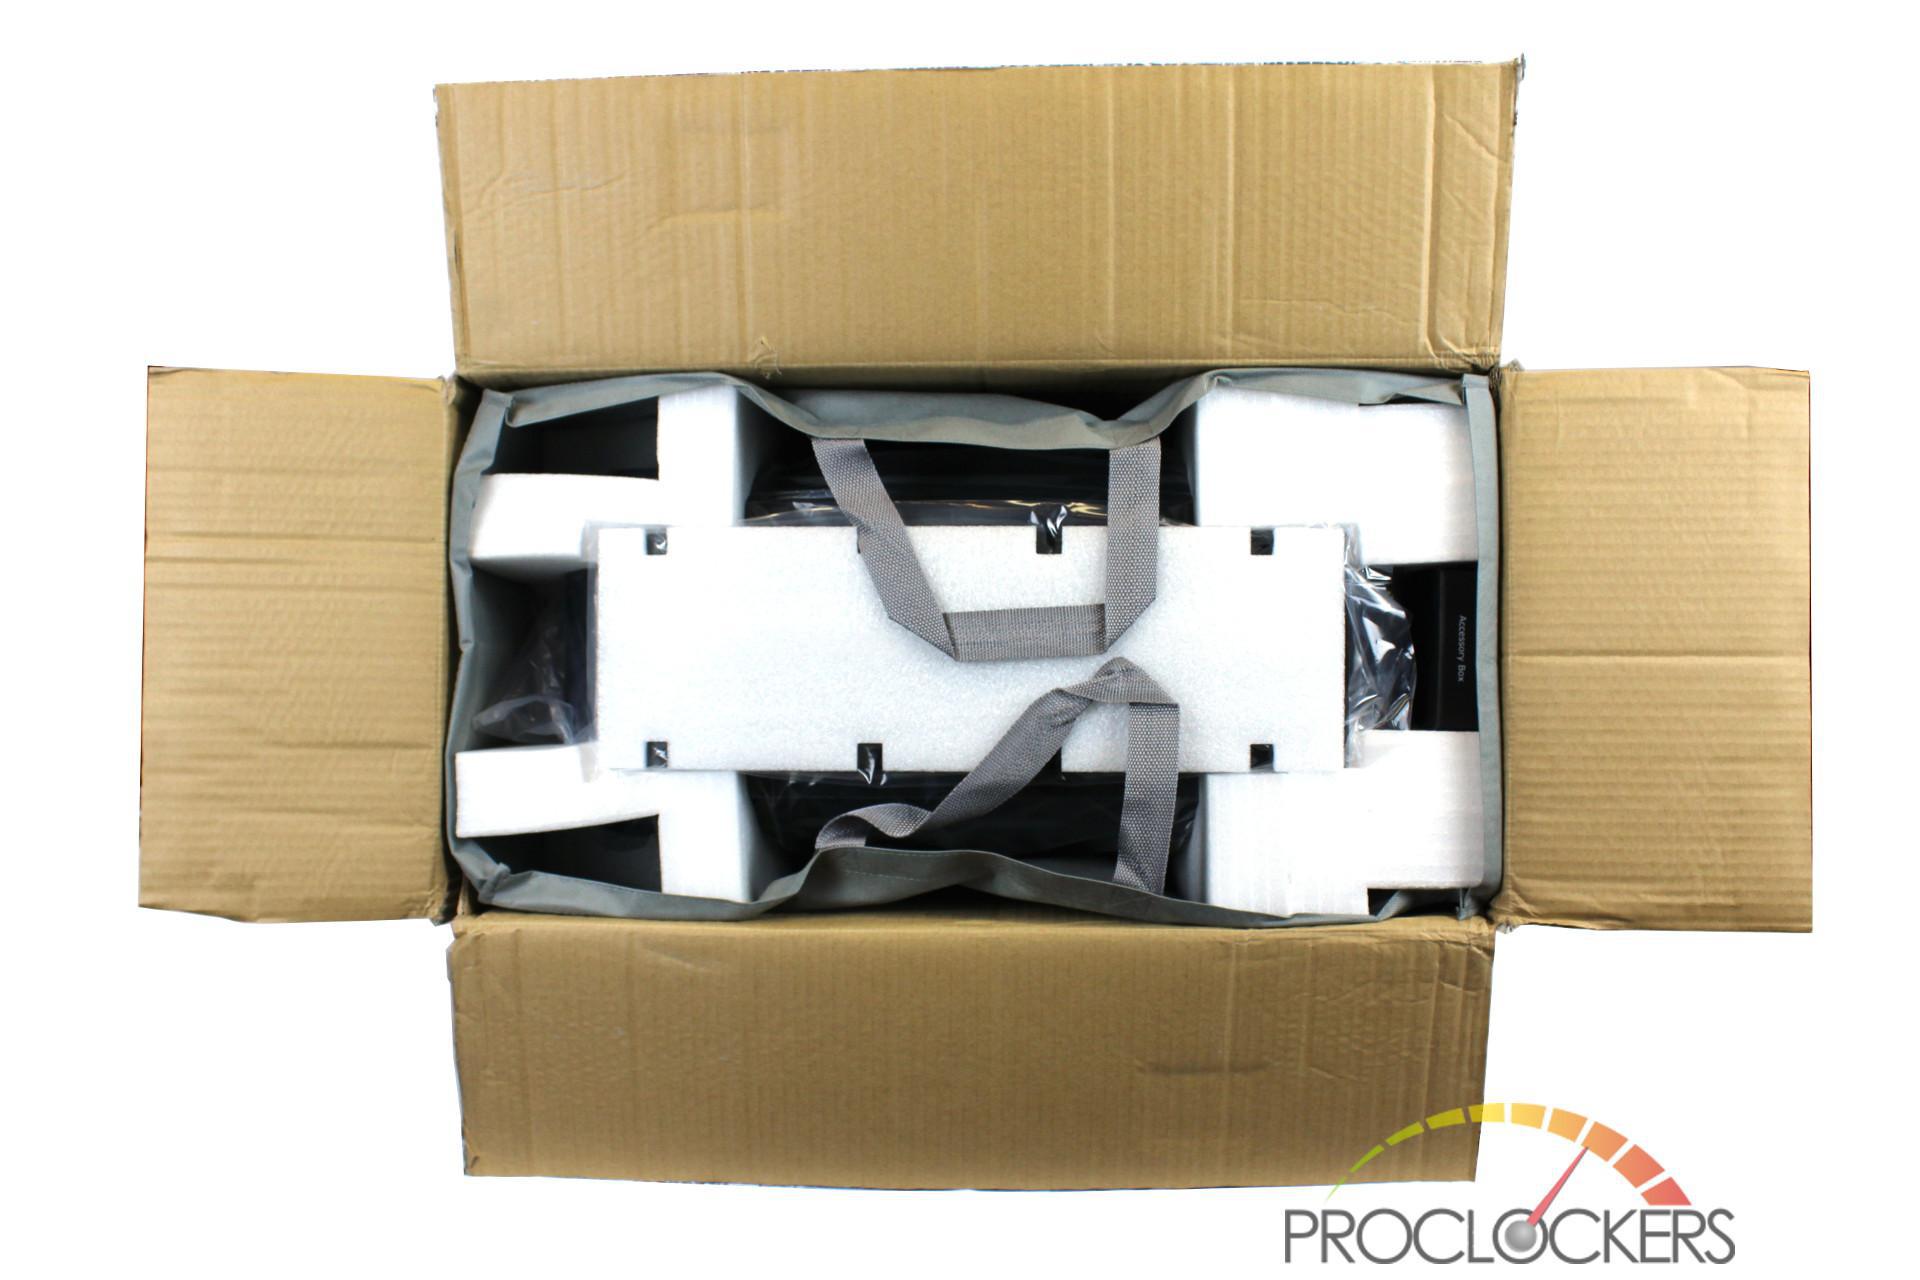
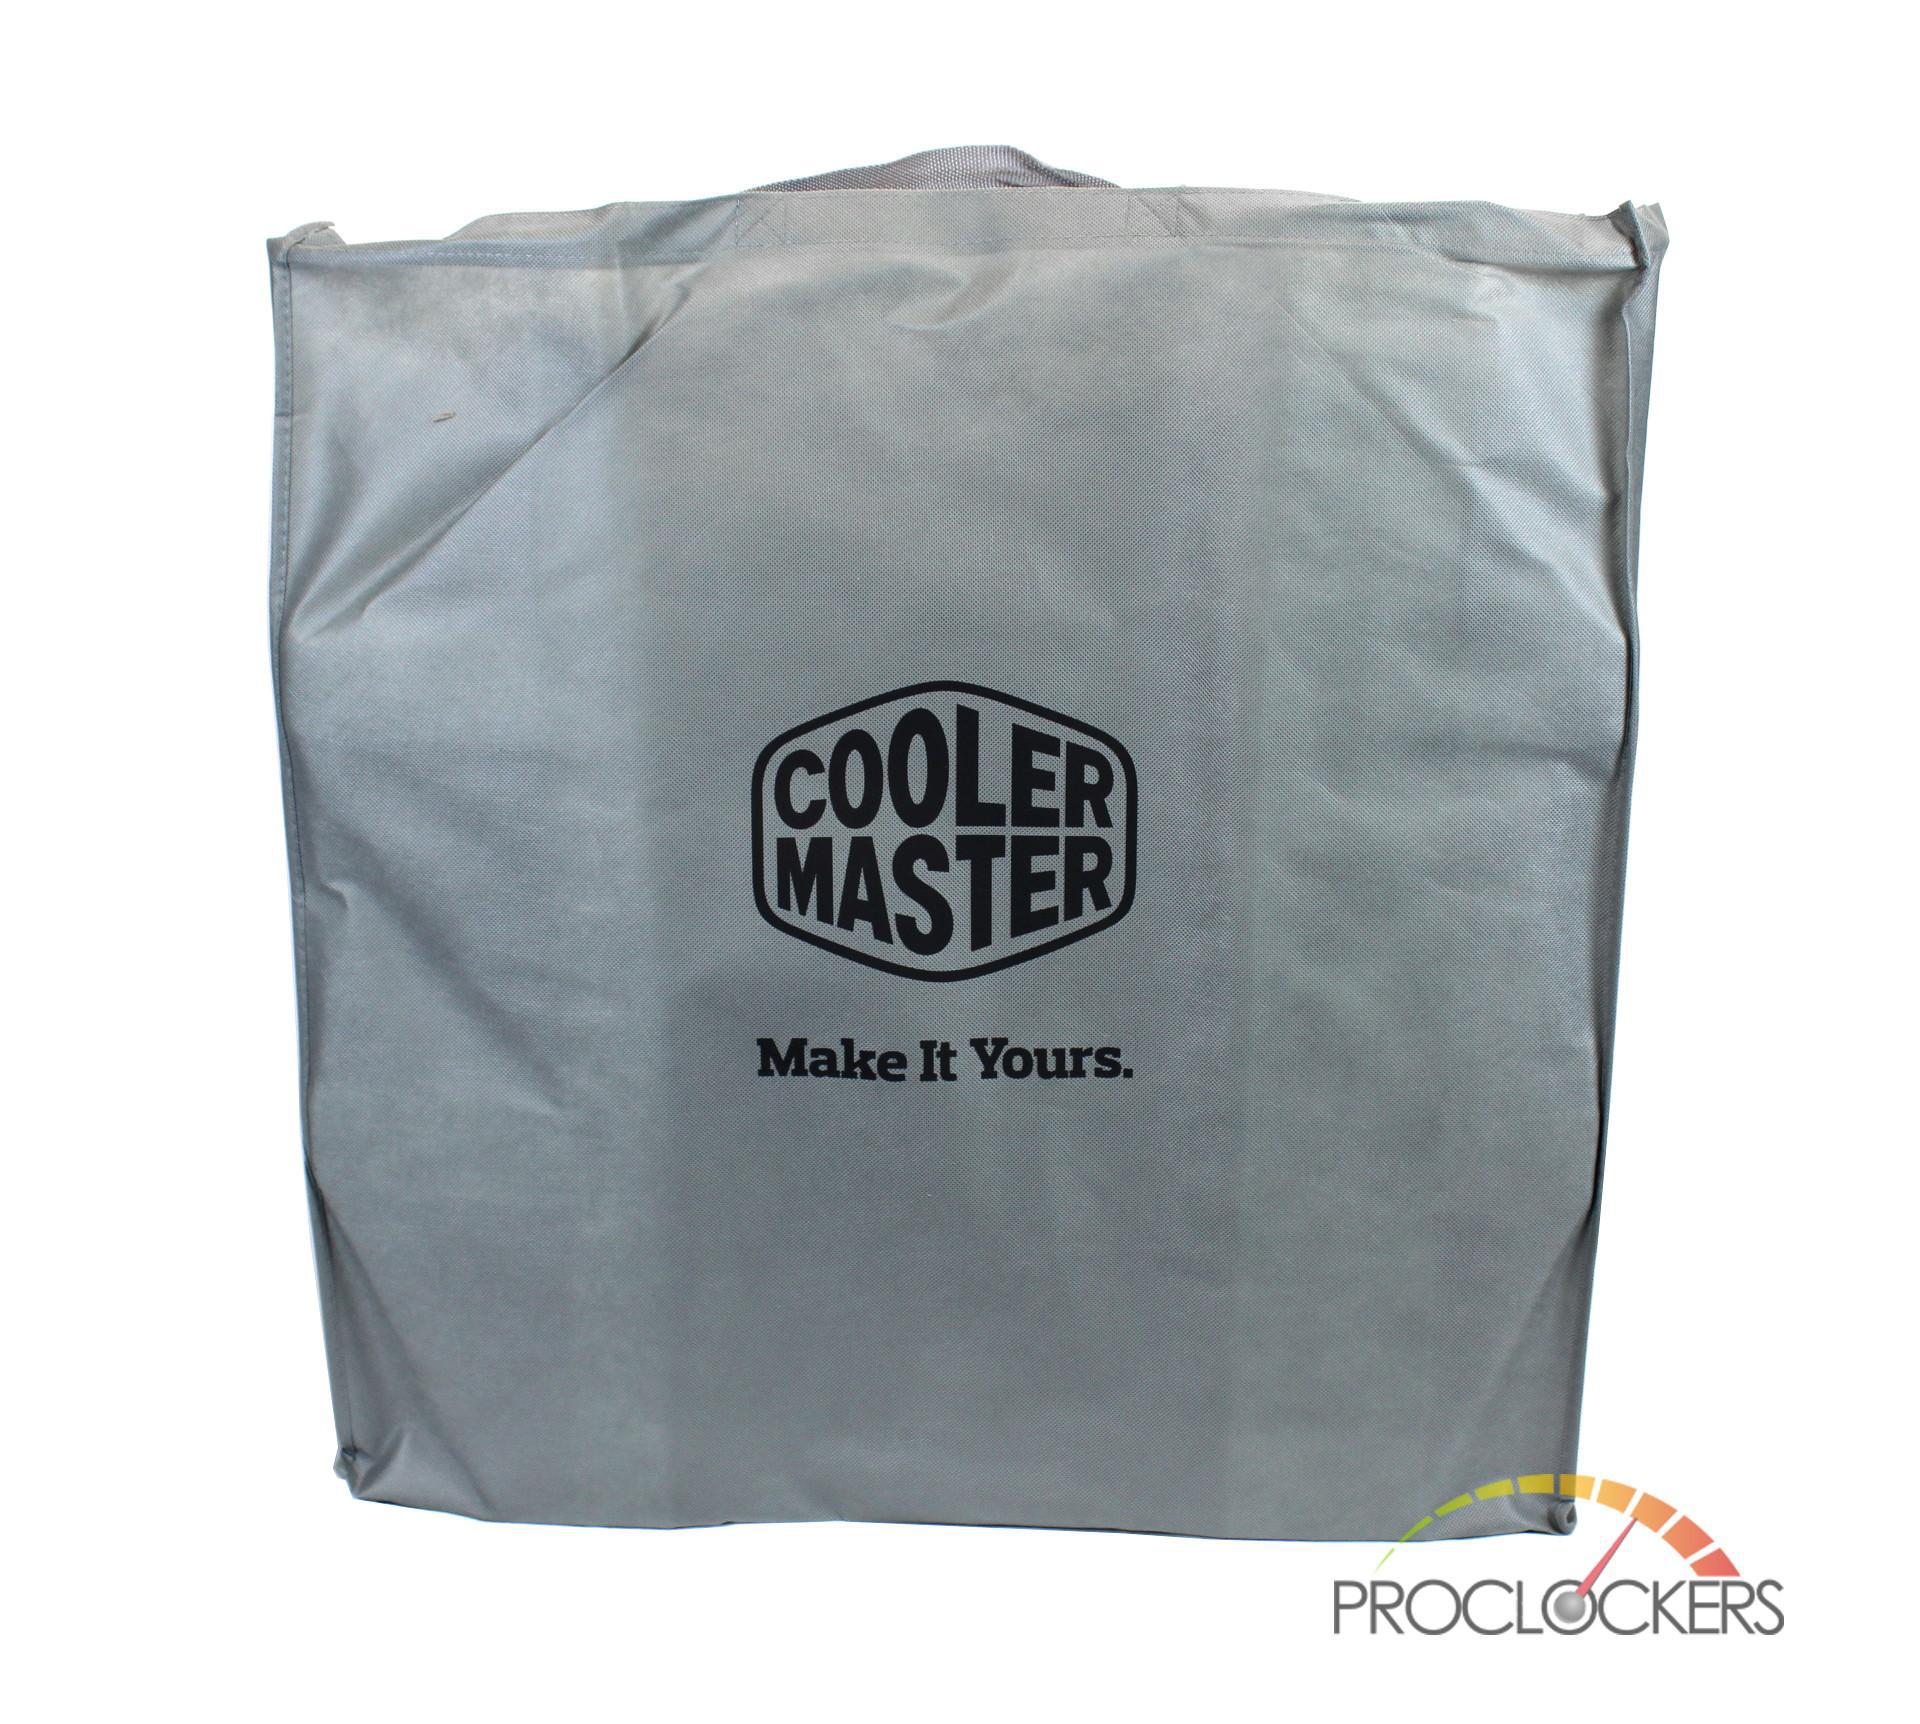
Using the handles of the bag, we were able to lift the case out of the box with little to no effort. I must say that this was much easier than flipping and sliding the case out as you normally would. The bag itself is high quality and proudly displays the Cooler Master logo and slogan on the front.
After the bag is removed, you can see the foam totally surrounds the H500M, which has kept all the tempered glass safe and intact.
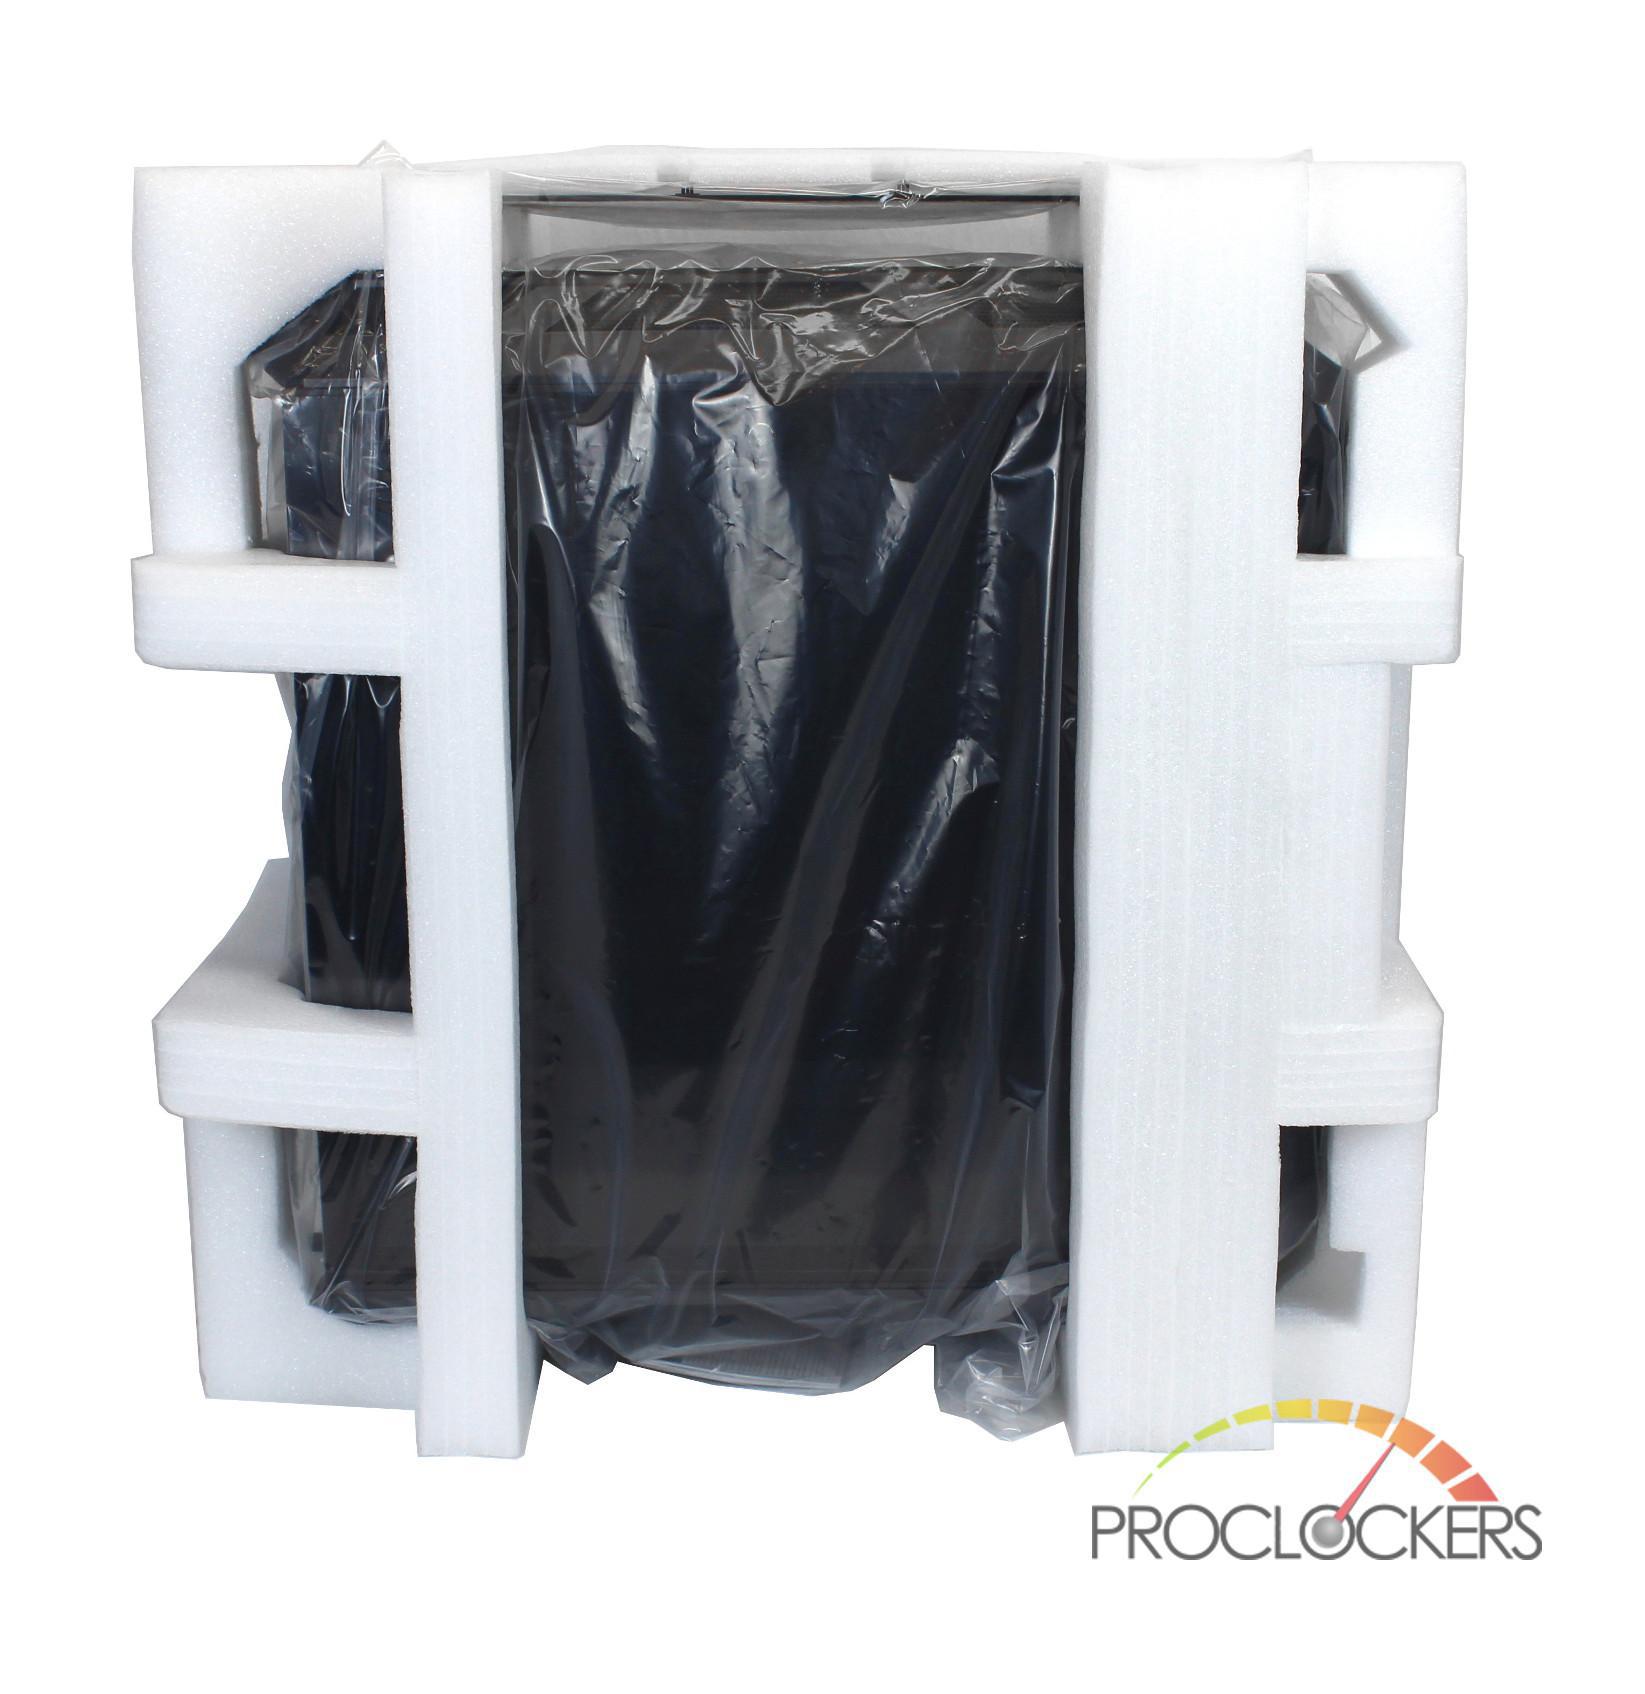
Once the foam is removed, the case itself is wrapped in a plastic bag as well as the swappable tempered glass front panel.
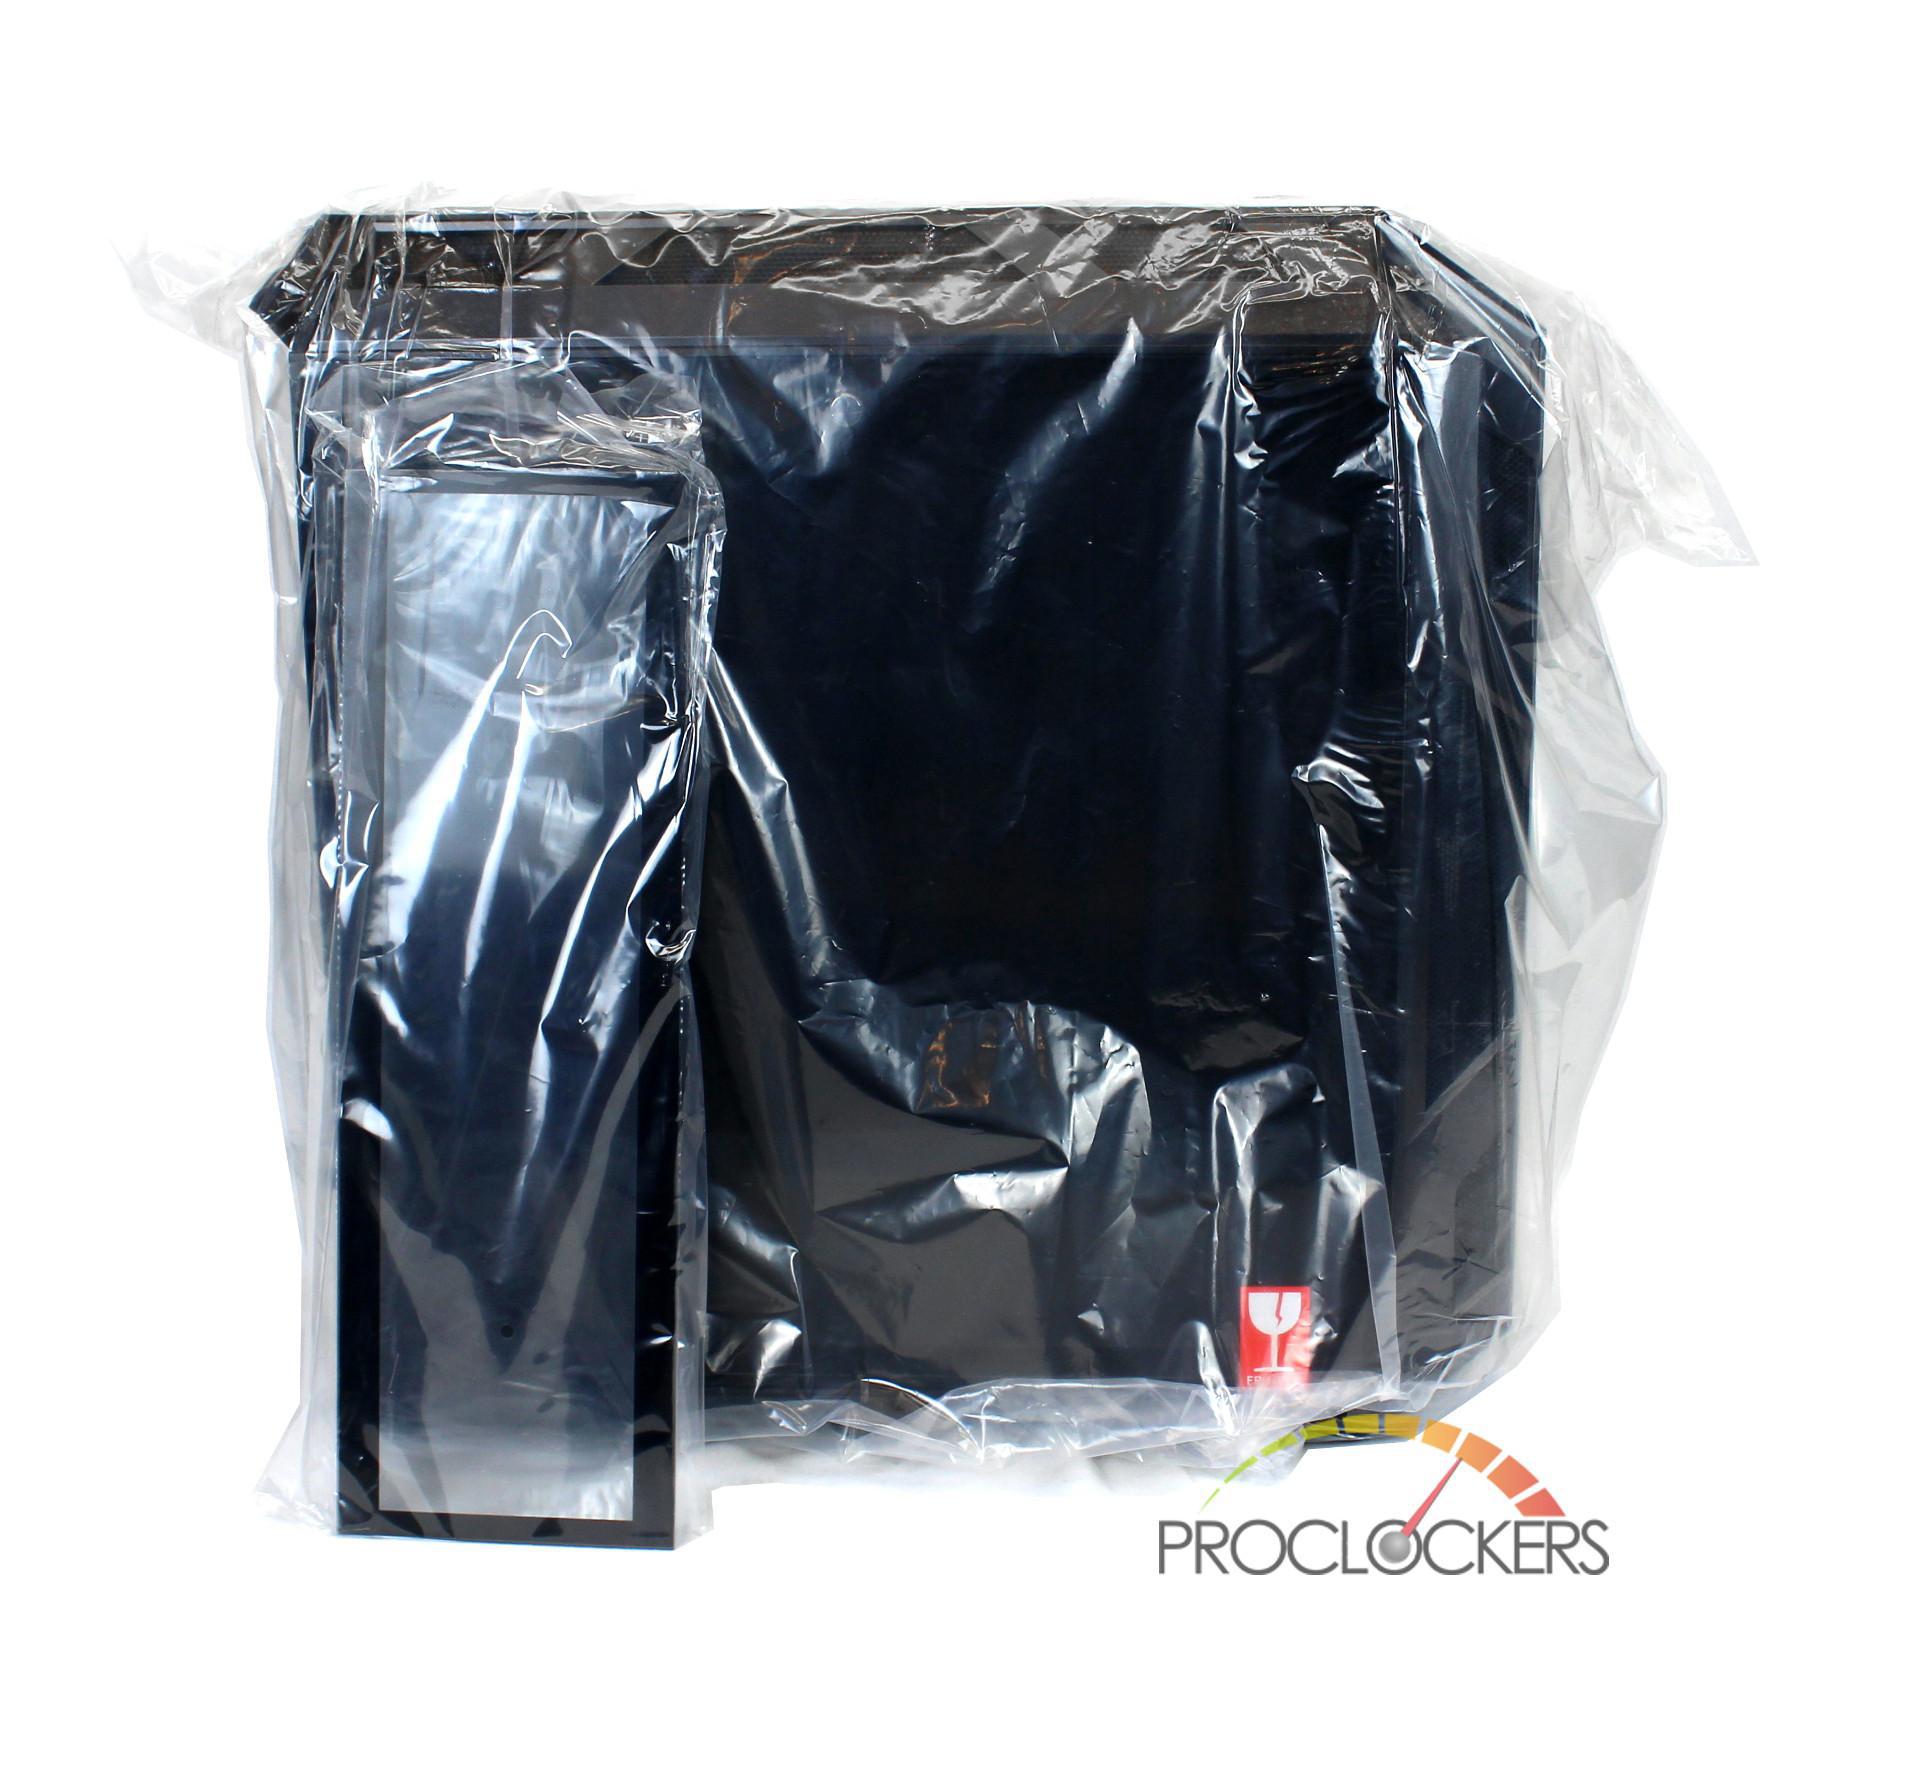
After we removed the bags, we noticed that all the tempered glass and plastic portions of the H500M covered with a protective plastic film. Happy peeling!
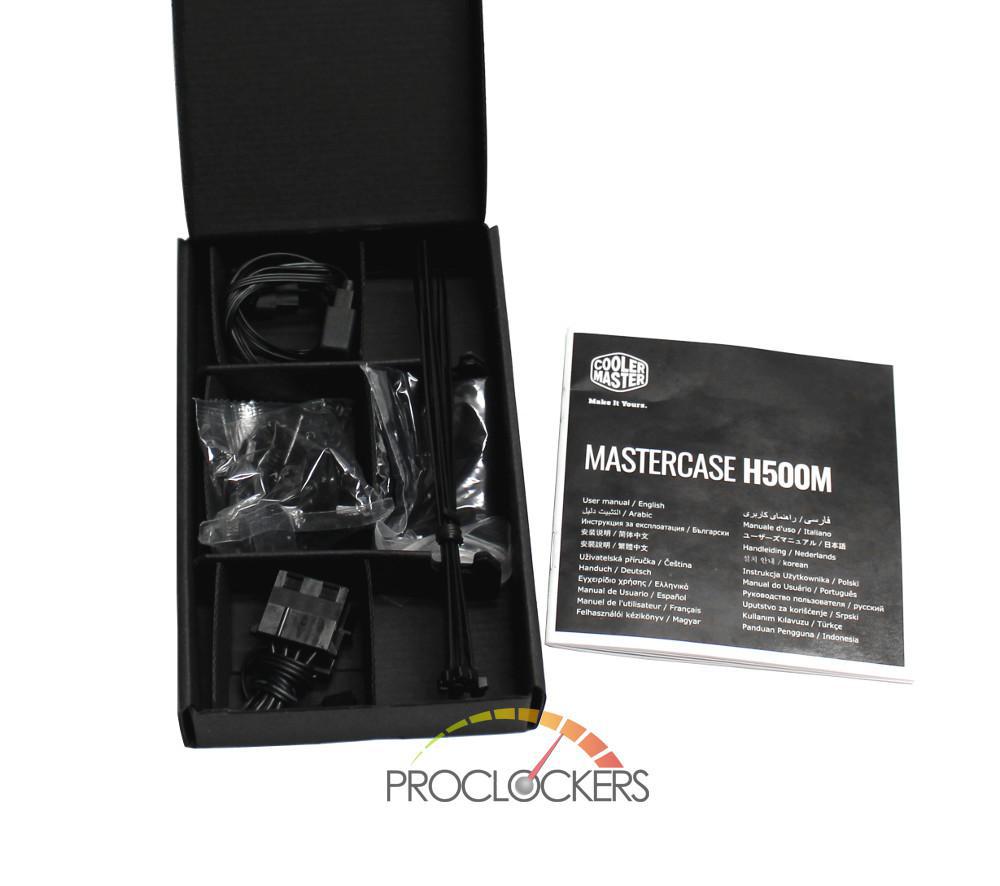
Included with the case is a handy little box with various screws, 3 to 4 cable adapter, ARGB extension cable, zip ties and a microfiber cloth. A case manual was also included.
A Closer Look: Exterior
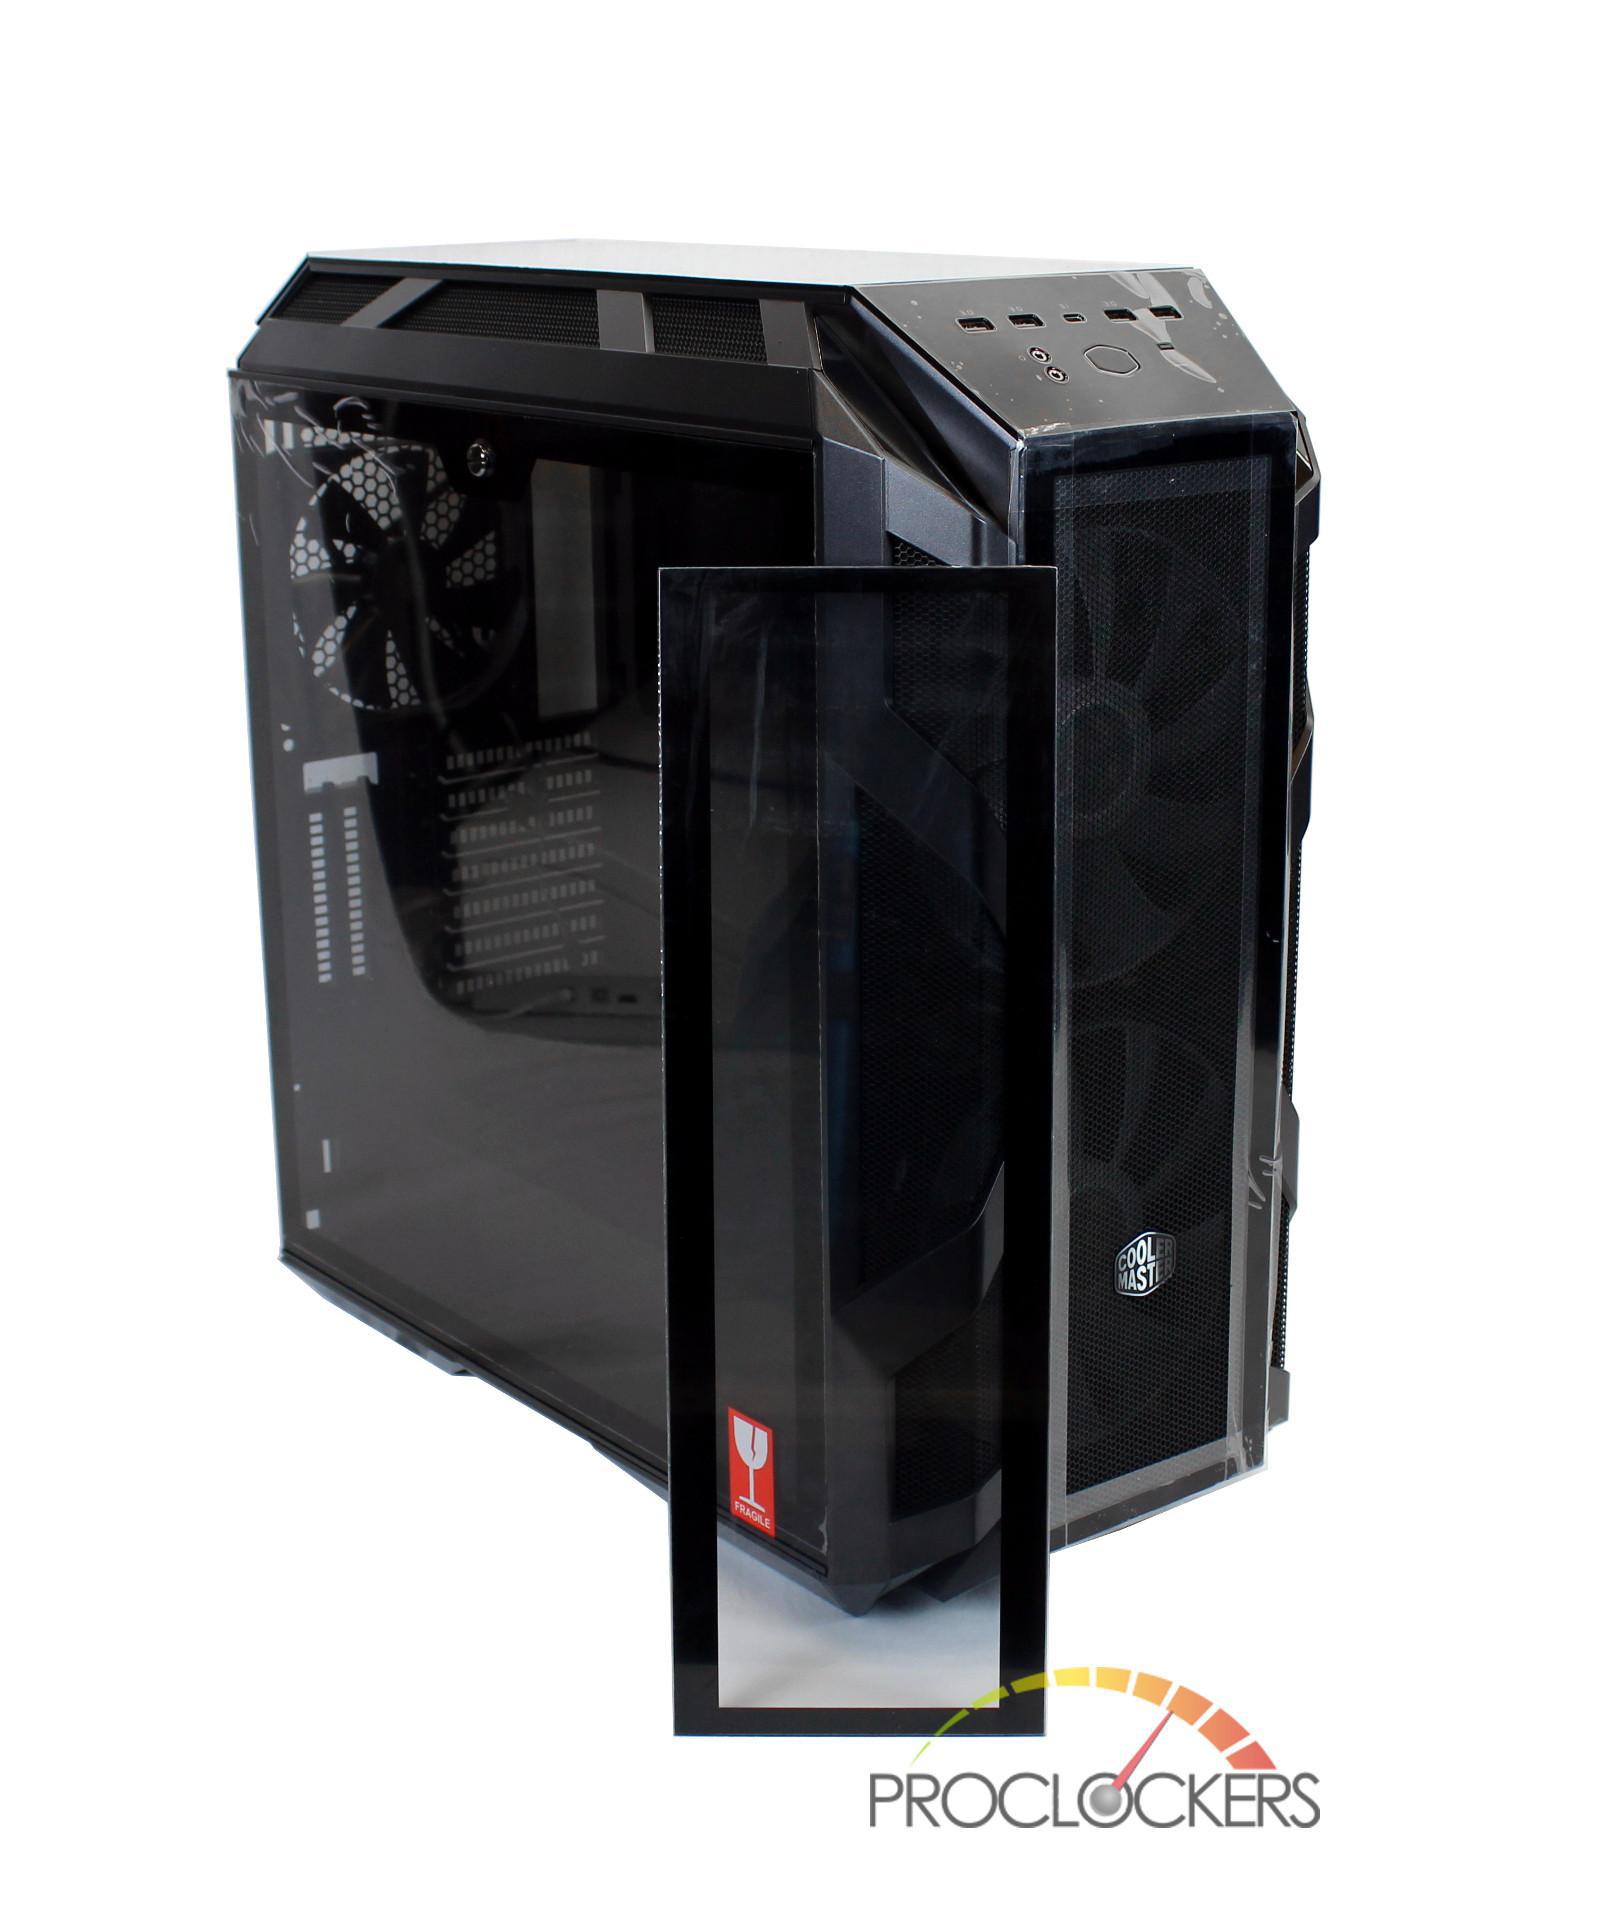
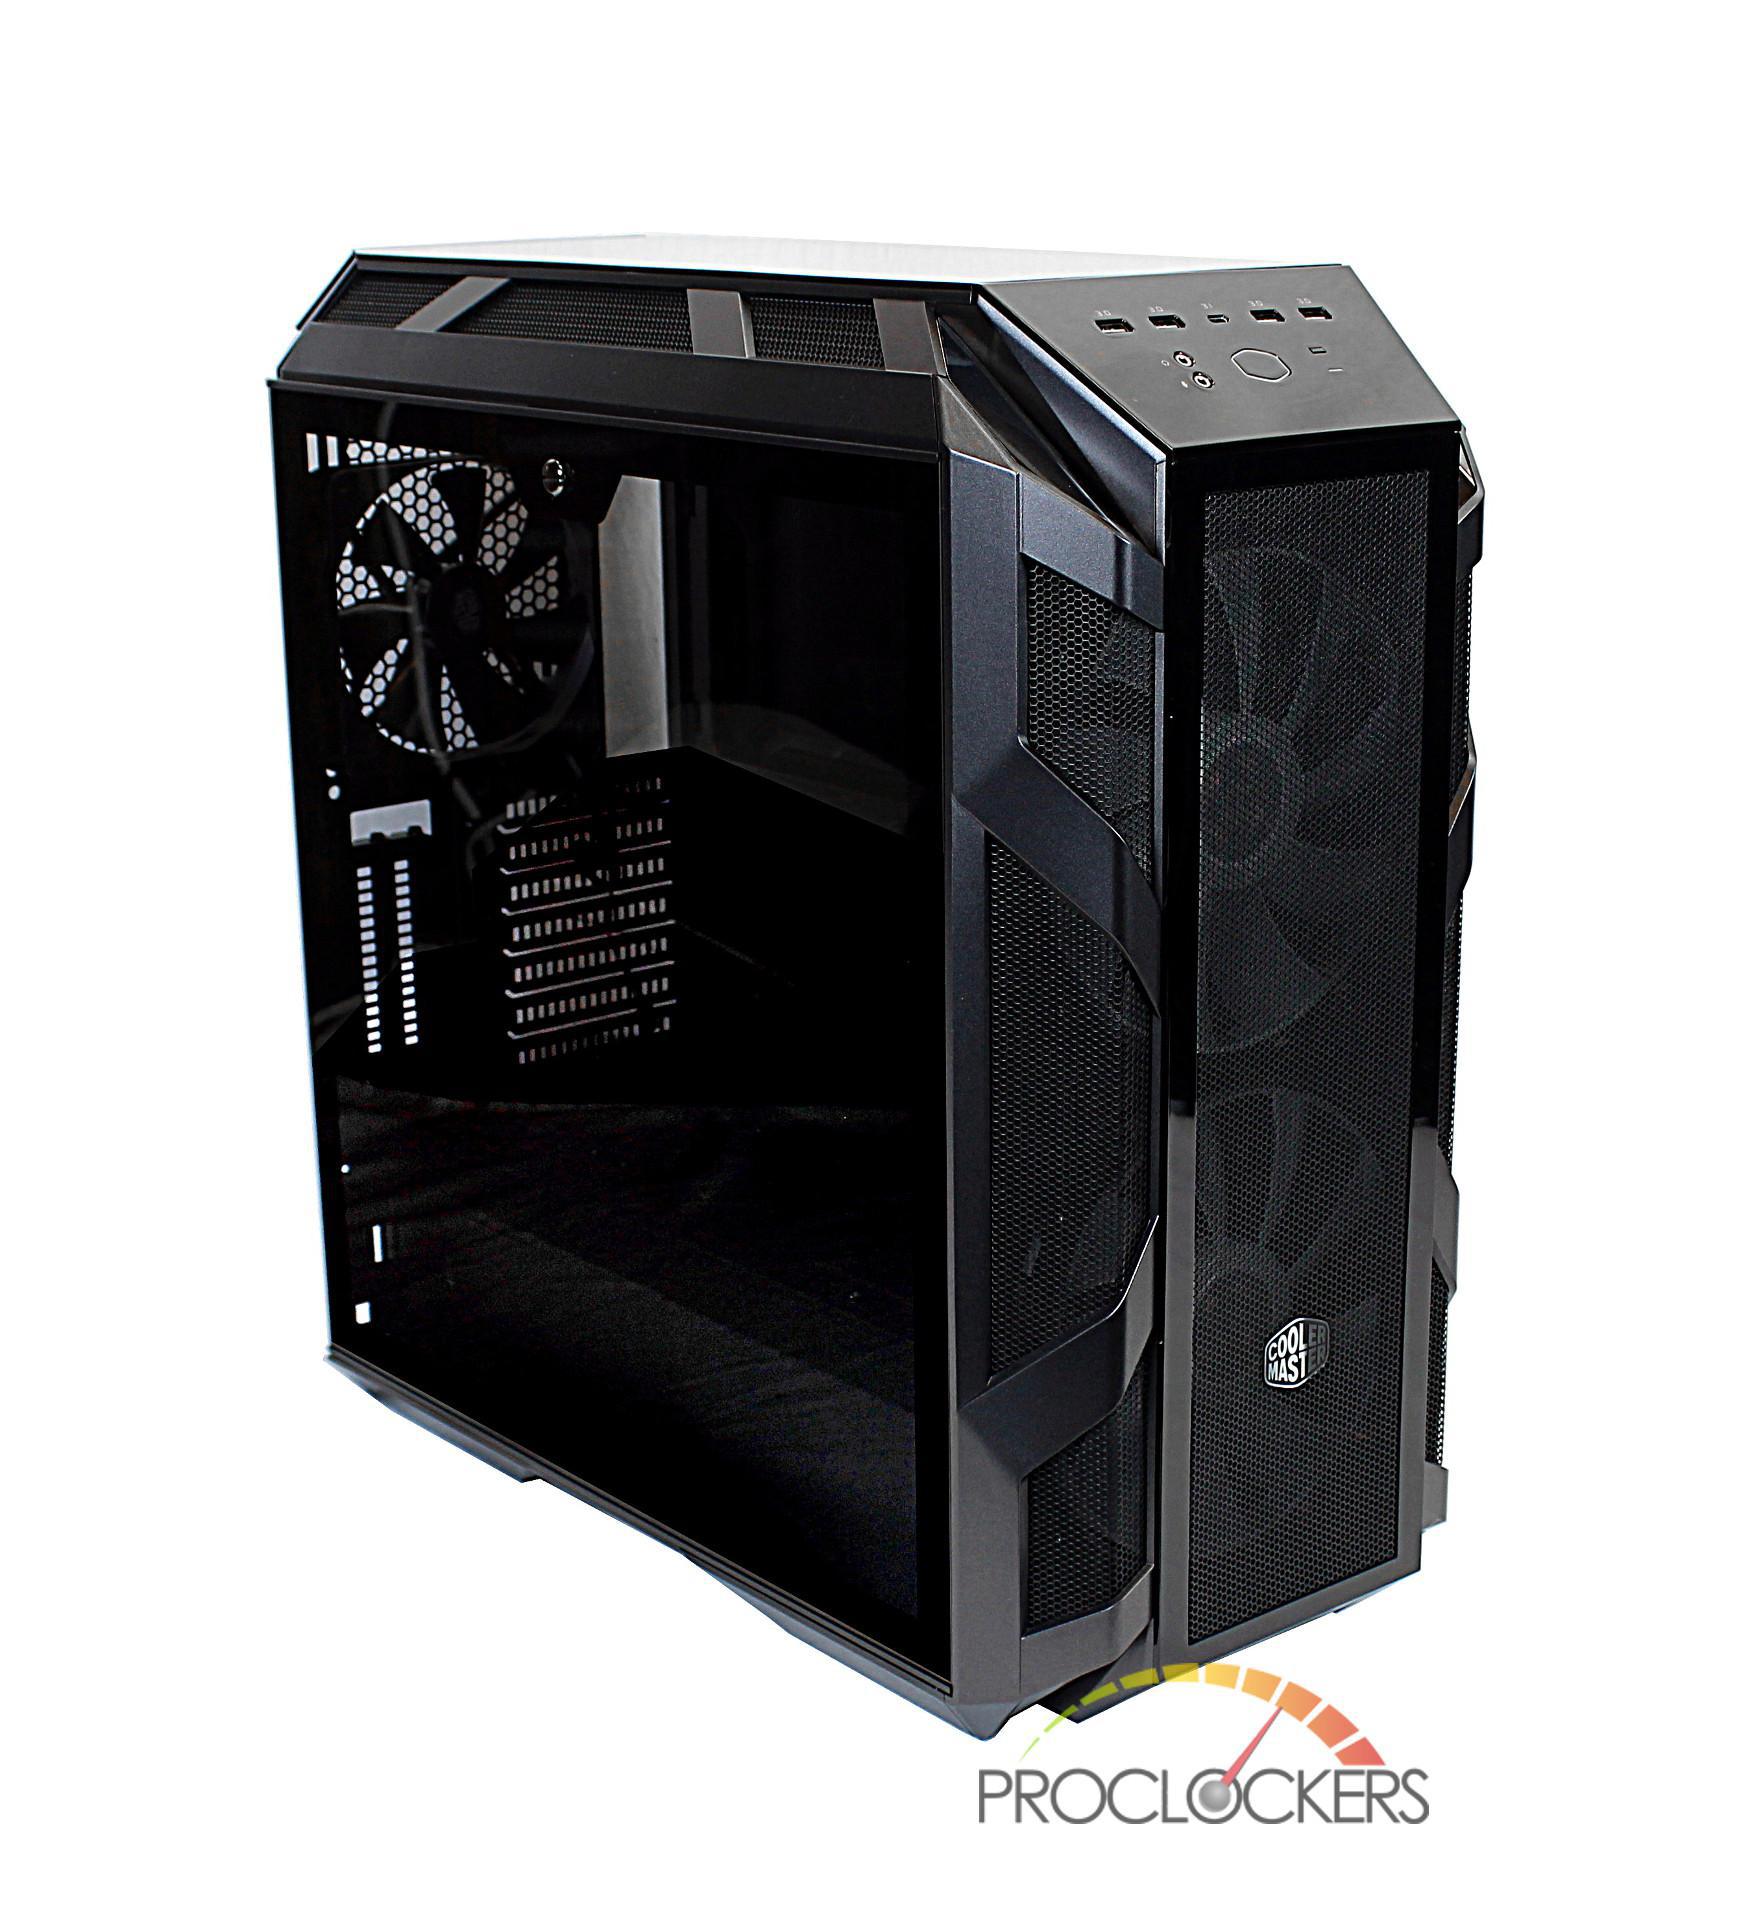
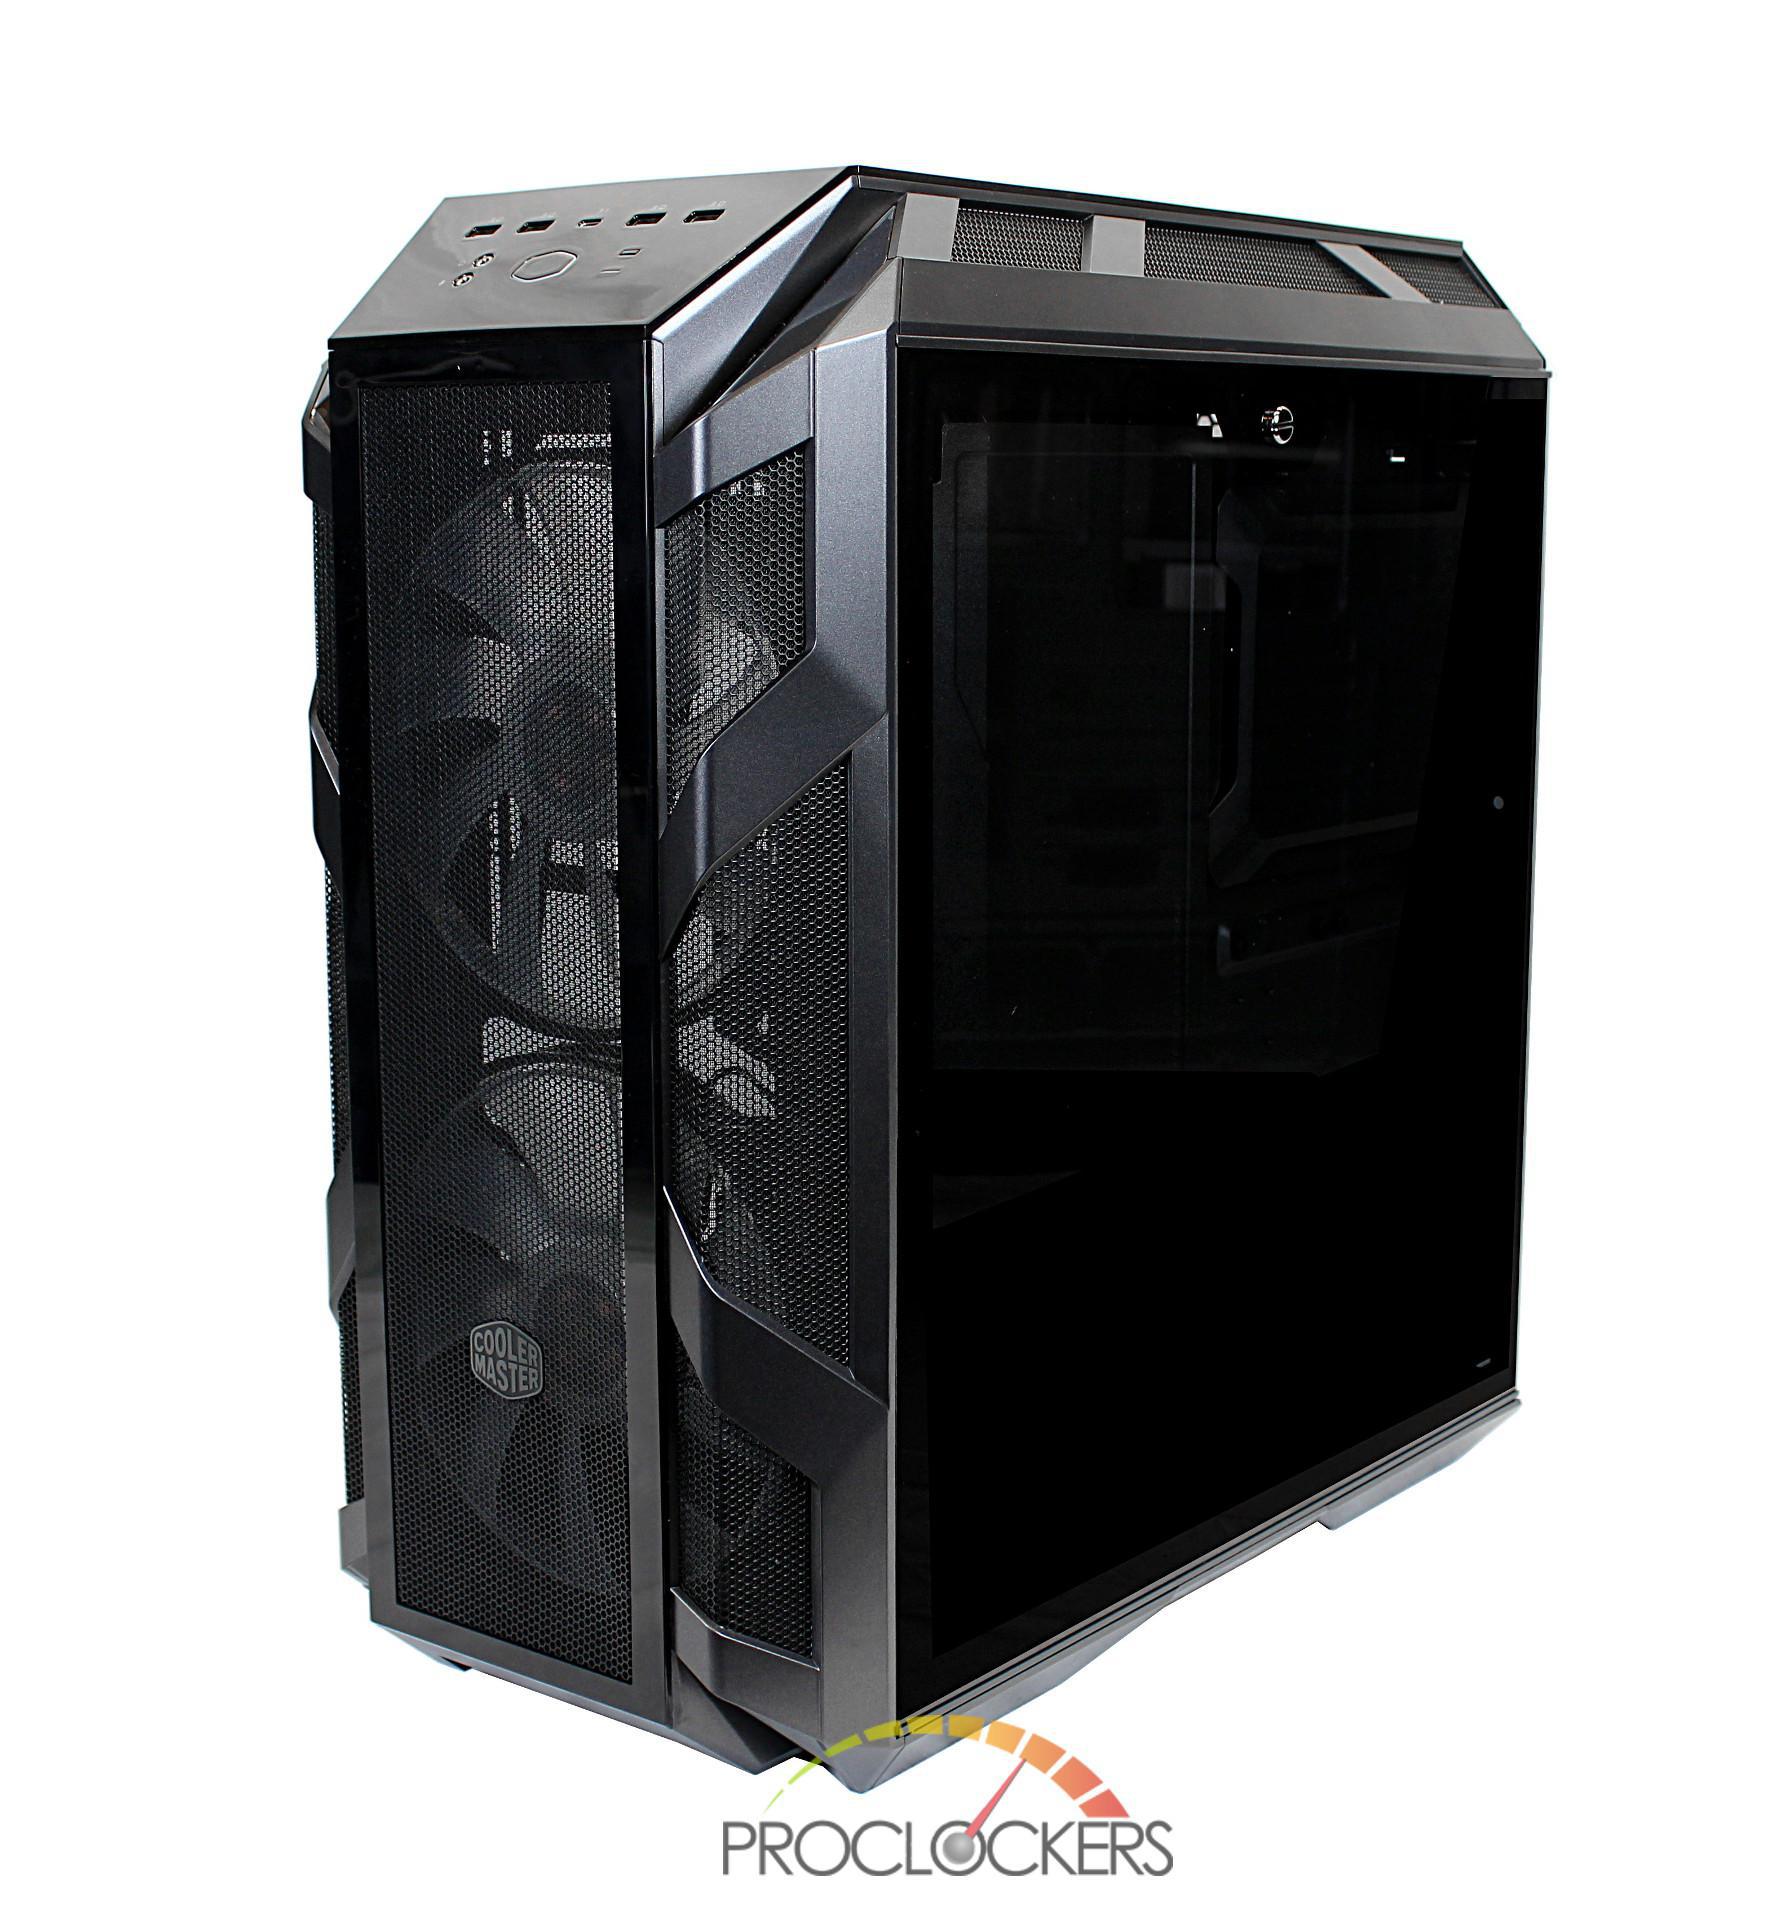
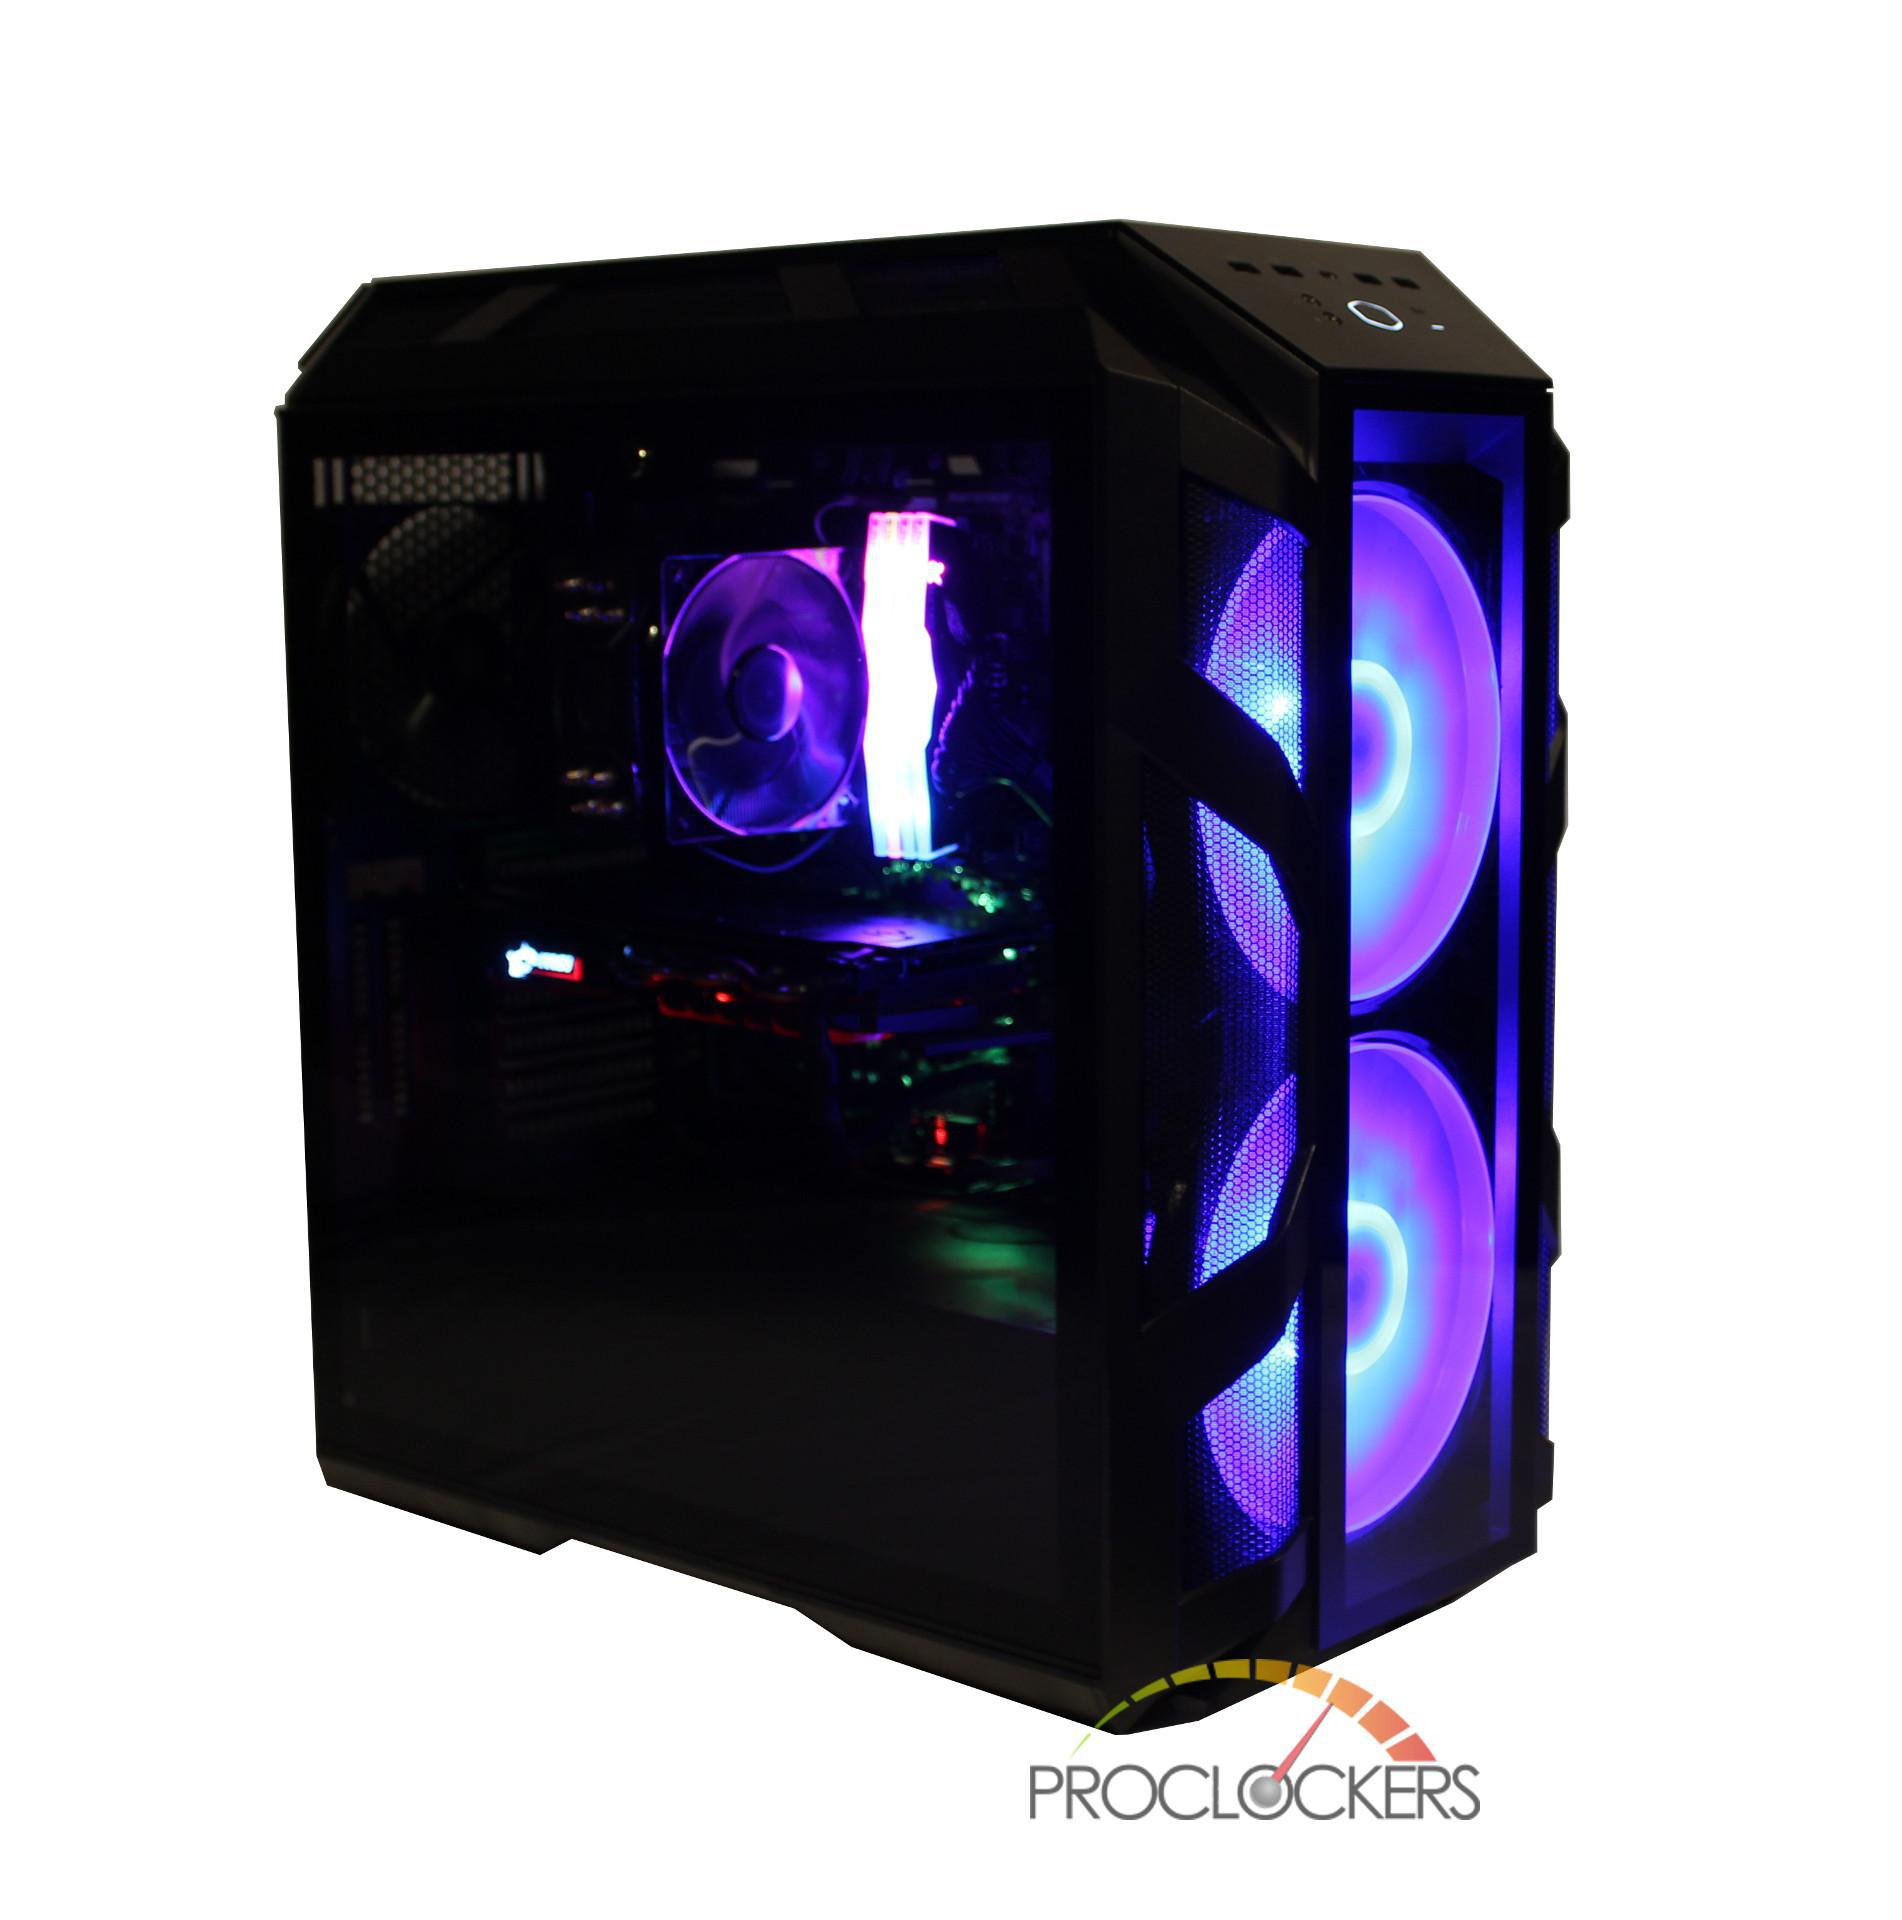
After peeling all the protective film from the H500M, you immediately notice the attention to detail that Cooler Master has put into this case. The whole case feels very well built and really has that premium look that you would expect from a $200 case. We really like how the all the tempered glass panels sit flush with the case’s shell, which keeps the lines extremely clean. Another bonus is the ability to replace the front panel based on your airflow and aesthetics preferences.
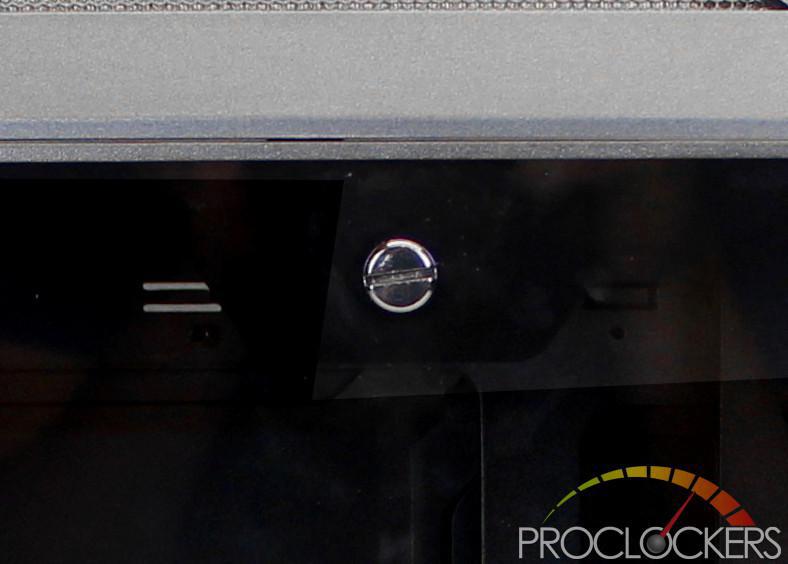
Looking at the display side of the case, you’re presented with a full tempered glass panel with a single locking mechanism to hold it in place. The glass itself has about an inch-wide black border and has a relatively dark tint. Our first thought about the tint is that it’s a little darker than we like but we will have to see how well you can view your build once its illuminated from the inside.
If you take a closer look at the locking screw, you will notice that it requires a flat head screw driver to open. As we were not able to unlock it by hand, we searched for a quick solution and discovered that the channel is the perfect size for a penny (not sure if this was intentional or not, but it was much easier than looking for our flathead screwdriver). If Cooler Master uses this lock in future cases, we would like to see this open without the use of any tools (or coins).
The back side of the case is identical to the other side and features the same tampered glass panel and locking screw.
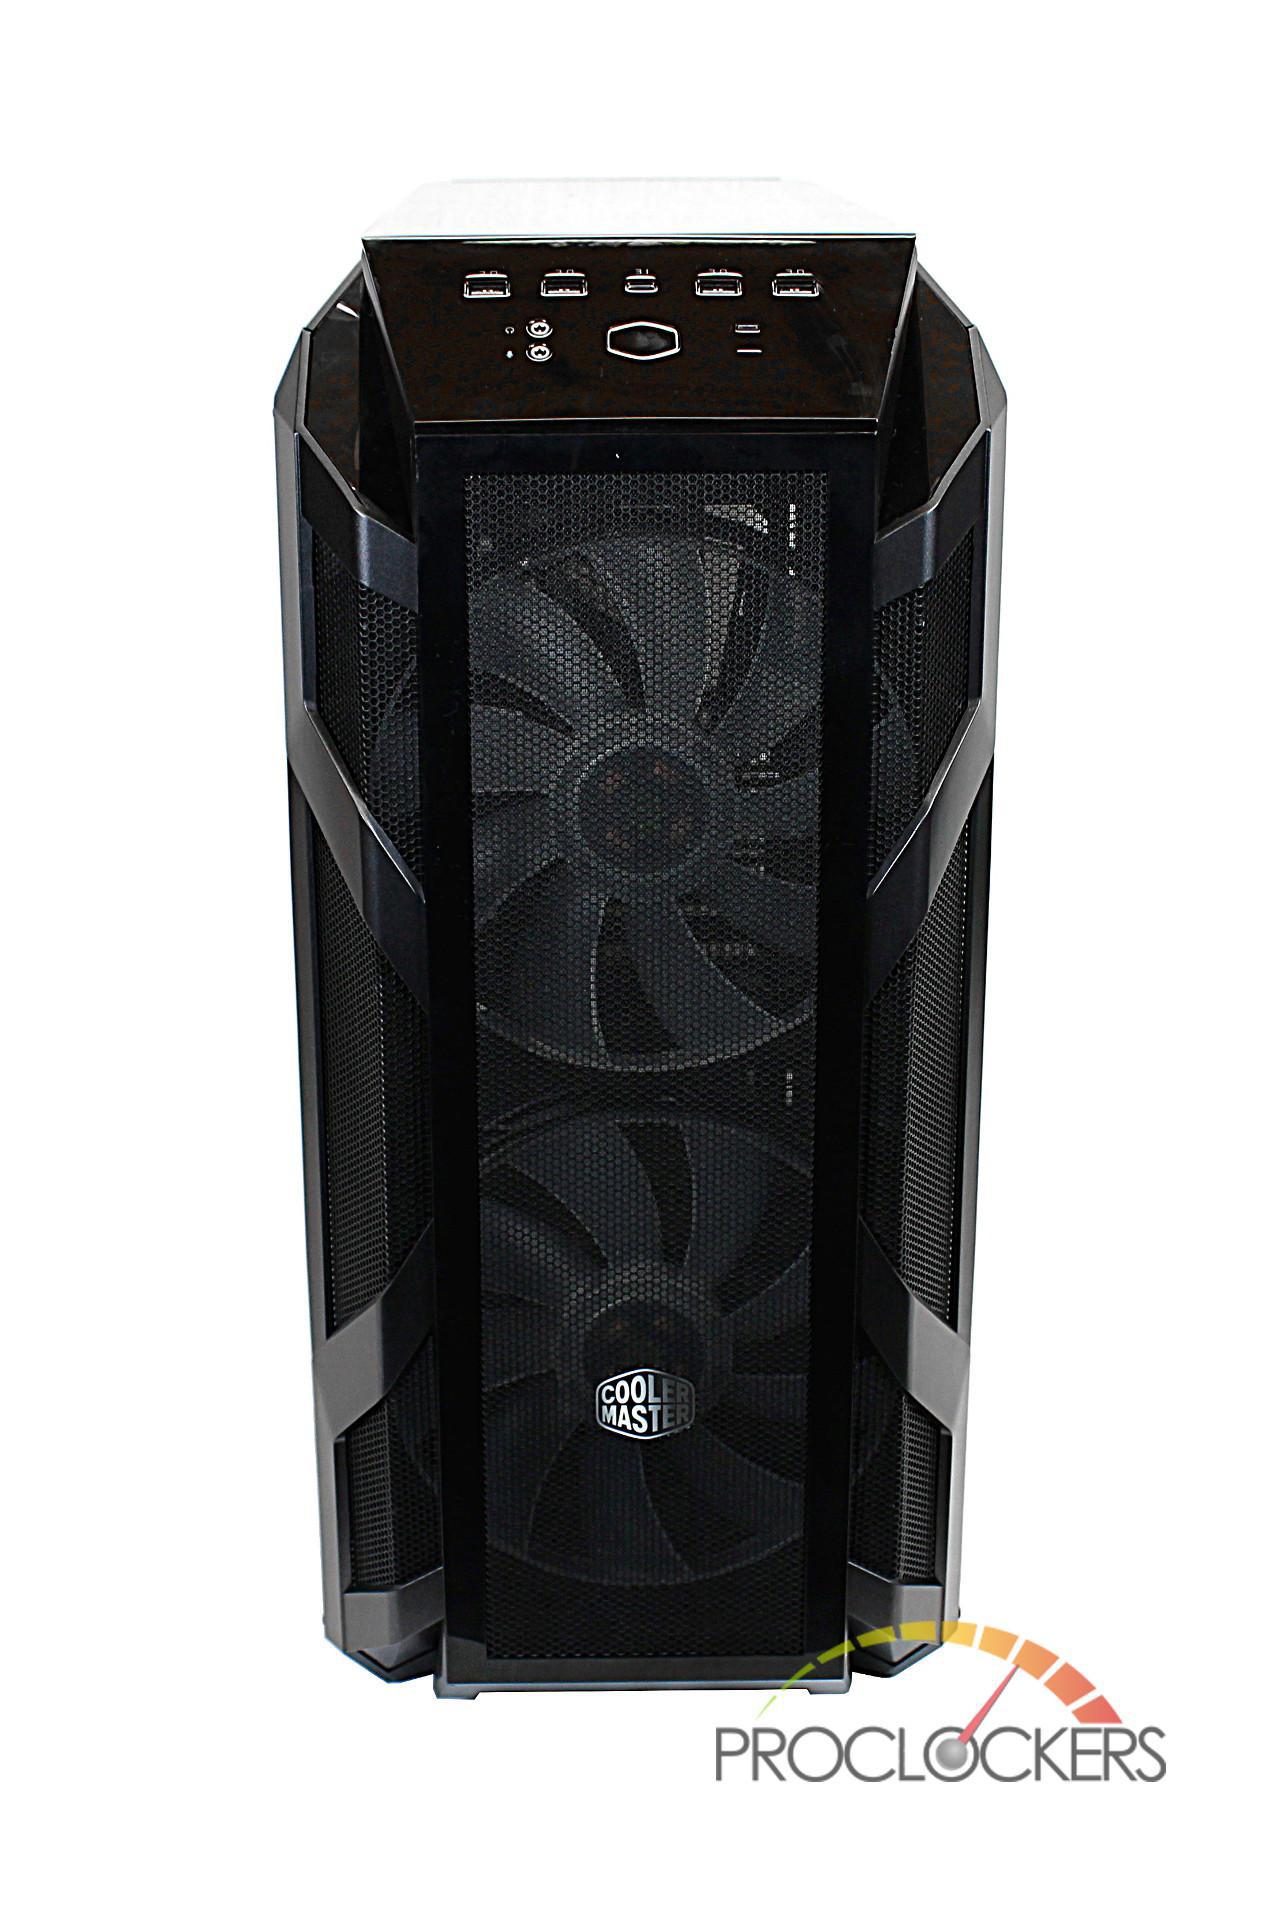
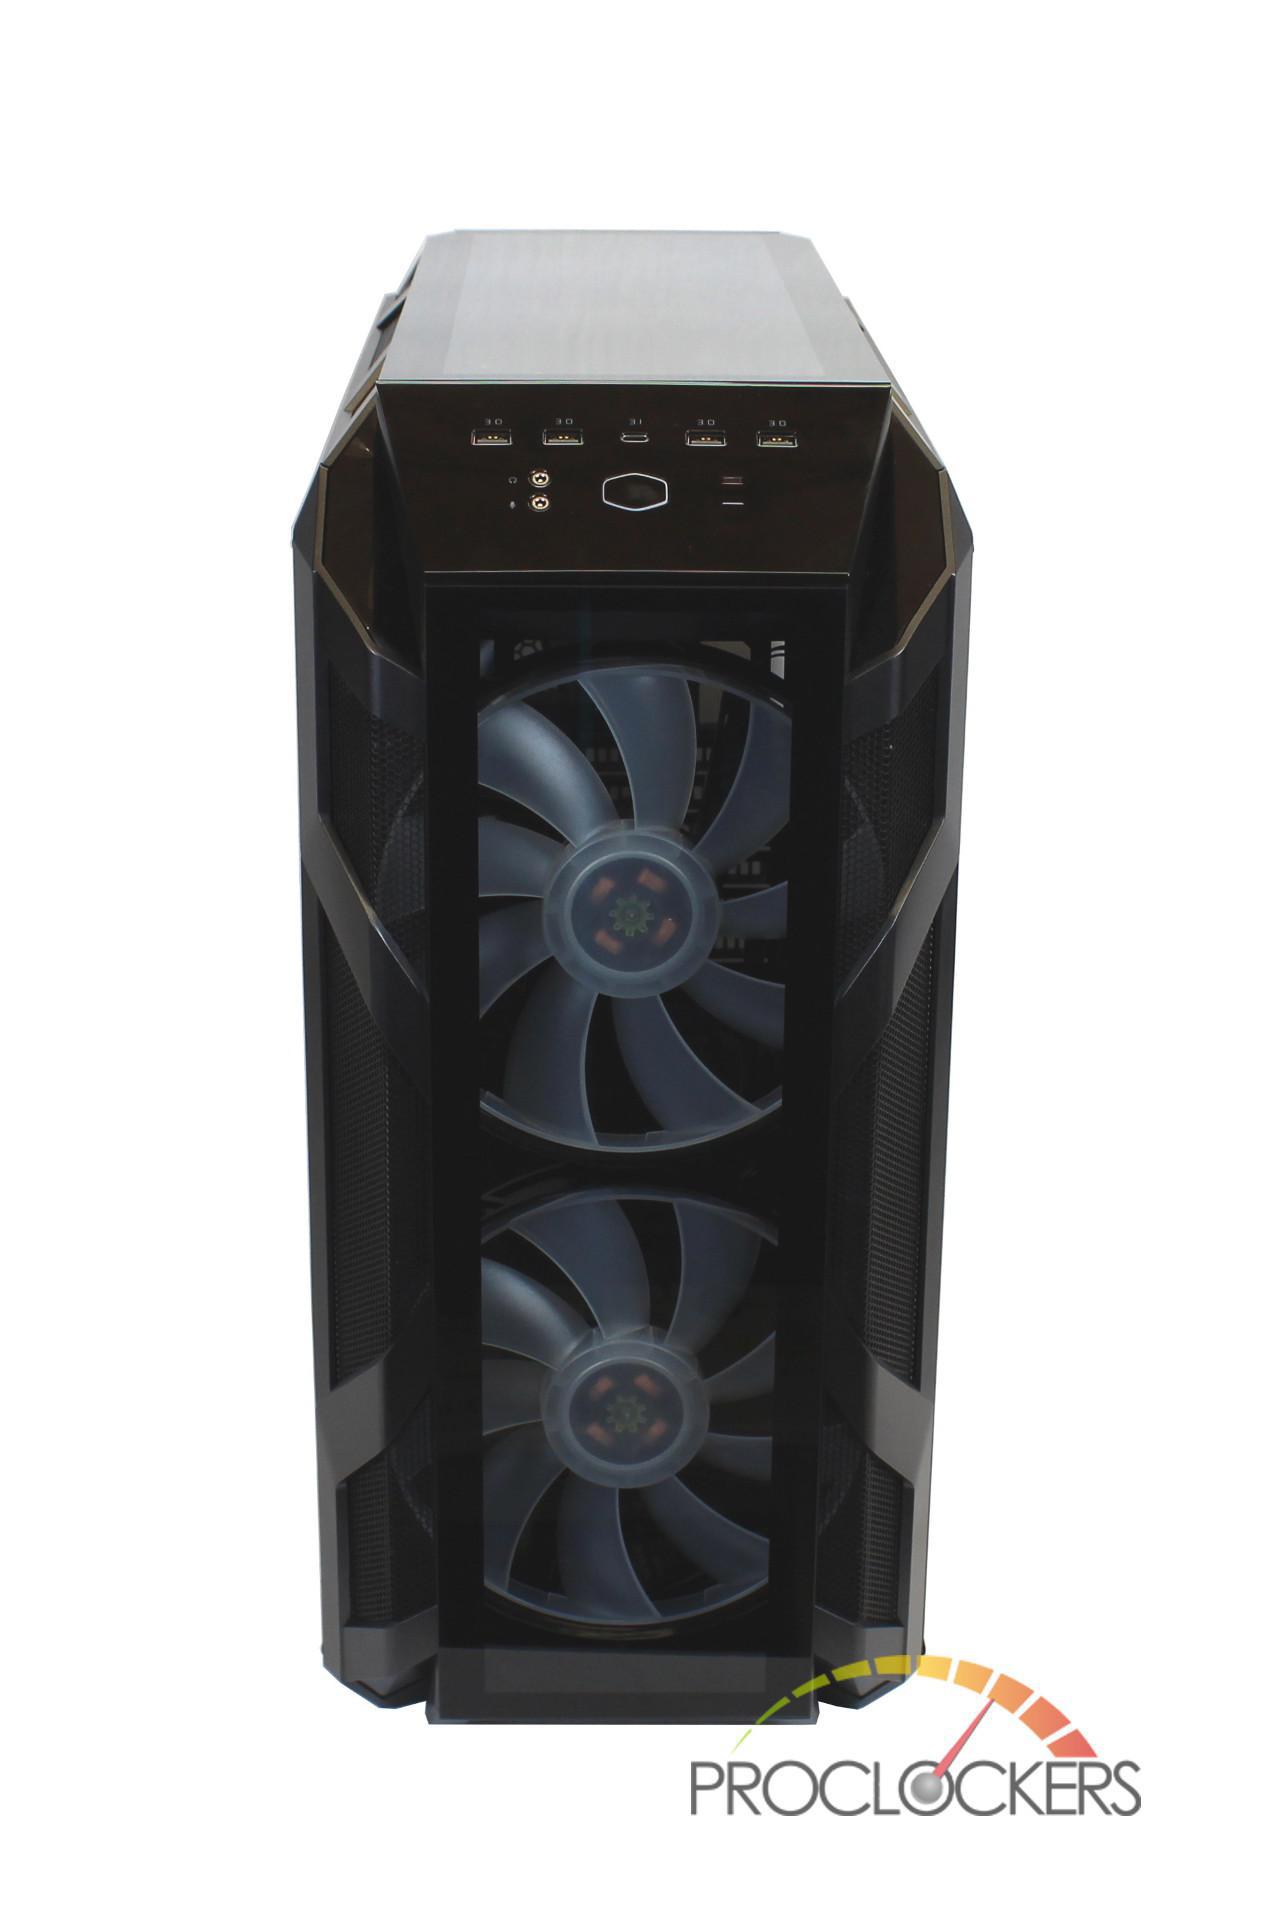
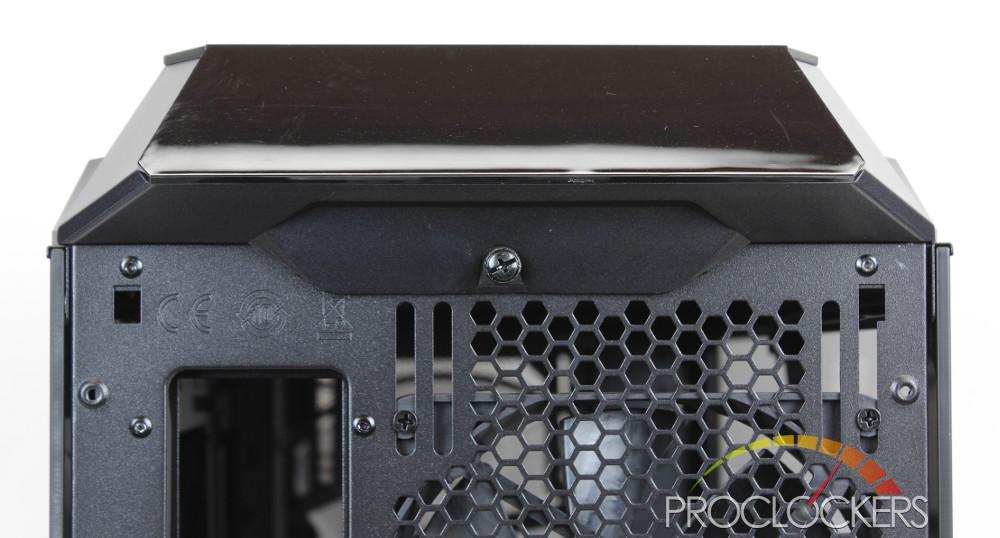
The front of the case comes preinstalled with the mesh panel with the USB ports and power button located on the top of the case.
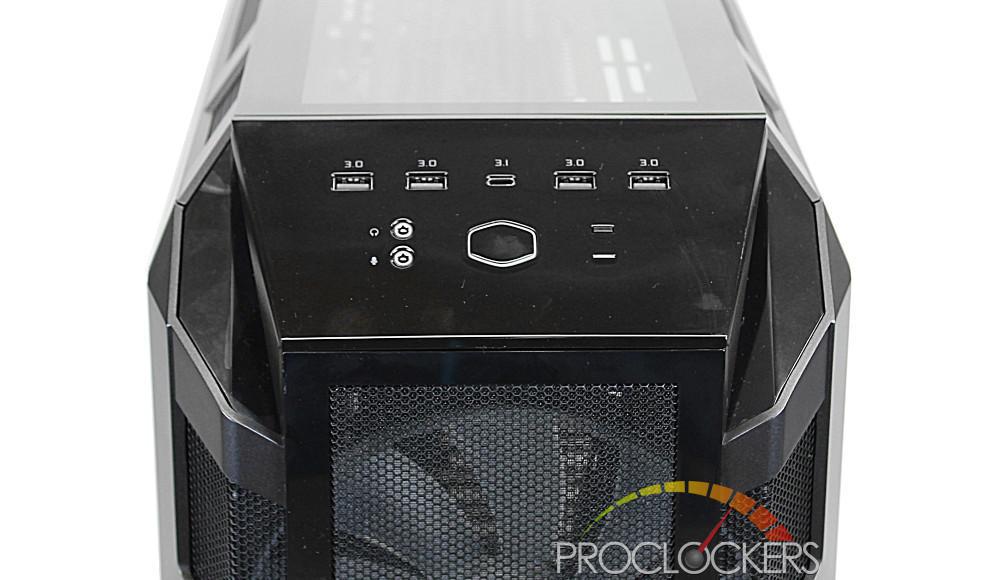
Taking a closer look at the IO, it’s nice to see the inclusion of the USB 3.1 Type-C port, which is slowly starting to hit mainstream use. Accompanying the Type-C port are 4 USB 3.0 port, a mic and headphone jack, a power button and a reset button that can optionally be used to manage the lighting of the system using the included ARGB controller.
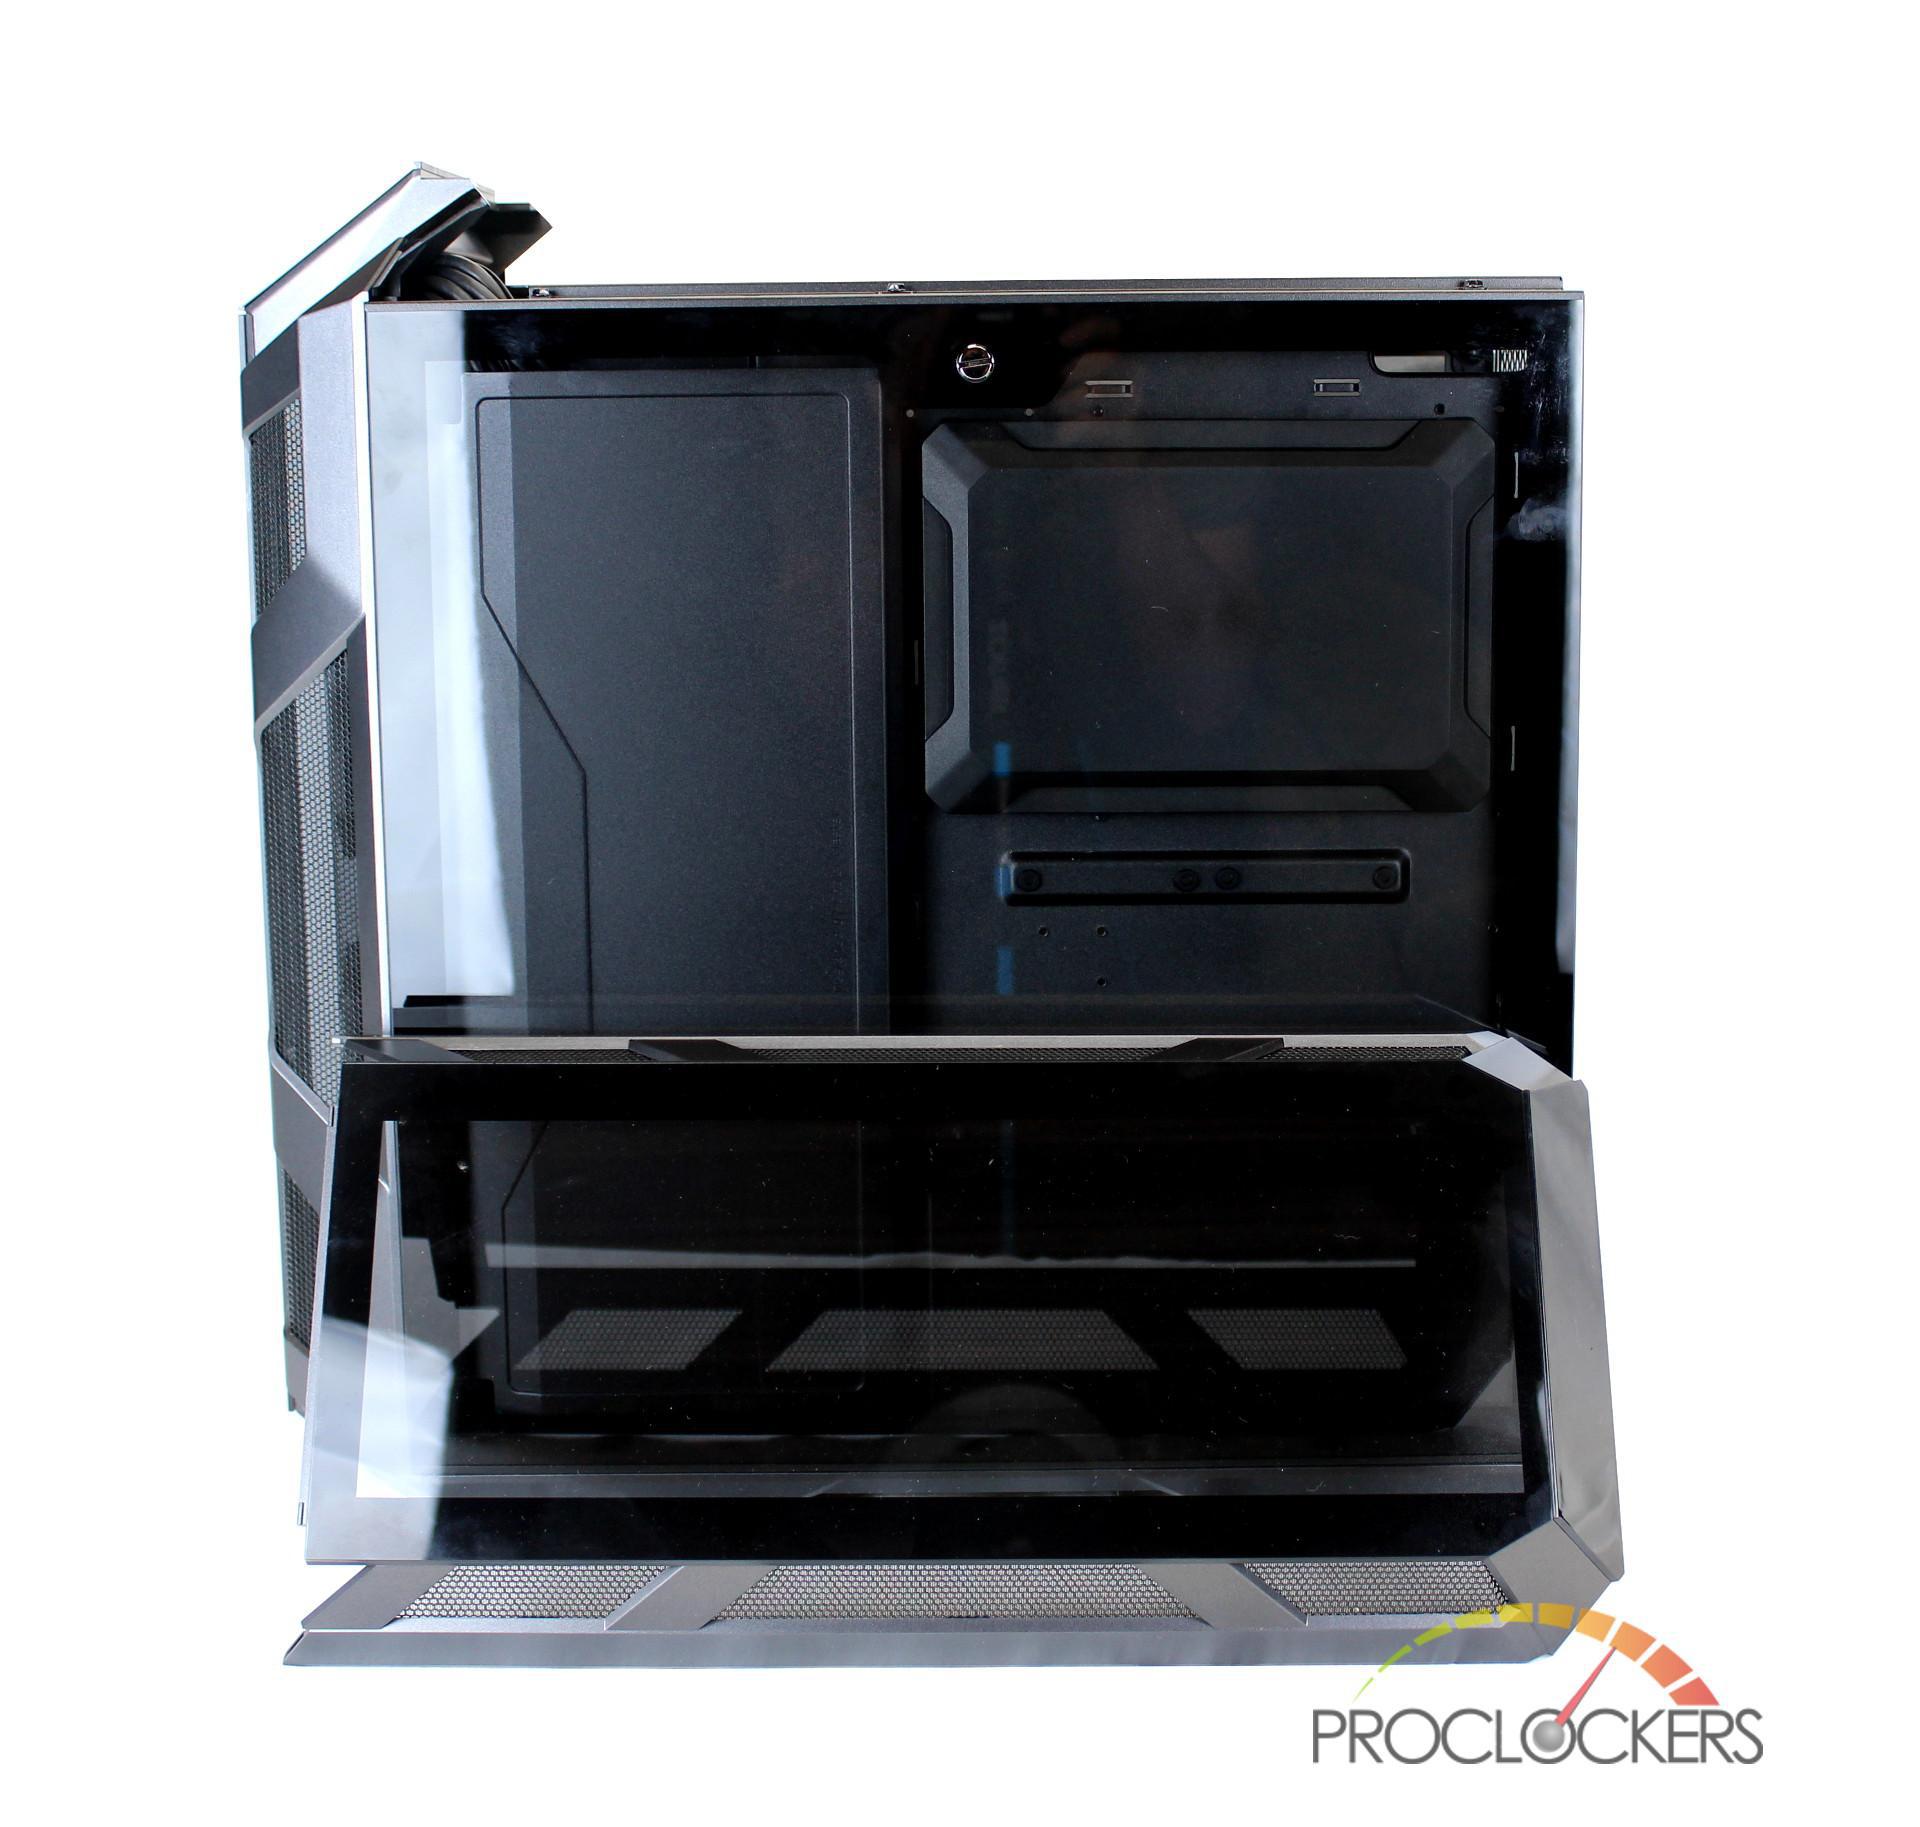
If the preinstalled mesh insert is not to your liking and you prefer the full tempered glass look and feel, you can swap out it with ease. Start by popping up the full front panel starting at the top of the case and moving your way down. Once you have the full front panel off you can see that the mesh insert is secured with 8 screws that have foam like washers on them. We would like to also point out that all the mesh in the front panel is filtered but it not removable so you will have to popoff the whole front panel to clean them.
After you have swapped the inserts, all you have to do is reattach the front panel by snapping it into place.
Looking at the back of the case, you see the normal IO cutouts and like most cases with a tempered glass panel, a vertical GPU mounting bracket. Down towards the PSU mount you will notice that there is a mounting plate with 4 thumb screws. This has been done so that the PSU can be installed from the back without needing to remove the whole PSU shroud like in the original H500P.
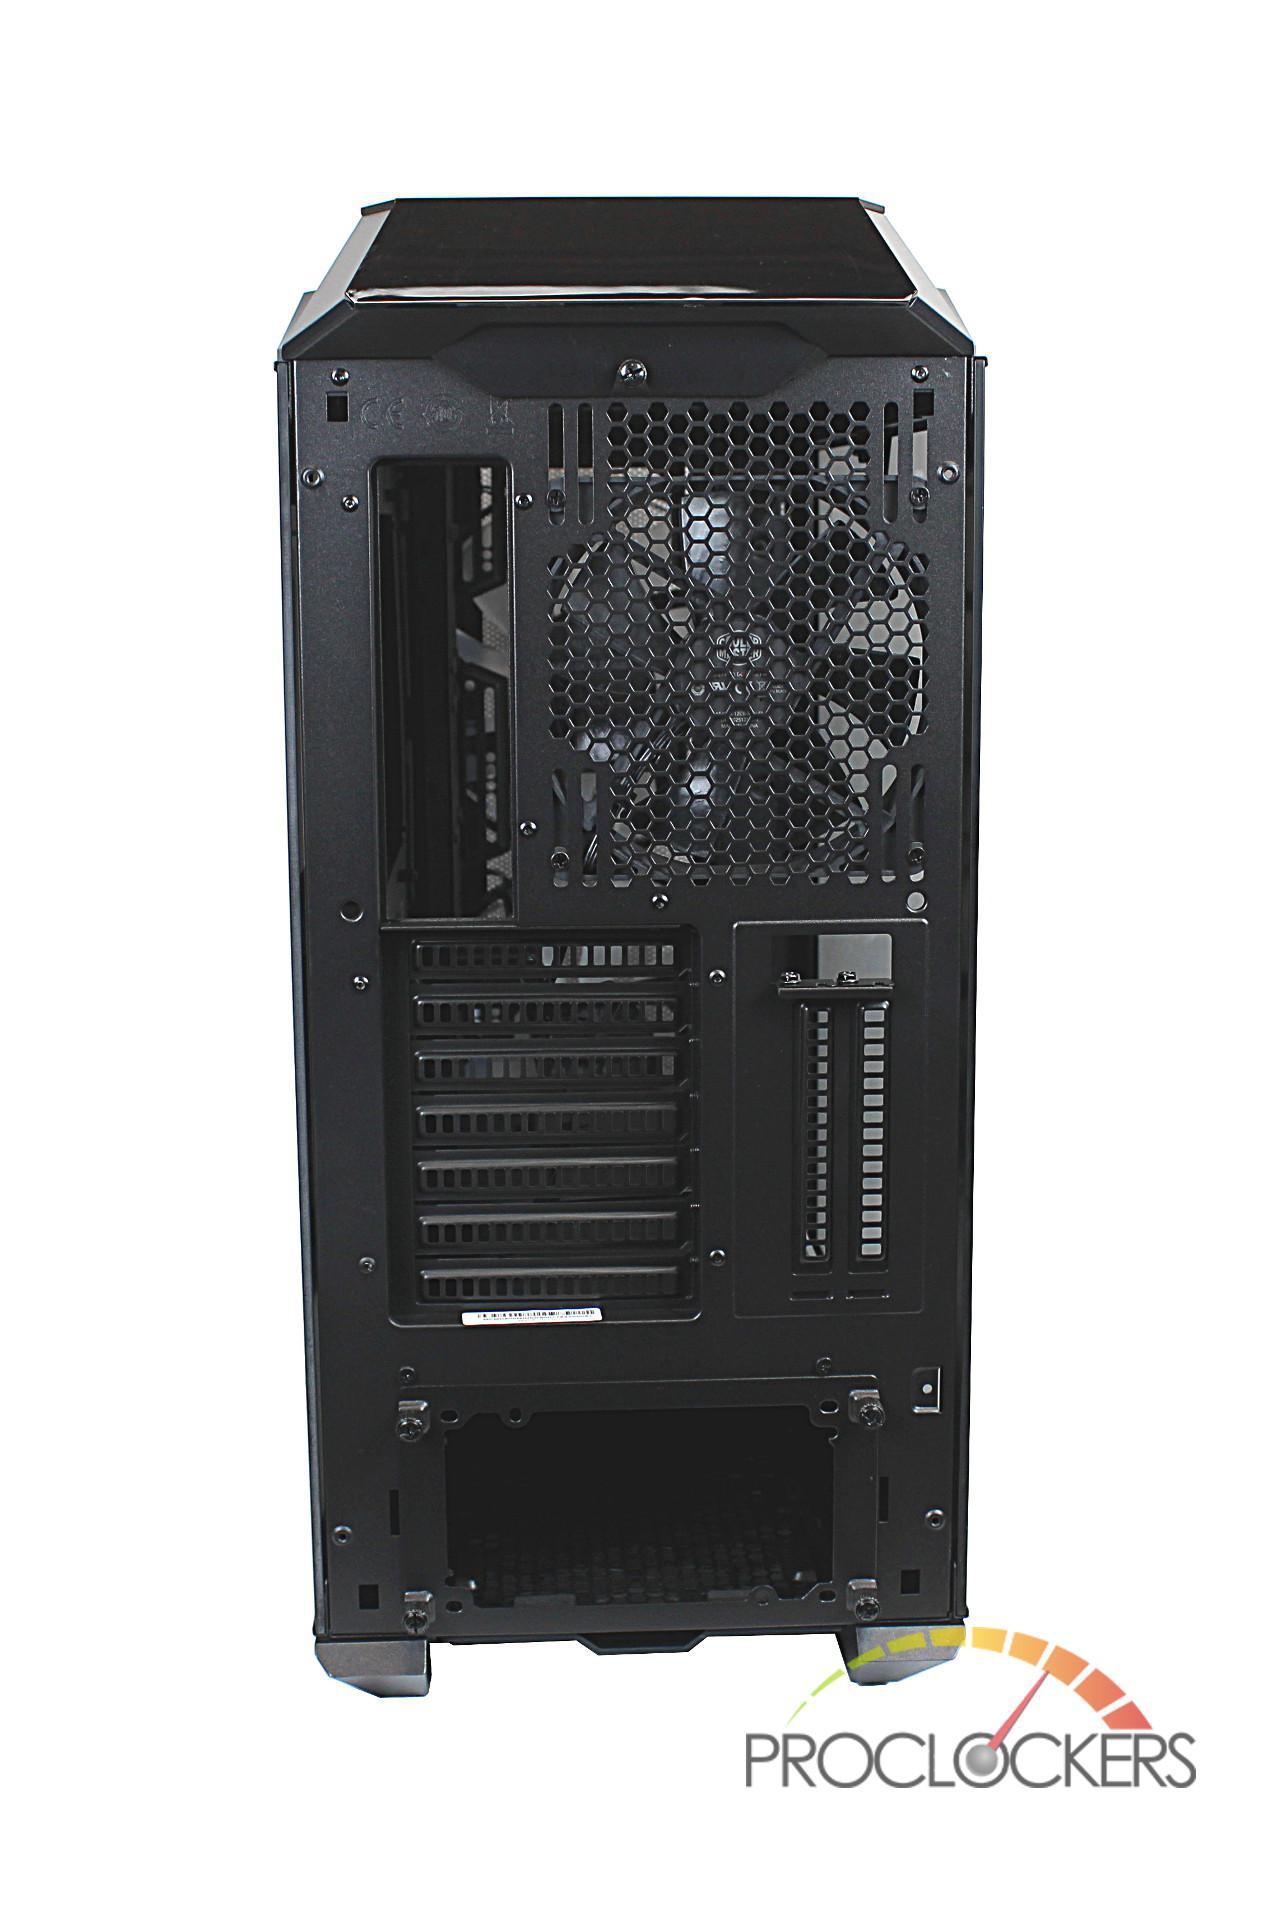
Flipping over the case you can see a removable dust filter for the PSU intake and 4 nicely sized rubberized feet.
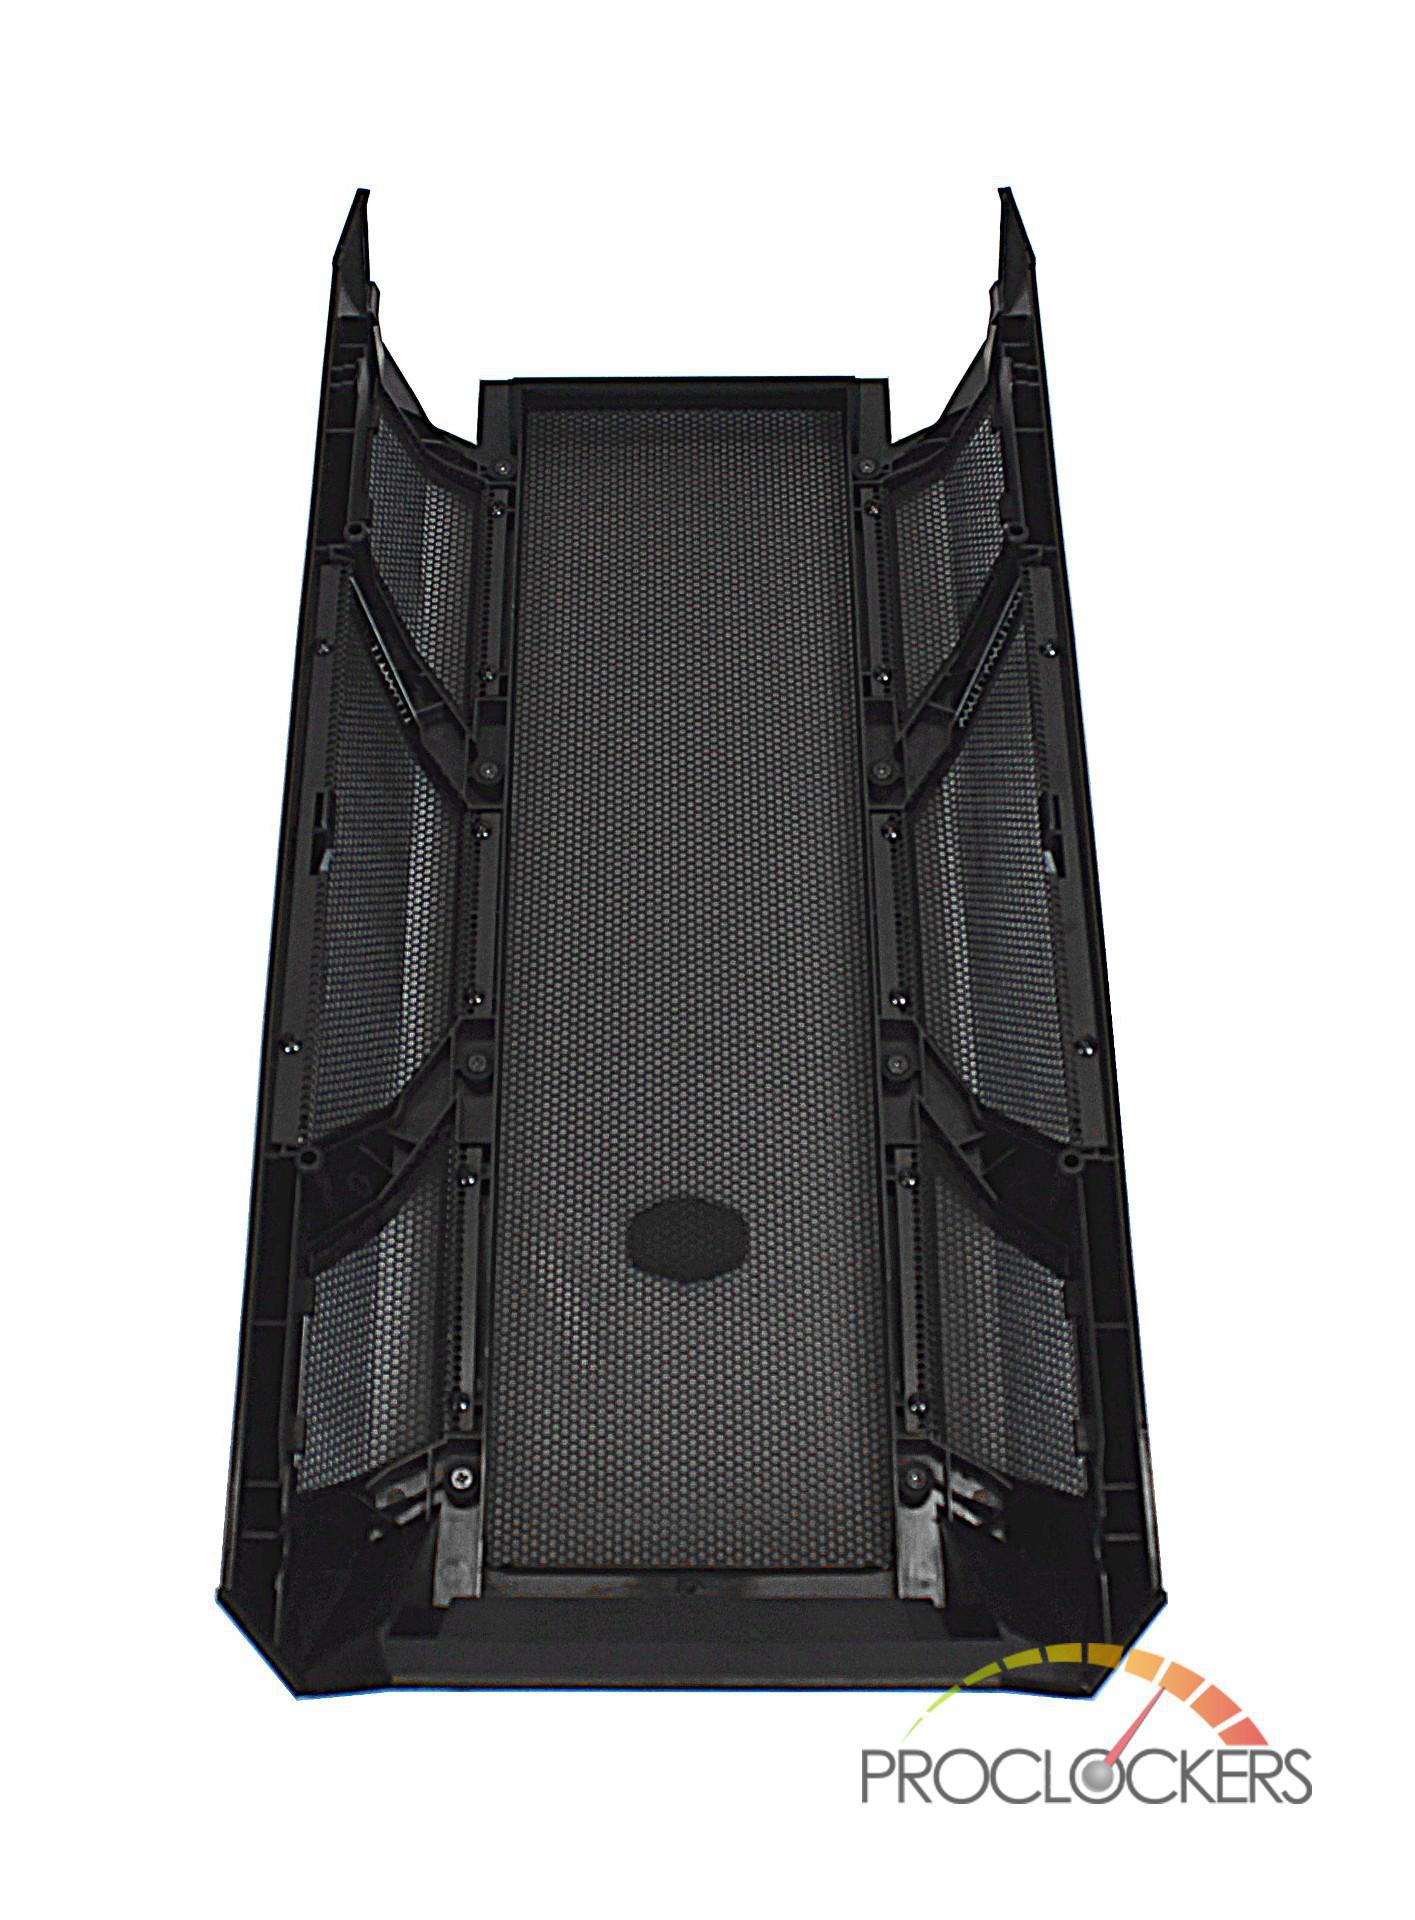
If you wish to install fans on the top of the case, you can do so by removing the screw on that back of the case. Once removed, you can easily lift off the top with your hands from the back. Fans can be mounted in the following configurations: 3 x 120mm fans, 2 x 140mm fans or 2 x 200mm fans. Like the front panel of the case, the mesh on the top is also filtered.
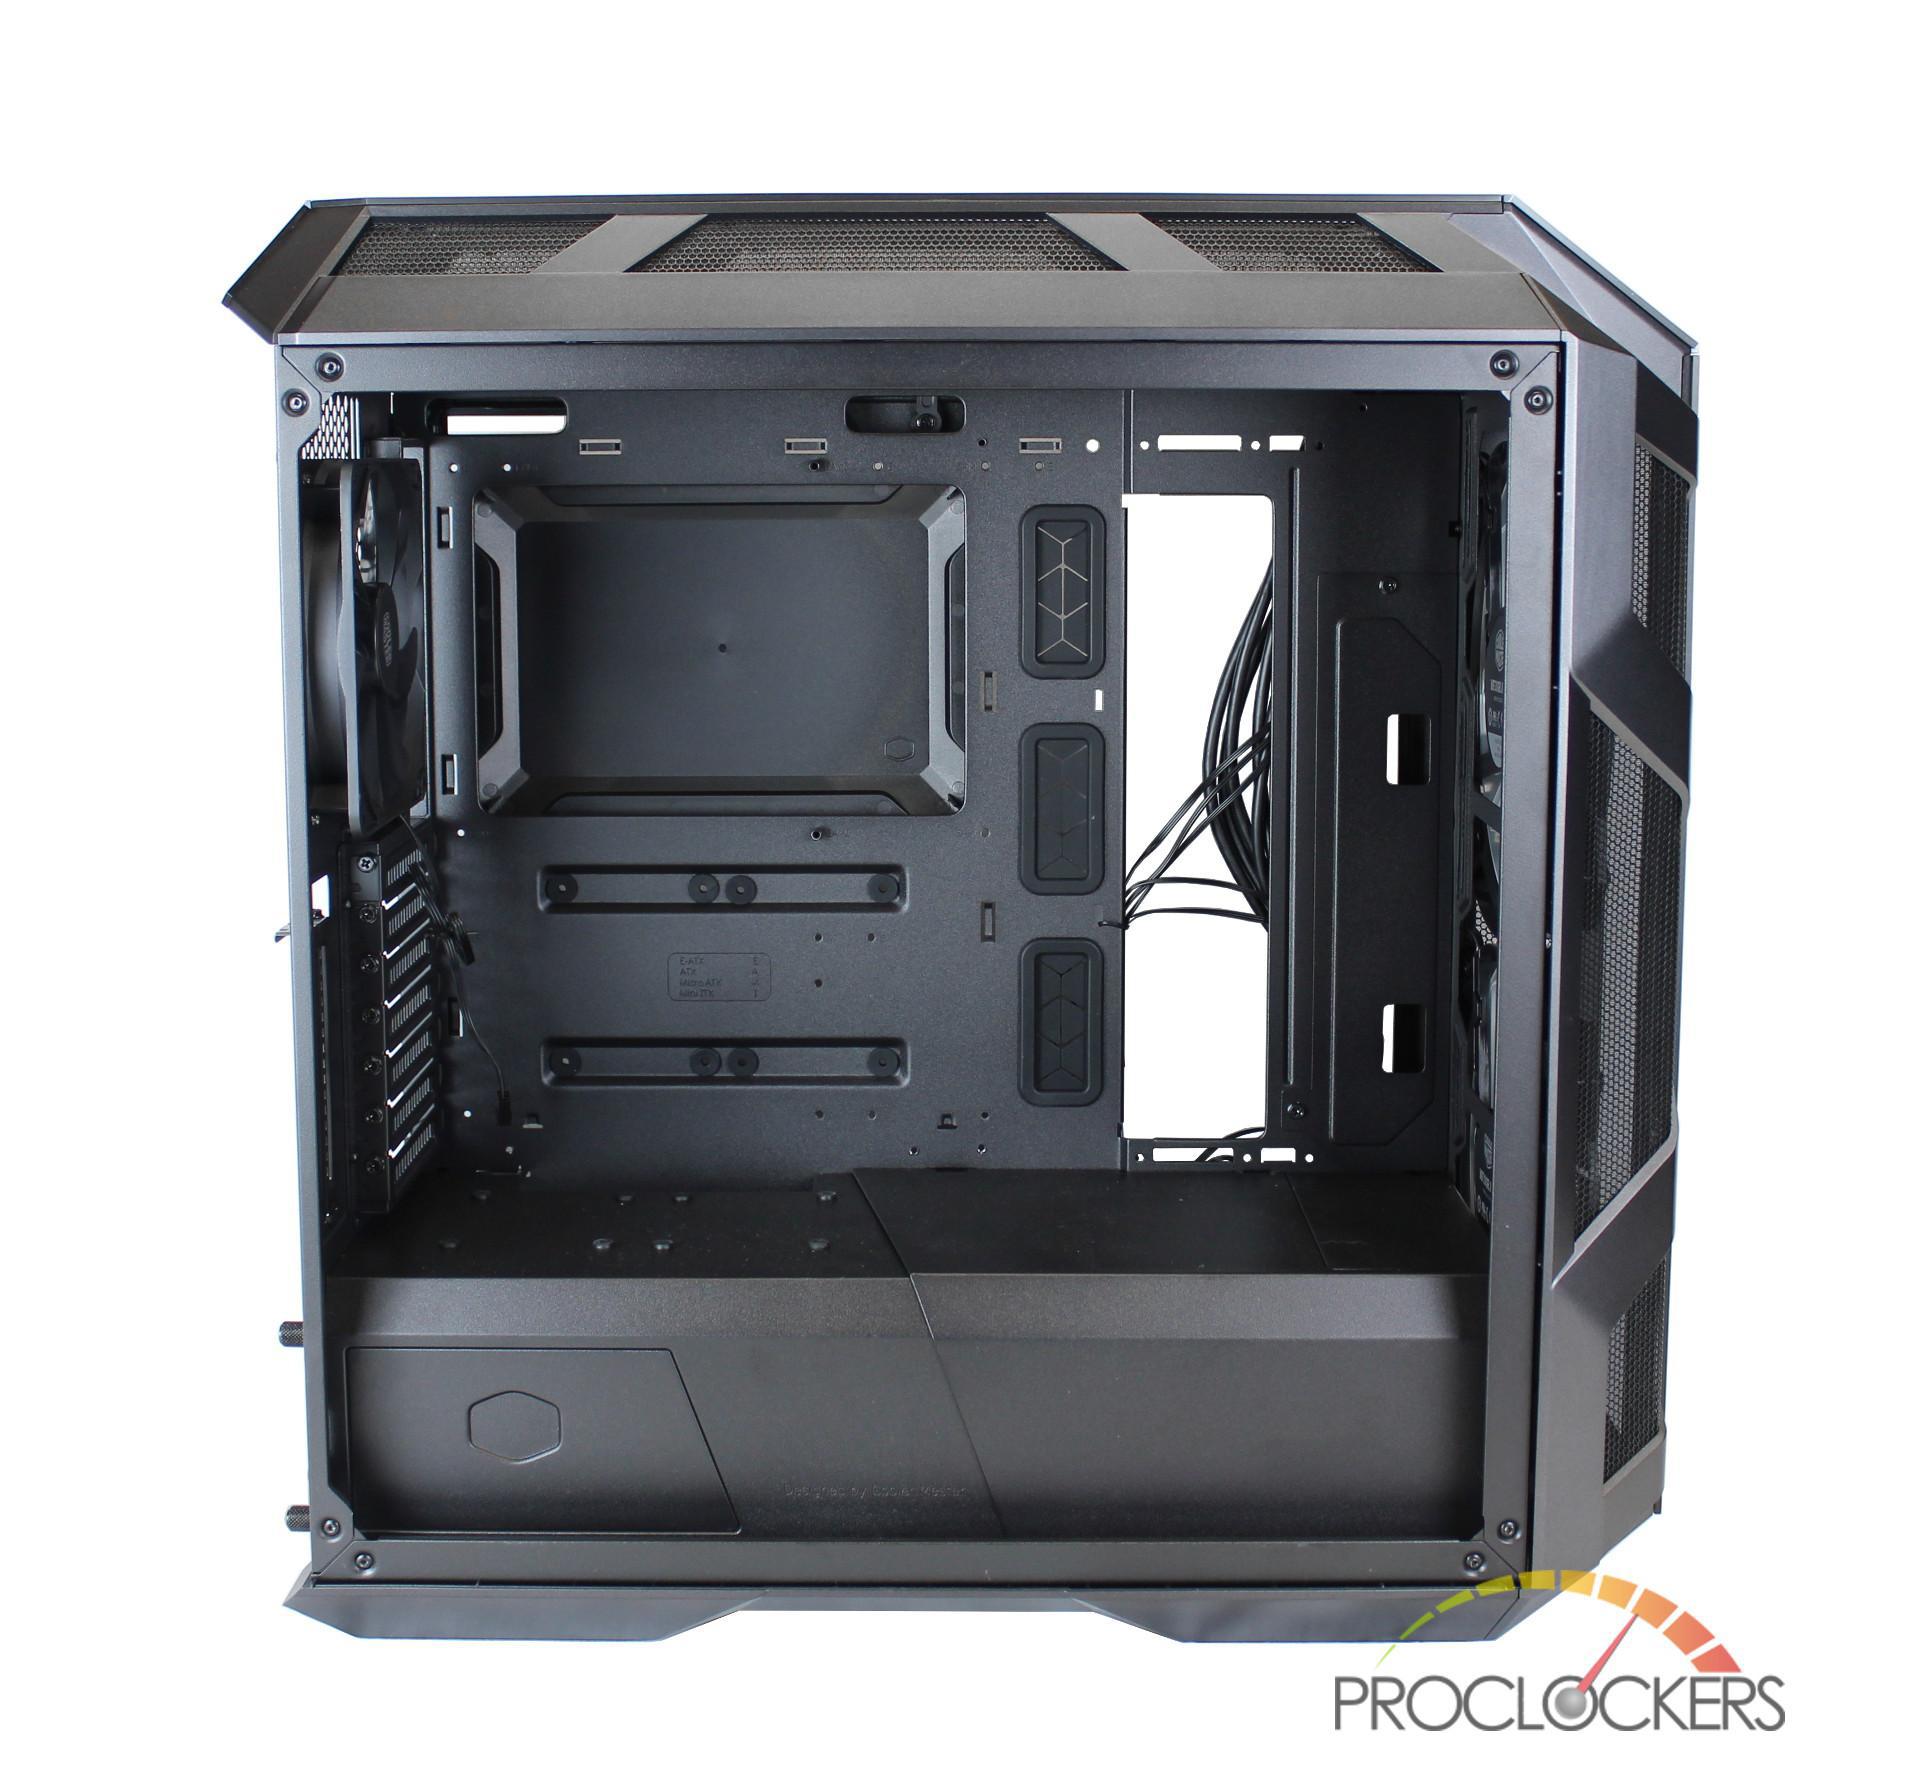
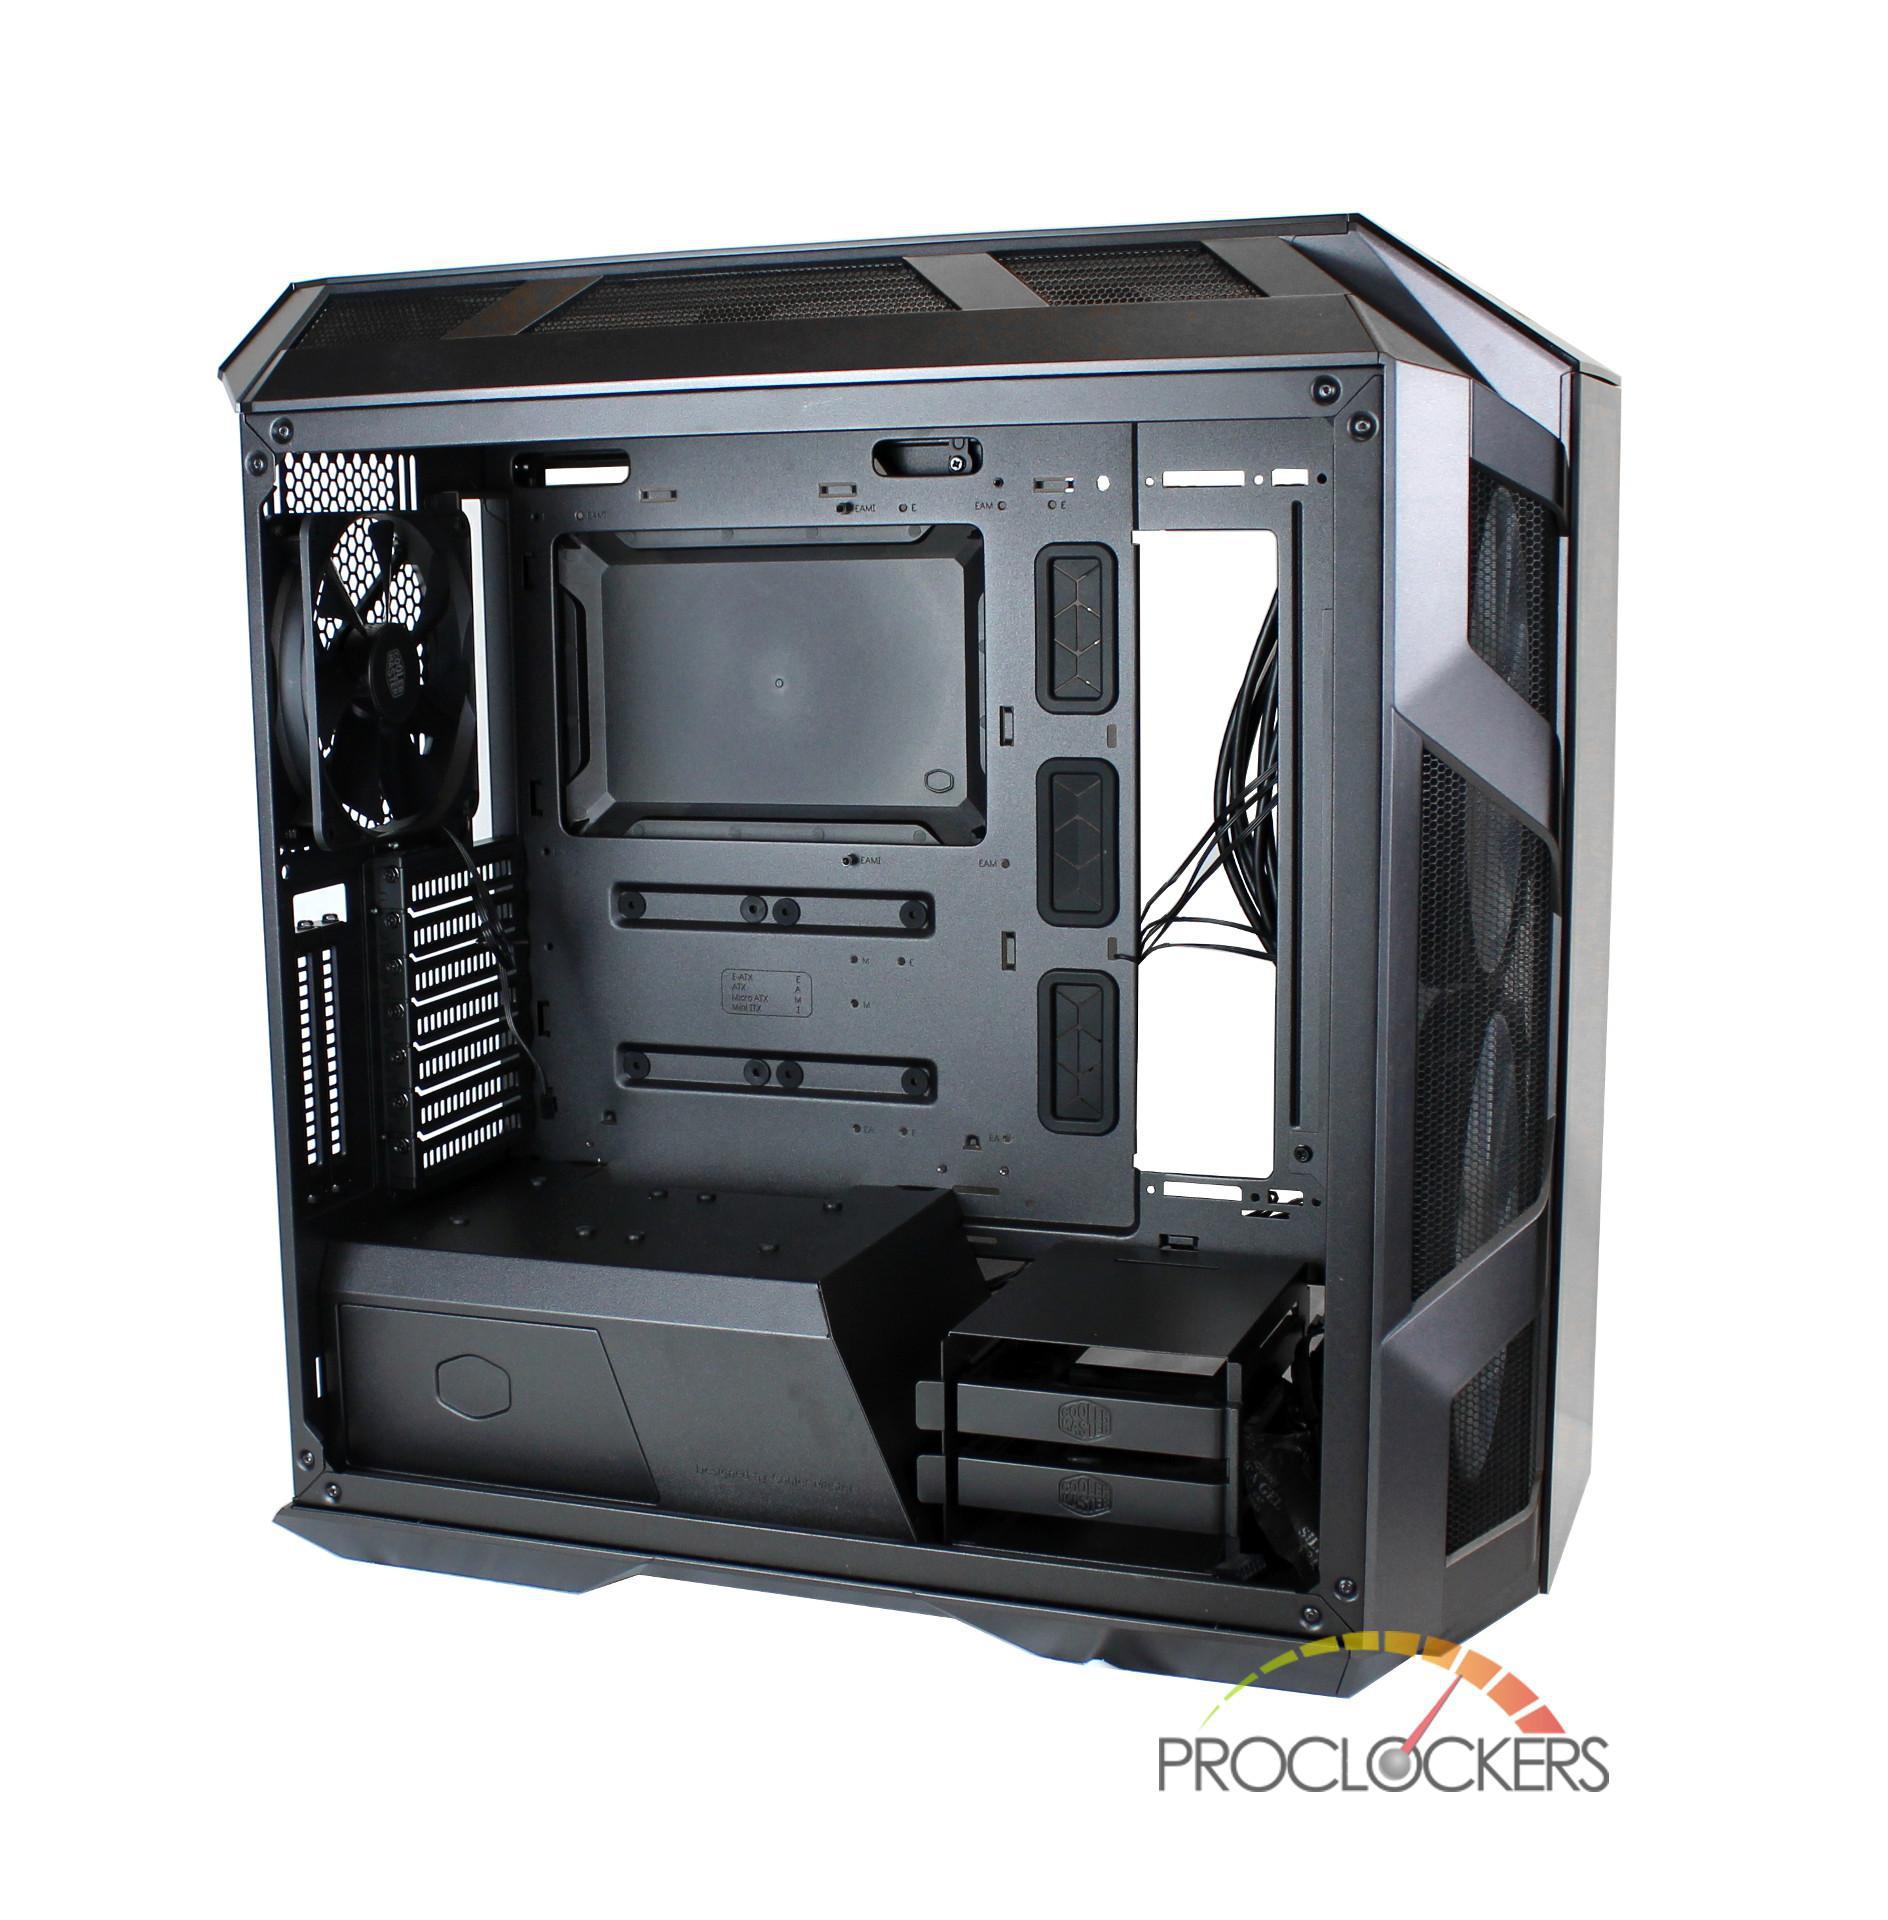
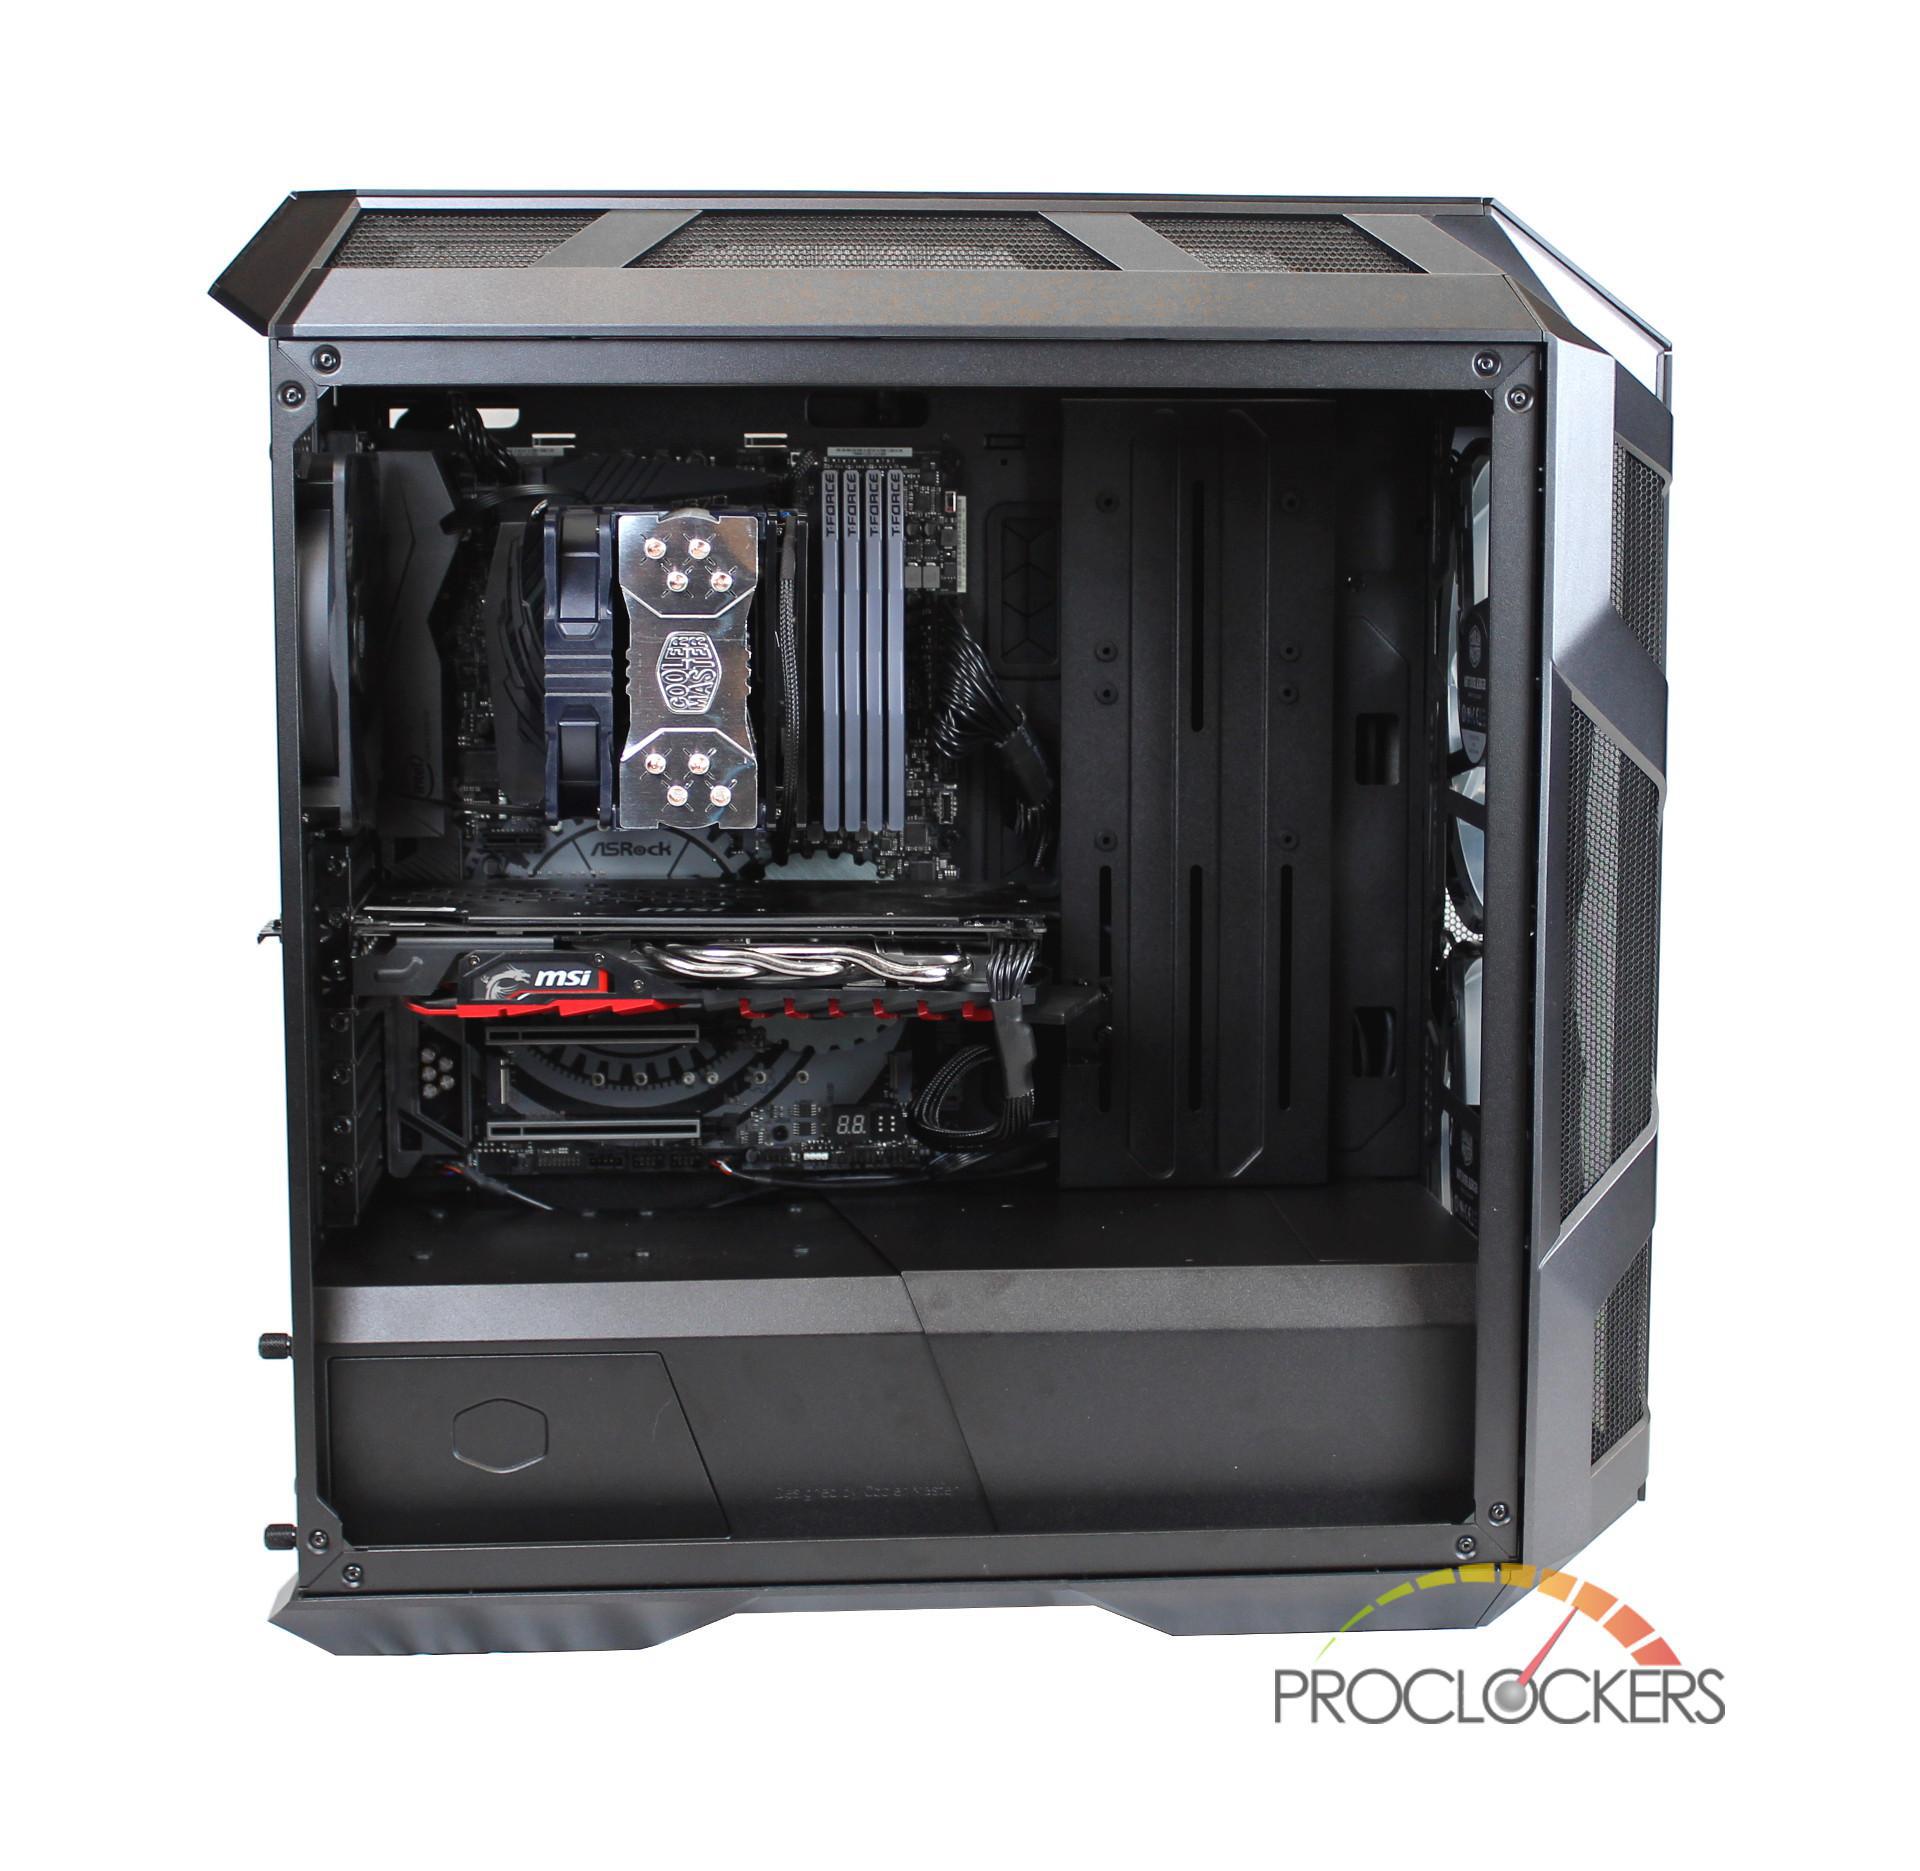
A Closer Look: Interior
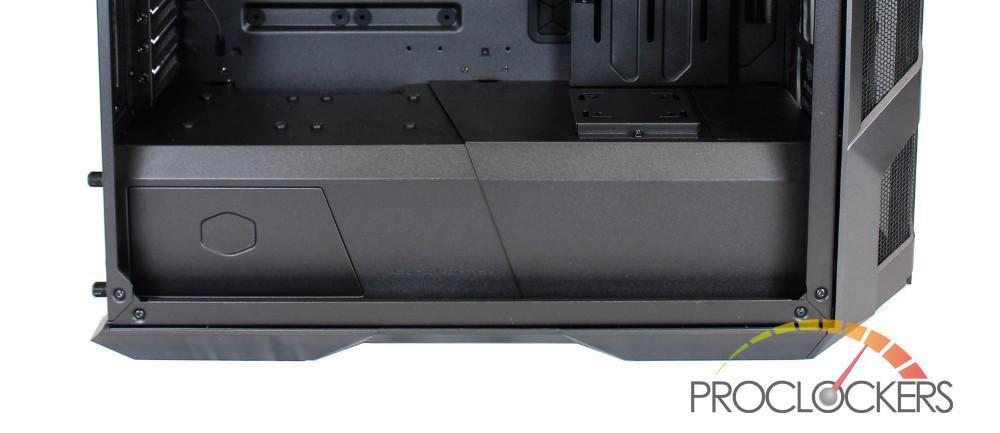
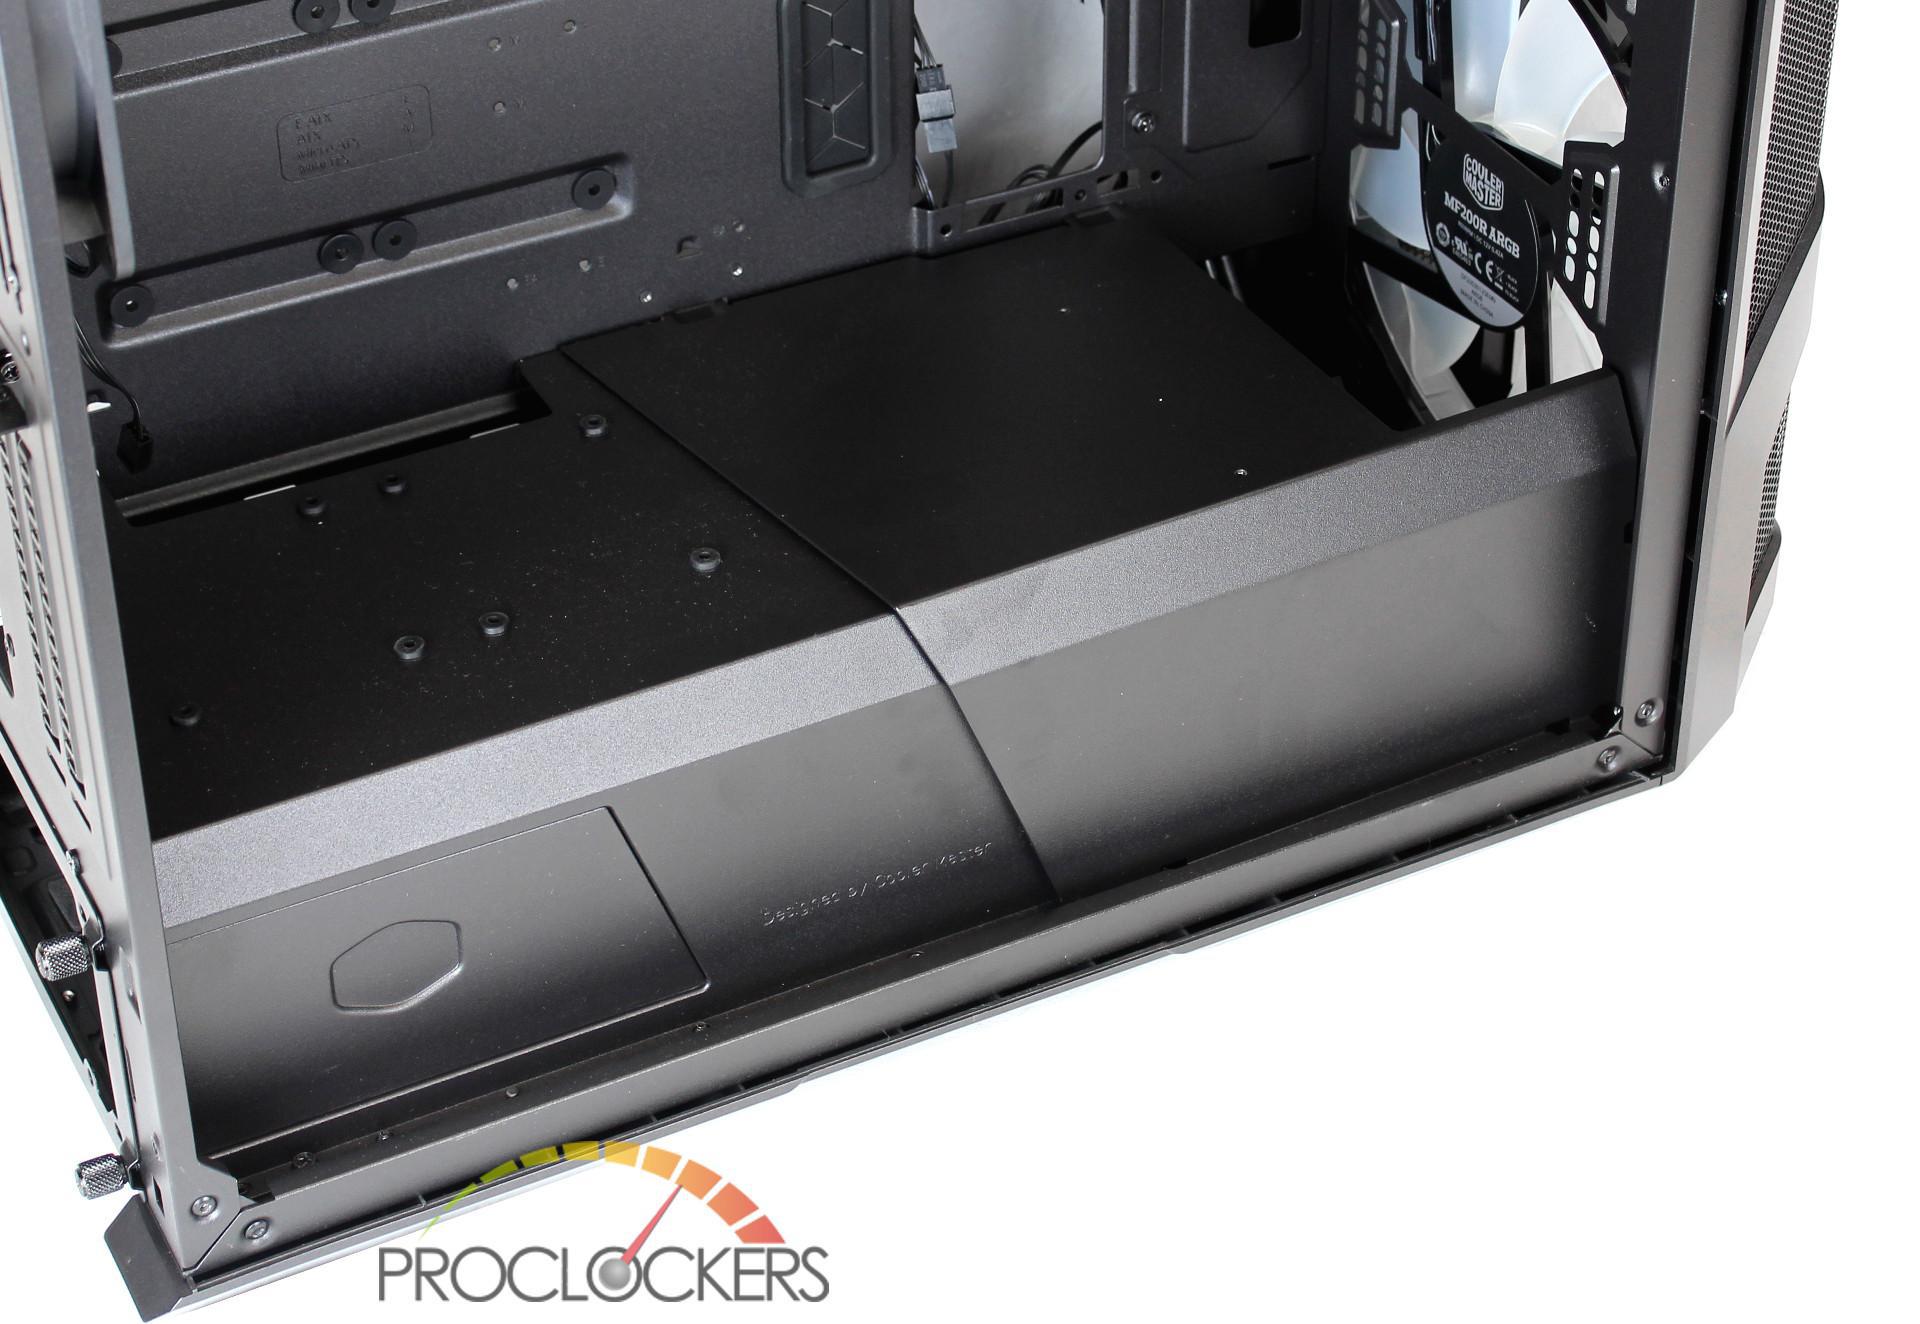
After removing the front tempered glass panel, you are greeted with a full matte black interior with the customizability that you would expect from a case in the MasterCase line. Some of the bonuses are a water bump mounting bracket on the top of the PSU shroud, a GPU support arm which is needed for those beefy graphics cards and reservoir mounting bracket sitting on the right side of the motherboard tray. Other great features include the multiple SSD mounting points both on the PSU shroud and on the reservoir mounting bracket and an extremely configurable PSU shroud which we will talk about later. The case feels very roomy and you should have no problem adding all the custom water cooling gear if you wish to move away from your air coolers. This case supports up to 360mm radiators on the front and top of the case and you should even have room for pull/pull (dependent on your rad and fan size) since you can install one set of fans under the top and front panel.
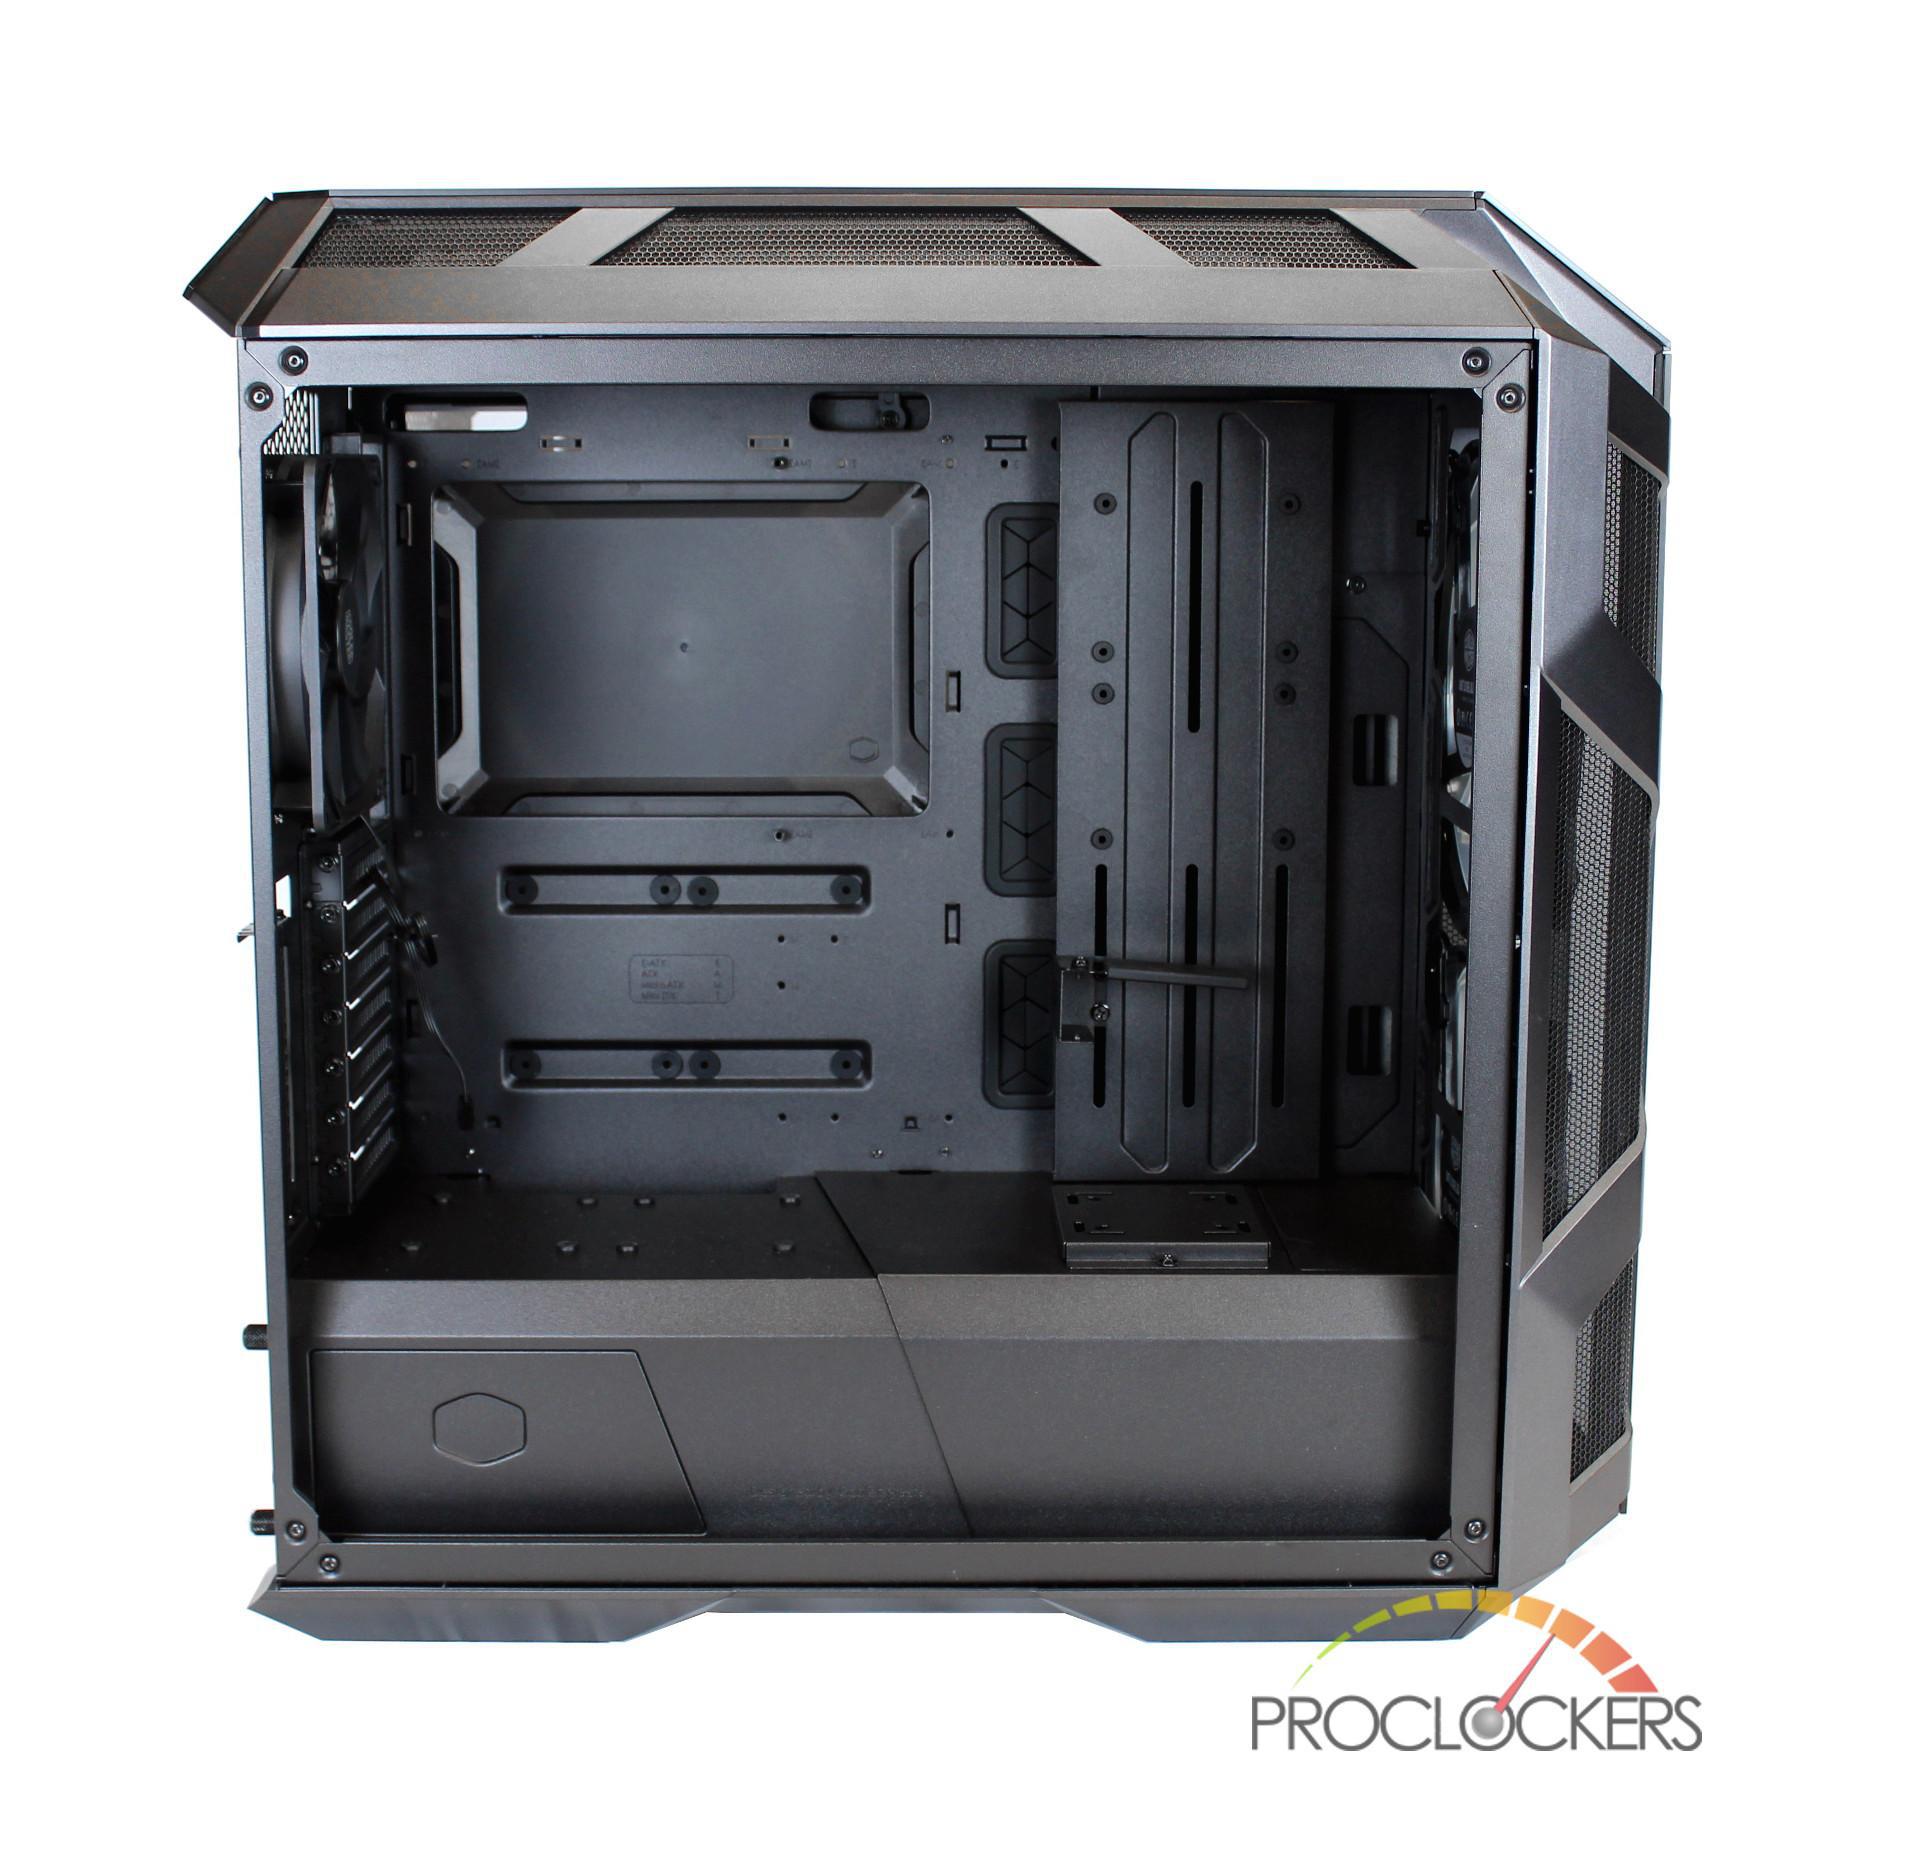
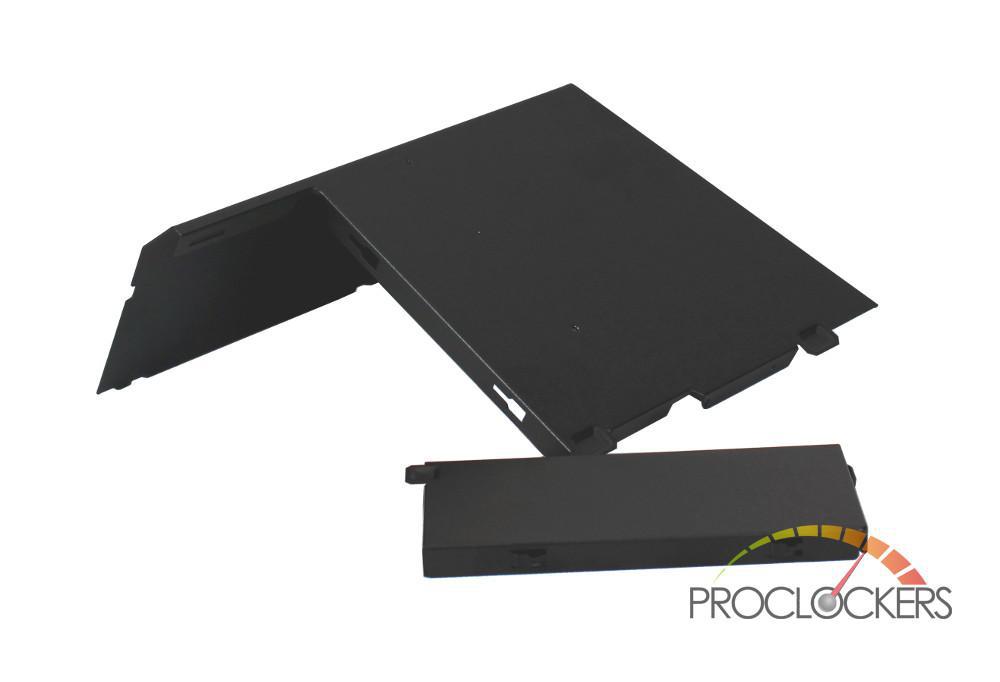
Flipping the case around to the back, you will notice the lack of visible wires. This is due to the 3 included covers, which keep the back of the case looking extremely clean. Below the motherboard tray, you also have the option to mount 2 SSD’s. Their wires can be routed though a cutout in the cover below them.
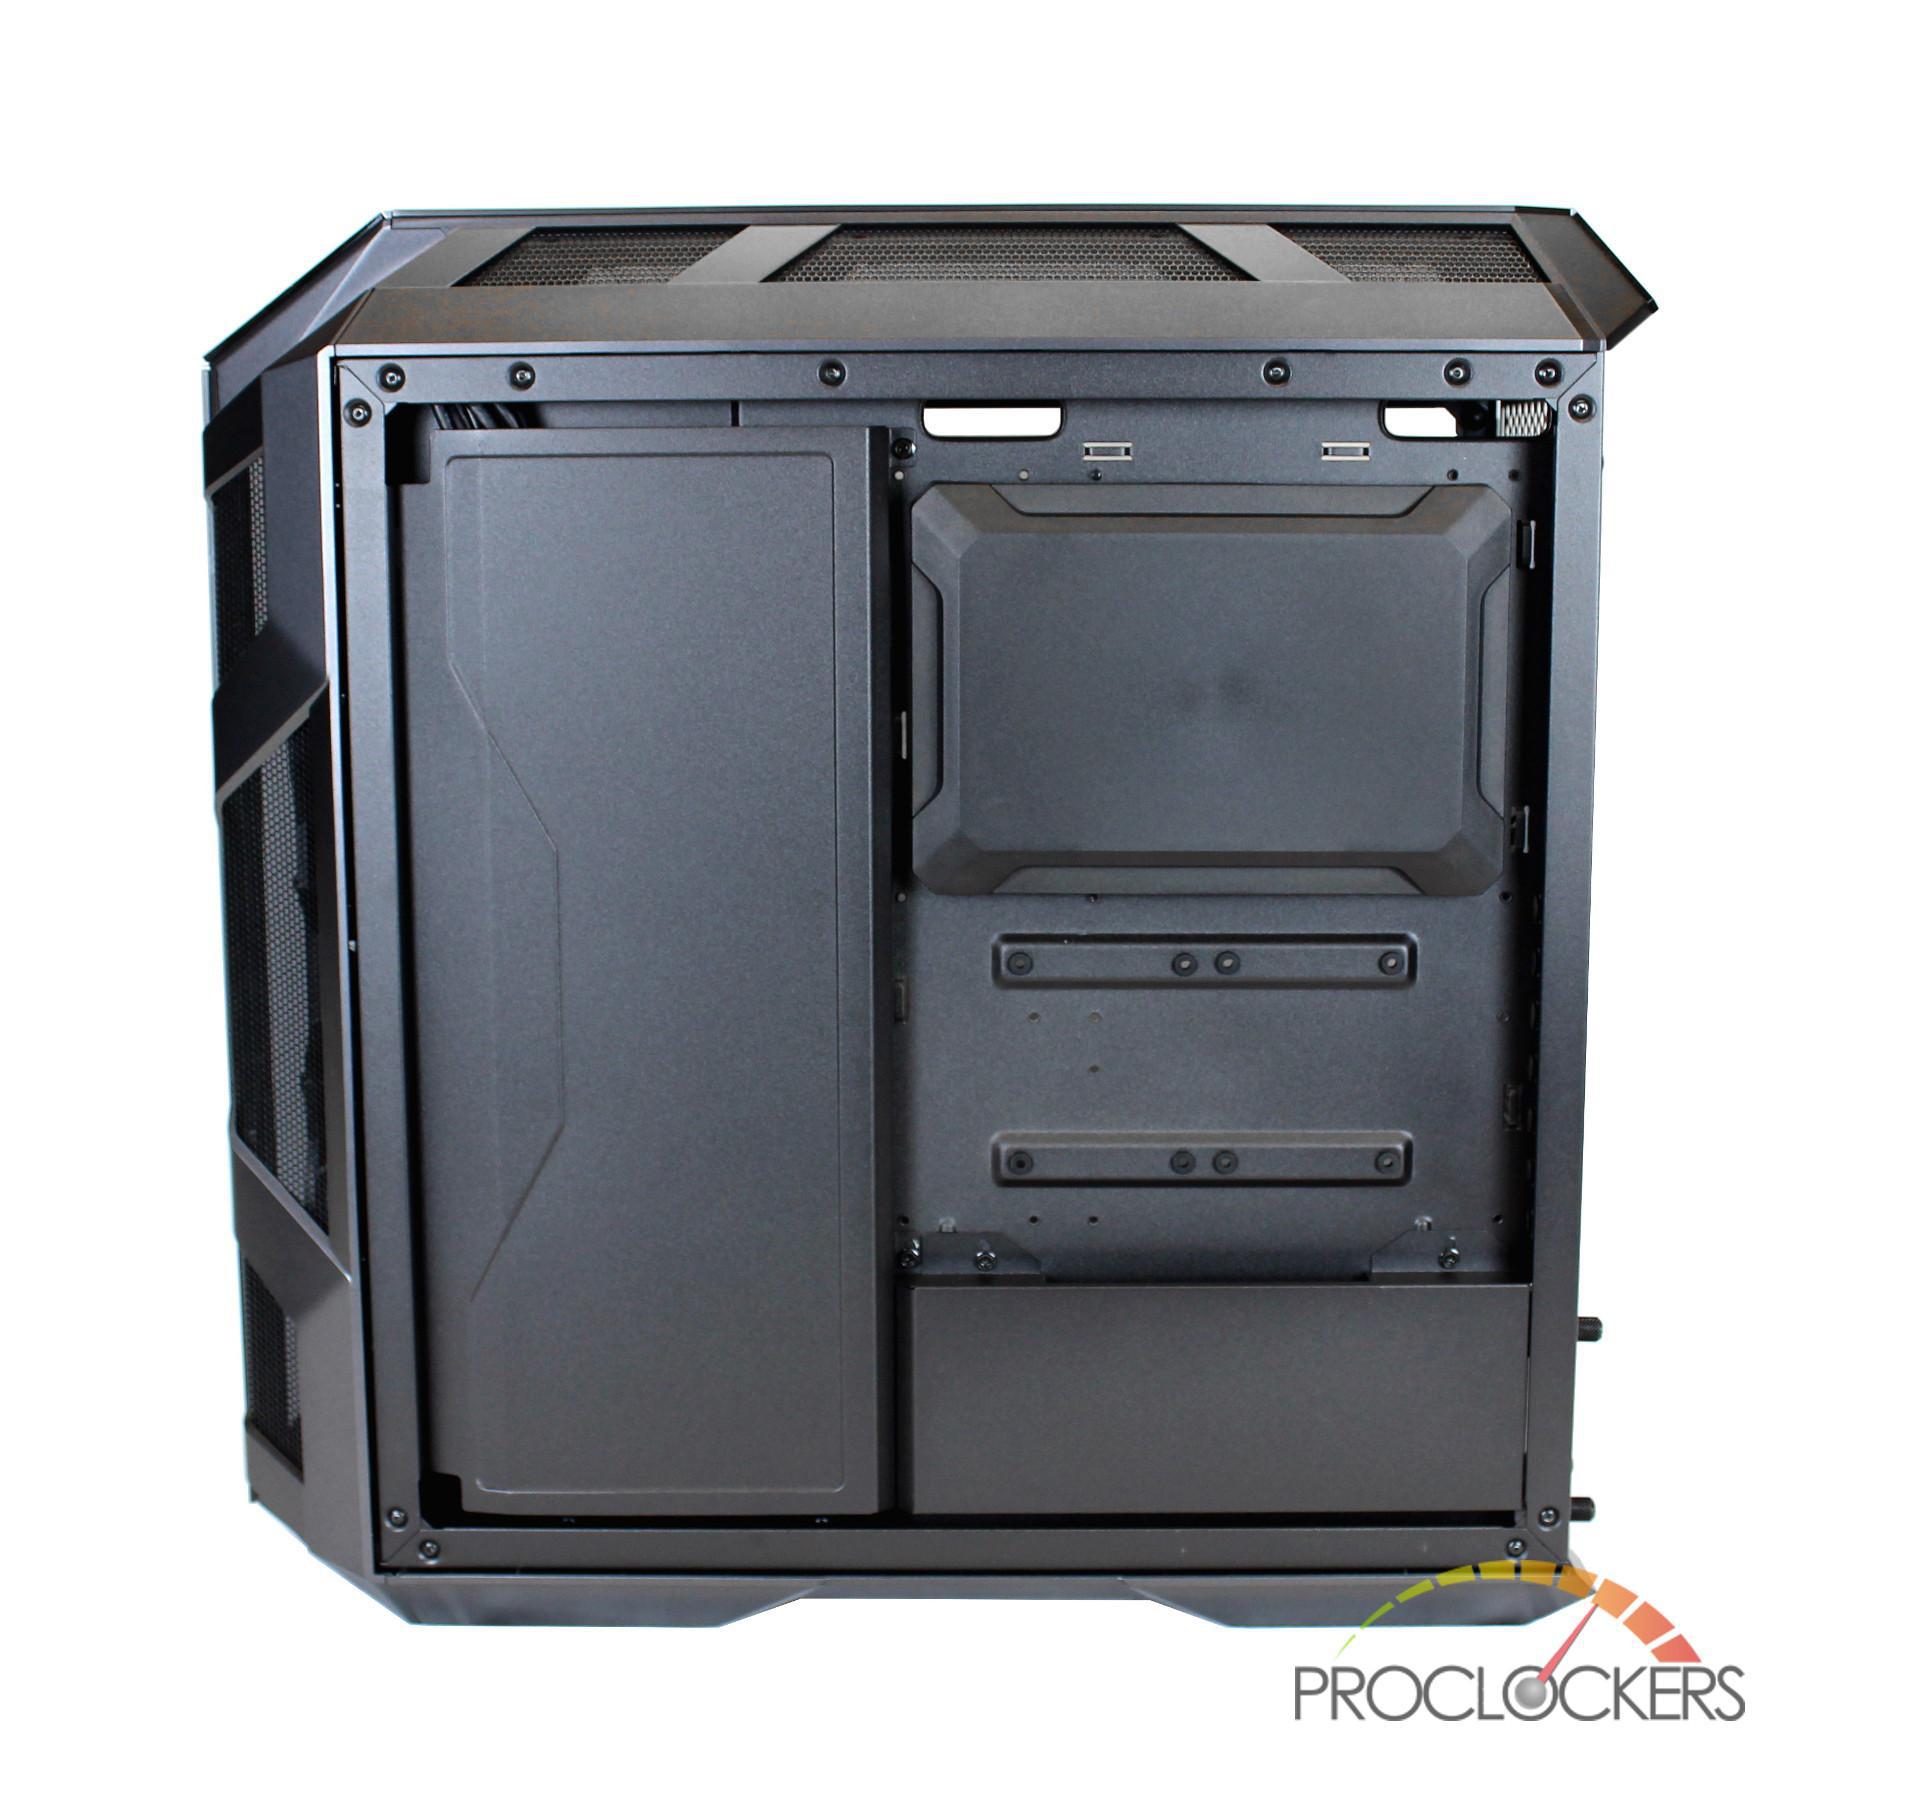
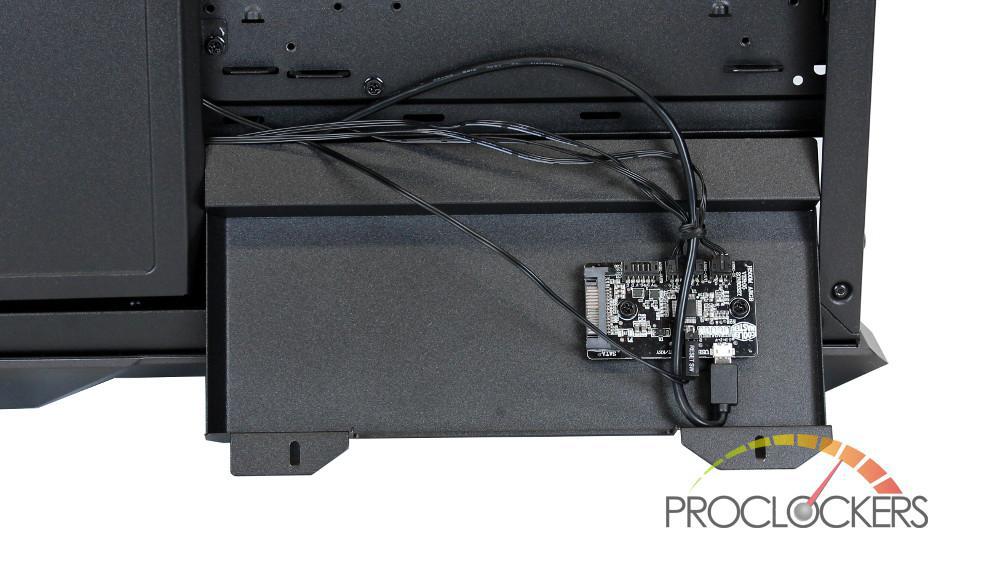
To remove the bottom right cover, you just have to remove the top 2 screws that hold it into place. When removing the bracket, make sure to be careful as the included ARGB controller is attached to the back via 2 screws.
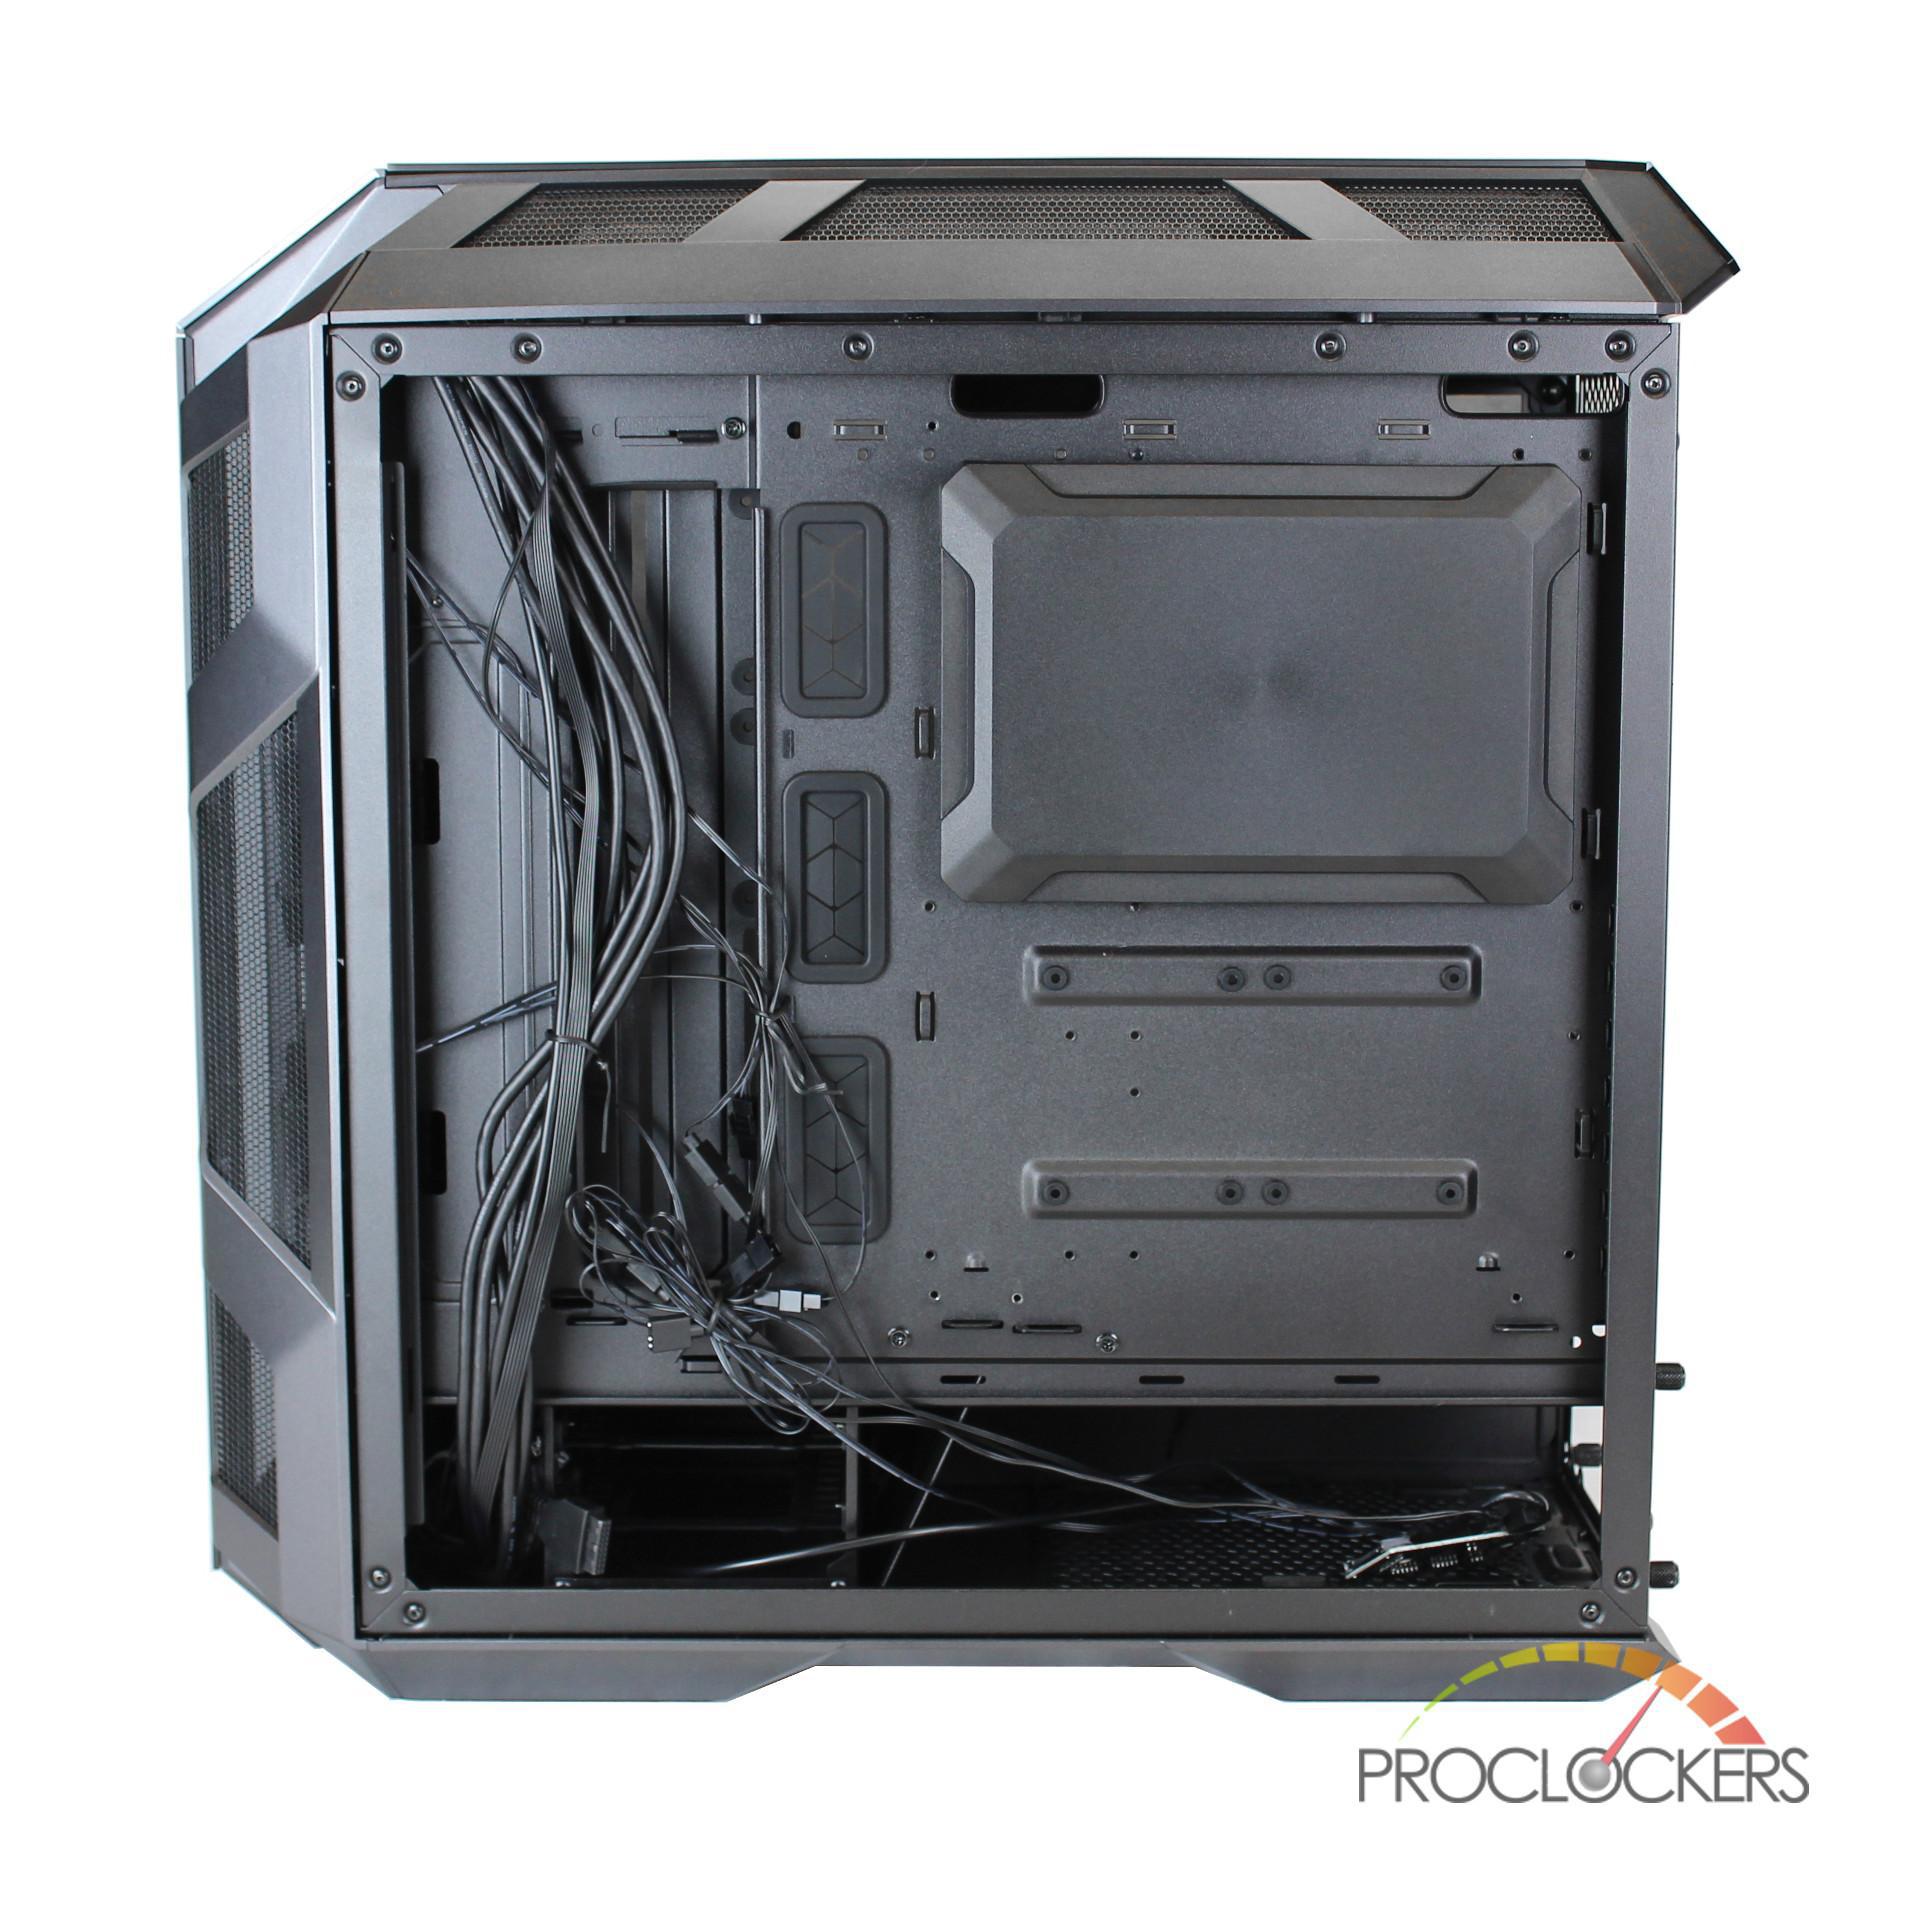
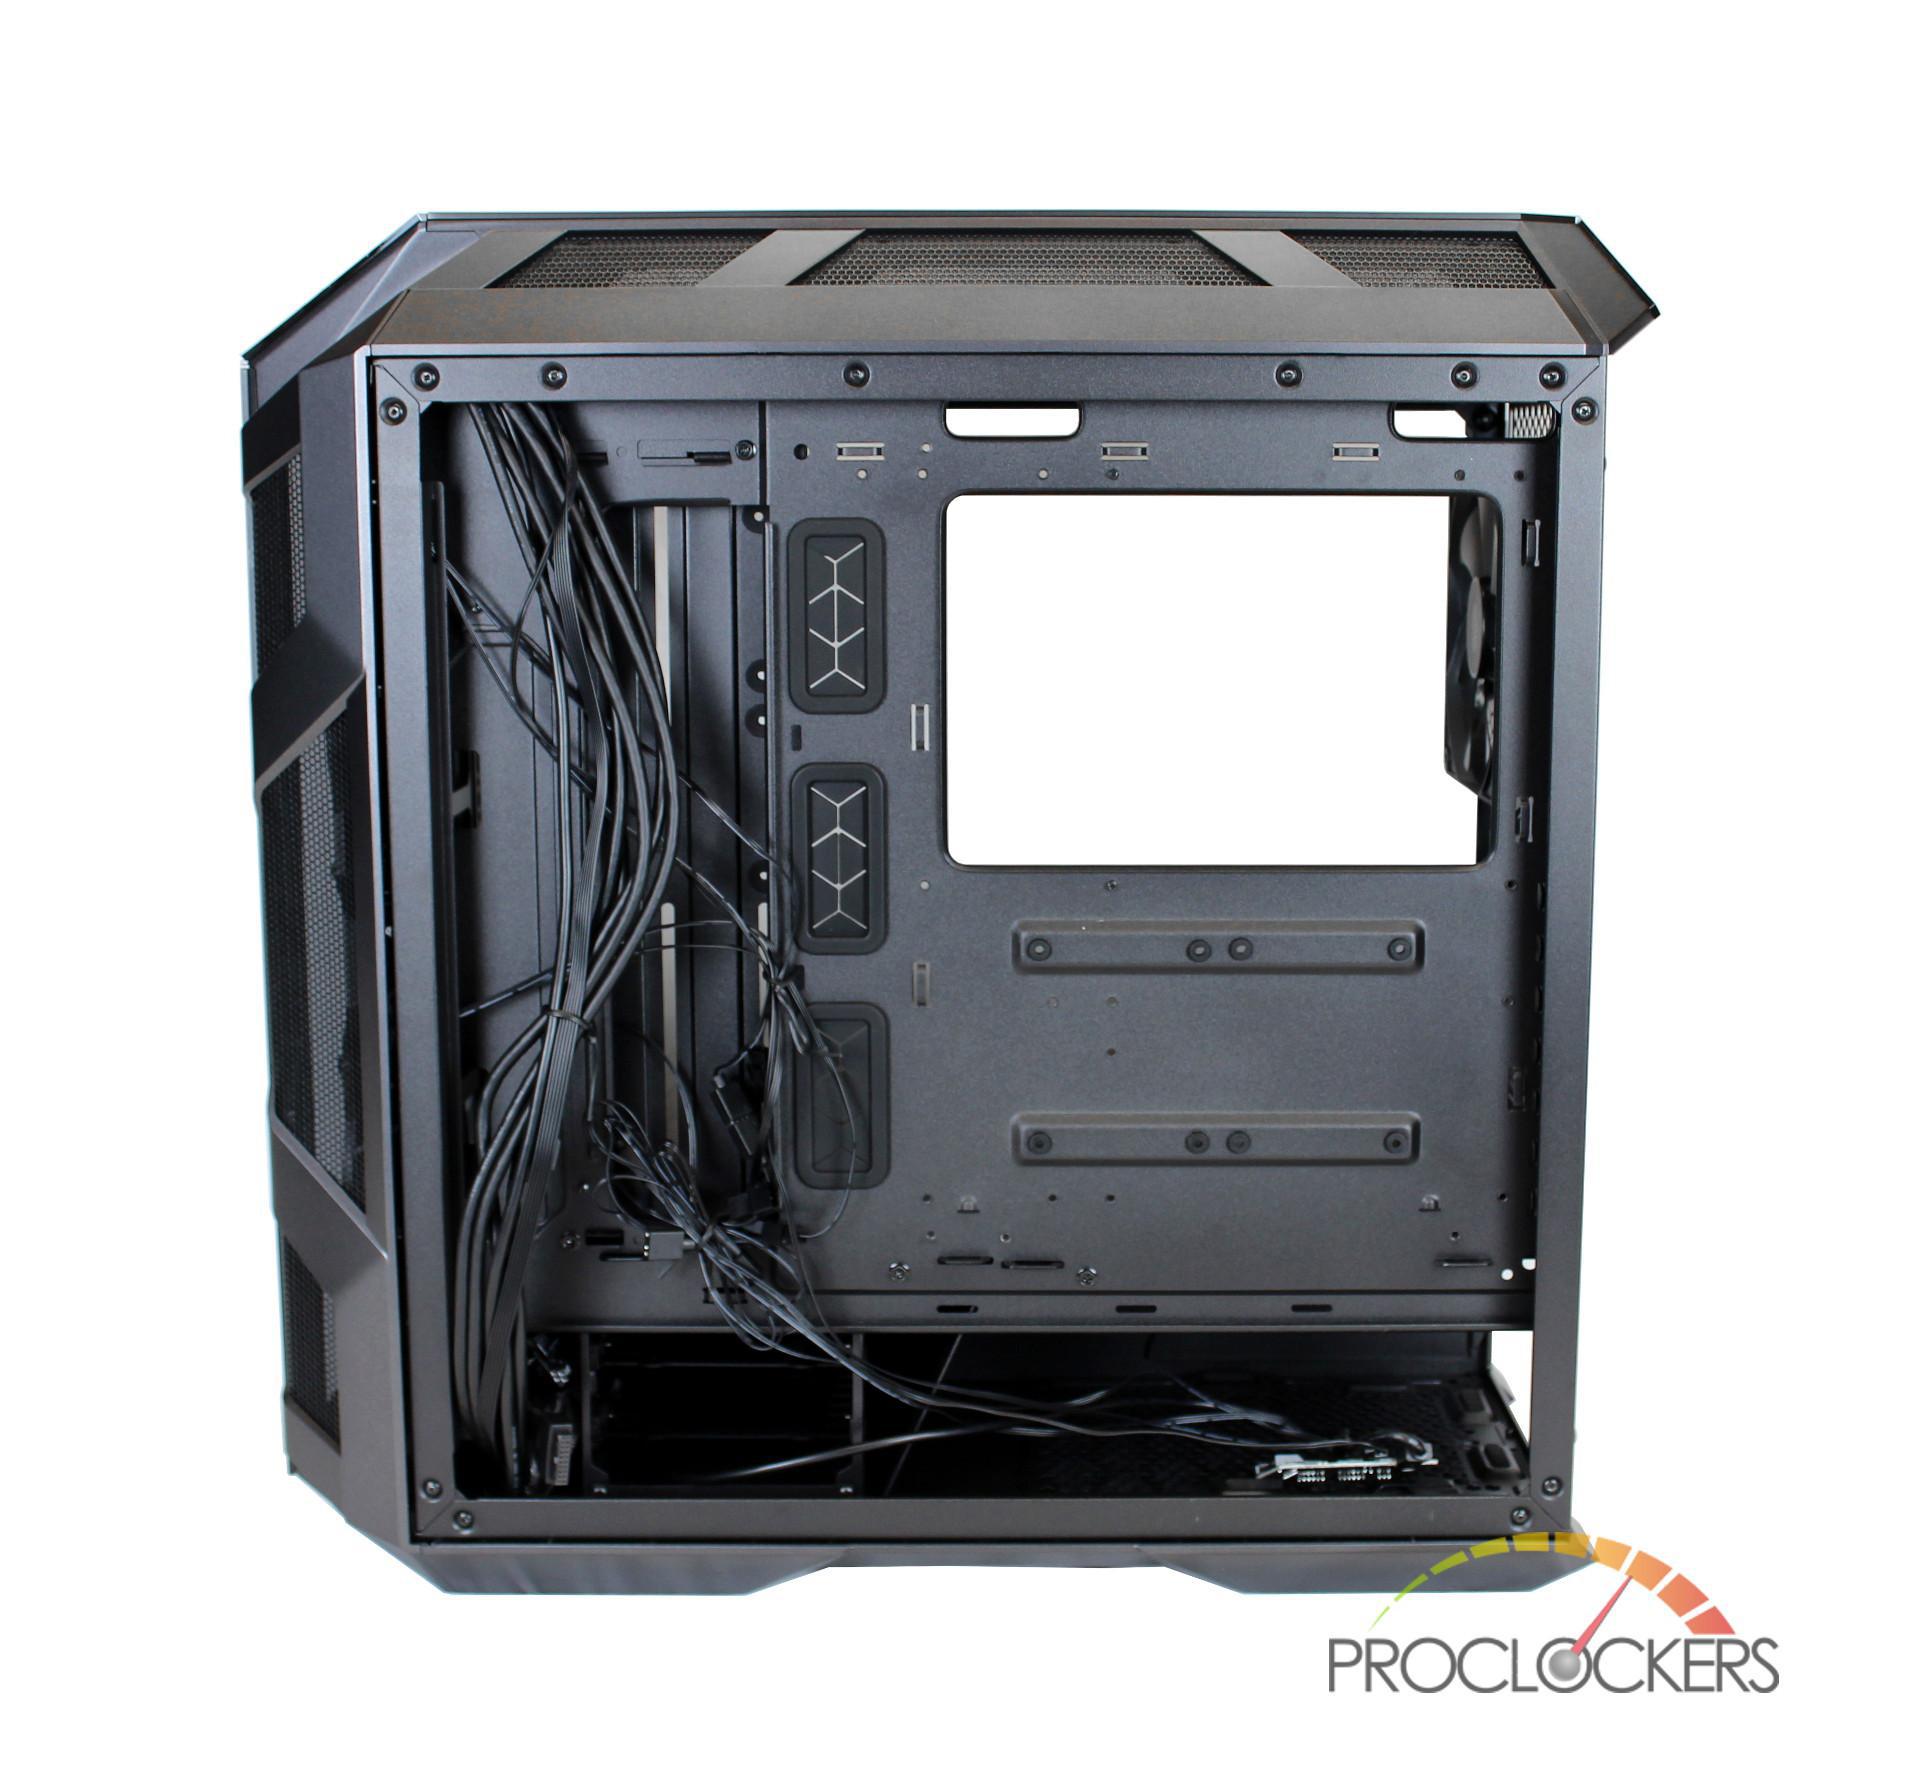
The left side can also be accessed by removing the 2 screws that are securing it to the case. This panel is hinged so that you can open it to the left to view the cables underneath.
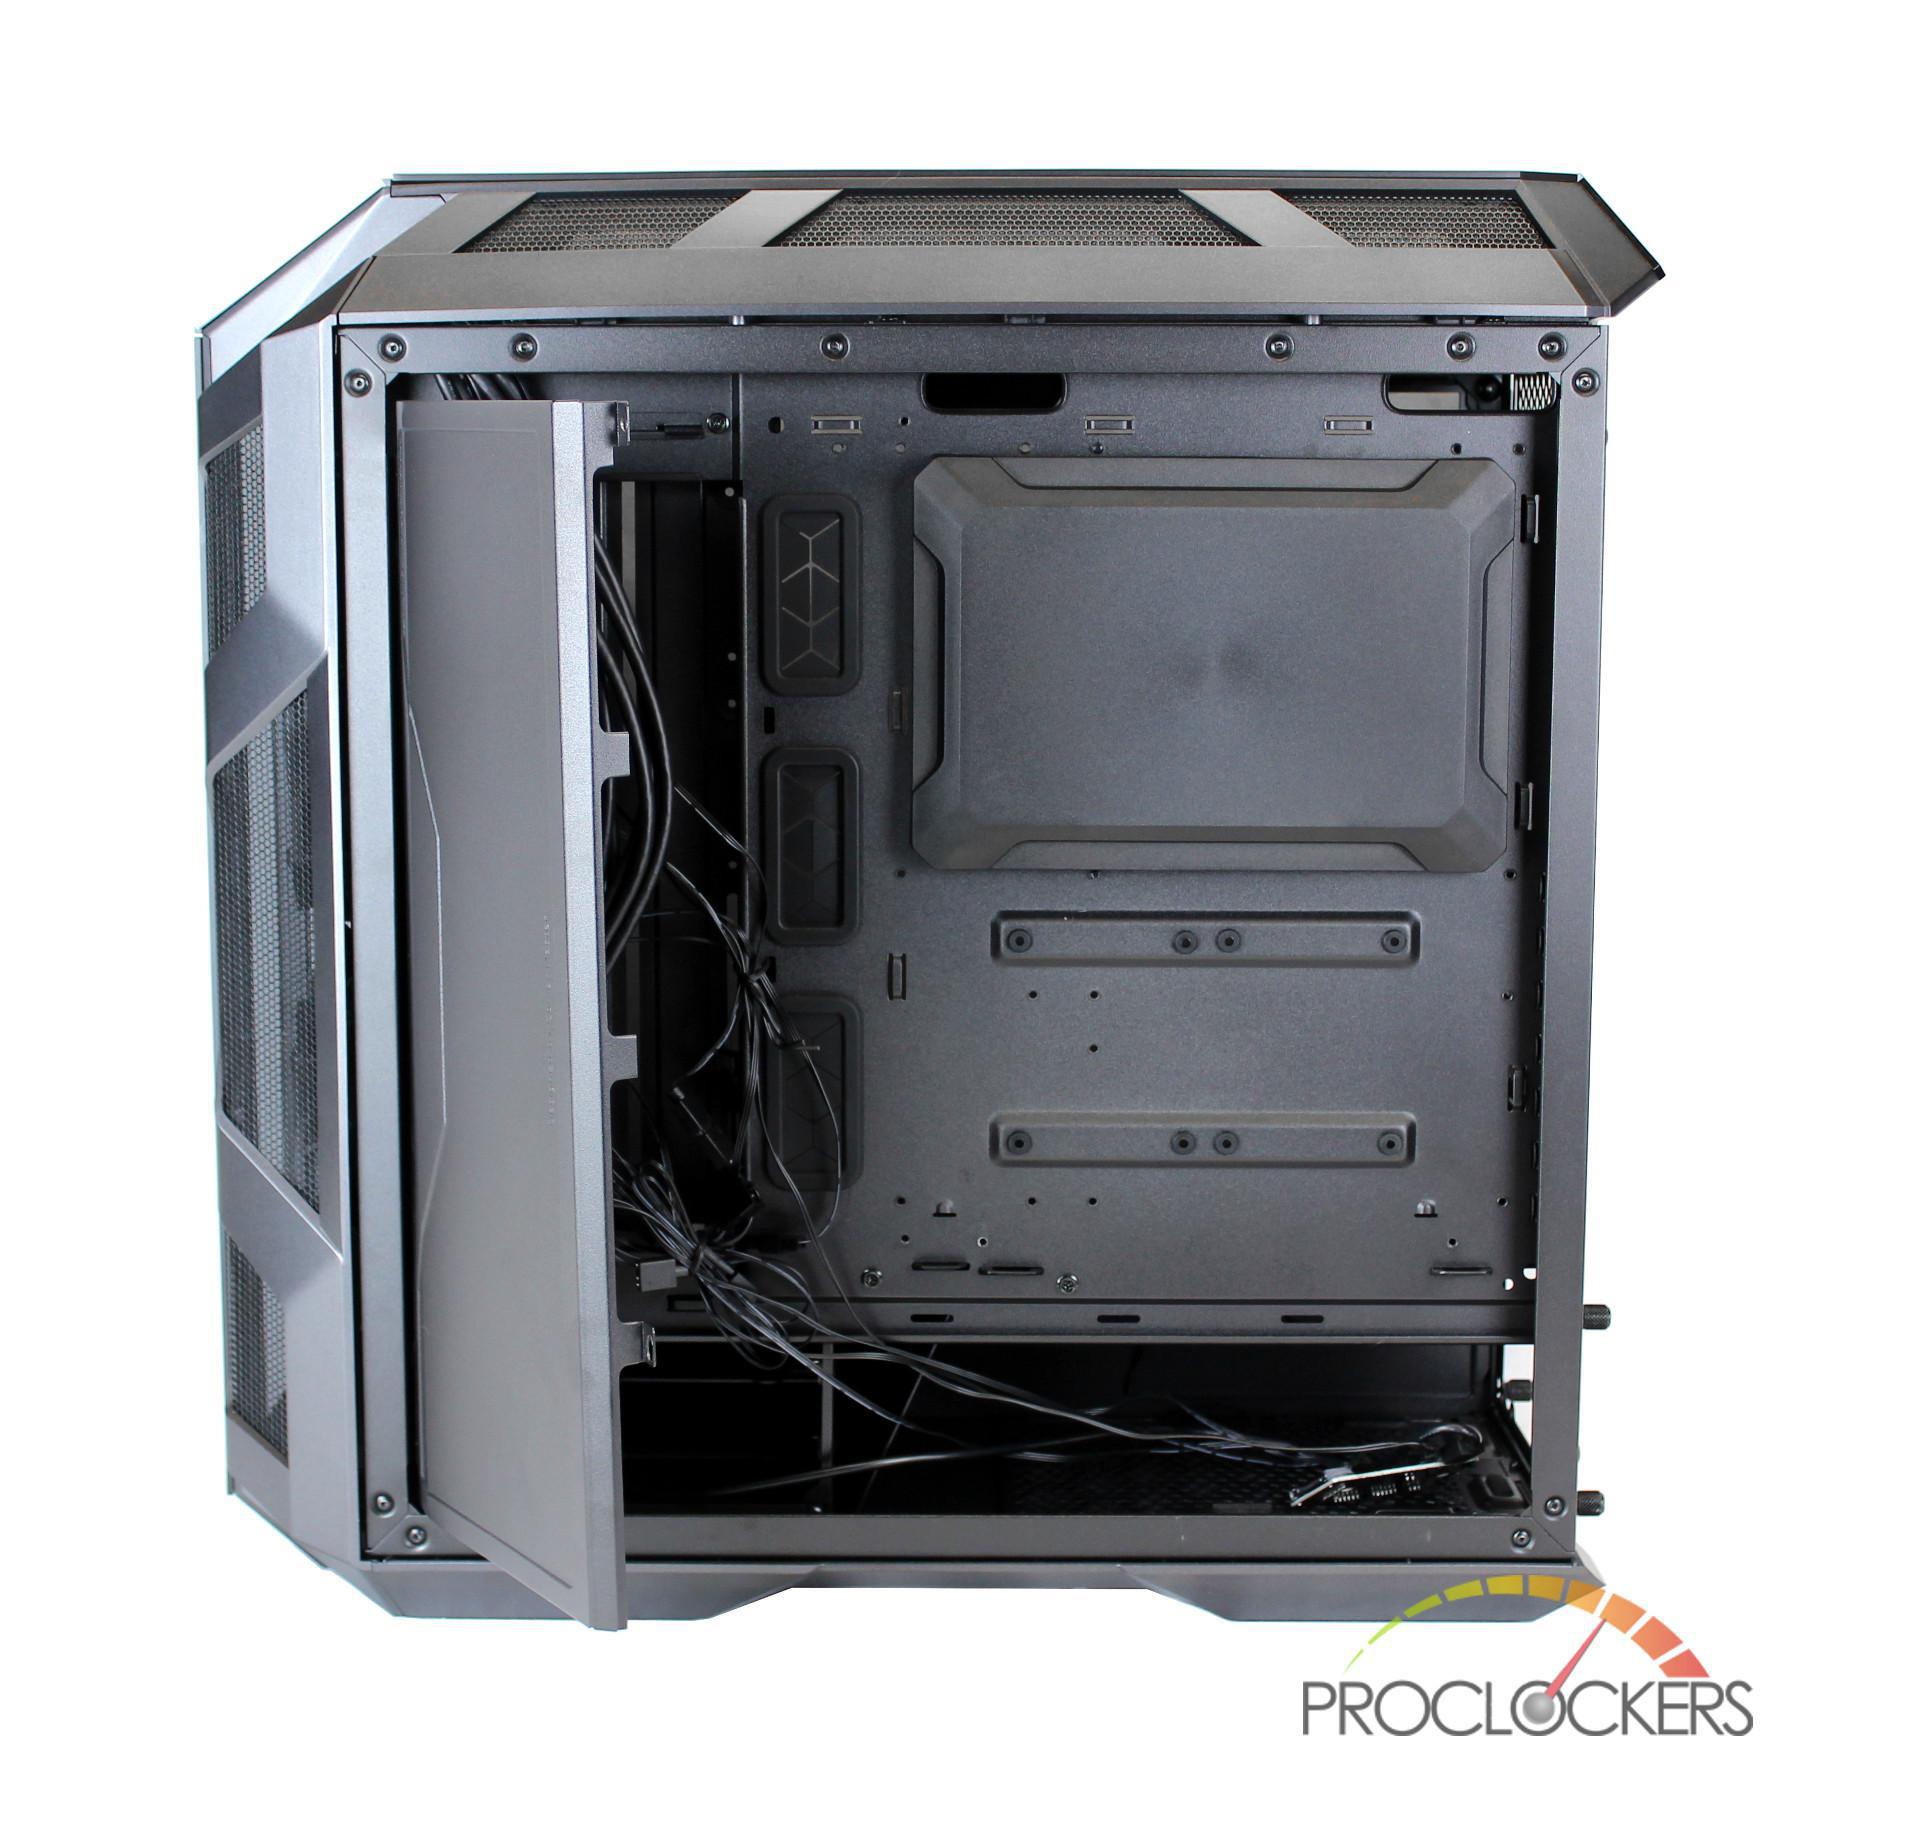
This hinged panel can also easily be removed by lifting it up which will give you complete access to all the hidden wires.
Another feature is the motherboard cutout cover, which just adds to the clean look of the back of the case. This cover is plastic so you don’t have to worry about shorting out your motherboard. If you need access to the back of your motherboard, you can easily remove it by popping it out.
A Closer Look: PSU Shroud
You must be wondering why a PSU shroud has its own section in a review. Well Cooler Master has managed to make a shroud so configurable that we really had no choice. Some of the notable features of this shroud include: completely removable, installed as full shroud, installed as ½ shroud, optional front rad cutout, optional panel to expose your PSU, 2 SSD mount points and a water pump mounting bracket.
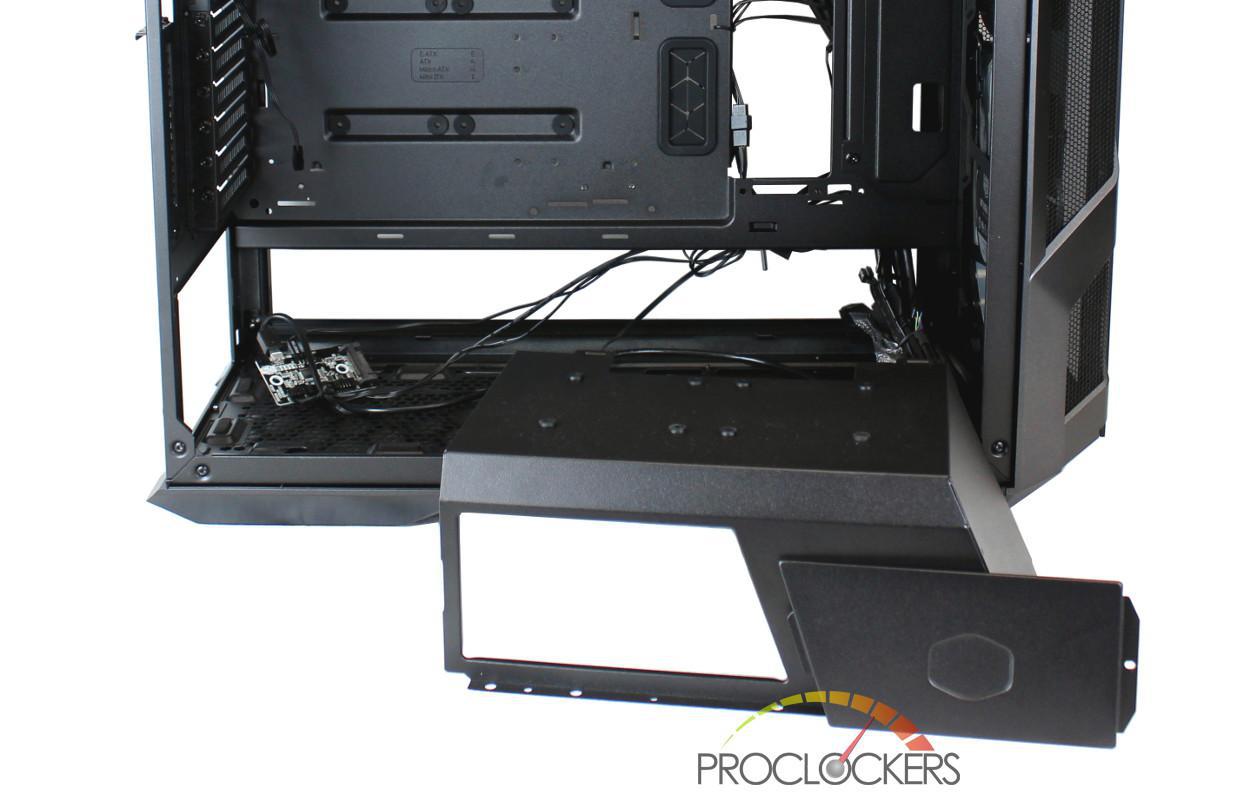
With that being said you really only want to be configuring this shroud once, and preferably before you install any hardware. The reason for this is that it’s quite a bit to work to get out and to completely remove it, you must take out a total of 11 screws. To start removing the shroud you must first detach the reservoir mounting bracket by unscrewing the 4 screws securing it as the back.
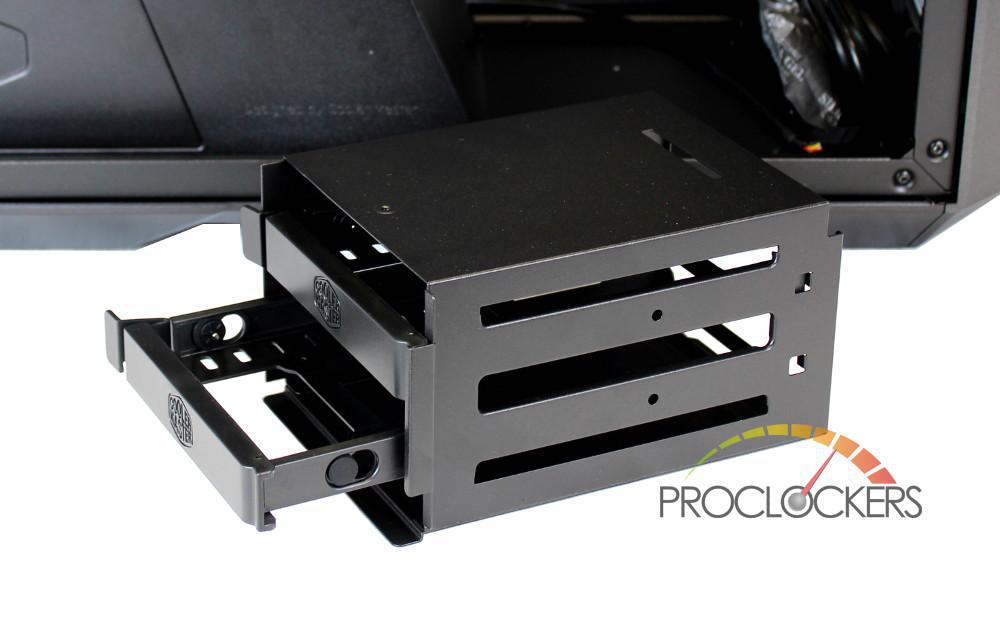
After the bracket has been removed, you must remove the 2 screws securing the front part of the shroud (one at the back of the case and the other at the front). Once those screws have been removed, you can gently remove the shroud (which may take some wiggling to get it out). After it’s out, you now have full access to your drive cage and can can remove it if you want. The second part of the shroud is totally enclosed, so you will see no PSU wires by removing the first piece.
If you still wanted a full shroud but also run a radiator in the front of your case, Cooler Master has you covered by including a removable radiator plate to give you the required space.
Putting the front shroud piece back in, you can see that you have enough room for a raditor as well as a fan if you wanted to do push/pull. Note this won’t fit all raditor and fan setups as they have to be smaller then 70mm when assembled.
If you wish to remove the whole shroud or configure it to expose your PSU, you must remove the HDD cage which is secured by a single screw. Once the cage has been removed, you can proceed to detach the last piece of the shroud by removing the 4 screws holding it in place (one at the back of the motherboard tray, one at the front, and 2 at the back of the case).
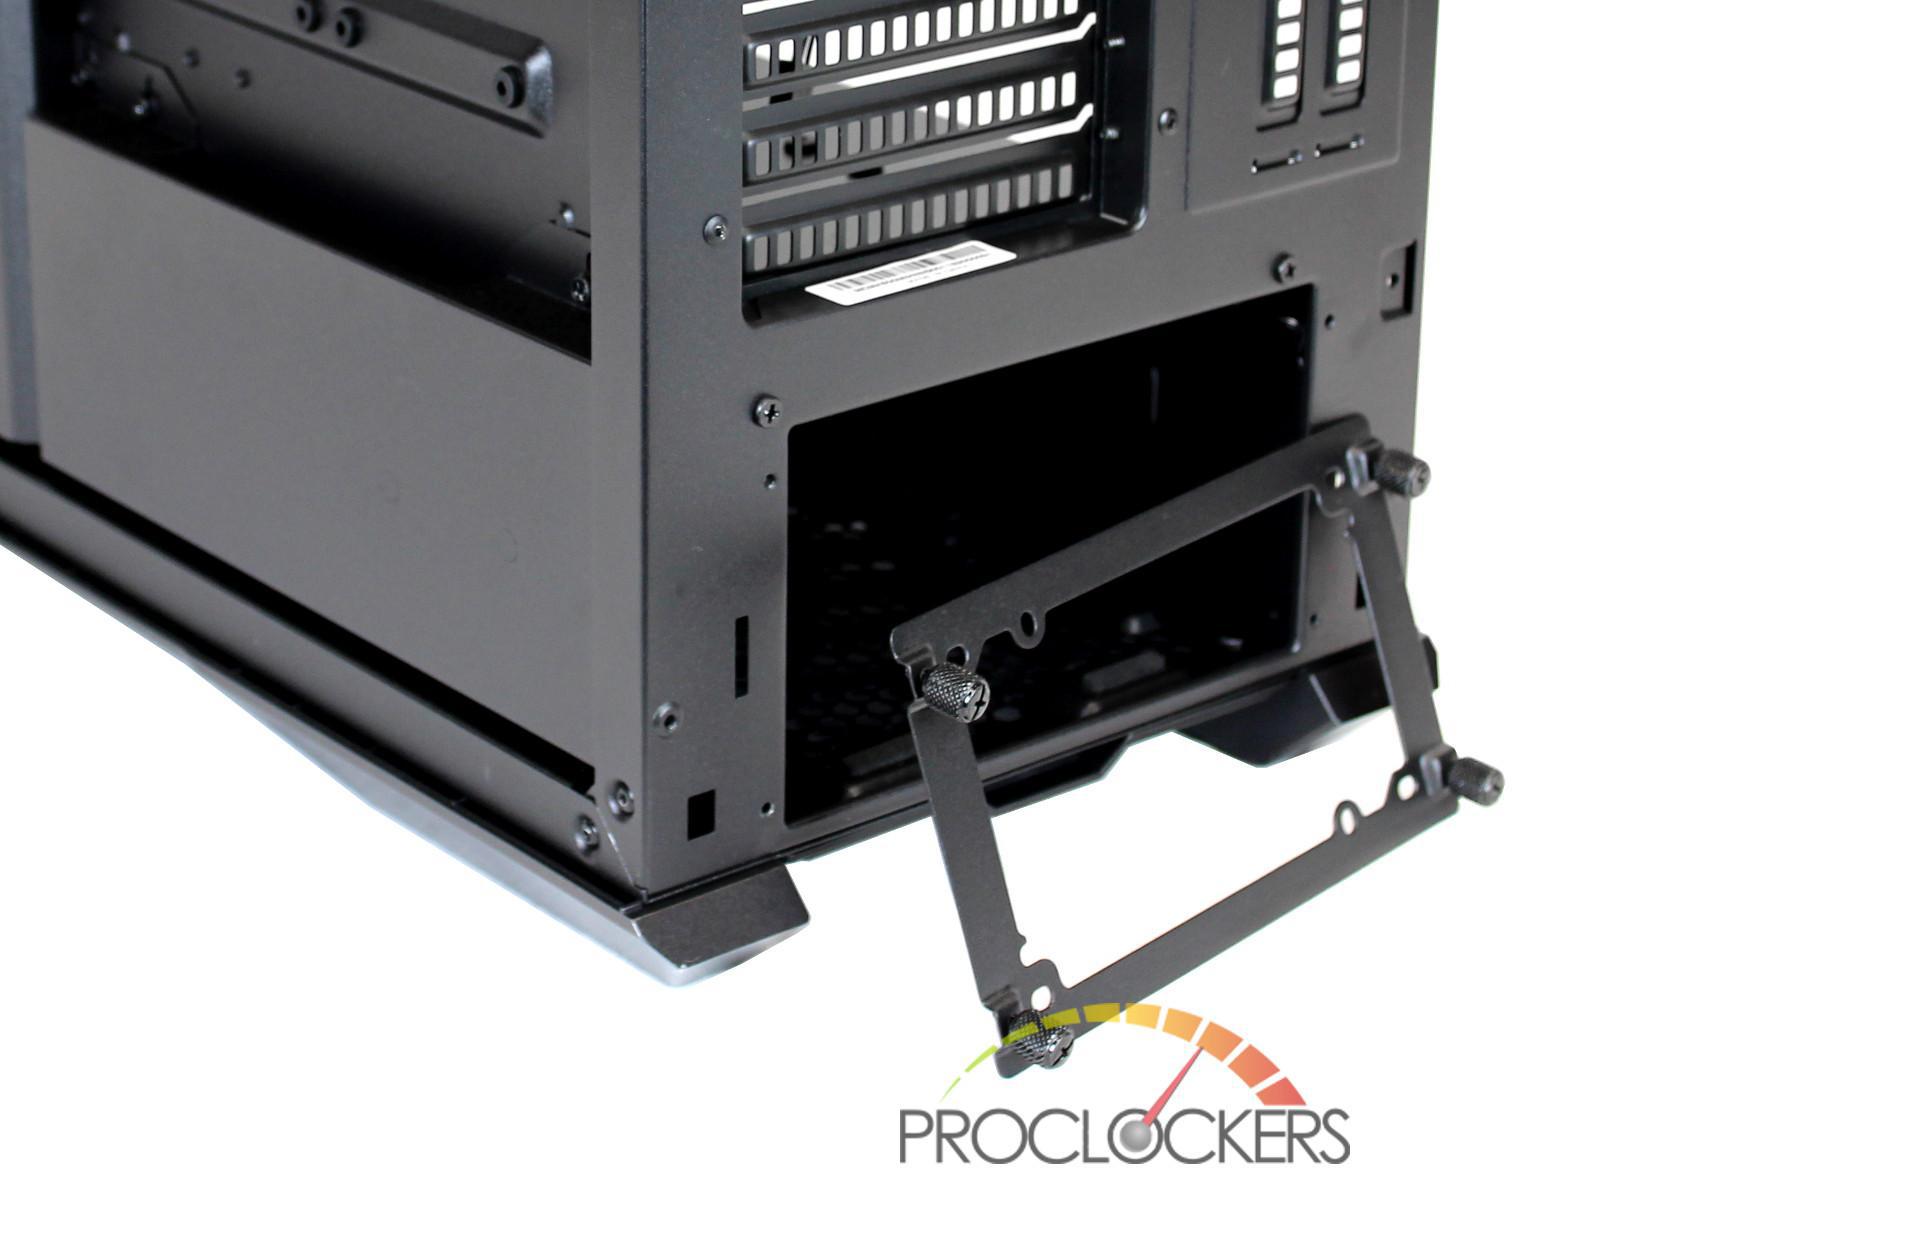
Some of you who owned the original H500P may be all too familiar with this shroud removal process as it was required to install the PSU. Well, Cooler Master has improved this on the H500M, so that removing the shroud is not required. To install the PSU, all you have to do is remove the PSU plate from the back of the case with the 4 thumb screws. Once removed, you attach this plate to your PSU and then slide the PSU into the cutout and reattach the plate to the case.
System Build & Installation
For my build, I decided to go for the front tempered glass panel to have a tempered on all side look and decided to keep the full PSU shroud to have a very clean look.
The hardware included in this build is:
- ASRock Z370 Tachi Motherboard
- Intel 8700K Processor
- 4 x 4GB Team Group T-Force Delta RGB Ram
- MSI X-Gaming RX480 8GB GPU
- Cooler Master 212 Hyper Evo Cooler
- EVGA 750W P2 PSU
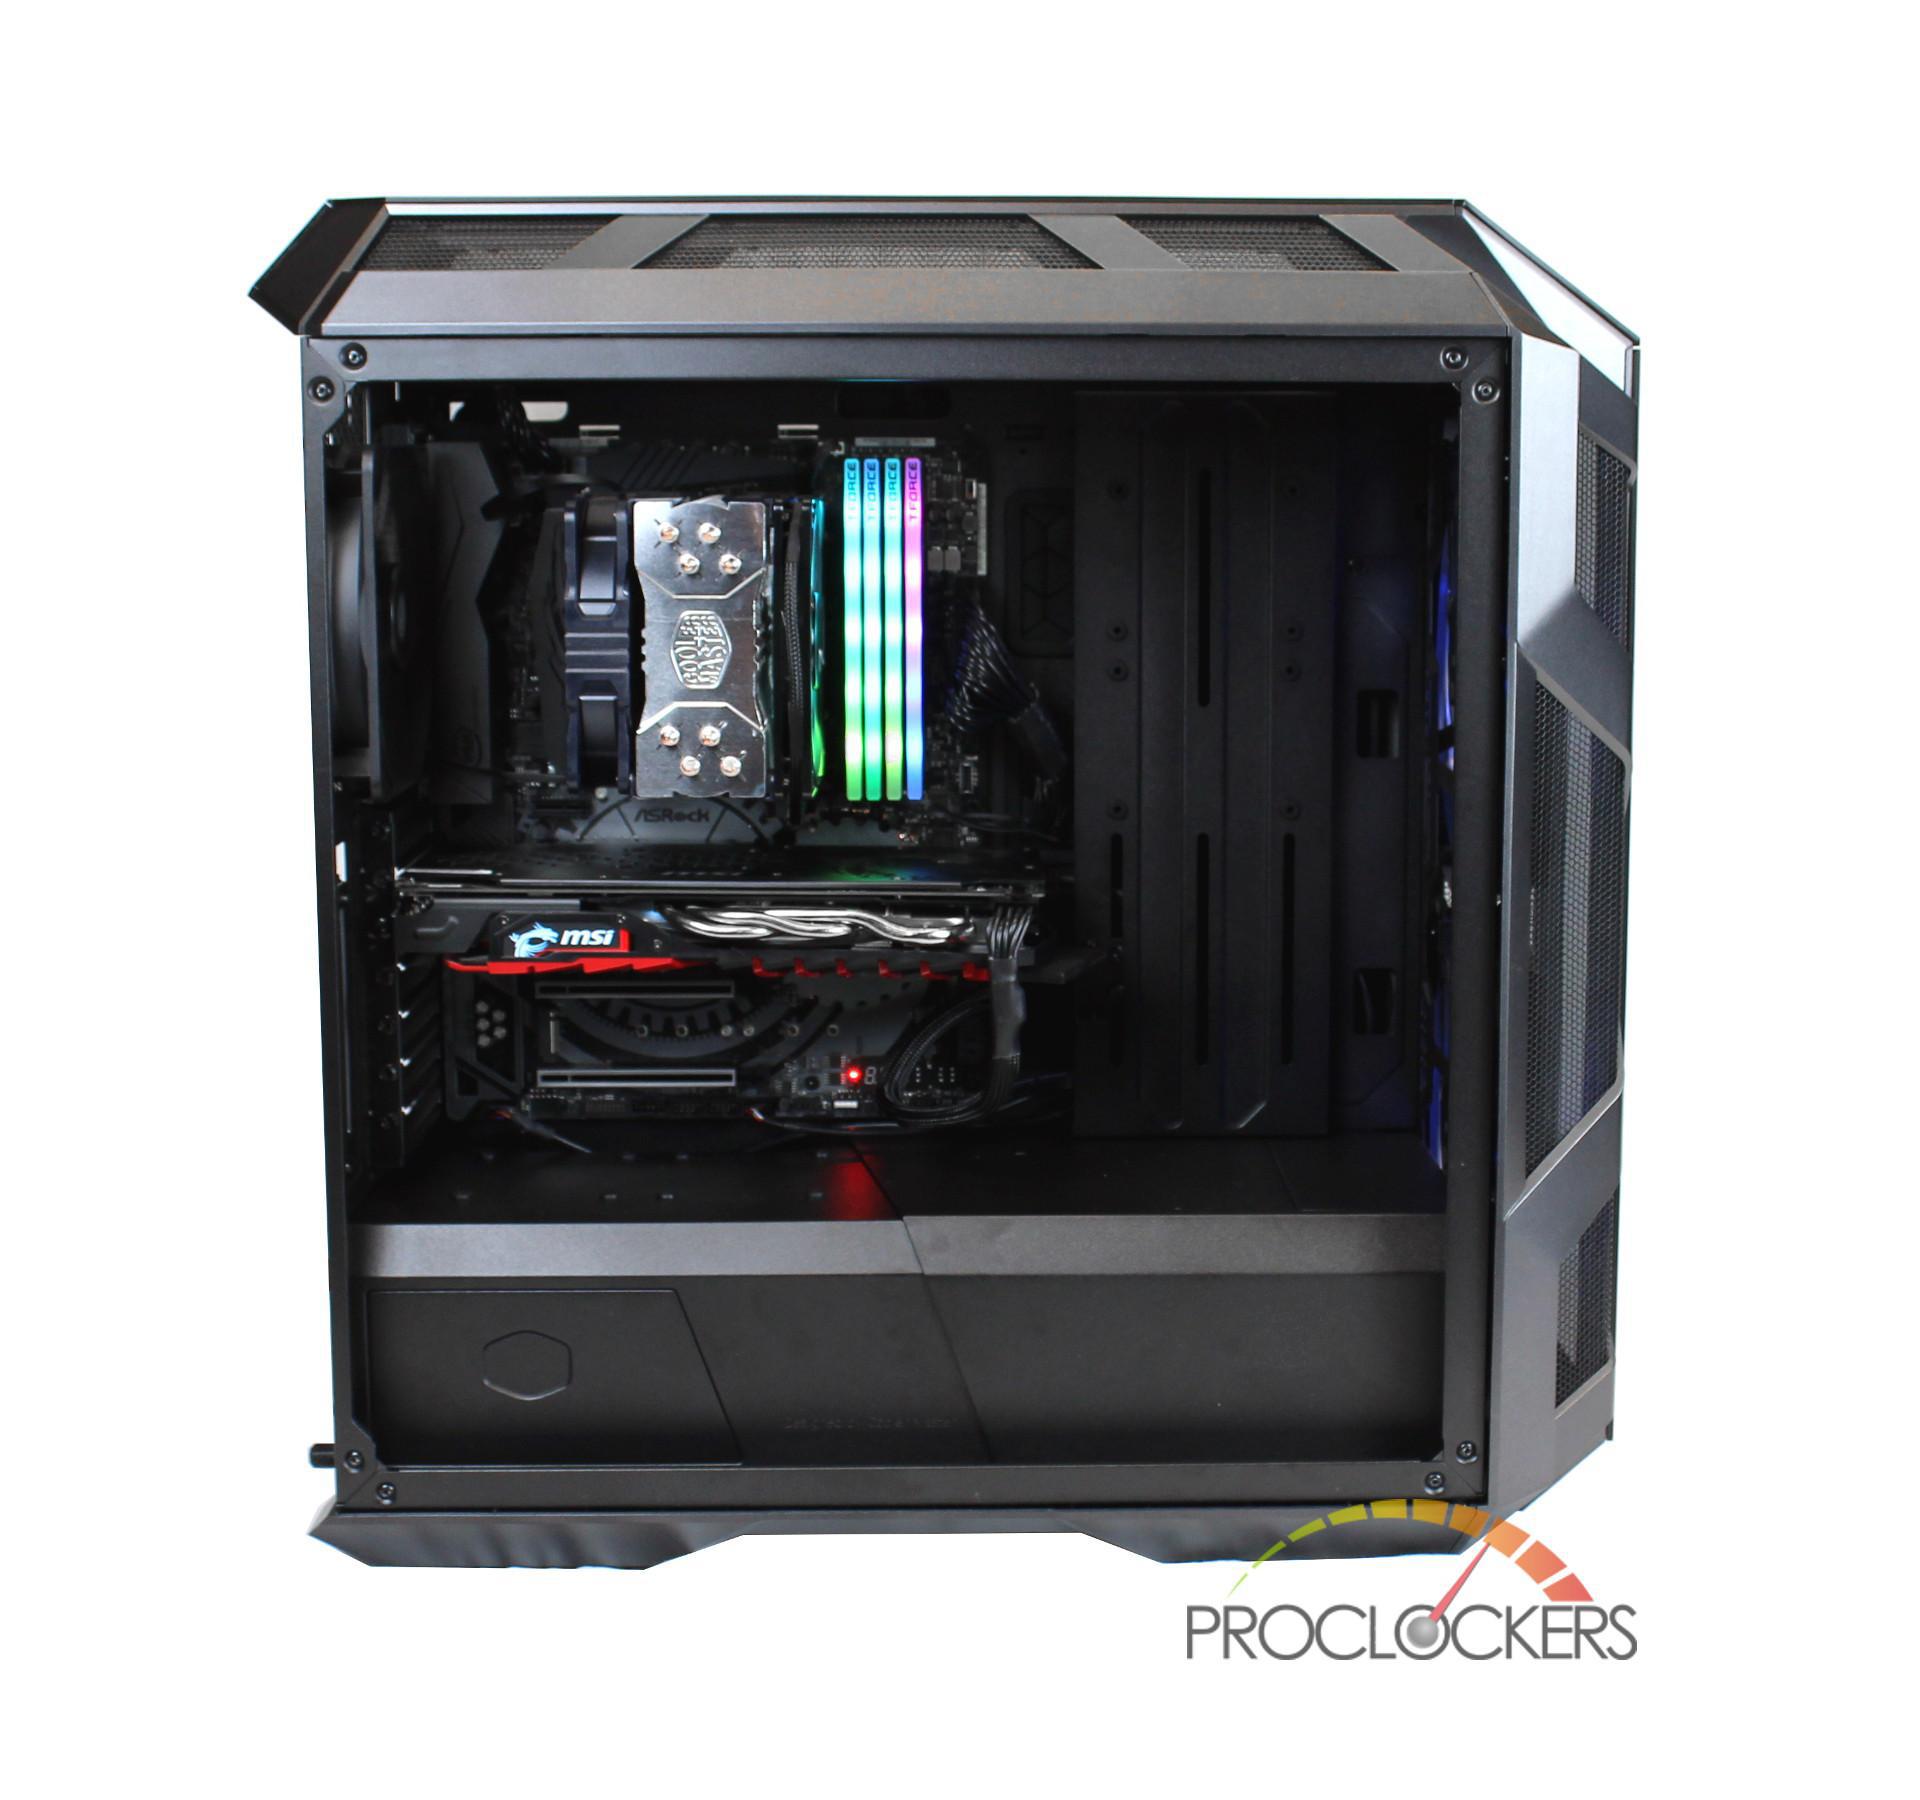
Before I even started putting hardware into the case. I made sure to carefully plan out my build. The reason for this is once I put the PSU in and attach all the wire covers on, I don’t want to have to remove them again. This is the price you have to pay to keep the back of the case looking clean. Due to all the planning beforehand, the build was an extremely smooth process with very few issues. I kept the build clean and all the cutouts and gromets were well placed. The GPU support arm came in handy to help eliminate any GPU sag.
Moving to the back of the case, I really like what Cooler Master has done with the wire covers. I was able to pretty much hide all my cables with the exception of the CPU cable and SSD cables. My PSU cables (especially the 24pin motherboard cable) are quite bulky and stiff so it took some time to reposition the cables so that the left plate could be reattached. If you own custom cables or your stock PSU cables are on the thin side, this shouldn’t be too much of an issue.
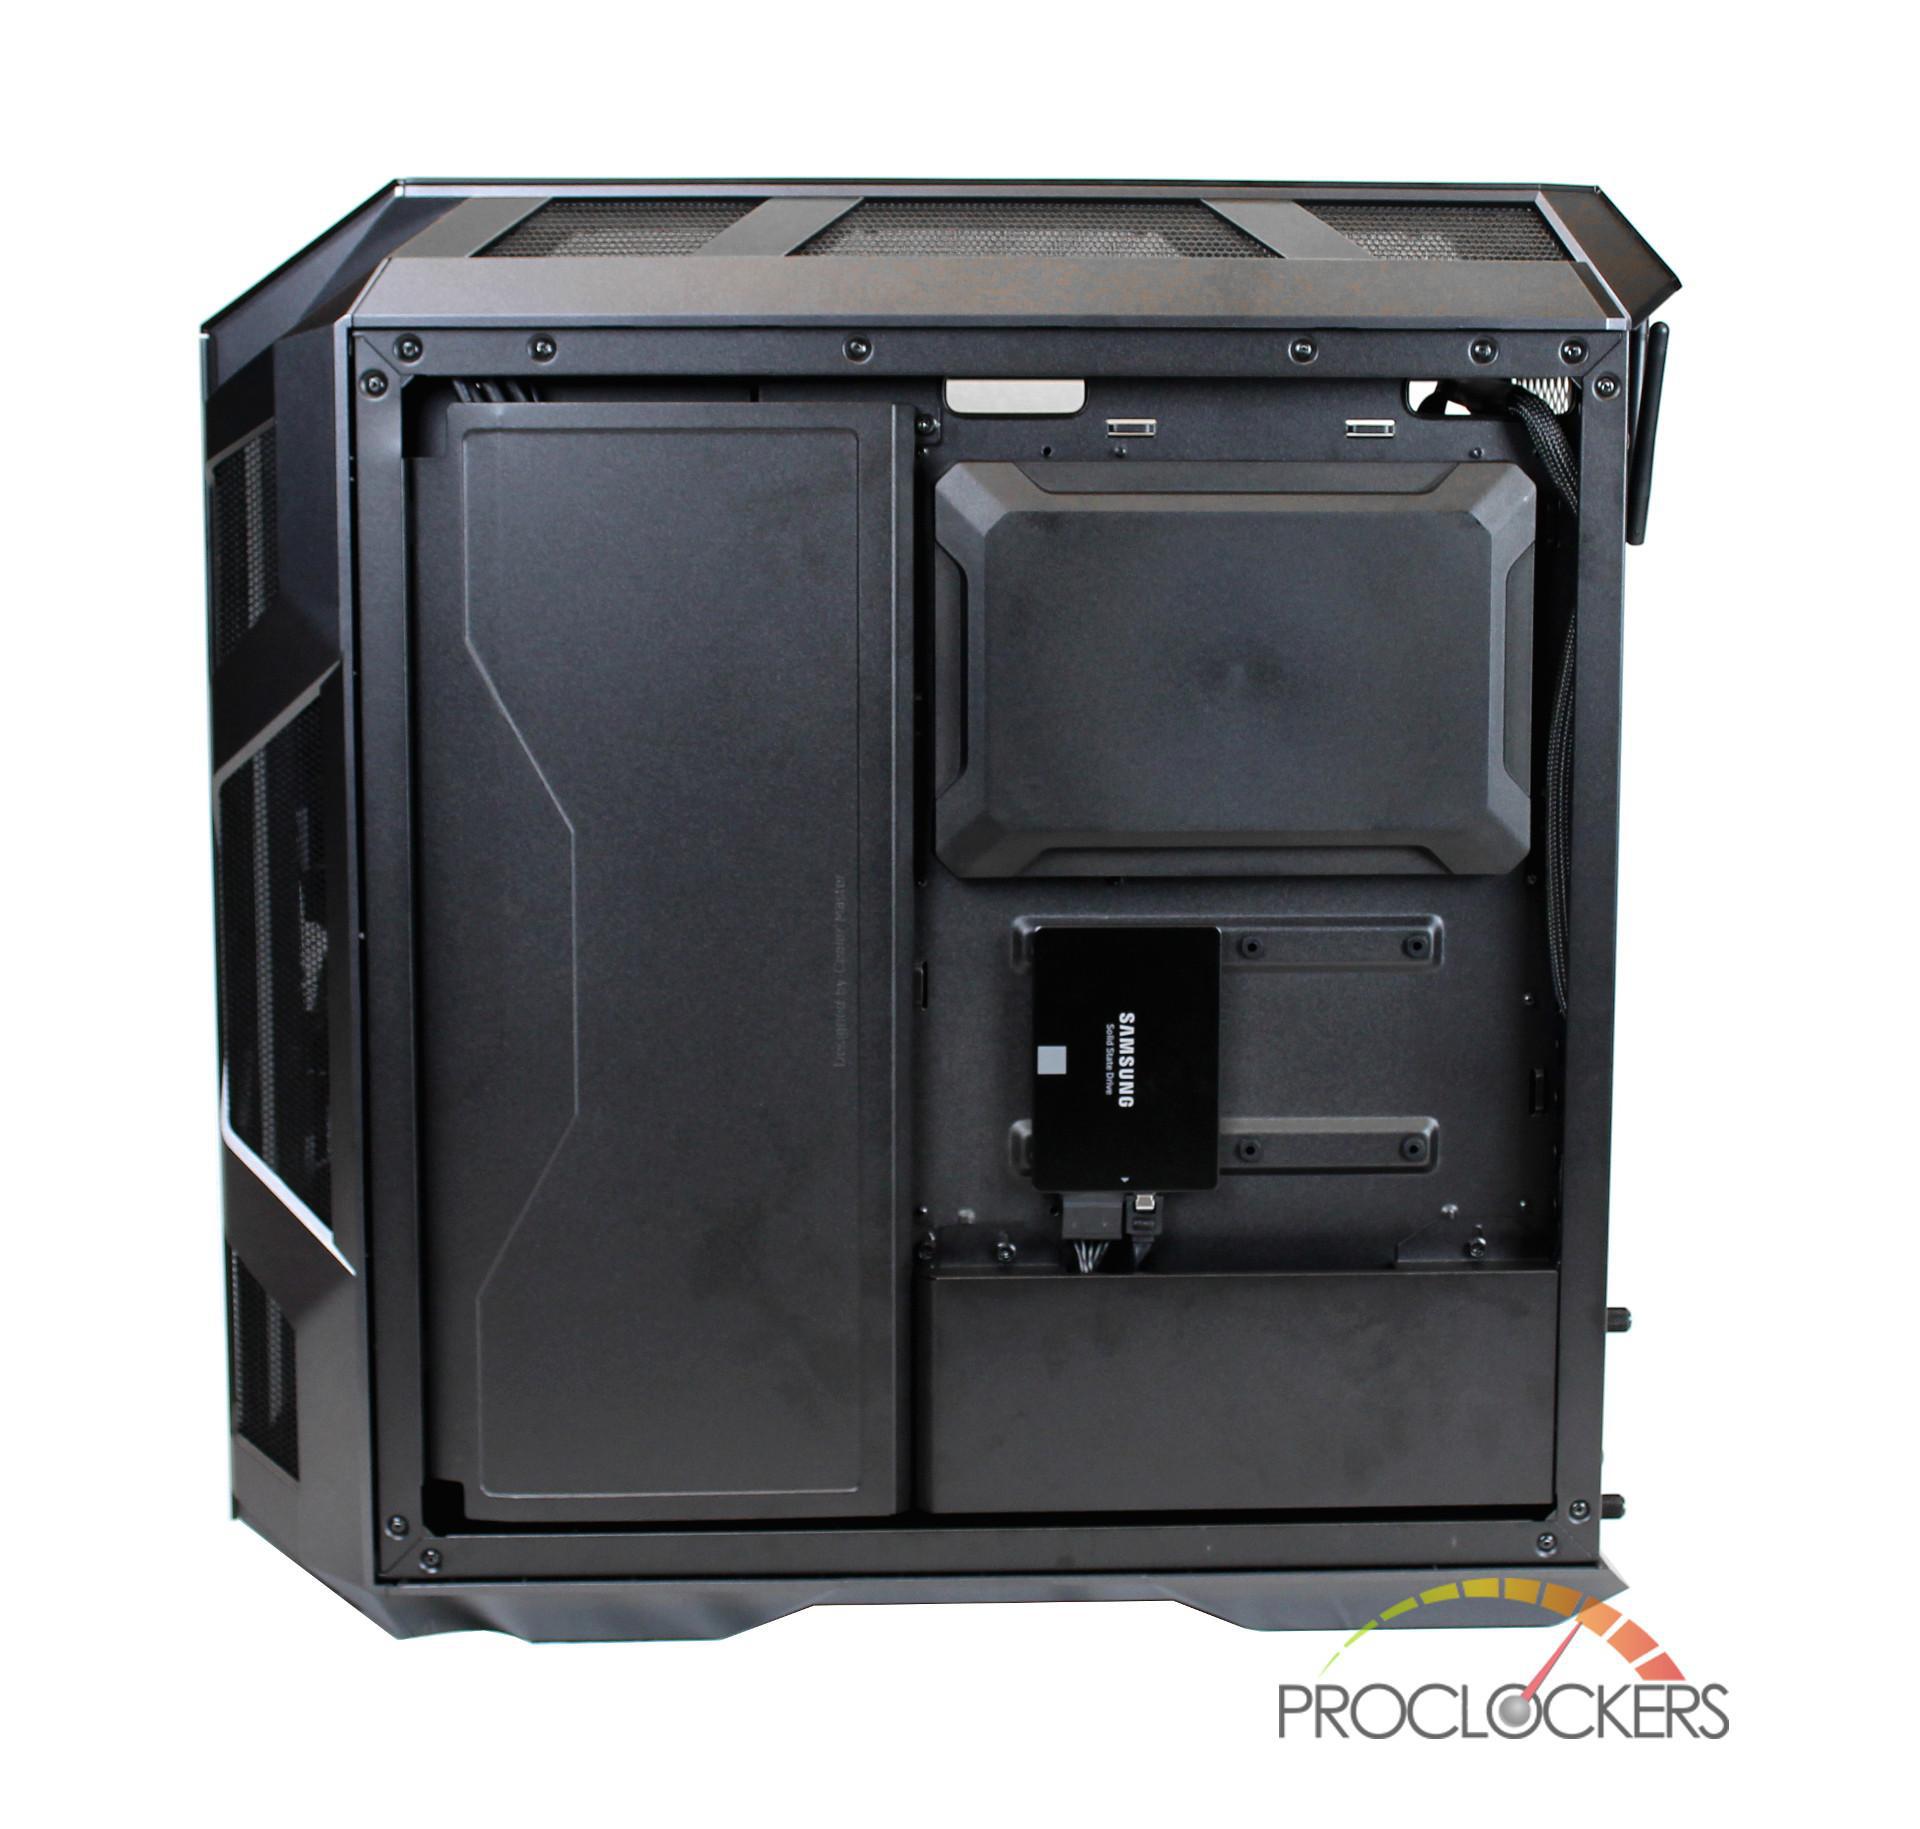
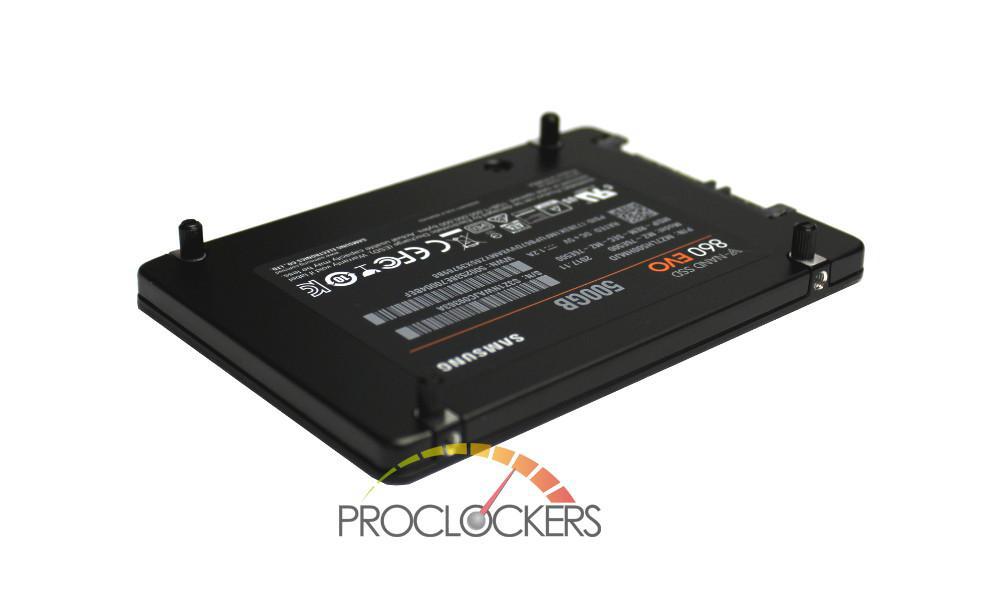
Another thing I really like about this case are the SSD mounts. At first, I wasn’t sure how I would attach an SSD to them until I saw the SSD screws in the included assortment box. These screws attach to the back of the SSD and then the SSD can just be pressed into the rubber SSD mounting points.
Overall this case was a breeze to build in. I had plenty of room to work and the only issue I ran into was with my PSU cables and the left wire cover. I achieved my goal of having an extremely clean build which was made easy with features like the PSU shroud and the wire covers.
Final Thoughts & Conclusion
Cooler Master has really brought their ‘A game’ when creating this case. They took all the feedback from the owners of the original H500P and truly listened. I personally enjoy every minute with the H500M and loved the attention to detail they had when creating it. Aesthetically, it looks amazing and it backs up those looks with a ton of features and configurability, which makes this case an option for both air-cooled builders and water cooling enthusiasts.
There are so many features I love about this case. From the configurability of the PSU shroud to the included items such as the GPU support arm and water pump bracket, this case allows you to “Make it Yours”. They have pretty much thought of everything that you would want to configure on a case. If I had to be picky, the only things I would change are: making the front/back panels open without the use of any tools, a little less of a tint on the front/back tempered glass panels so the build could be more visible and removing the writing above the USB ports on the front IO as I think it distracts from the case’s clean look. Those things are extremely minor and are really based on my personal preferences as opposed to design flaws.
Would I recommend this case for people looking for a mid-tower case? Absolutely. It may be on the higher end of the mid-tower market at $200, but in my opinion it’s worthy of this price tag.


The 25 Best Anime Cats, Ranked
What are the best anime cats? Cats are something you either love with every fiber of your being or vehemently...


The 25 Best Anime Teachers, Ranked
Who are the best anime teachers? With high school being such a prevalent setting in anime, it makes sense that...


The 25 Best Orange Hair Anime Girls, Ranked
Who are the best orange hair anime girls? Orange hair is interesting in anime because it can either be a...