
Hardware
Cooler Master Silencio S600 Case Review
Introduction
Many people don’t have the luxury of having a dedicated office or games room and their PC usually ends up in the living/media room. This could make gaming a little more difficult as you may annoy the person watching TV while your PC’s fans are revving up during your Call of Duty match.
If the above scenario matches your situation, you’re going to want to look for a chassis that is built to be as silent as possible. This is exactly what Cooler Master’s Silencio S600 hopes to solve, which has been designed with silence in mind.
The S600 sports a minimalistic Silencio design, sound dampening material, the option of tempered glass or sound-dampened steel side panel, a reversible steel door, and includes two Silencio fans. With an MSRP of $99.99, it just might be the silent case you have been looking for.
We would like to thank Cooler Master for sending us the Silencio S600 to review.
About Cooler Master
Back in 1992, when the internet was in its early stages and CPU’s were measured in MHz rather than GHz, a company called ORYX was born. ORYX later became Cooler Master, which we know the company as today. Started by a rogue product manager who had no funding and no support except a single administrative secretary, he set out to create, innovate and improve products for the PC industry. Starting with its first product, a Socket 7 CPU heat sink in 1993, their product line has since grown to Cases, Peripherals, Fans, and much more. Over the past 25+ years they brought many advancements and firsts to the PC industry (such as the first all copper heat sink) and today, they continue to innovate by bringing new and exciting products to market.
Features & Specifications
Notable Features:
- Swappable side panel
- Silencio design
- Sound dampening material
Technical Specifications:
| MODEL NUMBER | MCS-S600-KN5N-S00 (Steel), MCS-S600-KG5N-S00 (TG) |
| SERIES | Silencio Series |
| SIZE | Mid Tower |
| AVAILABLE COLOR(S) | Black |
| MATERIALS | Steel, Plastic, Tempered Glass, Sound Dampening Material |
| DIMENSIONS (LXWXH) | 478mm x 209mm x 470.5mm (incl. Protrusions), 466mm x 209mm x 460.5mm (excl. Protrusions) |
| MOTHERBOARD SUPPORT | Mini ITX, Micro ATX, ATX |
| EXPANSION SLOTS | 7 |
| 5.25″ DRIVE BAYS | 1 |
| 3.5″ DRIVE BAYS | 4 |
| 2.5″ DRIVE BAYS | 5 |
| I/O PANEL | 2x USB 3.2 Gen 1 (formerly USB 3.0), 1x 3.5mm Headset Jack (Audio+Mic), 1x SD card reader |
| PRE-INSTALLED FANS – FRONT | 1x 120mm (PWM 800-1400 RPM) |
| PRE-INSTALLED FANS – REAR | 1x 120mm (PWM 800-1400 RPM) |
| FAN SUPPORT – FRONT | 2x 120/140mm |
| FAN SUPPORT – TOP | 2x 120/140mm |
| FAN SUPPORT – REAR | 1x 120mm |
| RADIATOR SUPPORT – FRONT | 120mm, 140mm, 240mm, 280mm |
| RADIATOR SUPPORT – TOP | 120mm / 240mm (remove ODD) (35mm max motherboard component height) |
| RADIATOR SUPPORT – REAR | 120mm |
| CLEARANCE – CPU COOLER | TG: 166mm, Steel: 167mm |
| CLEARANCE – GFX | 398mm |
| CLEARANCE – PSU | 160mm |
| POWER SUPPLY SUPPORT | Bottom mount, ATX PS2 |
| DUST FILTERS | Top, Front, Bottom |
| EAN CODE | 4719512087398 (Steel), 4719512087404 (TG) |
| UPC CODE | 884102059841 (Steel), 884102059858 (TG) |
| CABLE ROUTING | 18-26mm |
Packaging & Unboxing
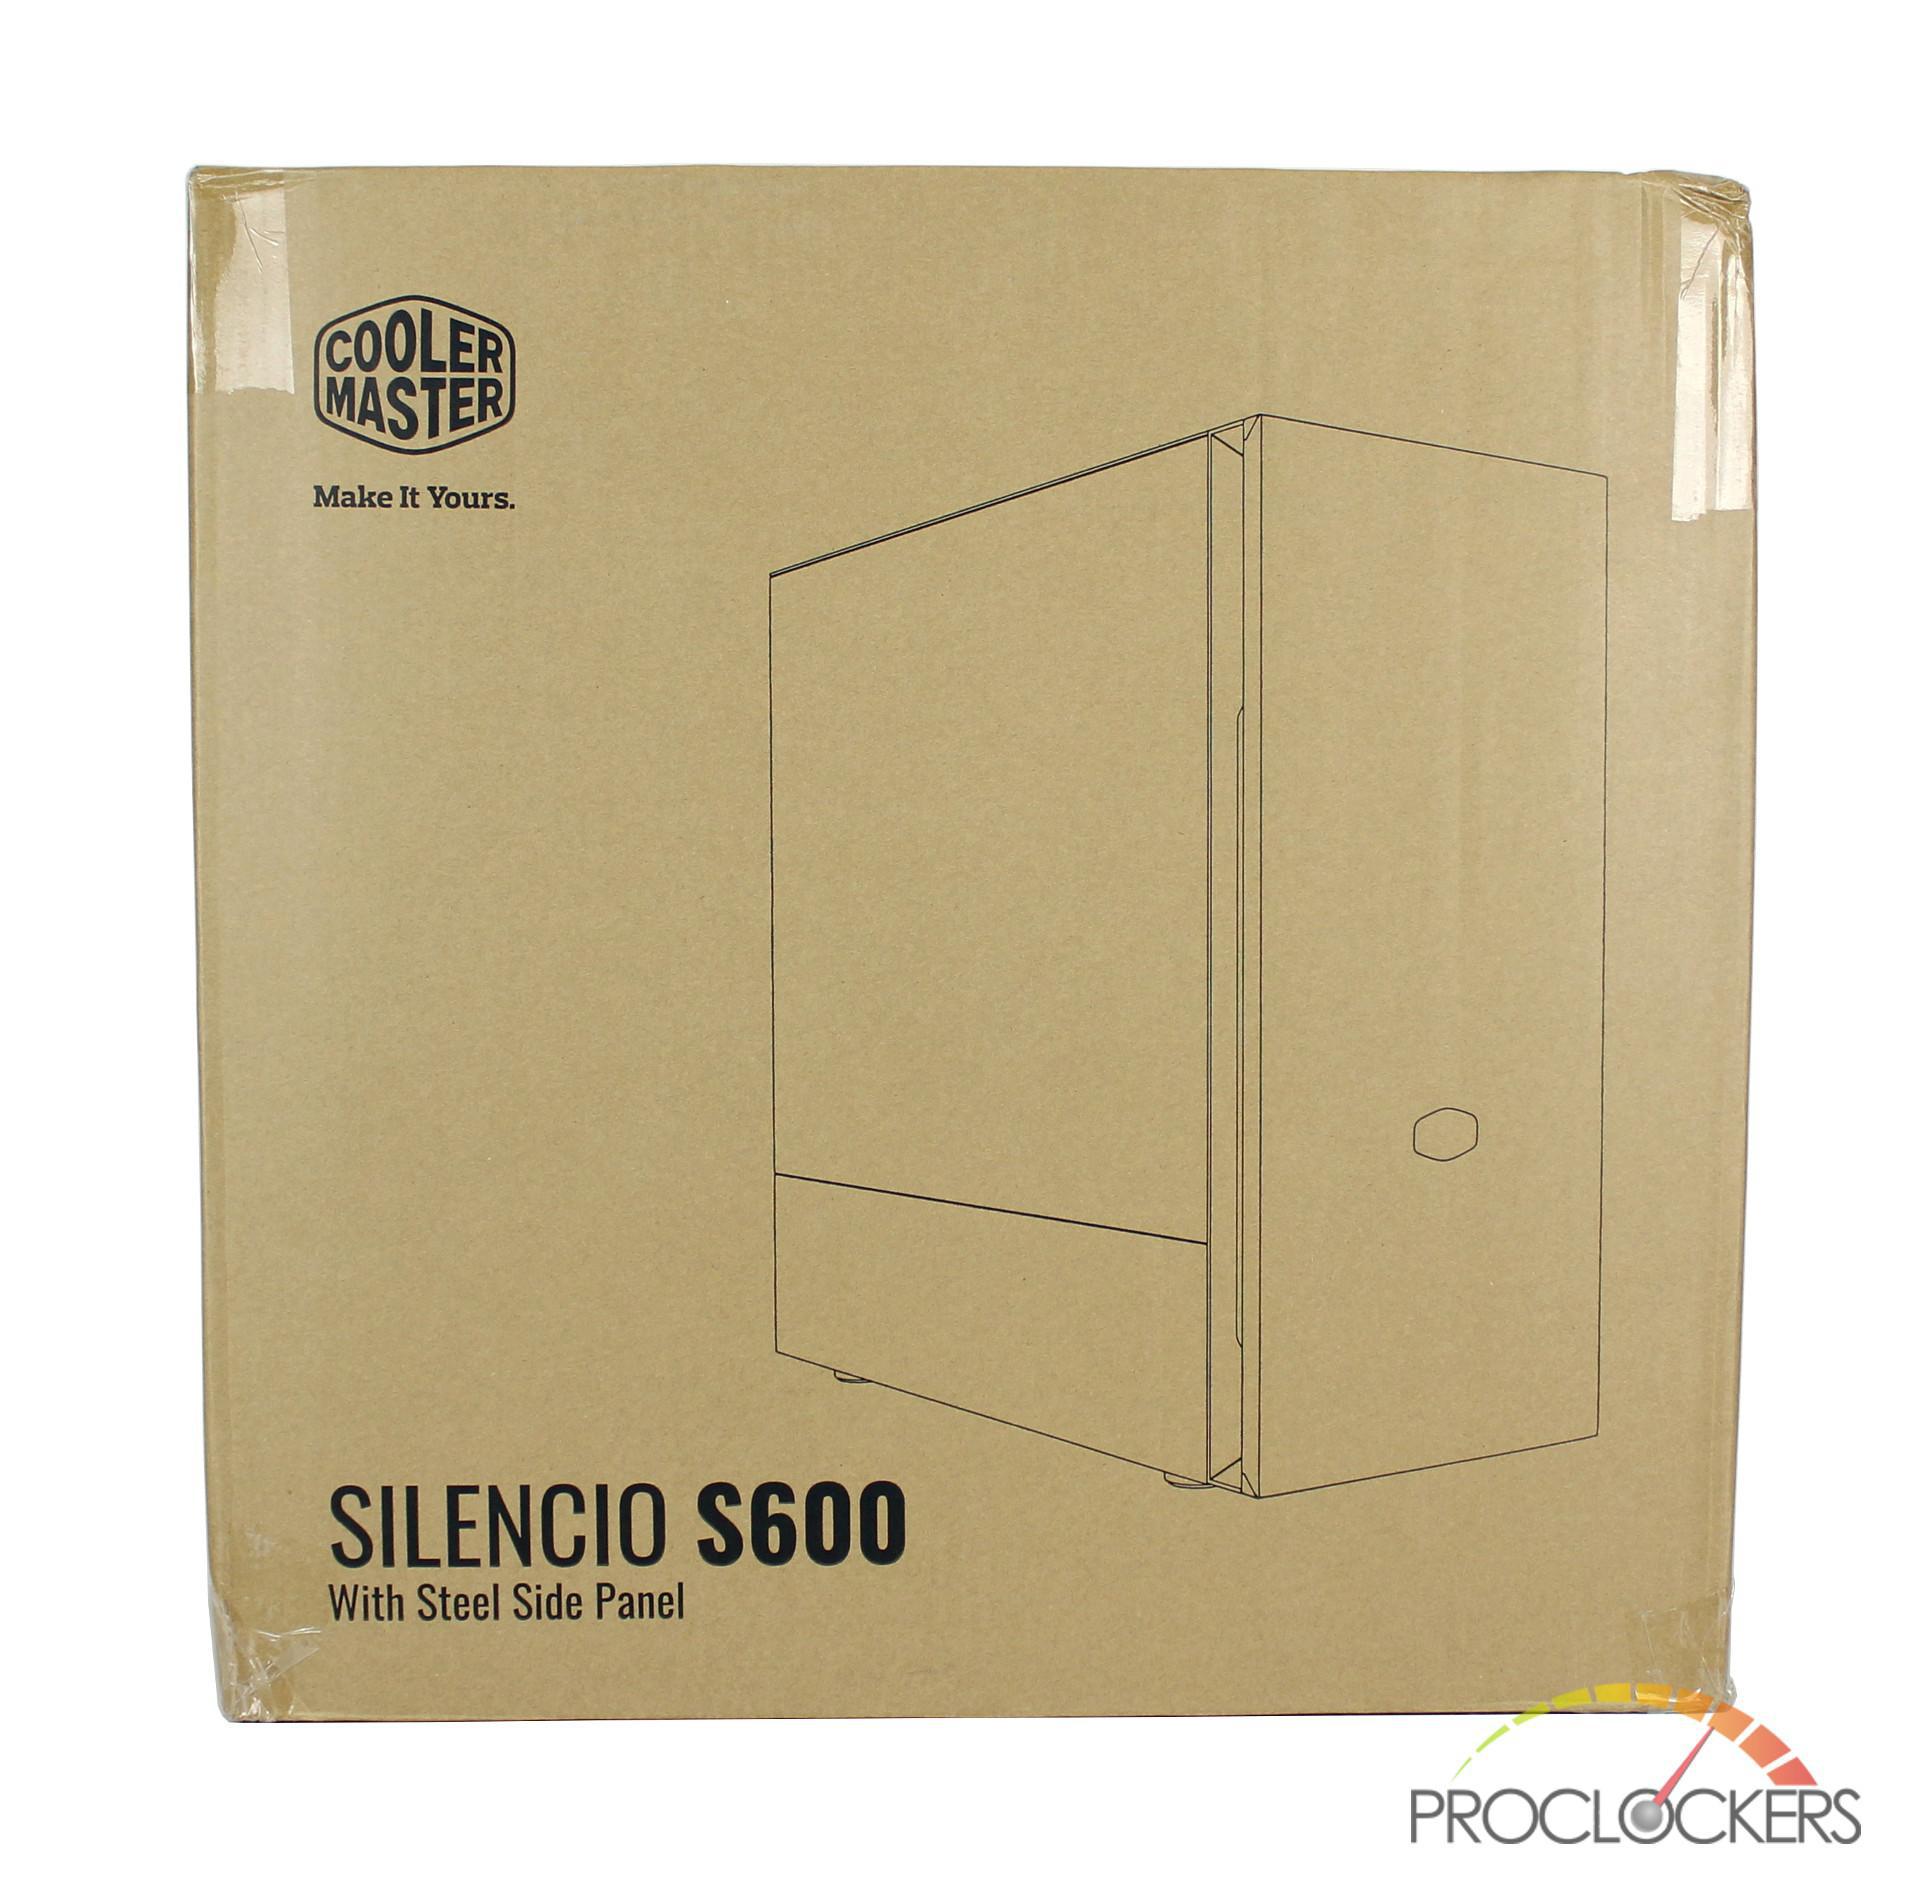
The Silencio S600 is packaged in a plain box with the front having a profile line drawing of the case. Looking to the bottom left you can see that we got the steel version of the S600 which is about $10 cheaper than the tempered glass model. For this review, Cooler Master also provided us with a tempered glass panel, which is the only difference being the side panel.
Turning to the side of the box, there is a list of specifications for the S600 as well as a link for Cooler Master’s website to get more information about the case.

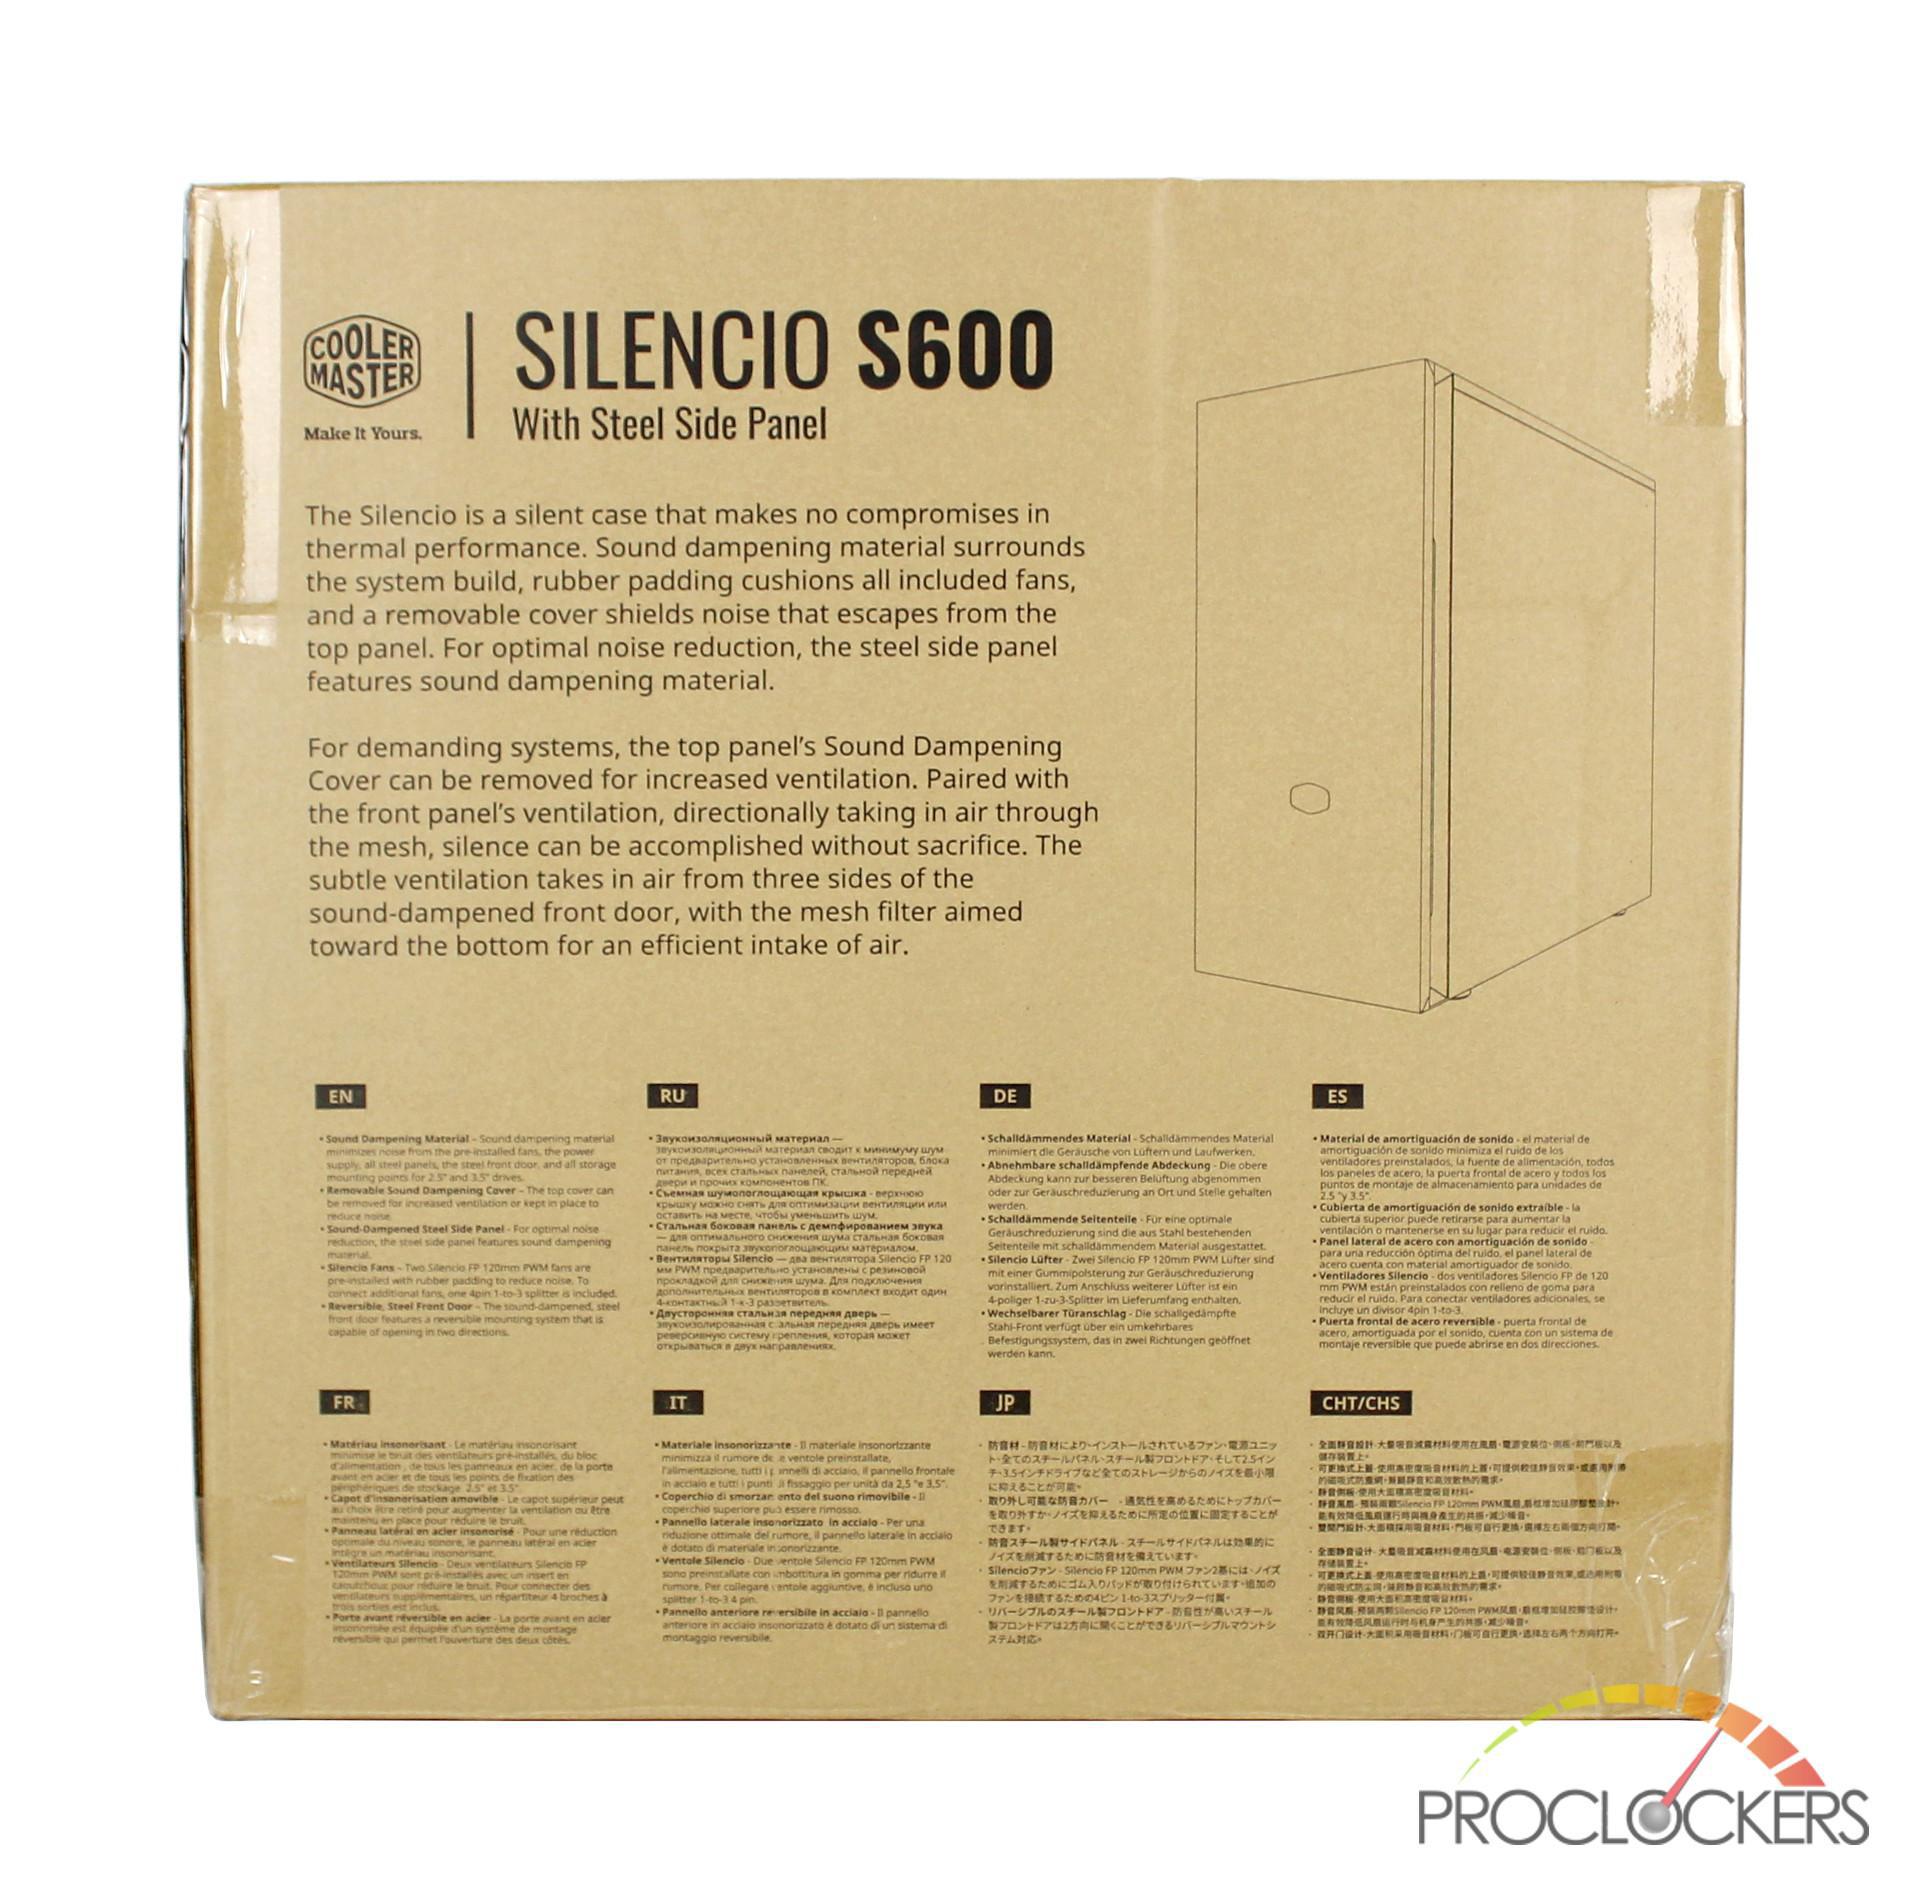
Moving to the back, we have another profile drawing of the S600 showing the opposite side of the case. To the right of the drawing is a few written paragraphs about the S600 features which are also in a bulleted list below in 8 different languages.
On the last side is the final line drawing of the S600 which shows off its extremely clean front.
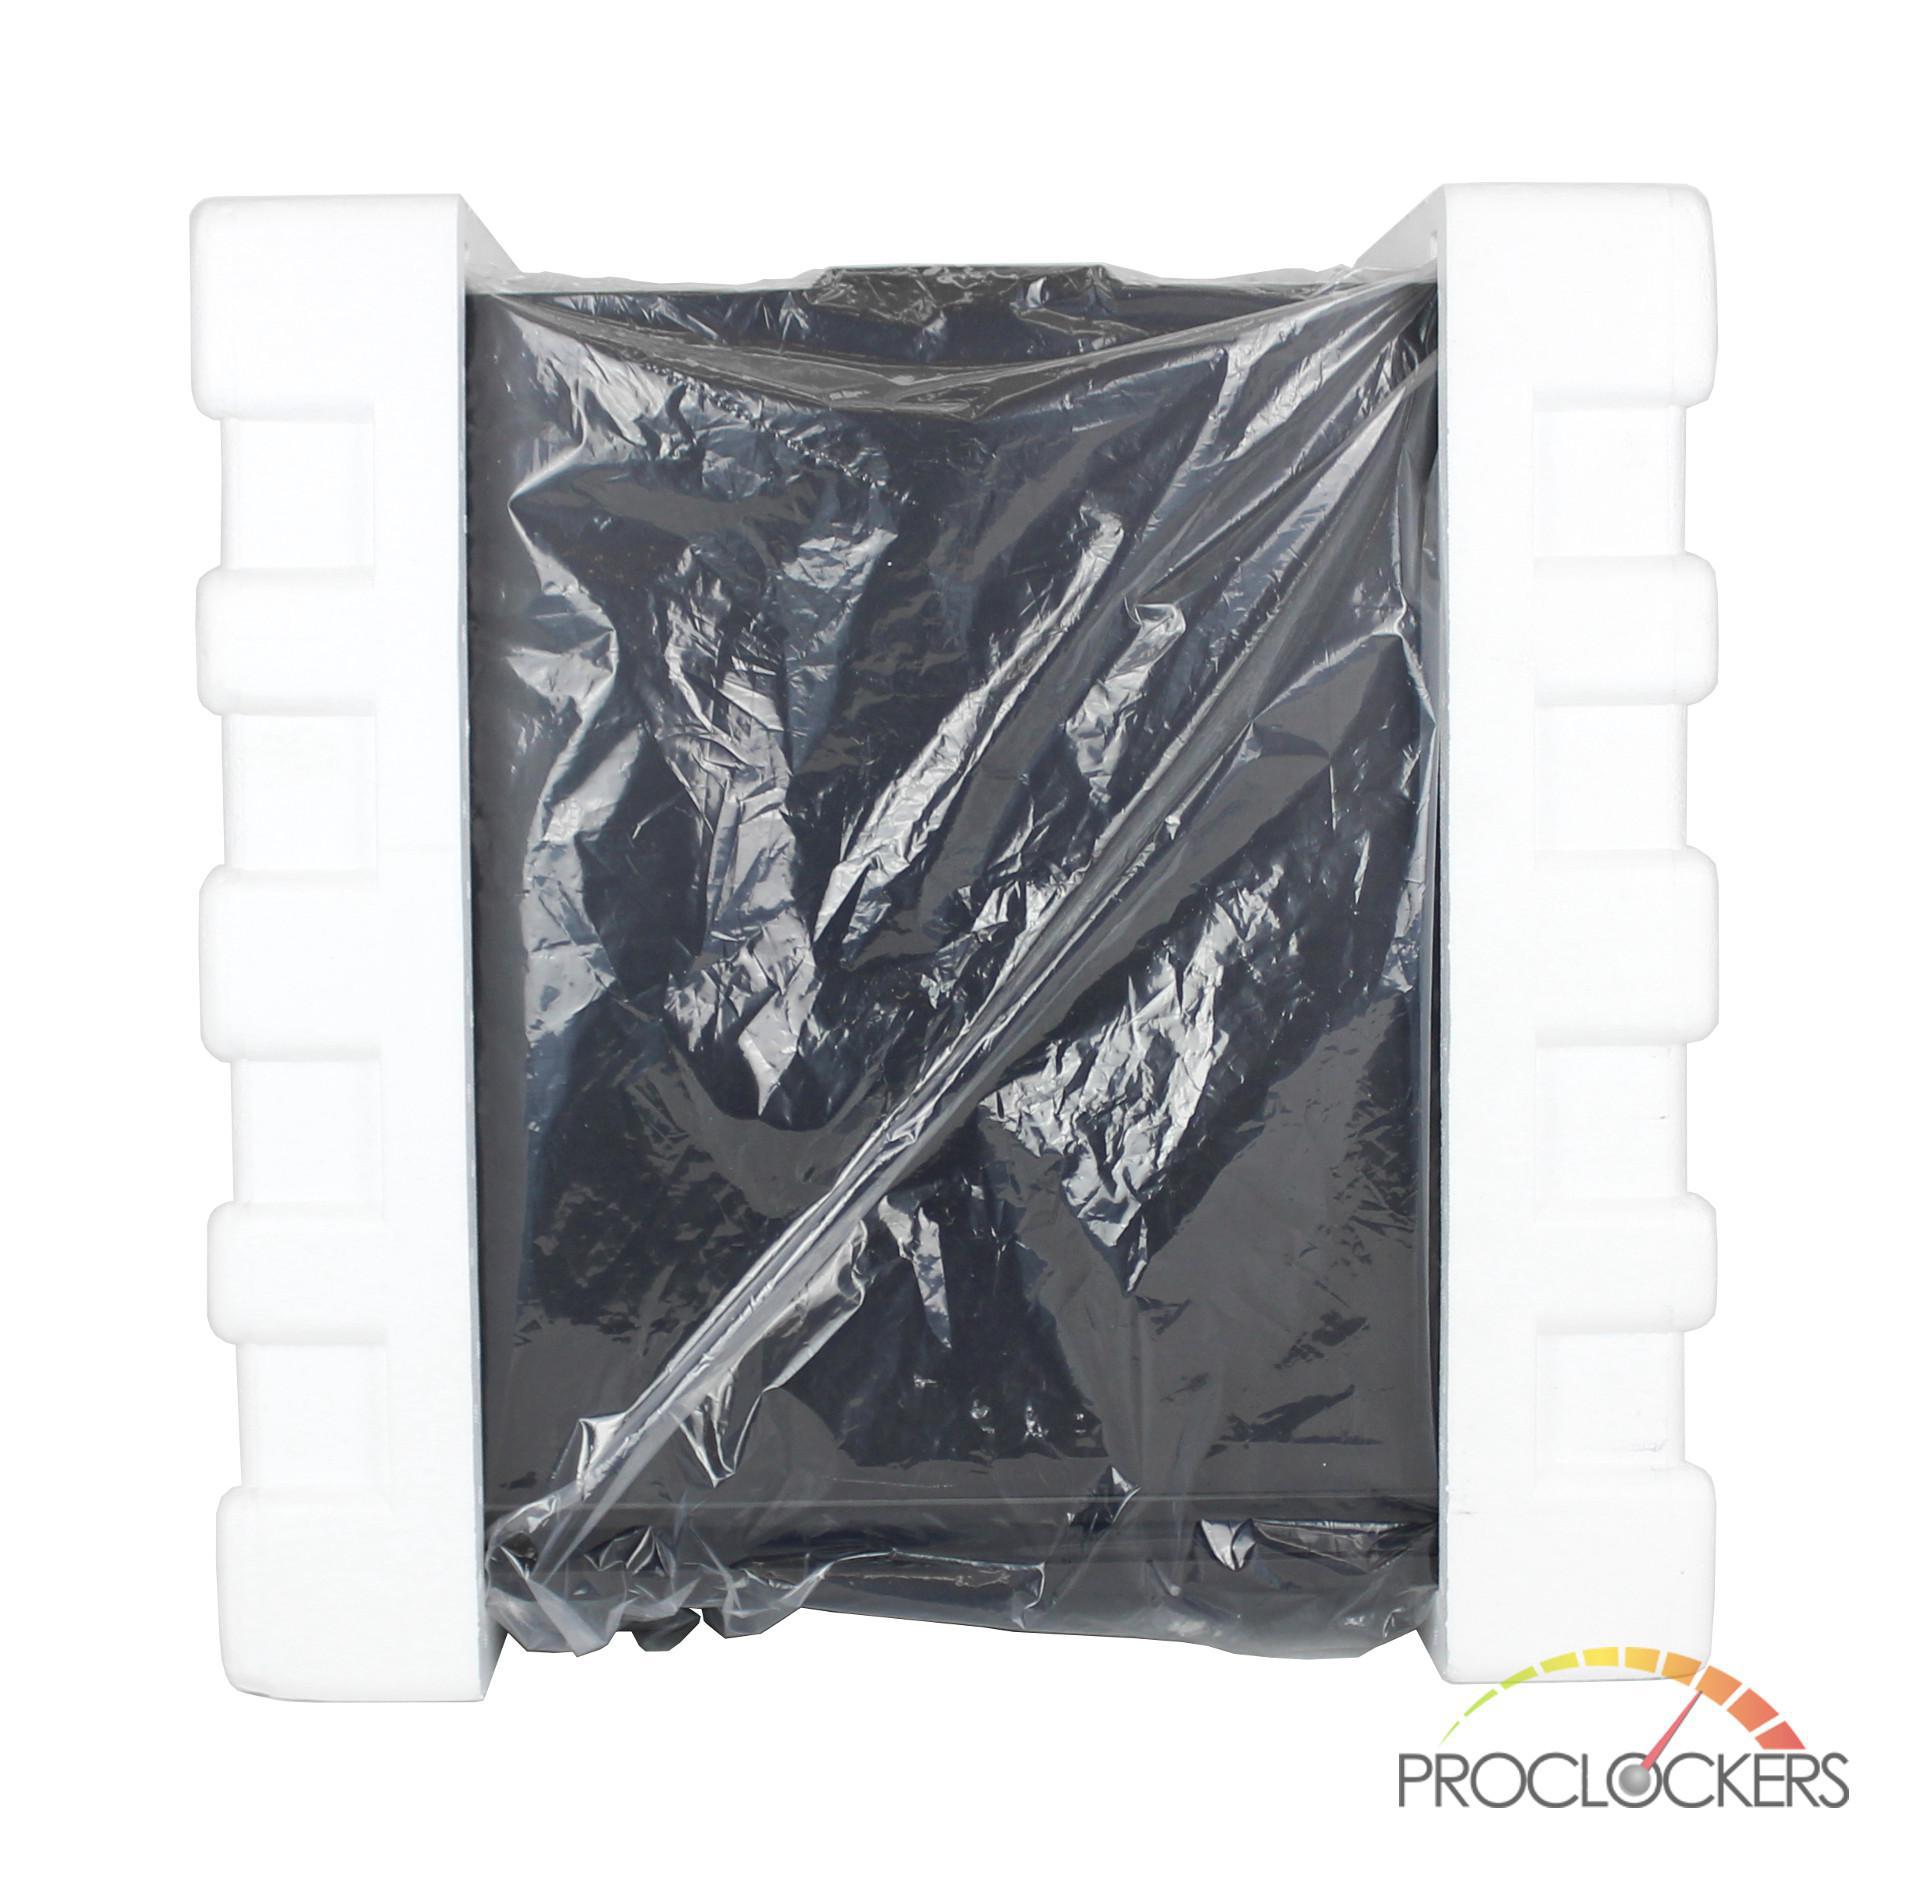
Removing the S600 from its box, we find it protected with 2 pieces of Styrofoam on each side and stored in a plastic bag.
Once all the packaging has been removed from the S600, we decided to remove the steel panel and put on the temper glassed panel one that Cooler Master supplied us with. Now, all we have to do is peel off the protective film to start our build in the S600.
A Closer Look: Exterior
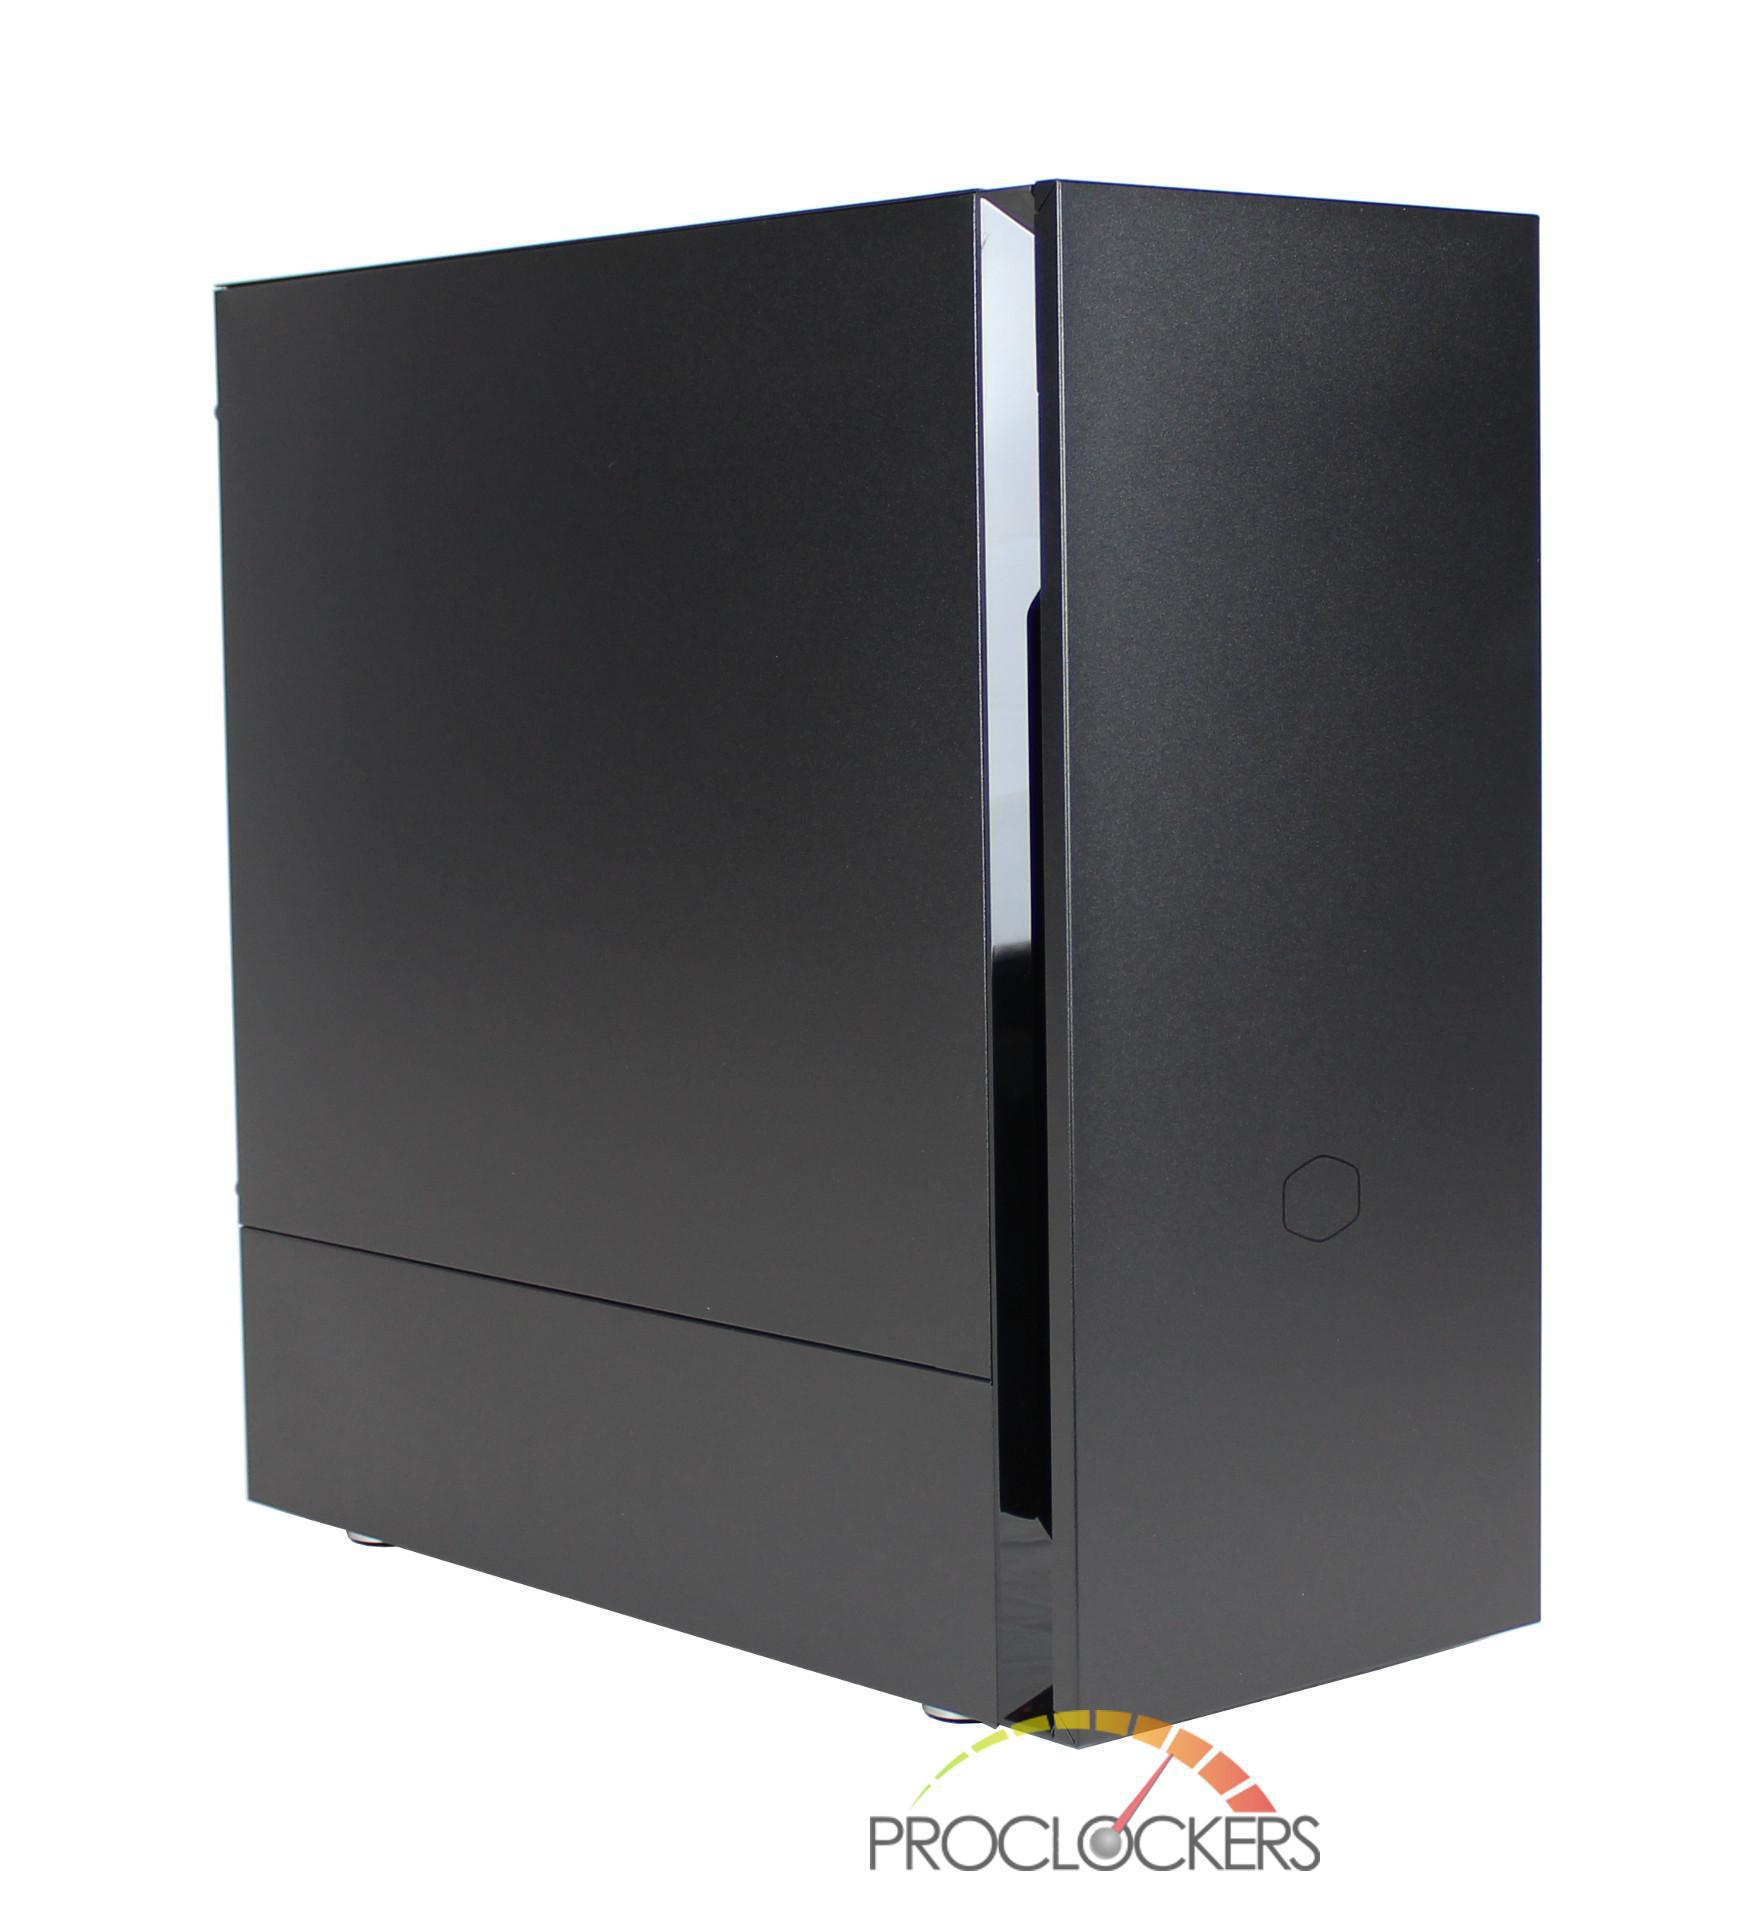
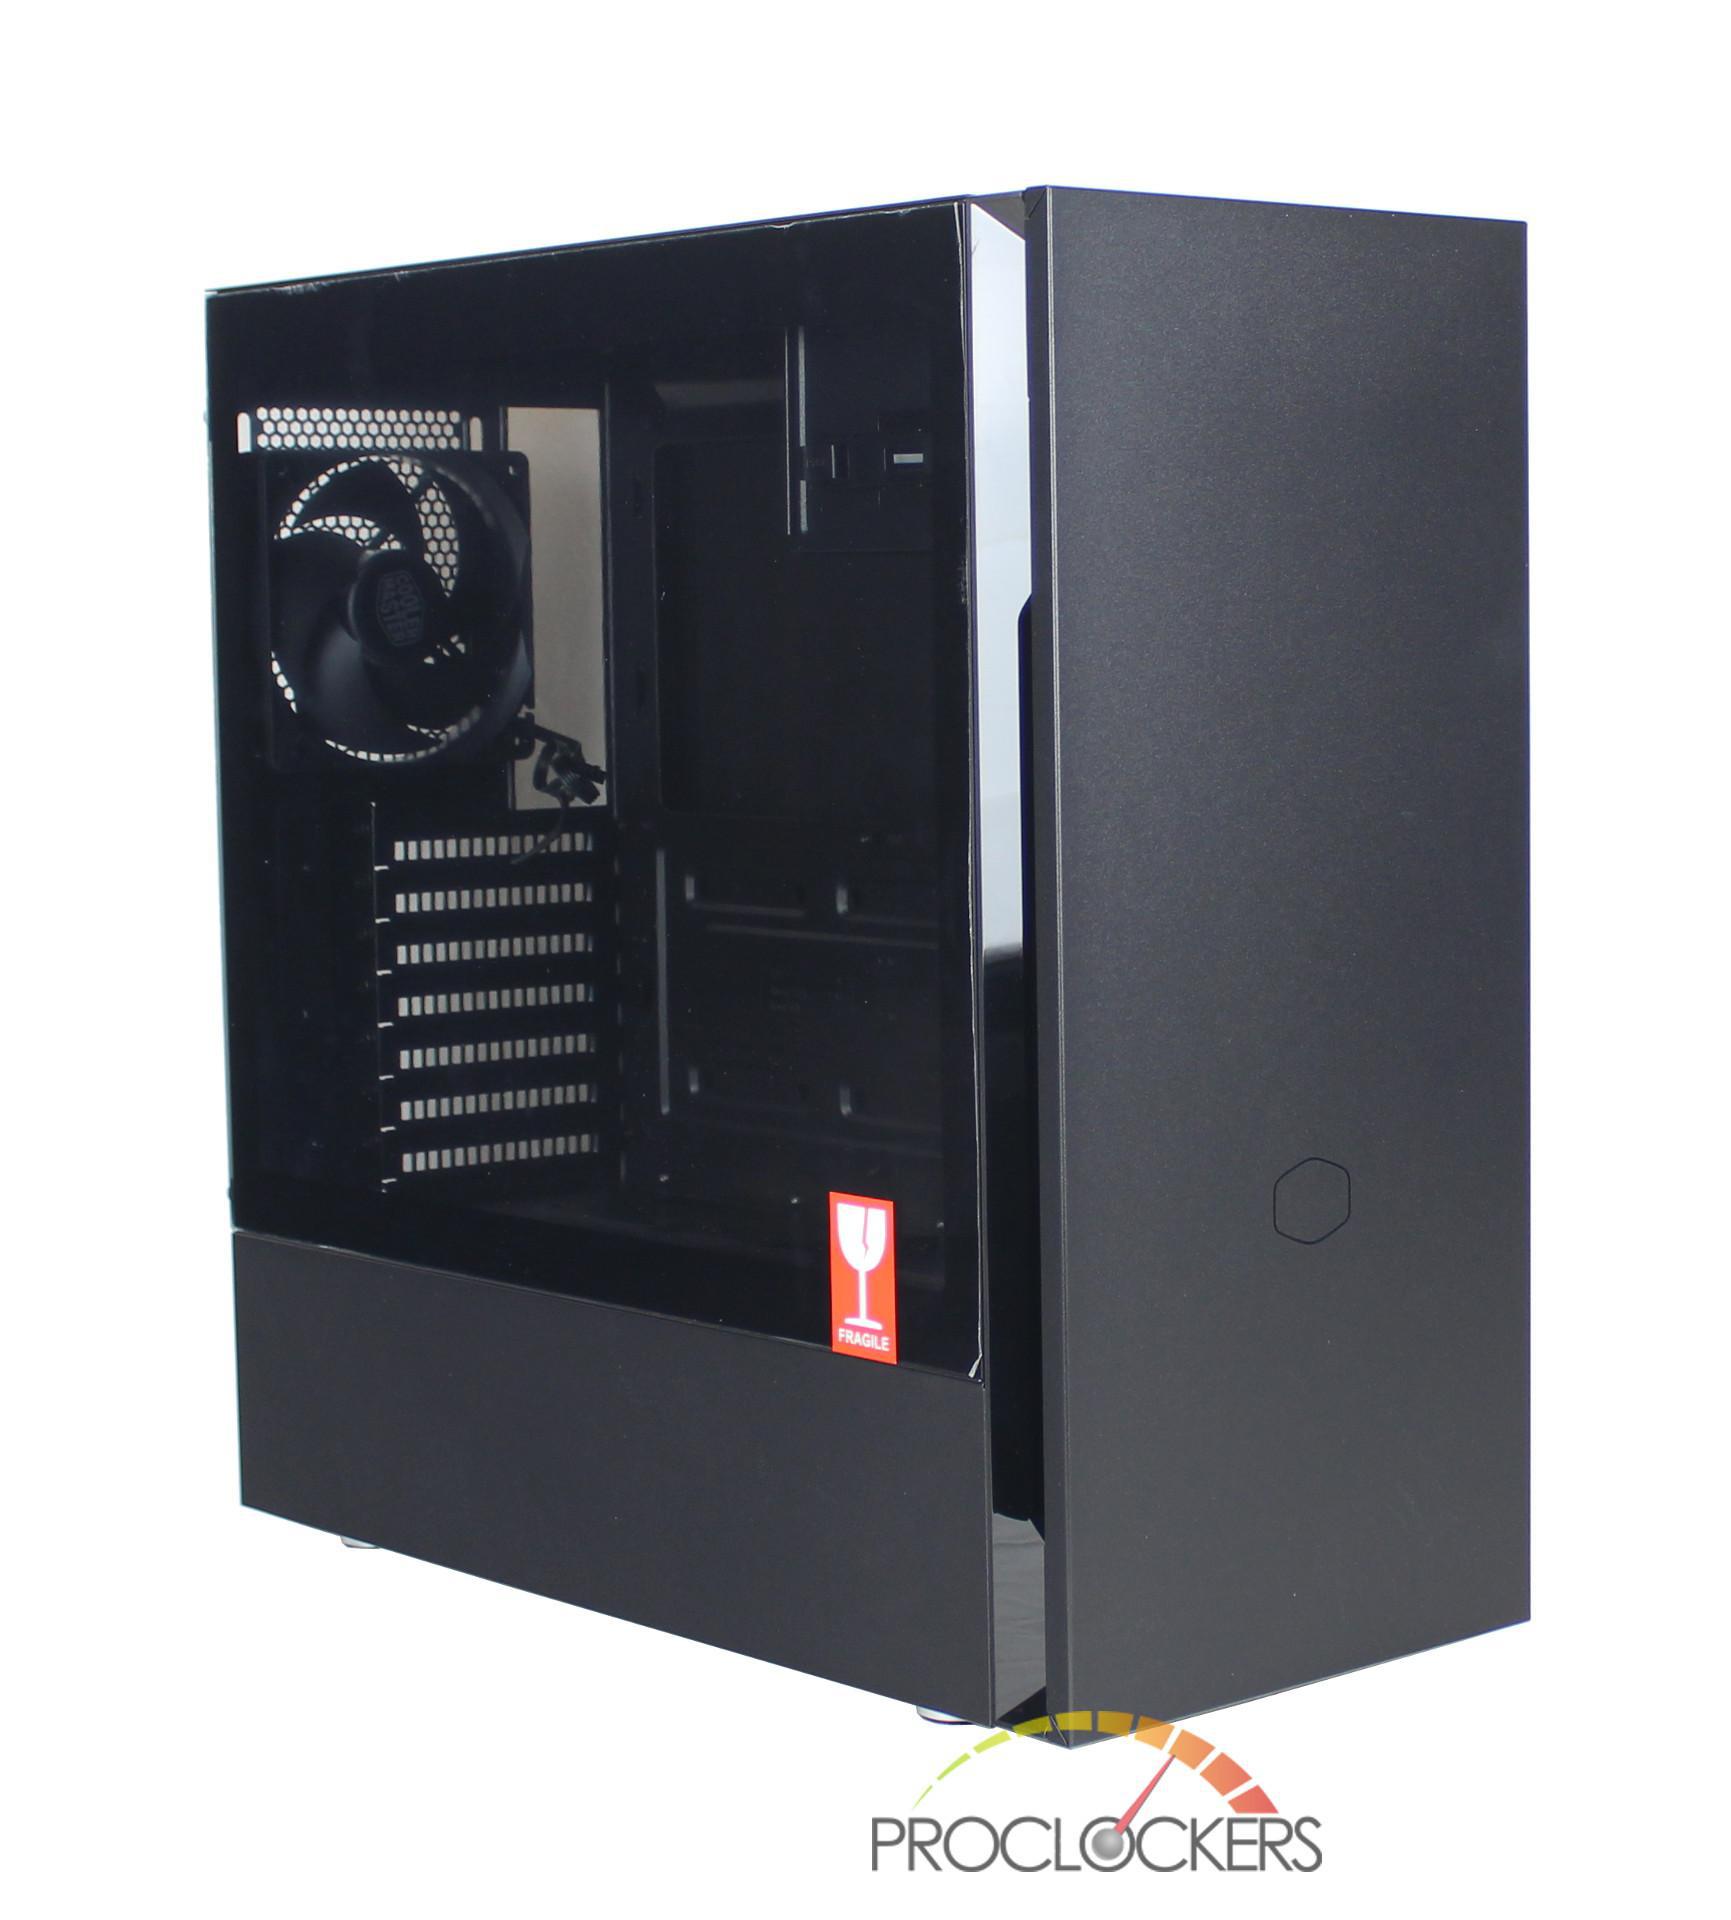
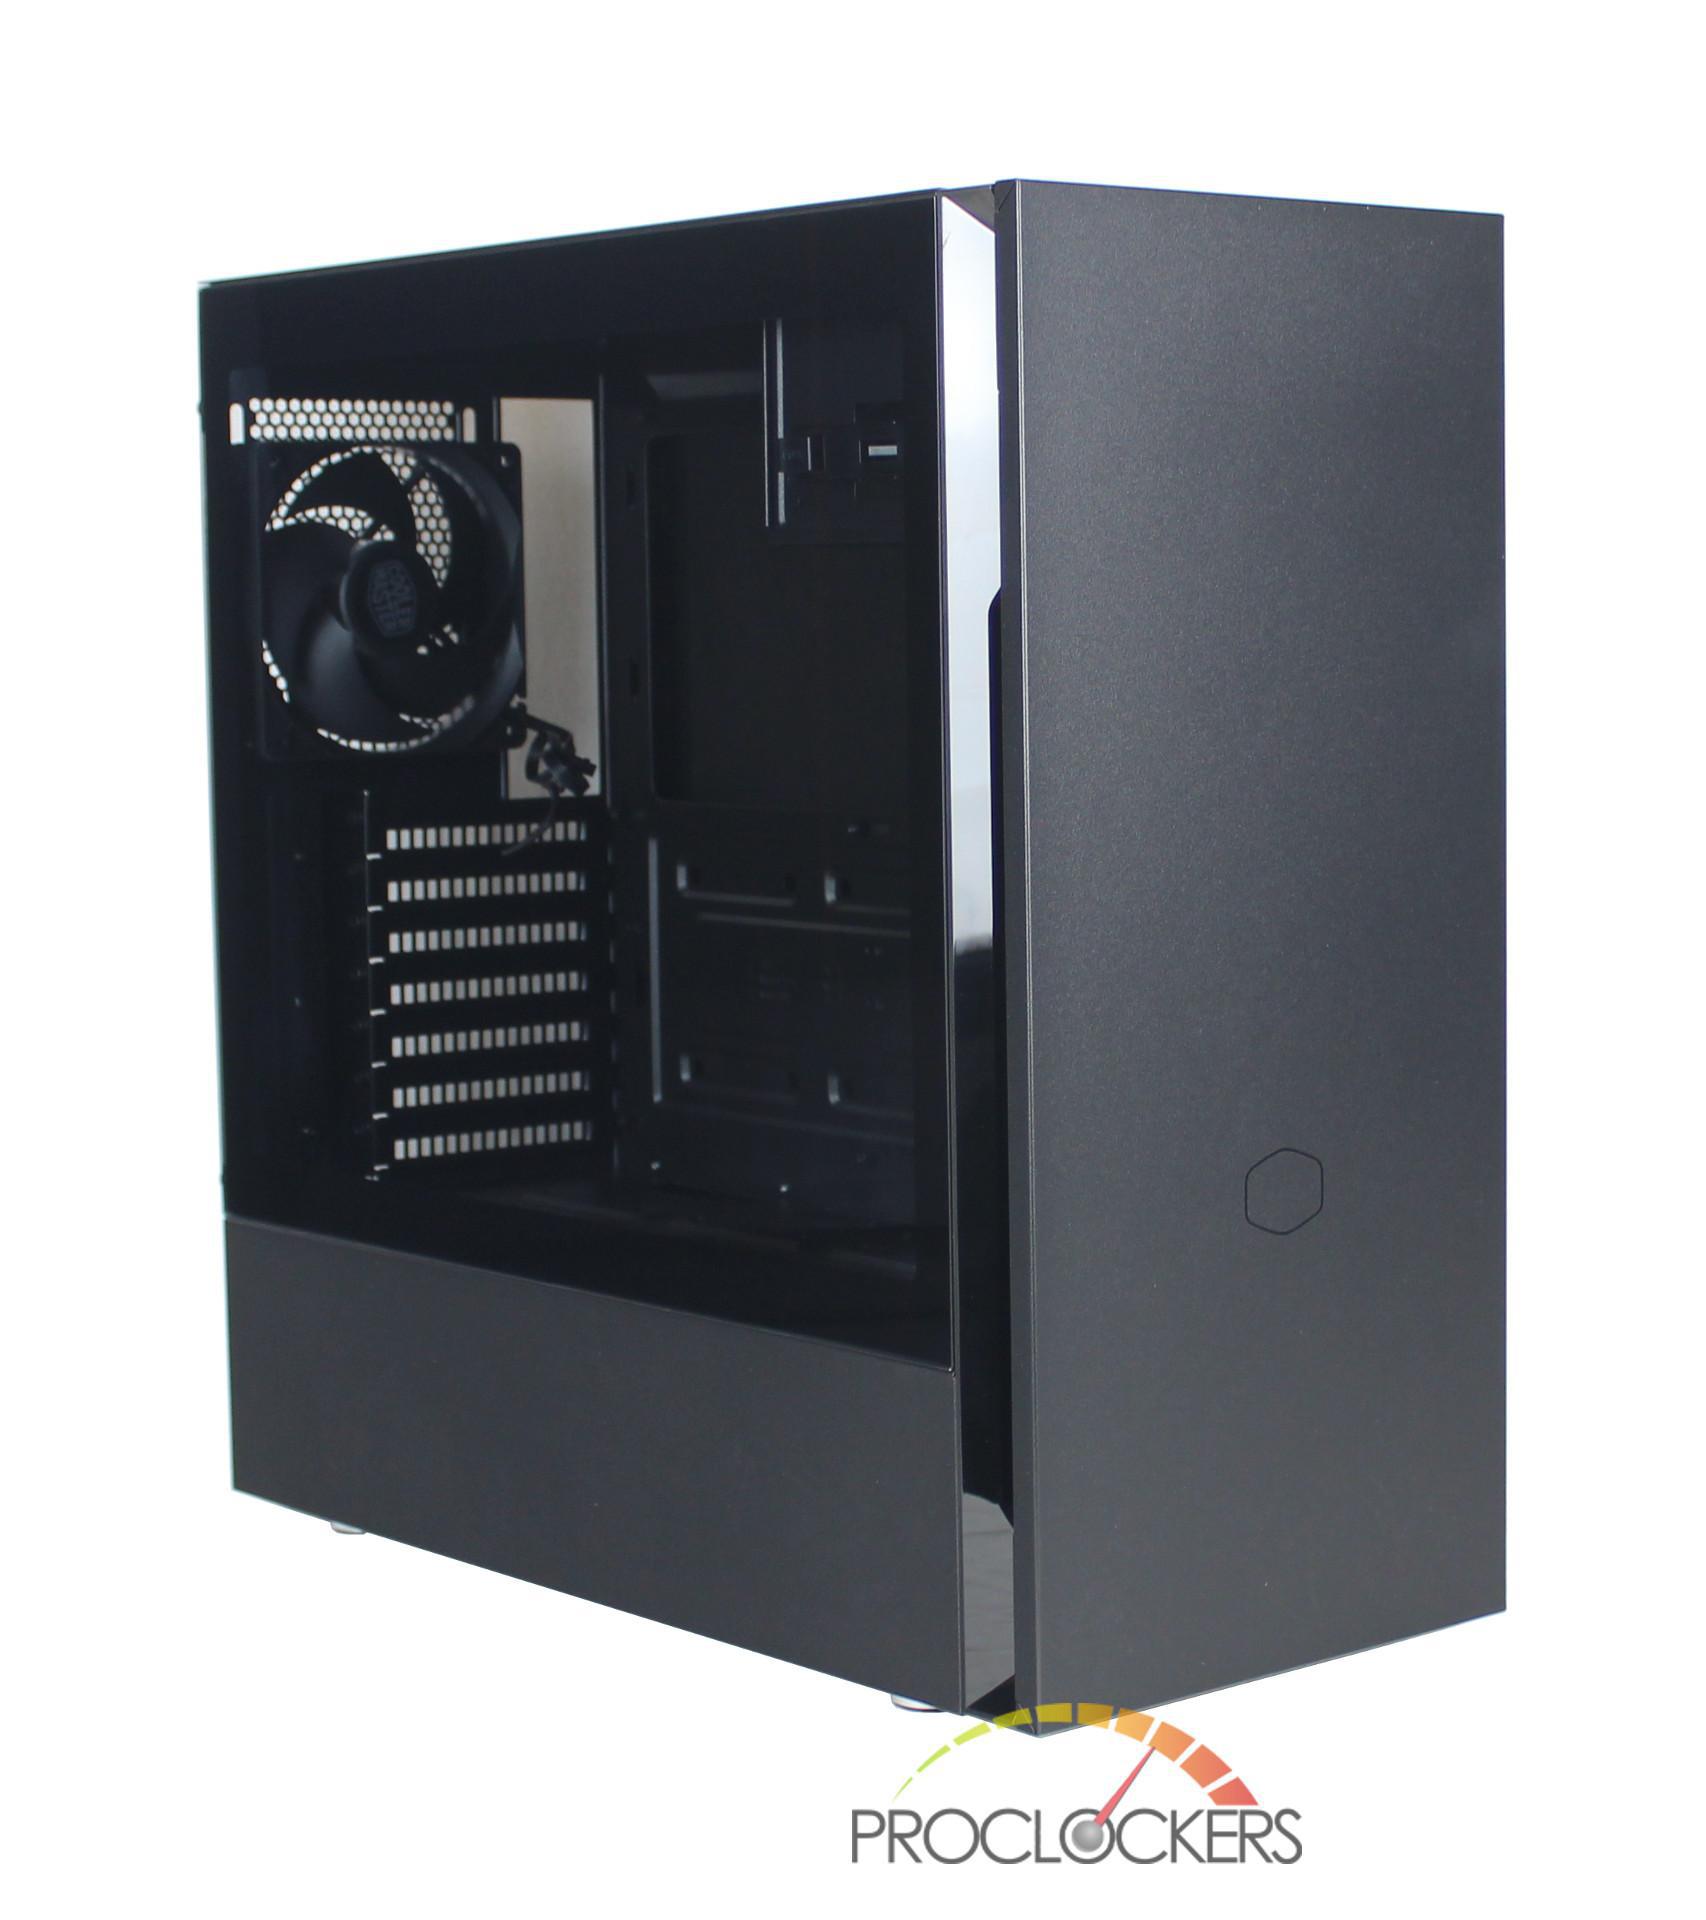
Now that the S600 is fully unboxed, we get our first look at its gorgeous matte black finish. The S600 is black throughout and maintains an extremely clean look. After trying both the steel and tempered glass side panel, I much prefer the latter as I like to show off my components.
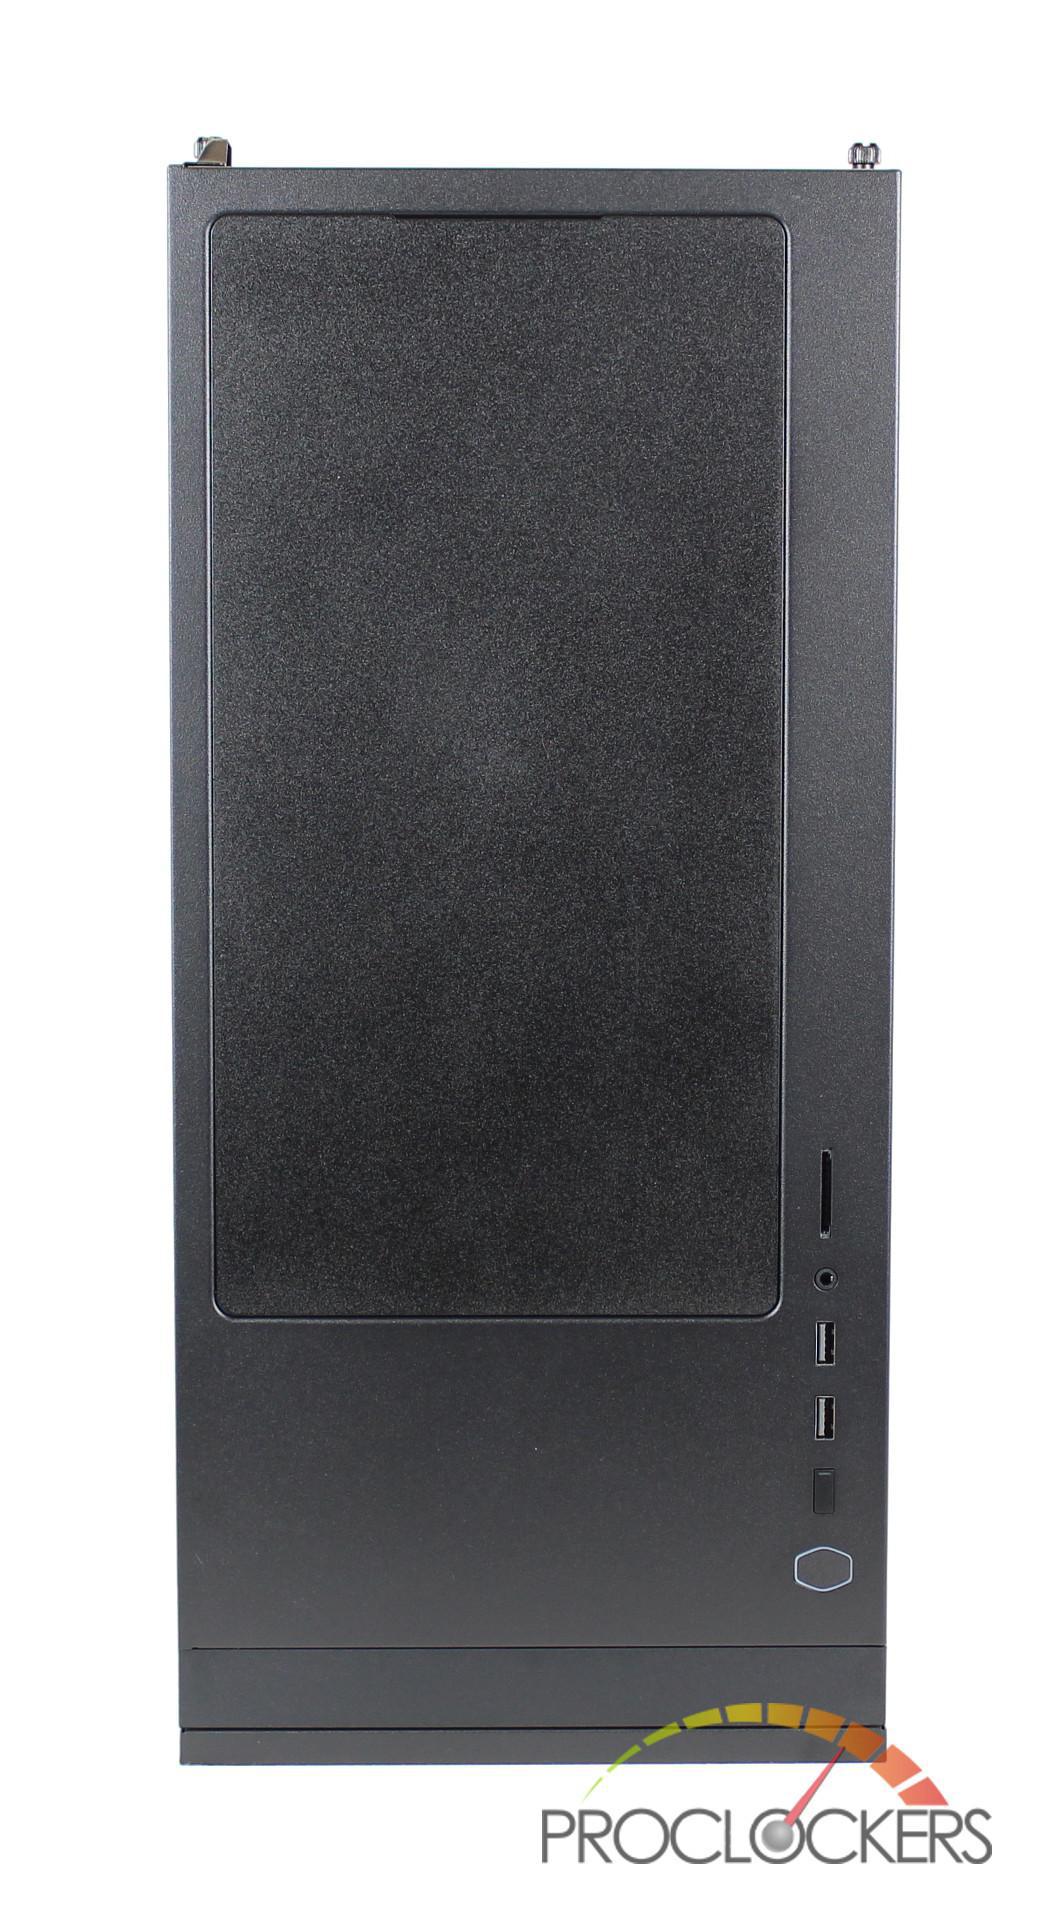
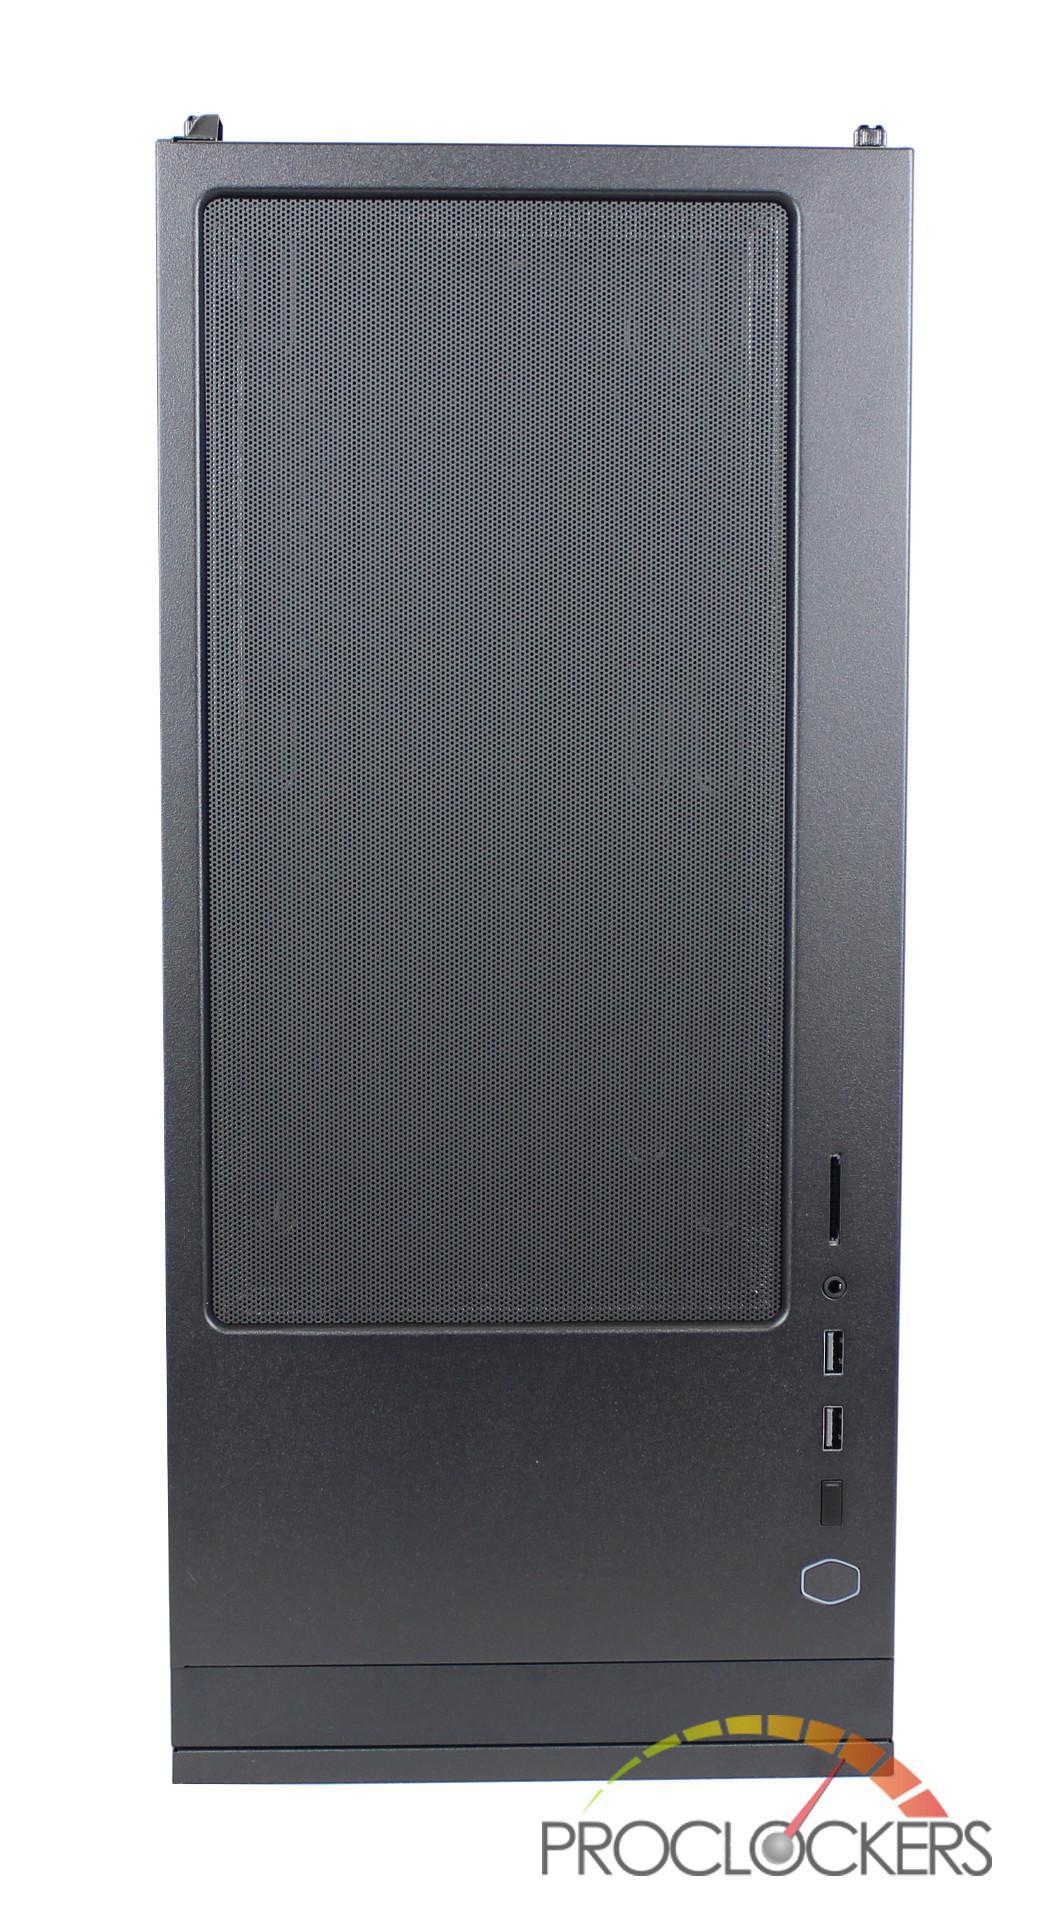
The front of the S600 is one of the cleanest I have seen out of the cases I have reviewed. It is pure matte black with no ventilation and only contains a gloss black Cooler Master logo in the lower part of the panel.
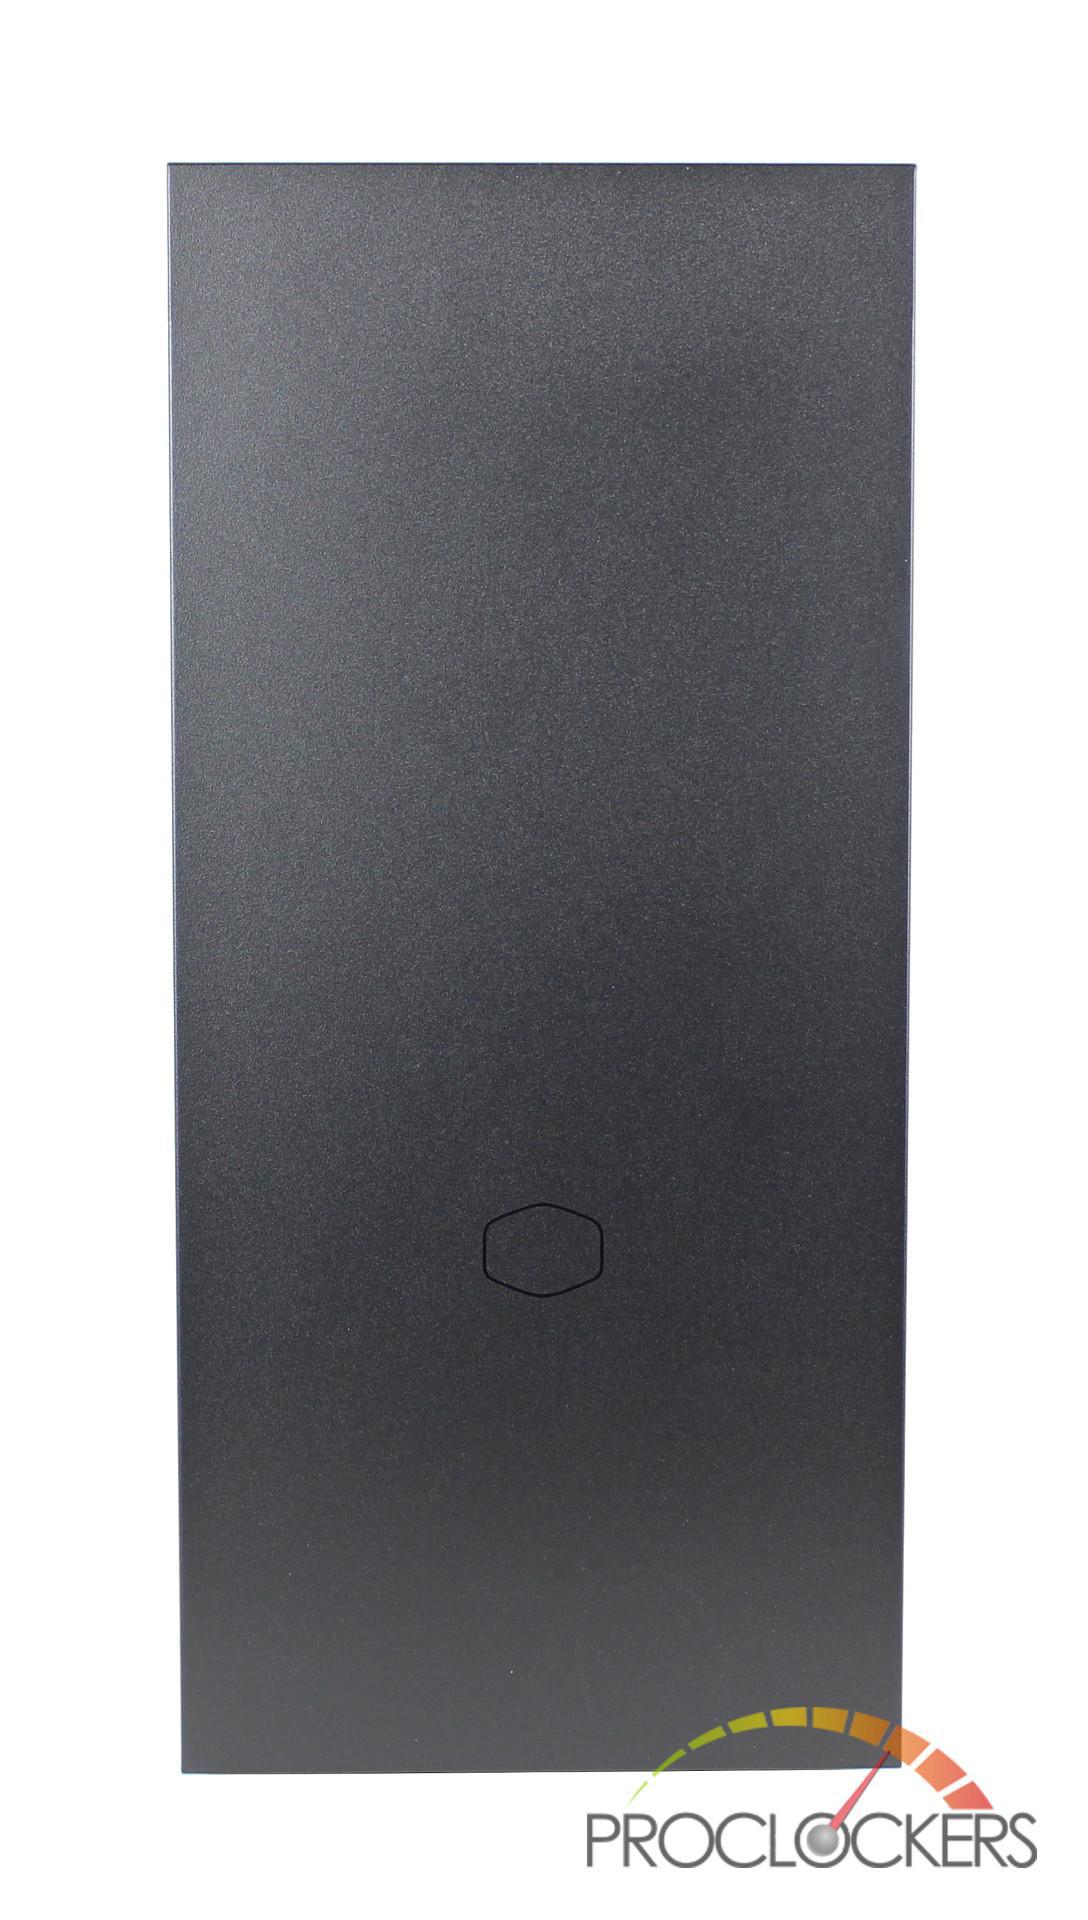
Since the front panel is solid with new vents, the S600 pulls its air from the sides thanks to a notched center.
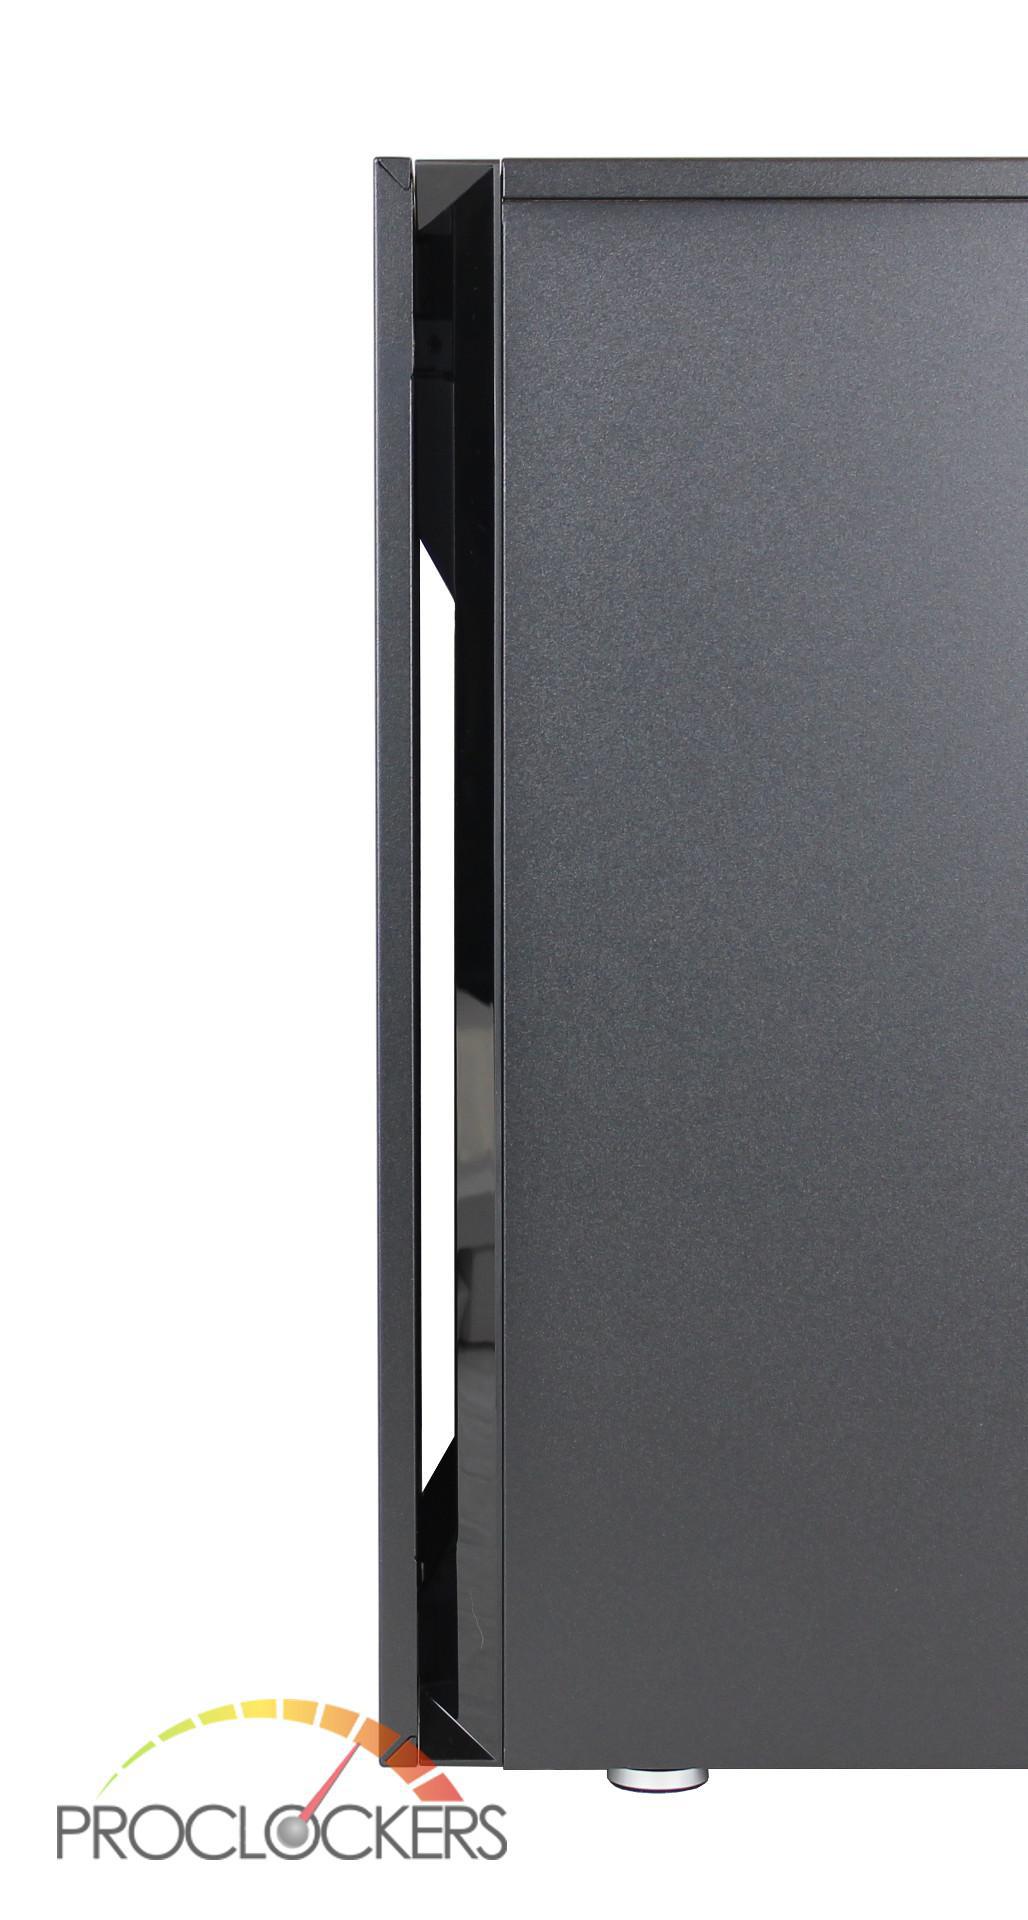
Opening the door on the front reveals a removable filter as well as a 5.25” drive bay on top. Looking through the filter we can see one installed Cooler Master fan in the middle and another fan mount at the bottom. You will notice on the left side you have a spot to attach hinges and that is because the front door can be reversed to open the other day. This is a nice option for people that place their desktop on the left side of the desk.
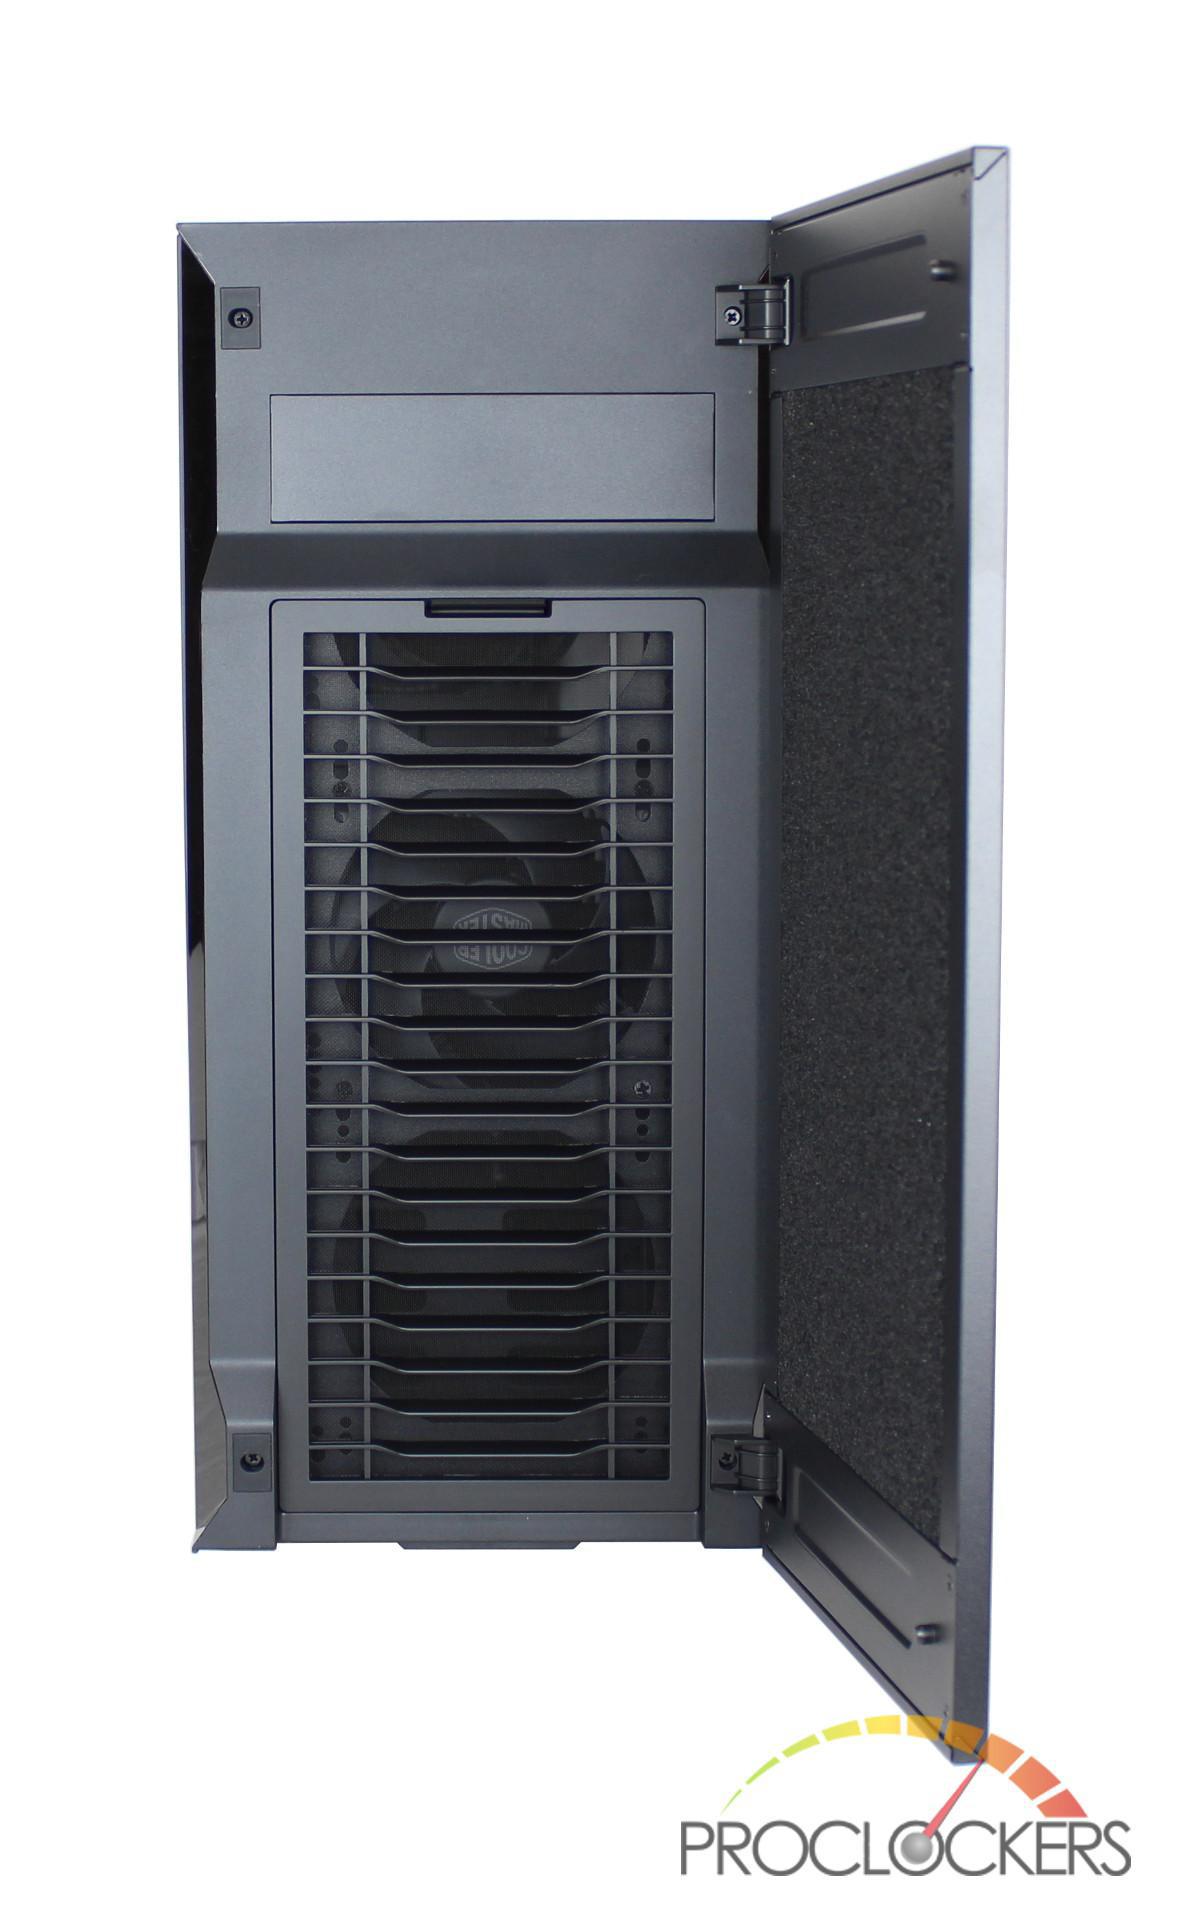
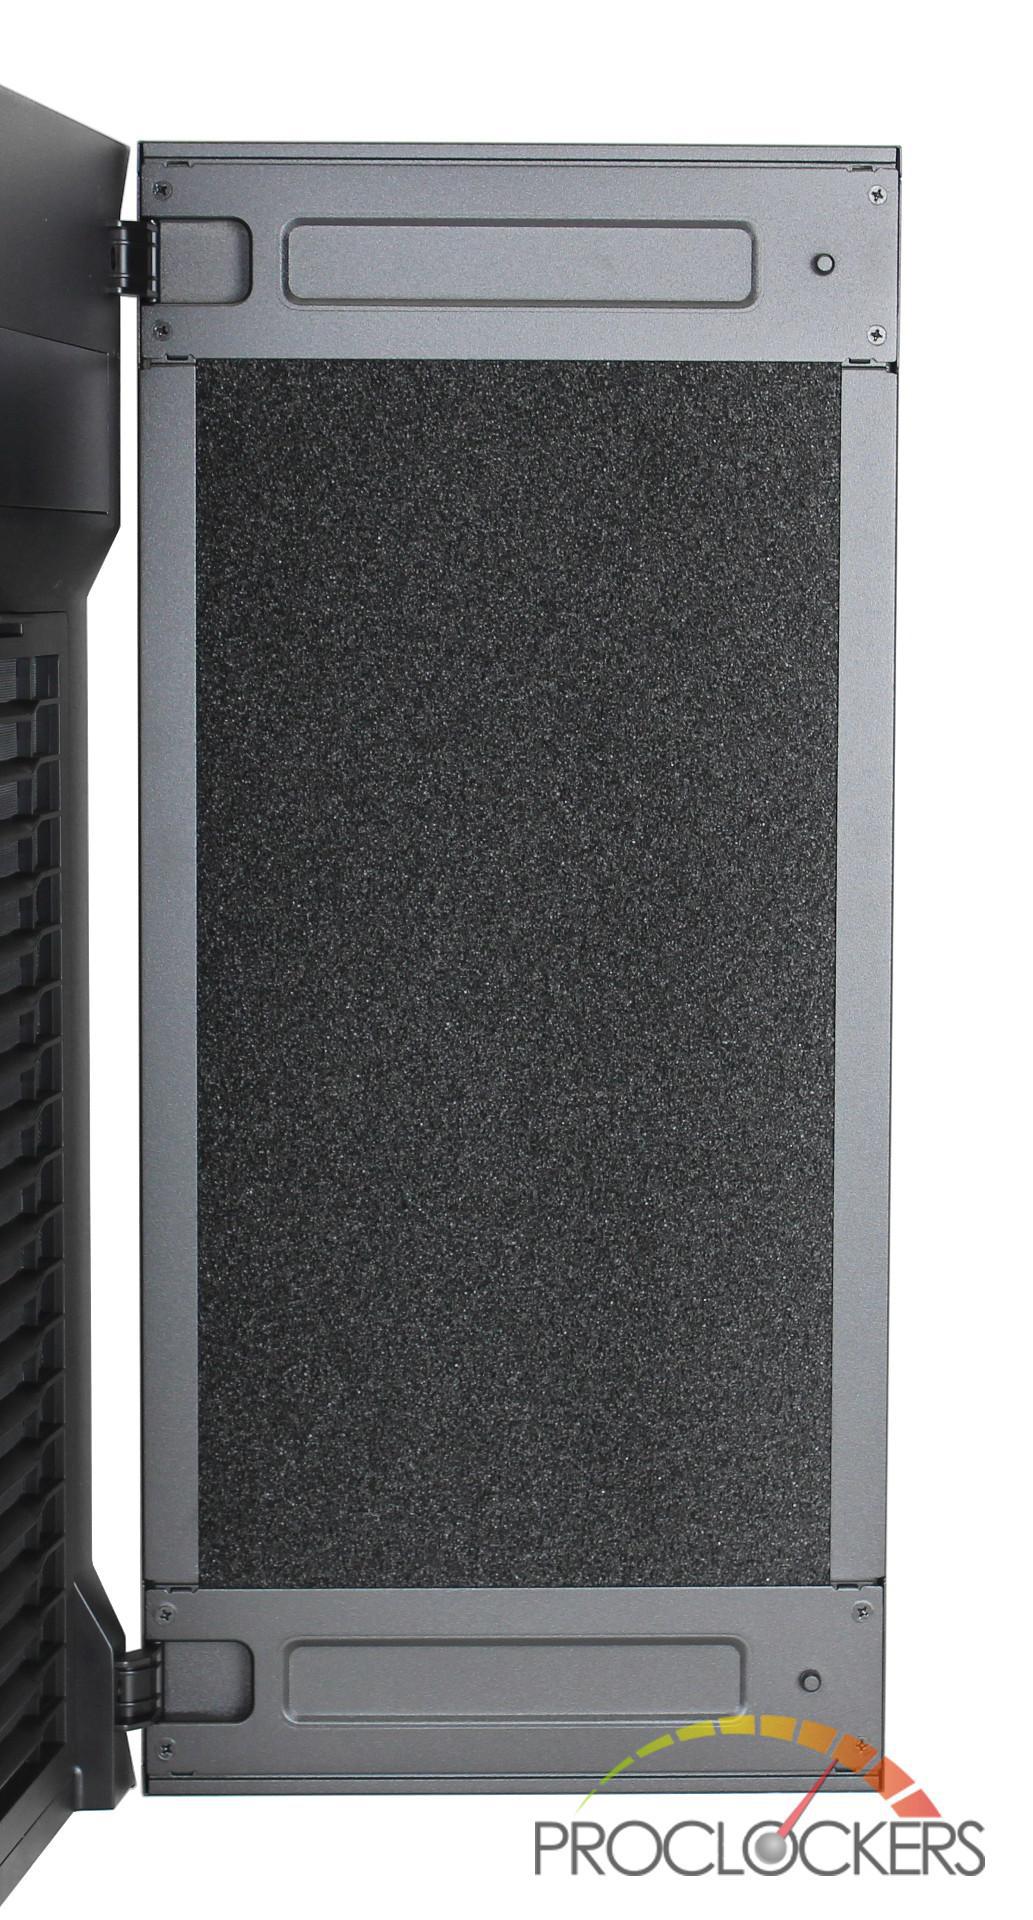
Looking at the back of the door, Cooler Master has installed some sound dampening foam to keep sound from escaping through the front of the case.
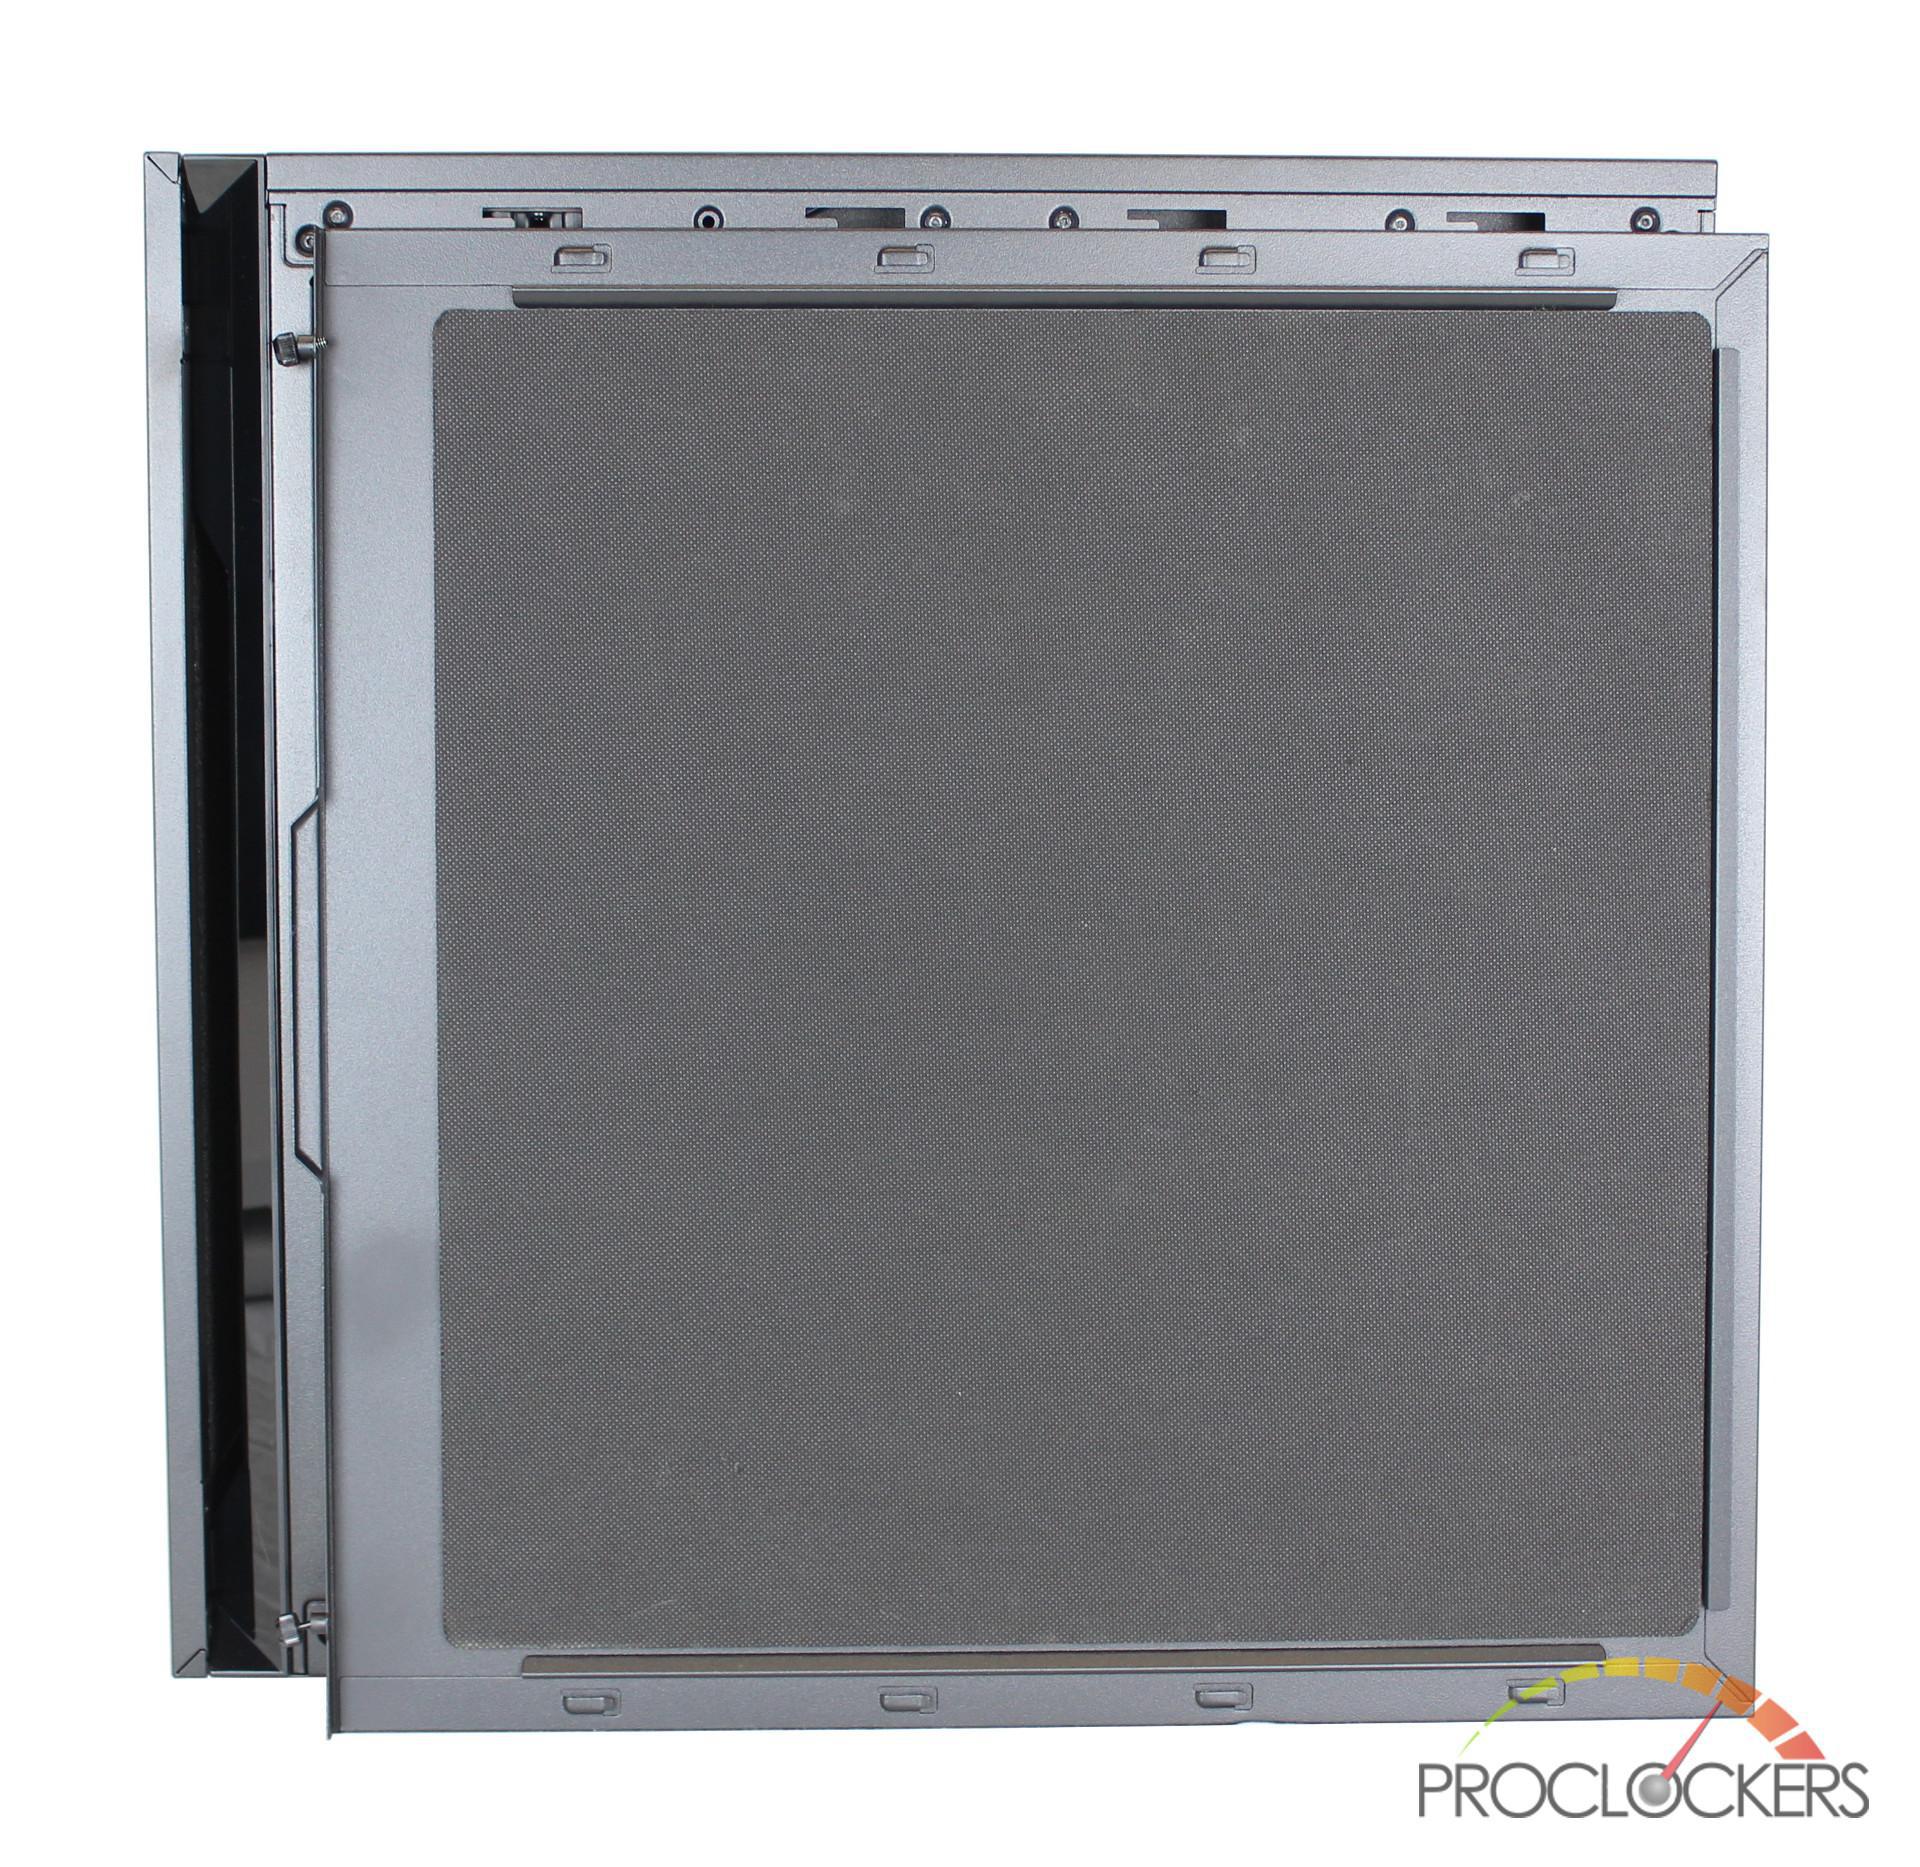
Turning the case to its other side, is a black steel panel that is attached to the S600 via two thumbscrews at the back. This panel looks identical to the one on the other side that we replaced with a tempered glass side panel.
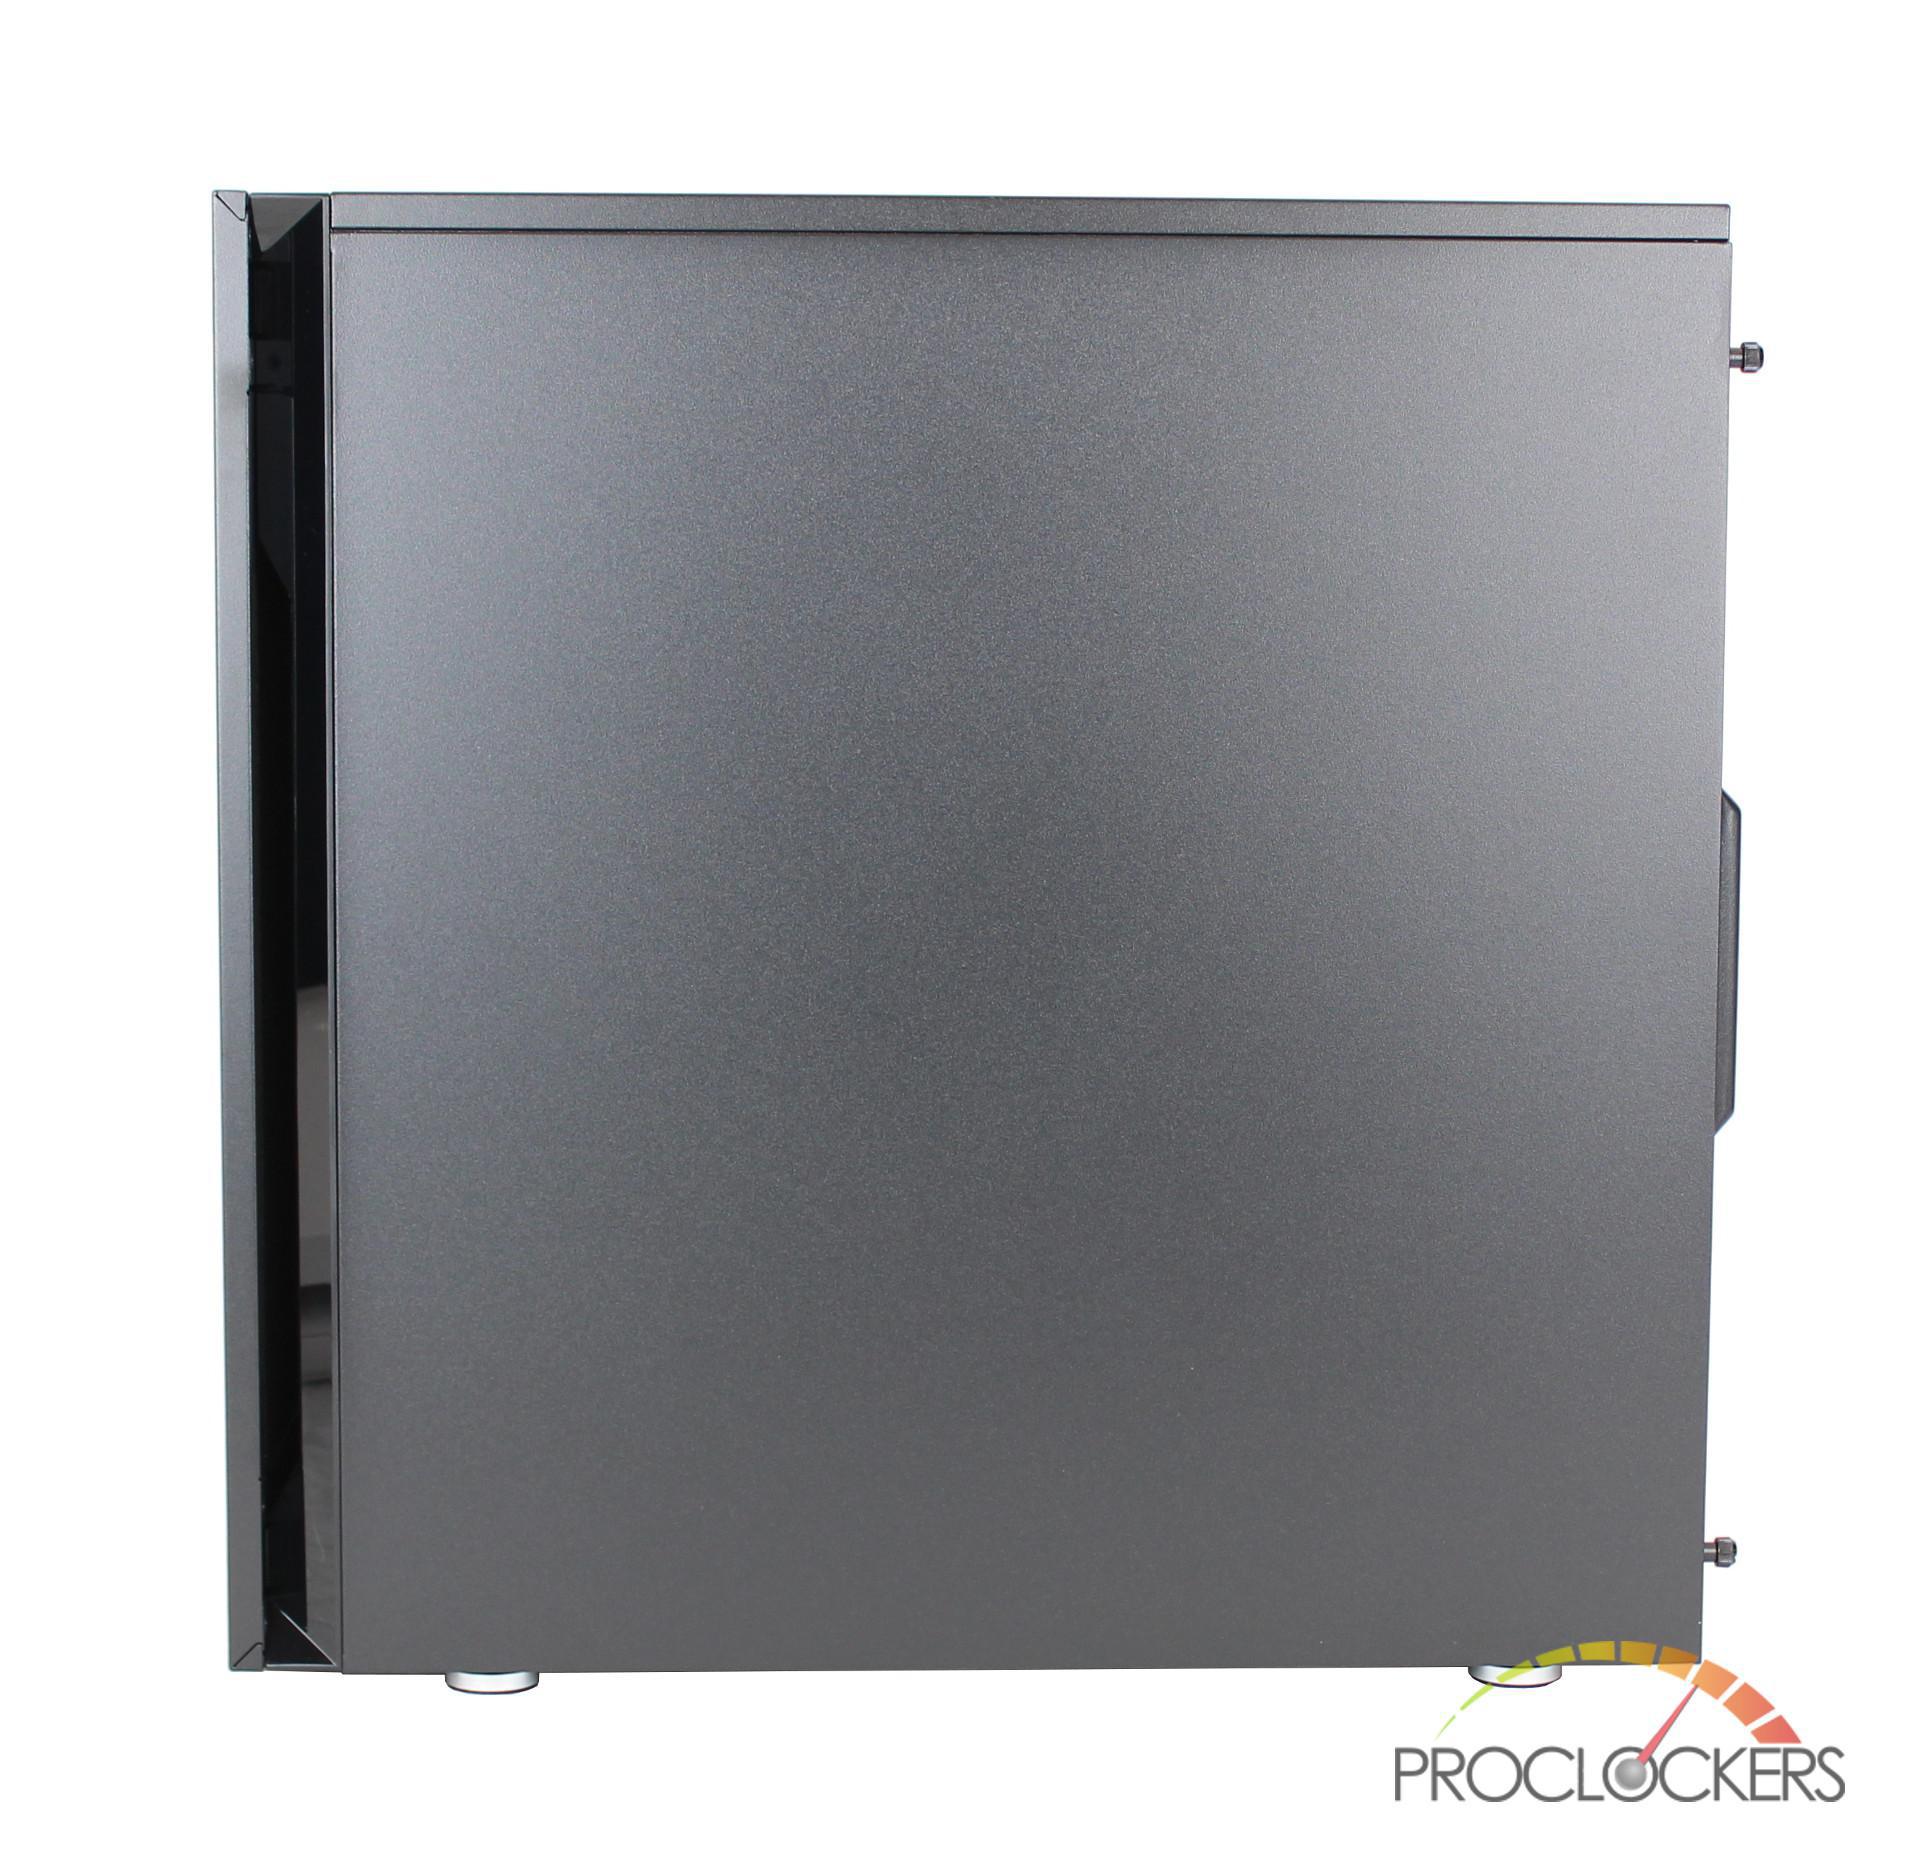
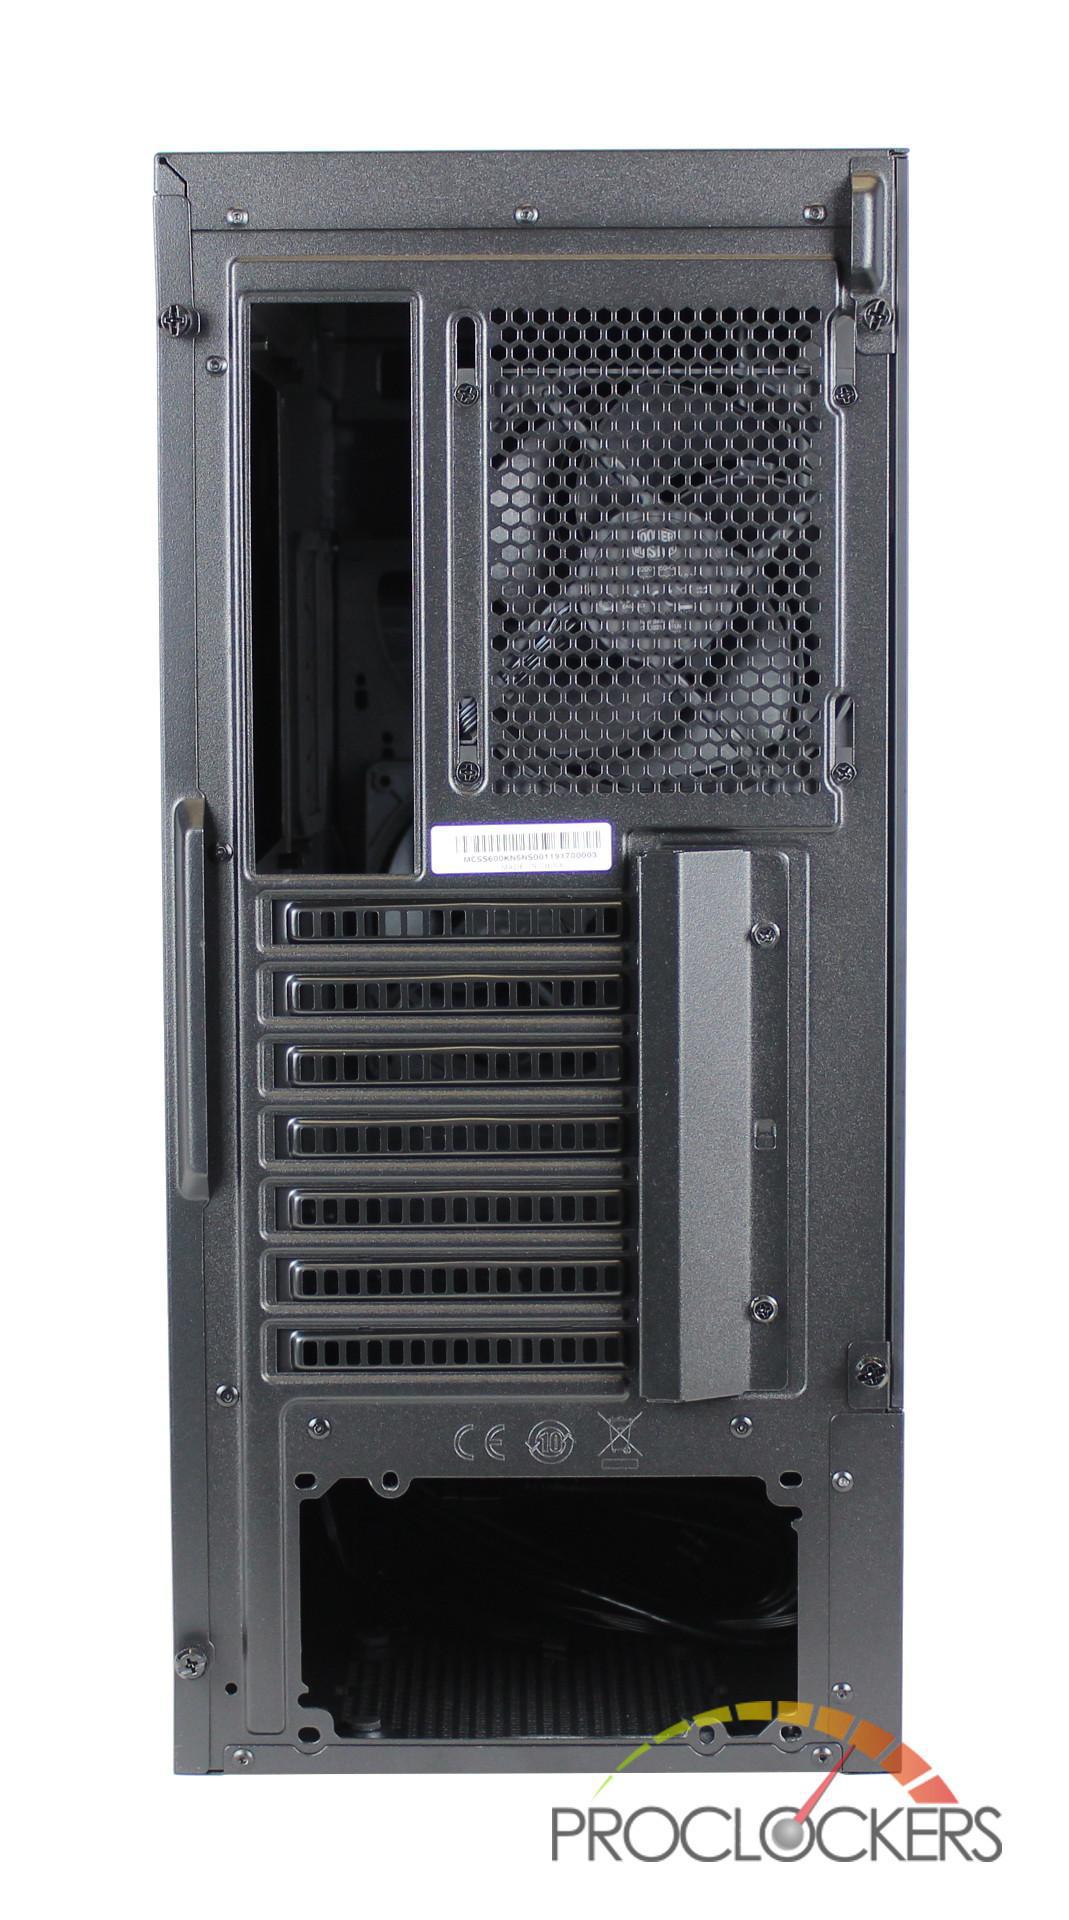
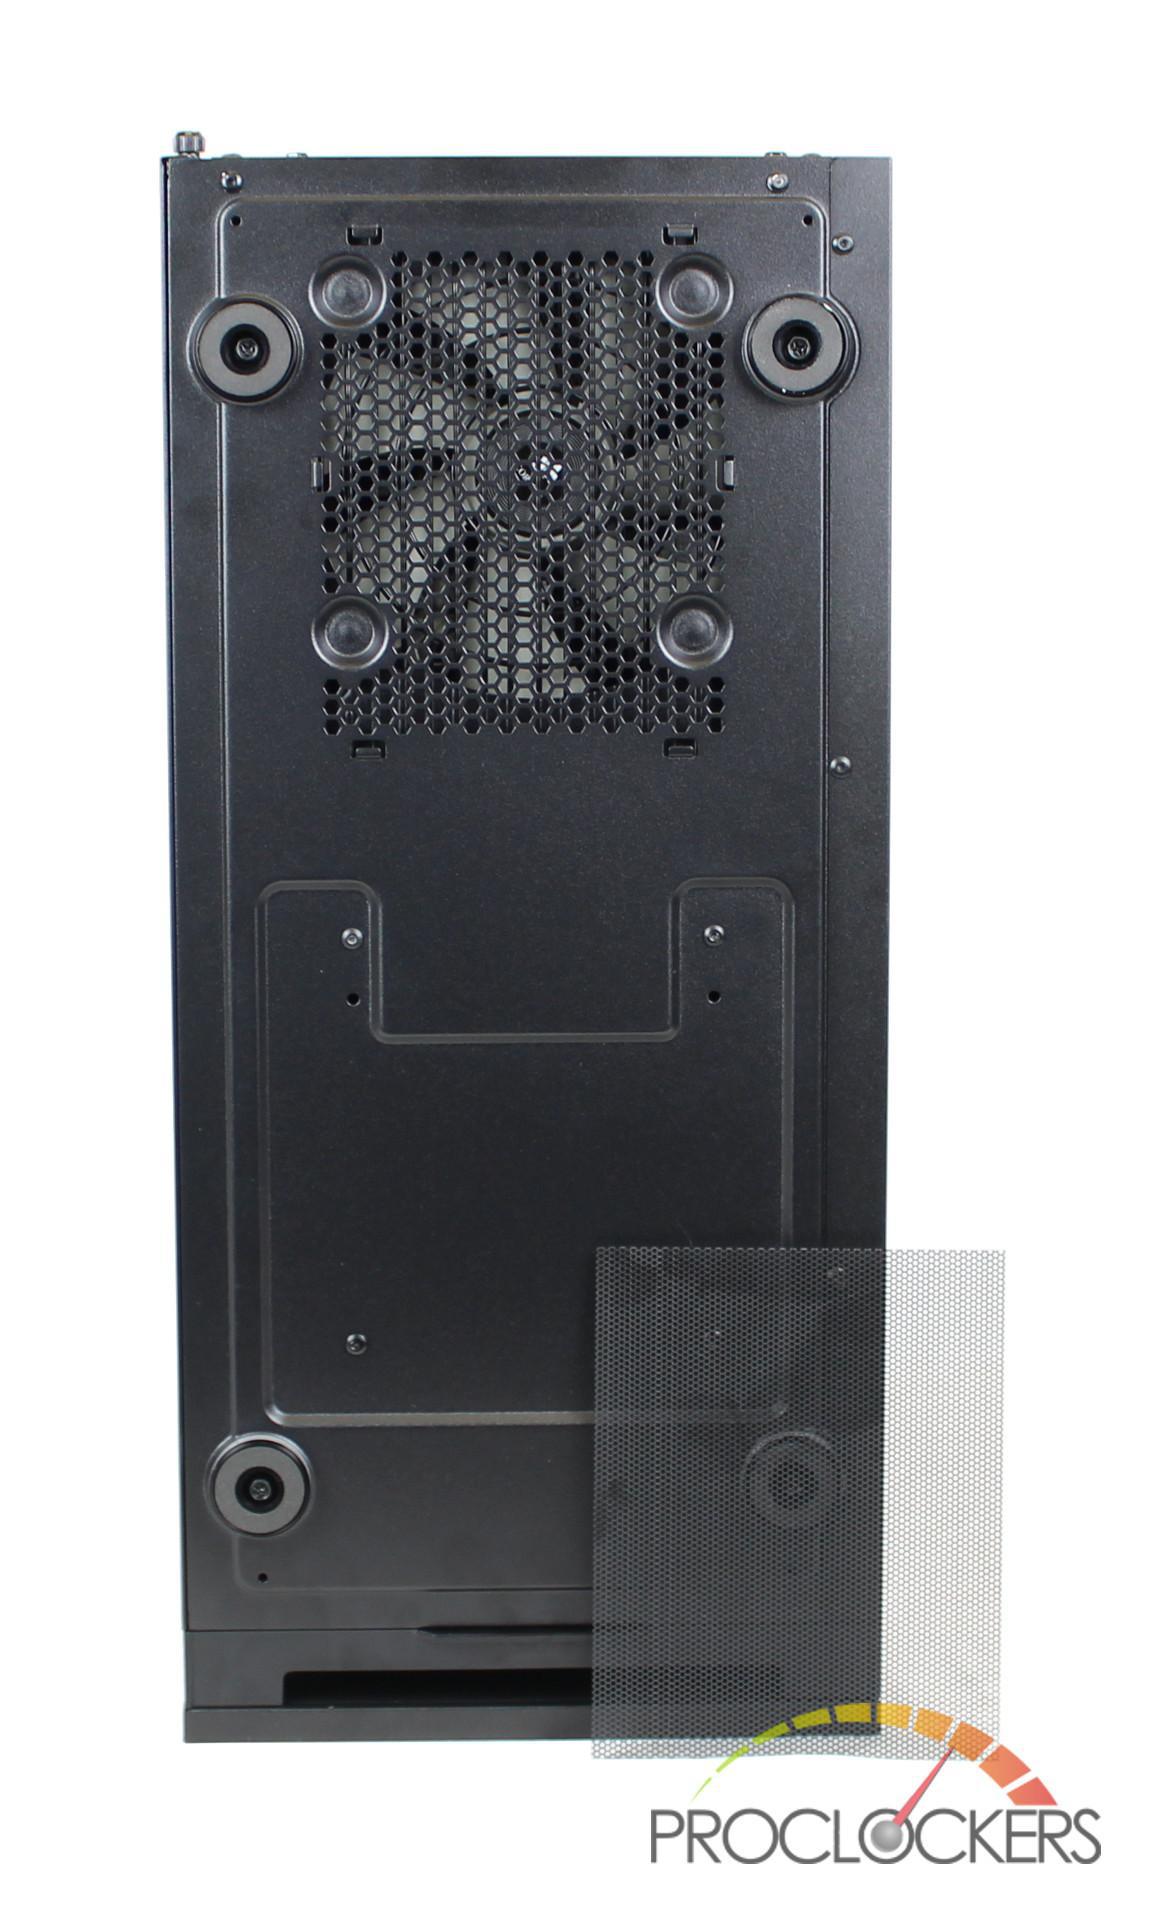
Moving to the back of the S600, there’s your usual I/O cutout, exhaust fan mount, PSU cutout, and 7 expansion slots. Covering the right side of the expansion slots is a steel cover that can be removed by taking out the two screws securing it in place.
Taking a peek at the top of the case we find a removable black panel that can be replaced with the included magnetic mesh panel. Toward the front of the case is the S600’s Cooler Master shaped power button and addition I/O.
Removing the top panel reveals a hexagon mesh, which has mounting points to install two 120mm or 140mm fans. Like the side panels of the S600, the back of the removable top panel also has sound dampening foam.
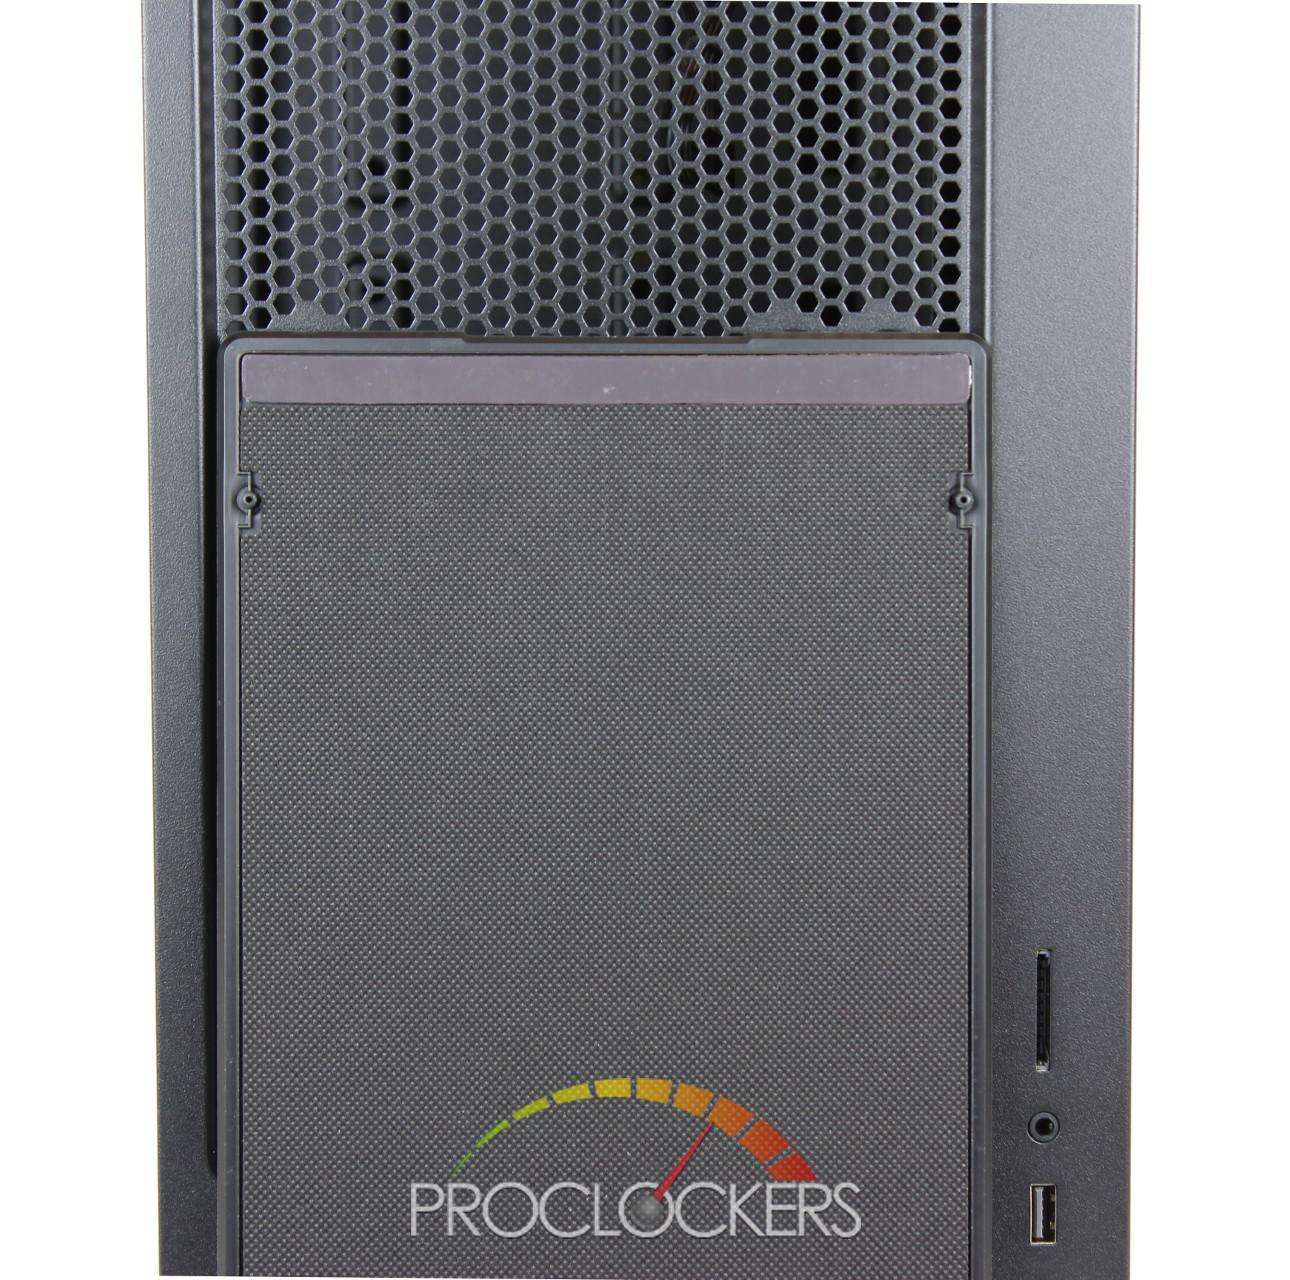
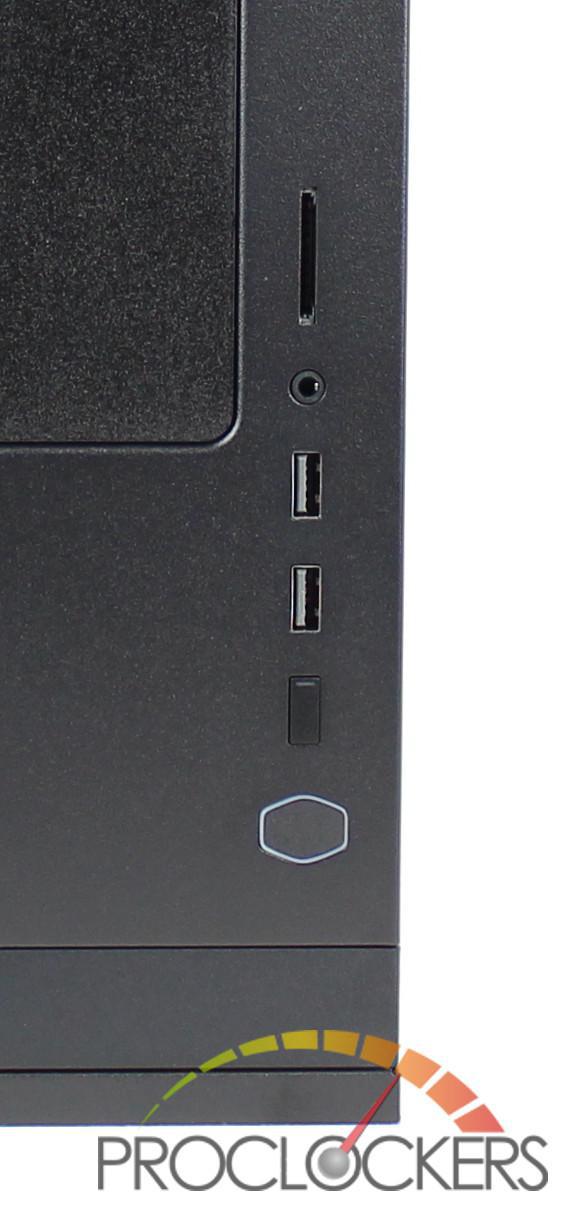
Taking a closer look at the S600 I/O, it includes an SD reader, 3.5 audio/microphone jack, two USB 3.0 ports, a reset button, and a Cooler Master shaped power button. It is nice to see the addition of an SD reader and that isn’t something you commonly see included in cases.
Flipping the S600 to the bottom, it has four rubberized feet and a filtered PSU intake.

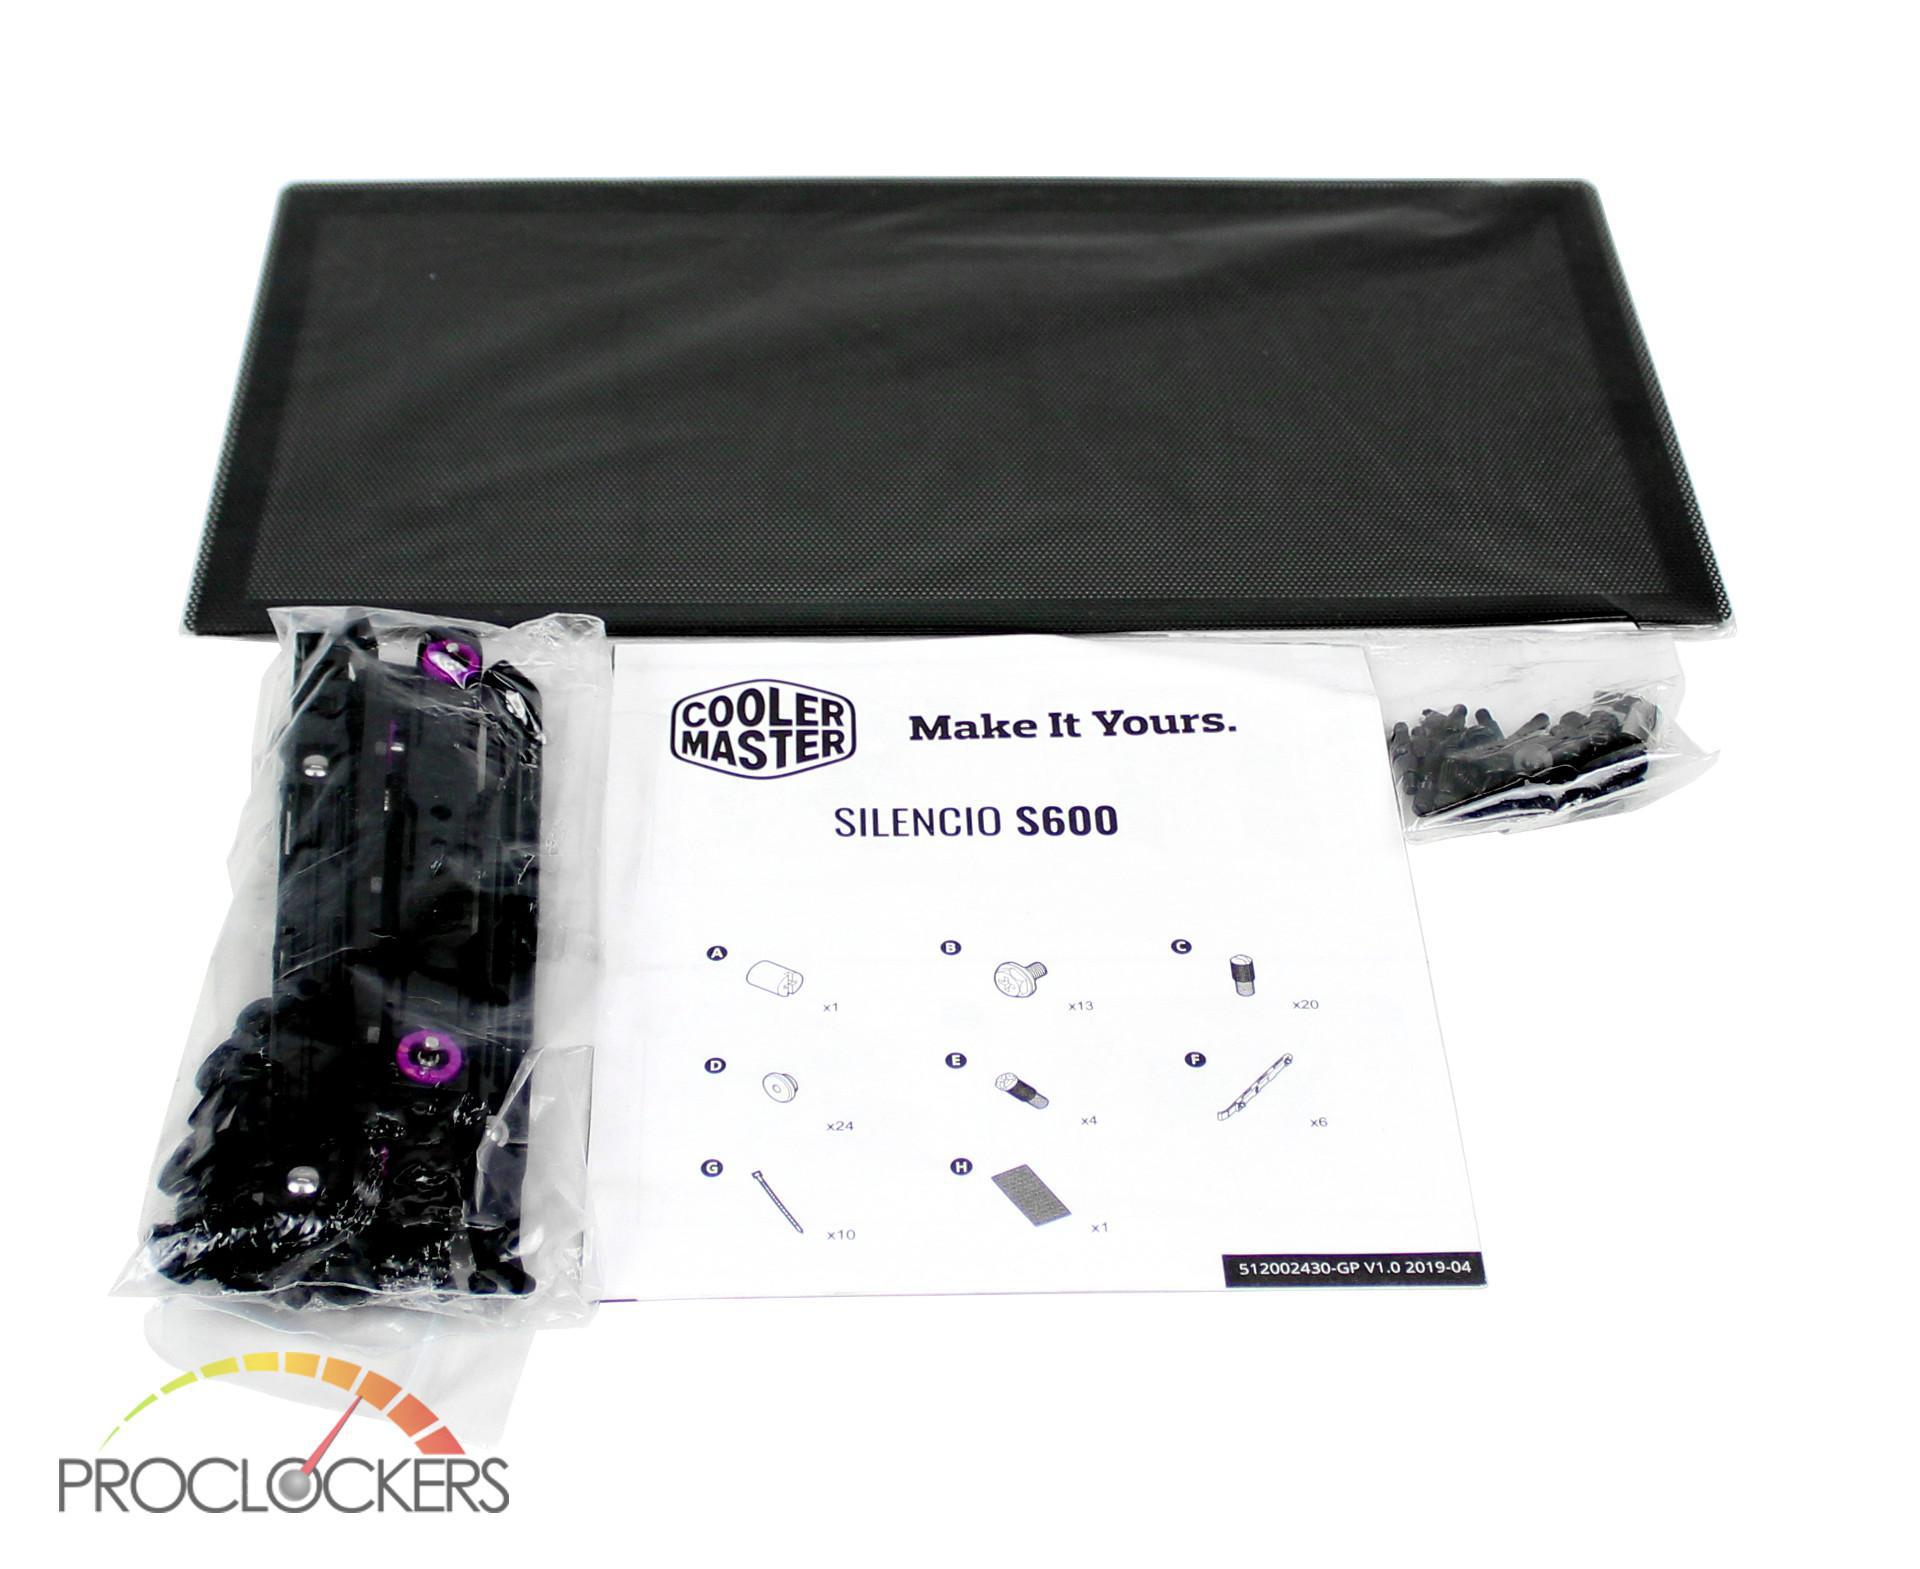
Packaged with the S600 were a magnetic top filter, user guide, mounting screws, and six tool-less drive mounts.
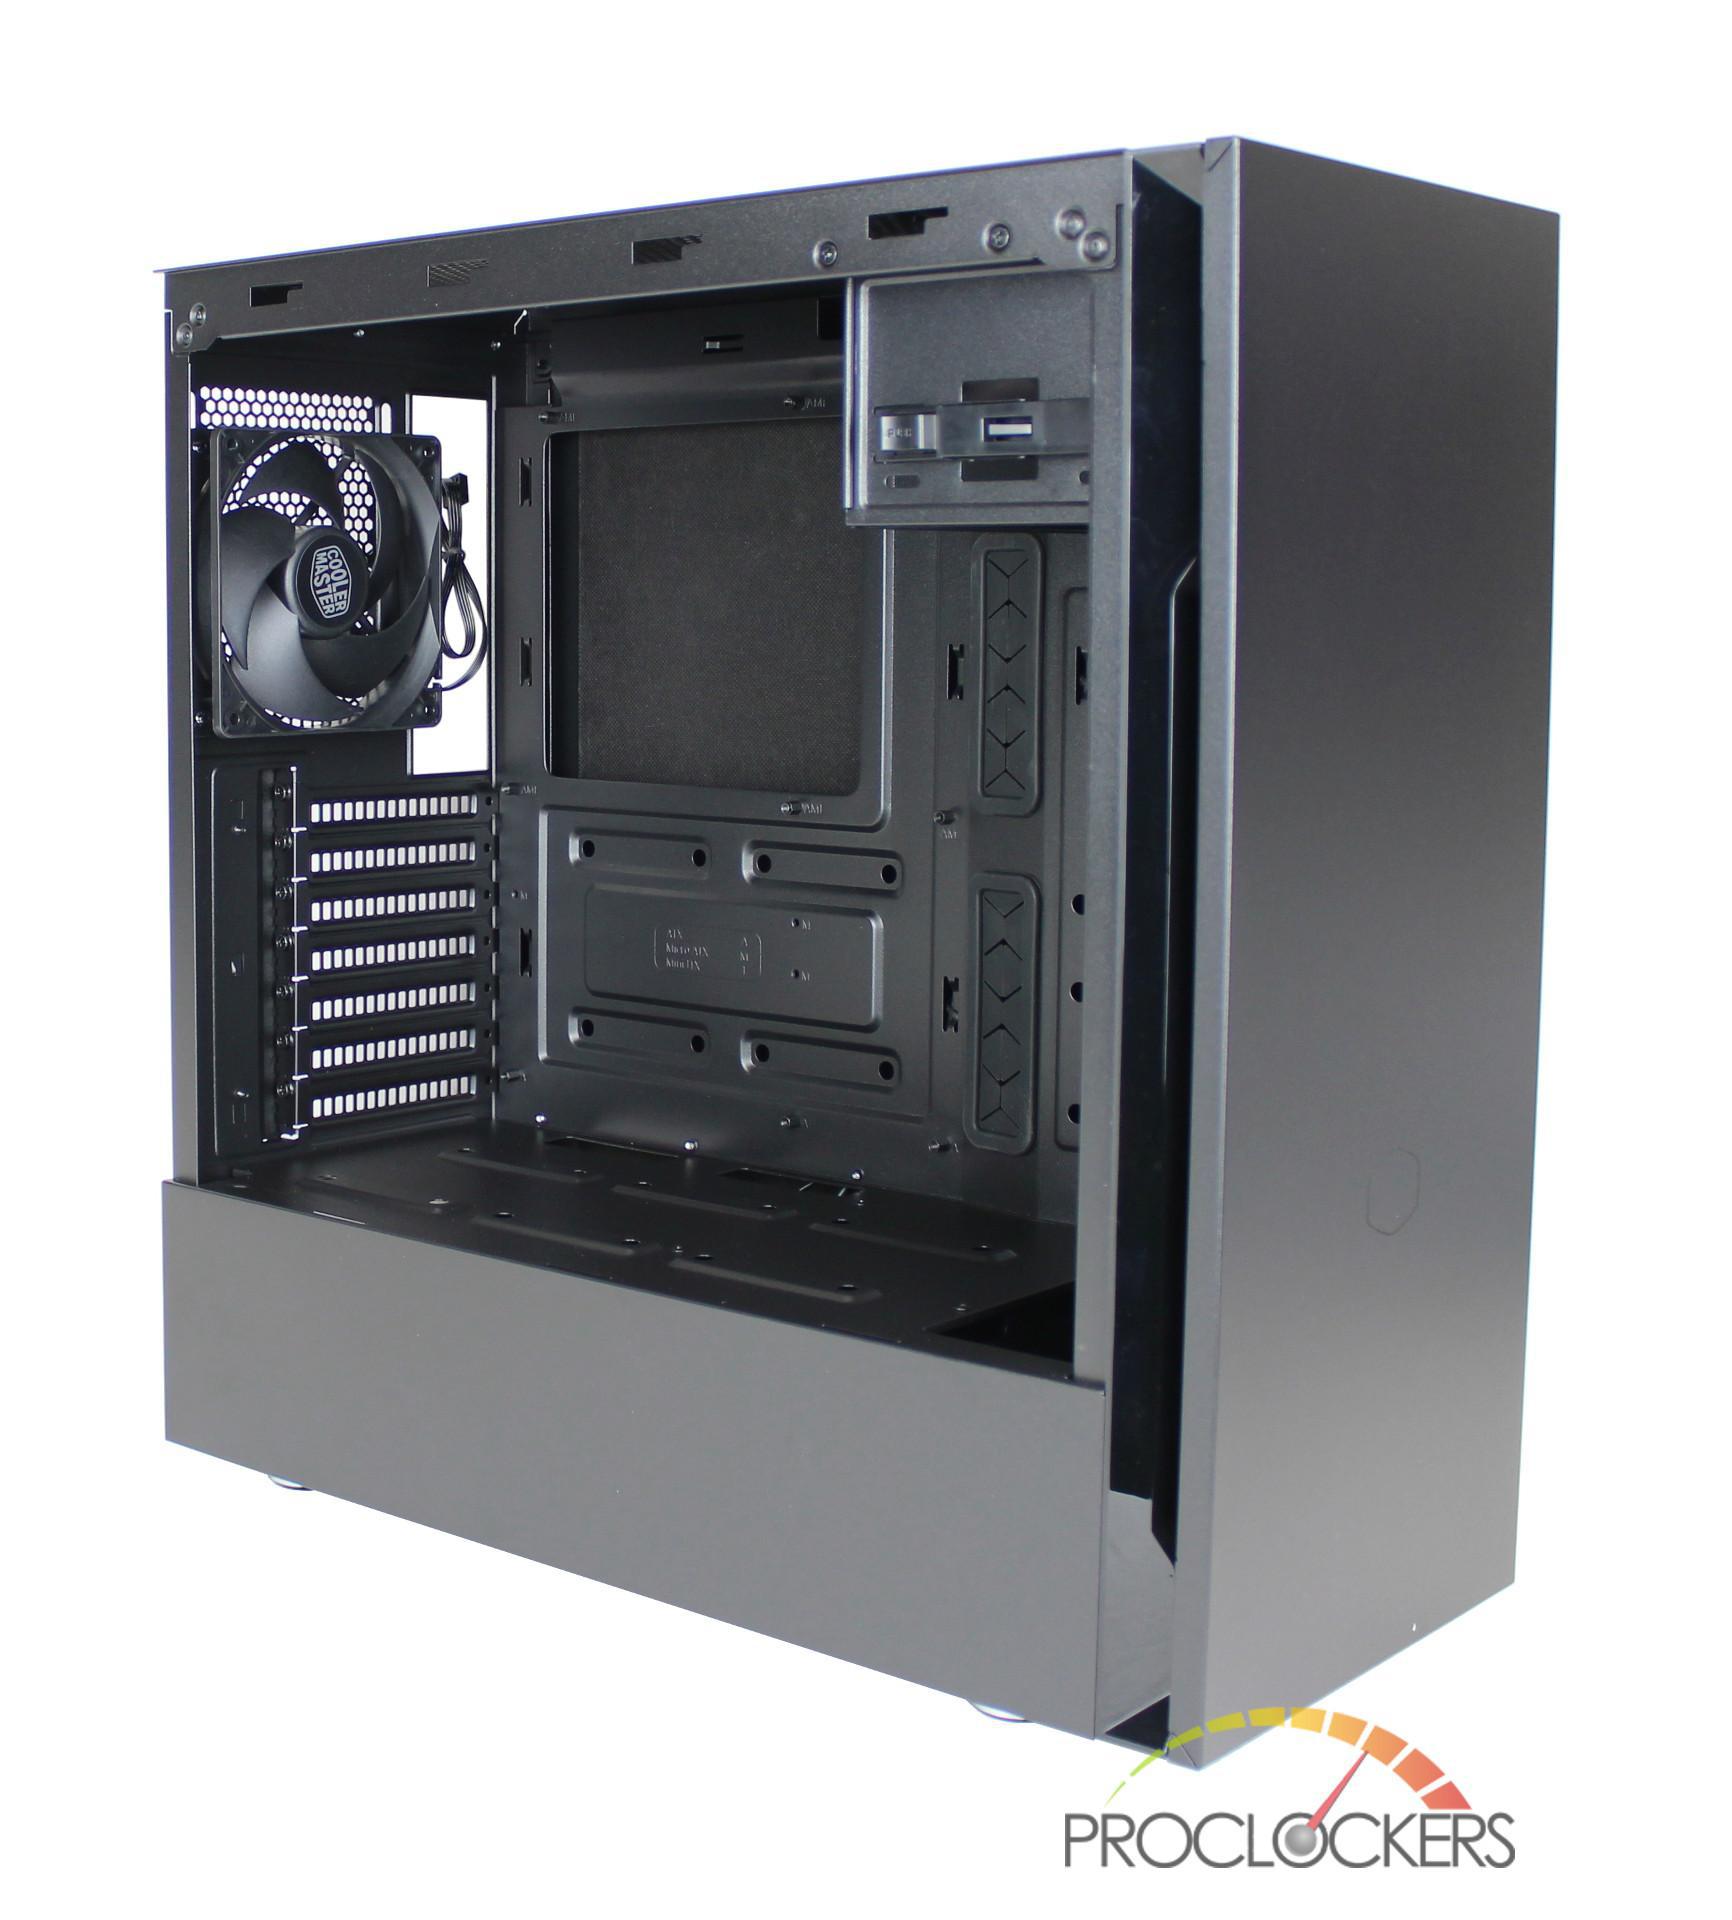
A Closer Look: Interior
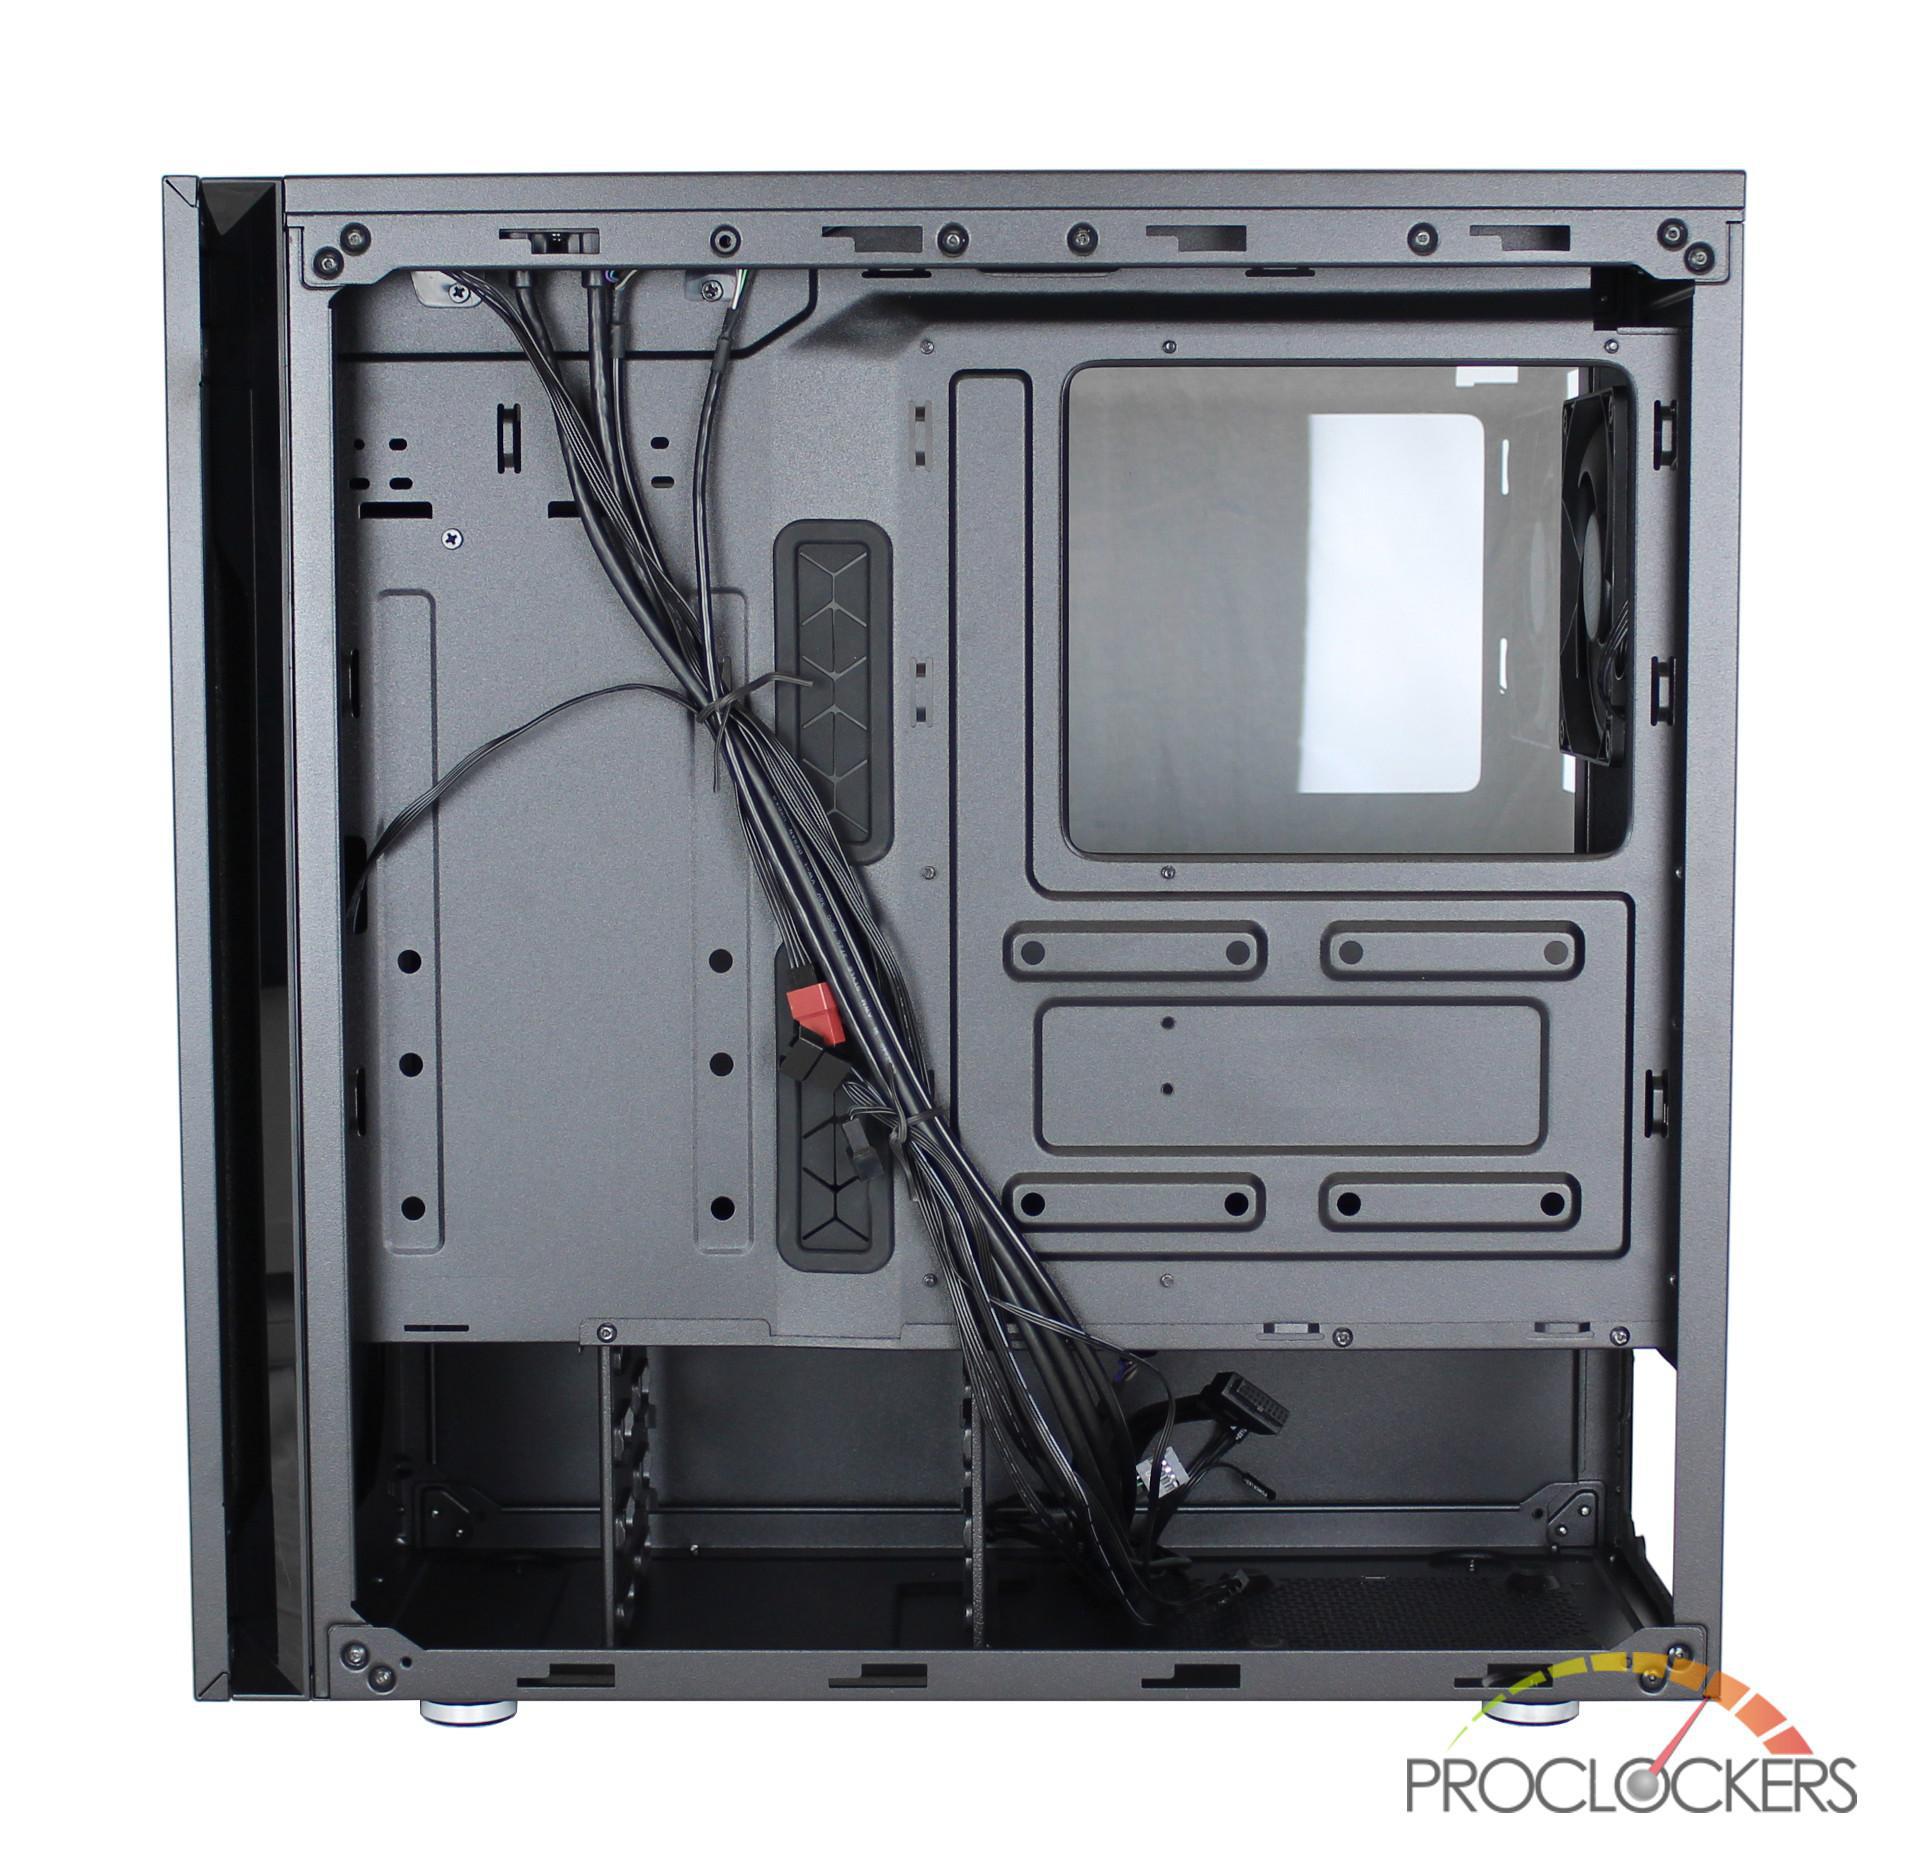
The black exterior has been continued to the interior which is also completely black. Looking to the motherboard tray, it has mounting points for various sizes of motherboards that include Mini ITX, Micro ITX, and ATX. For cable management, there are plenty of routing options around the motherboard tray with two grommeted cutouts to the right, two cutouts at the top, and two cutouts below on the PSU shroud. Looking to the upper right corner, there is a removable 5.25” drive with toolless installation brackets.
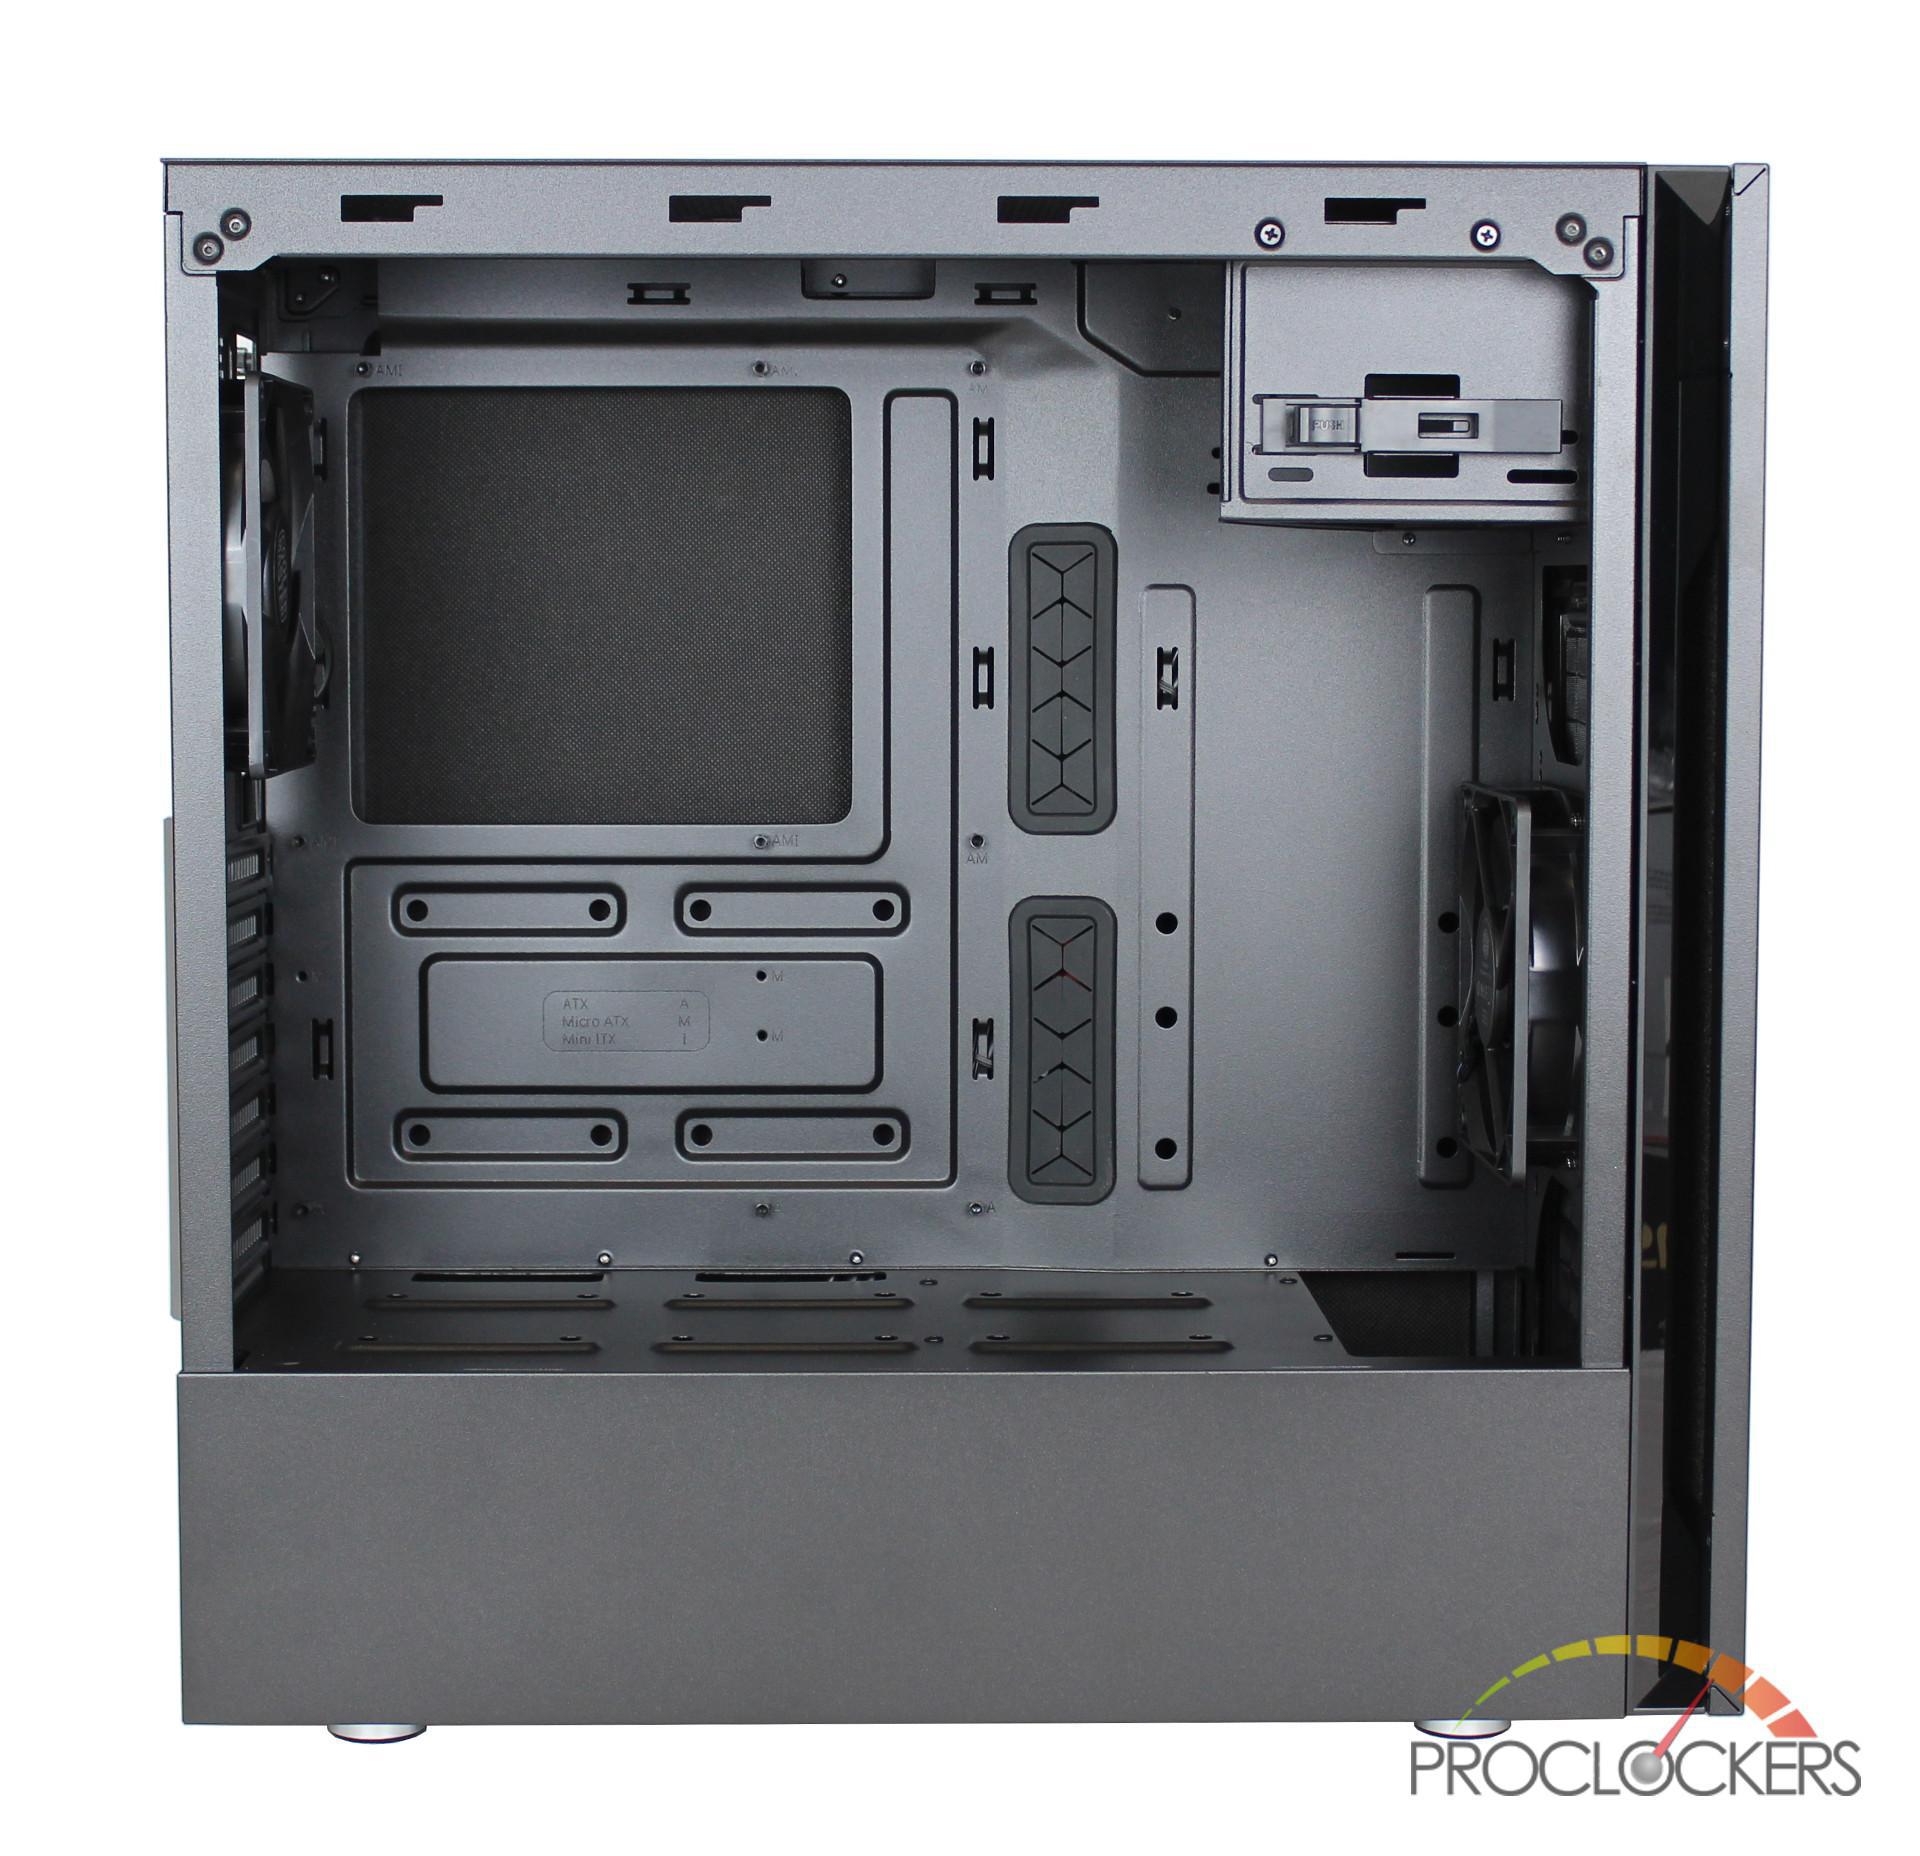
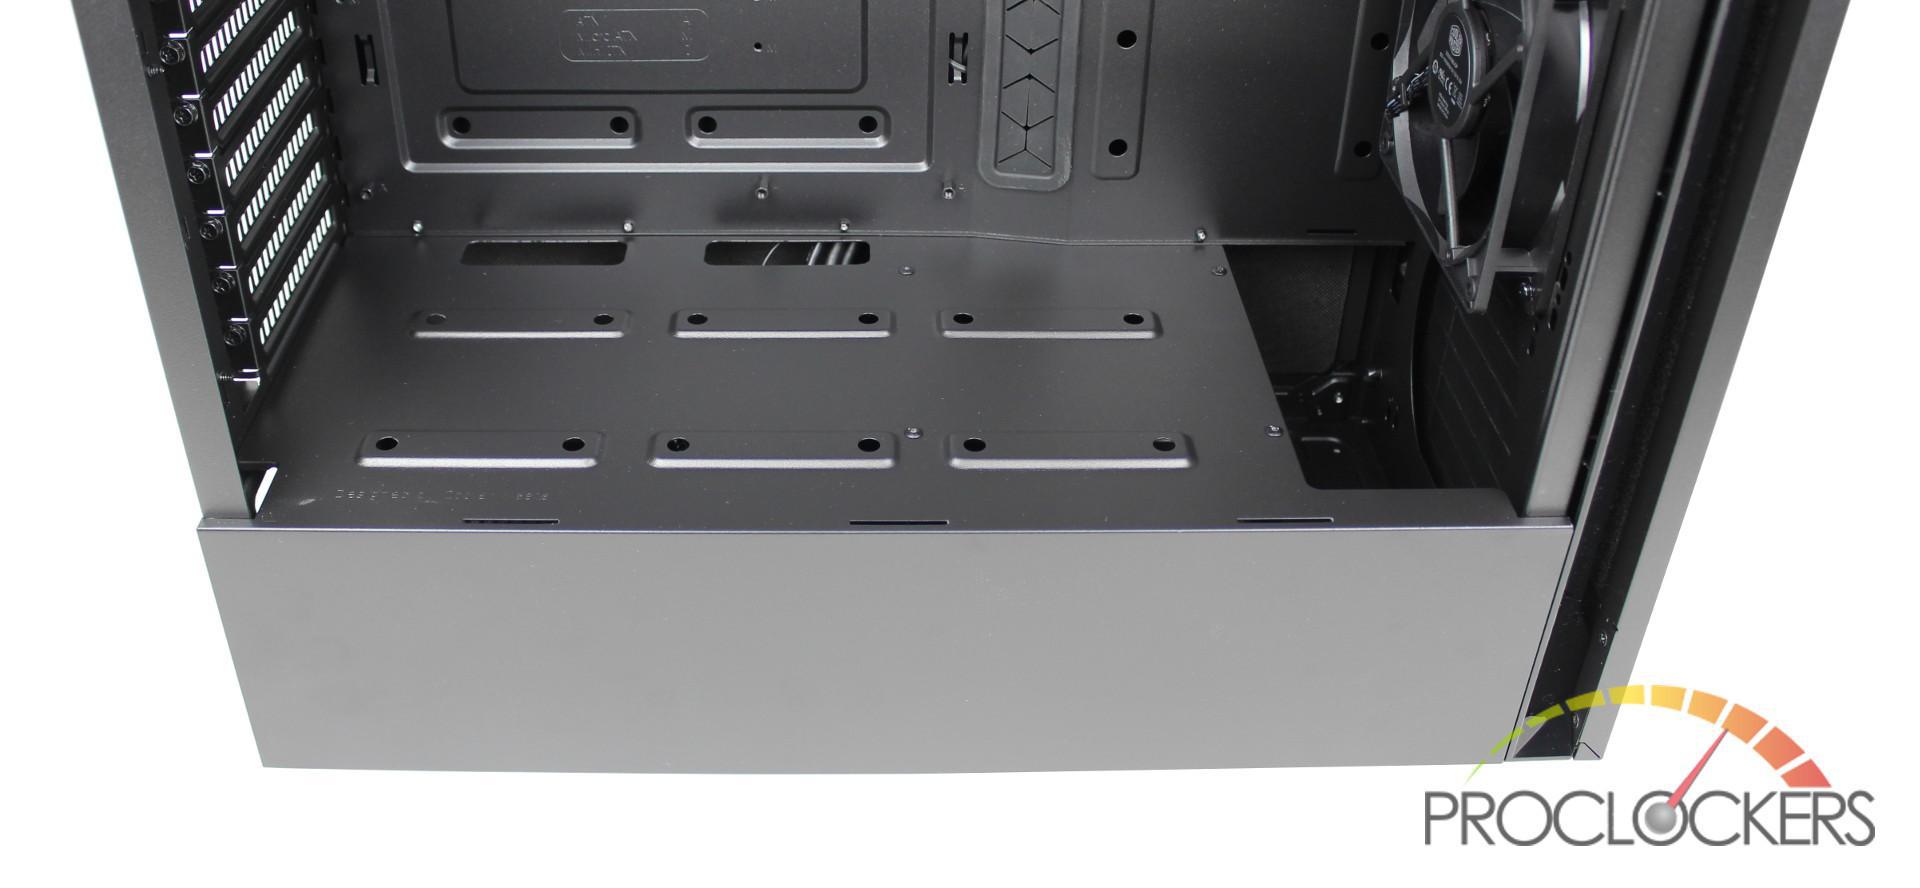
The S600 includes a full PSU shroud with three mounting points for 2.5” drives and has a large cutout on the right if you wish to install 240/280mm radiator at the front of the case.
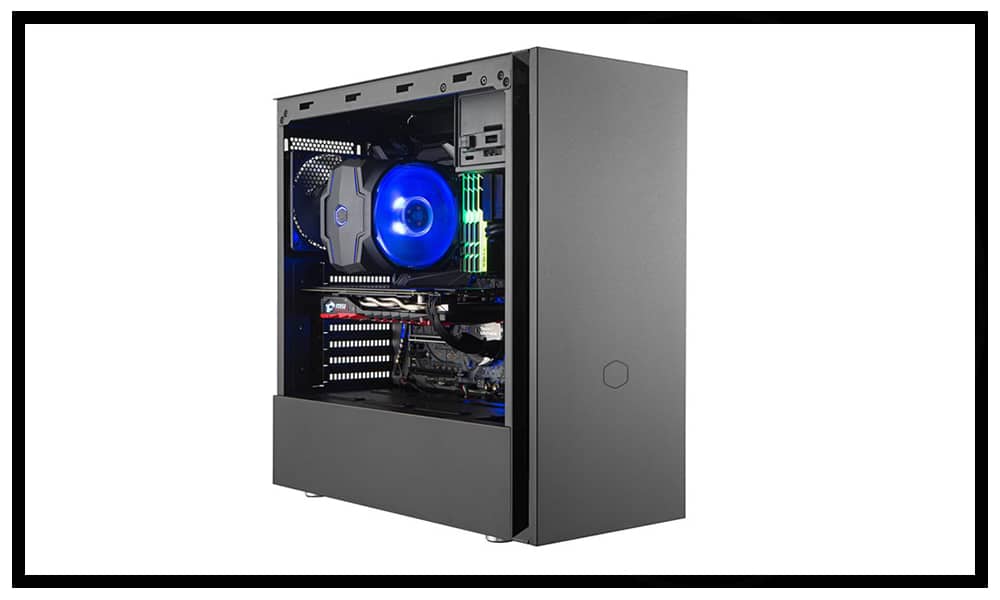
Toward the front of the case, we have a single installed Cooler Master Silencio FP 120mm fan with room to install another one below. It does look that at one point there was supposed to be a third mounting point for a fan at the top as there is a half cutout below the drive bay.
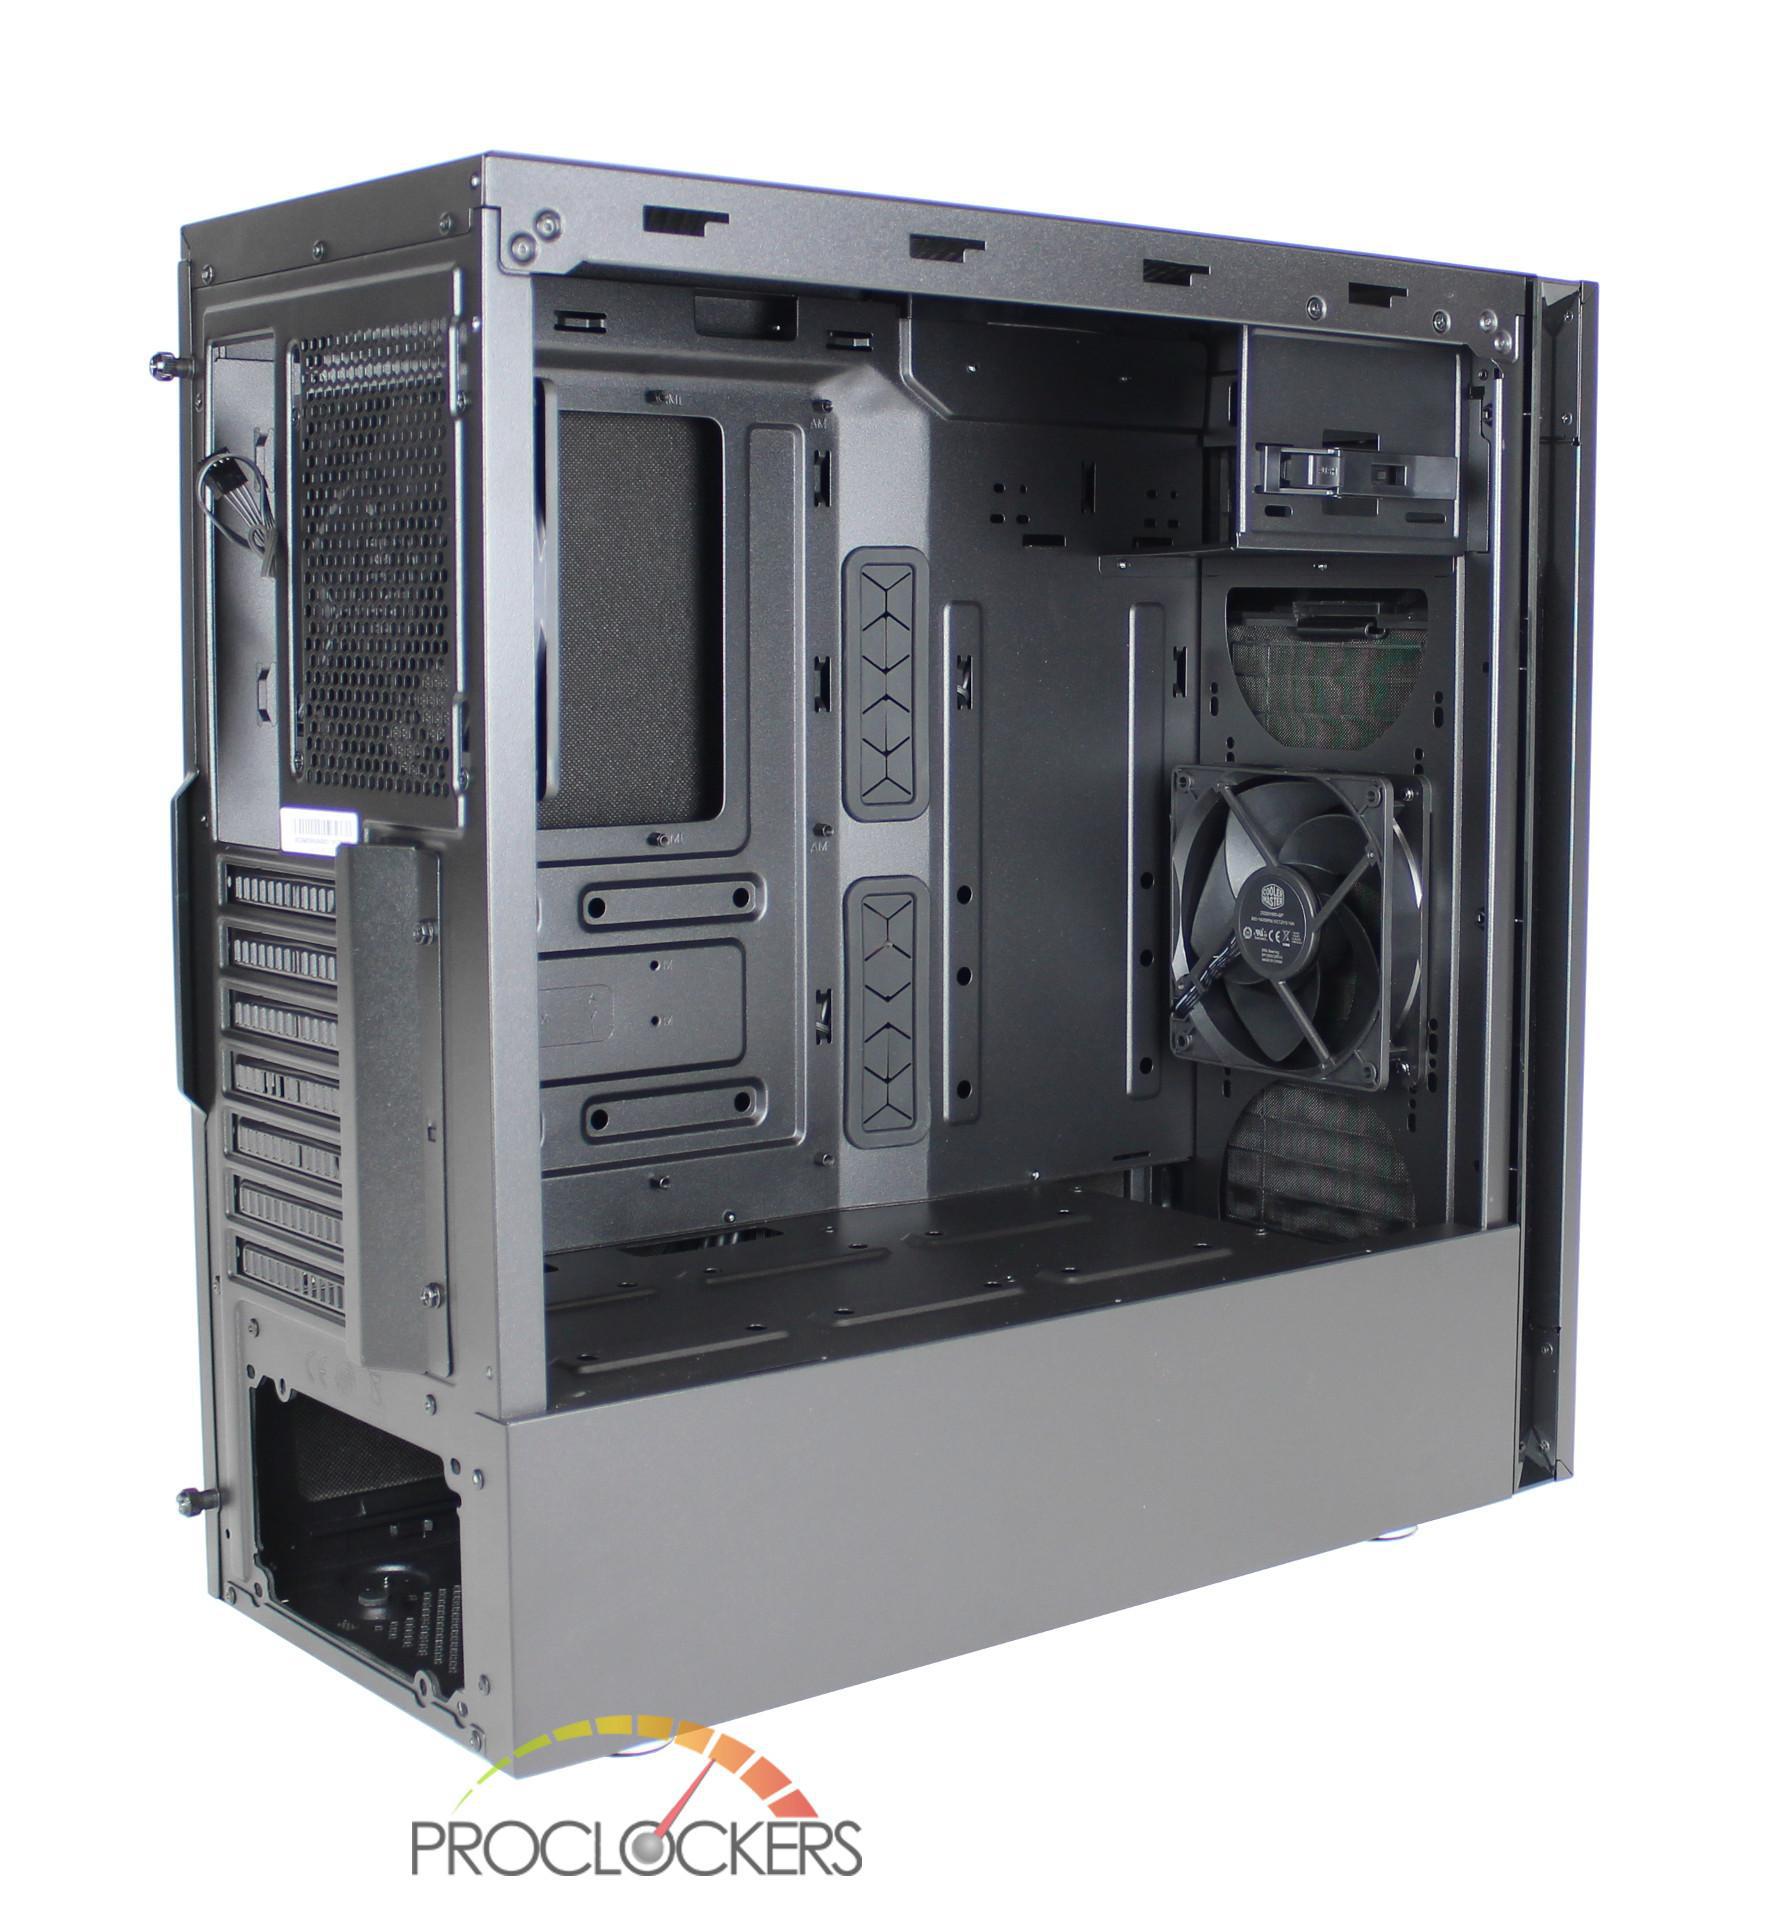
At the back is a second preinstalled Cooler Master 120mm fan as an exhaust.
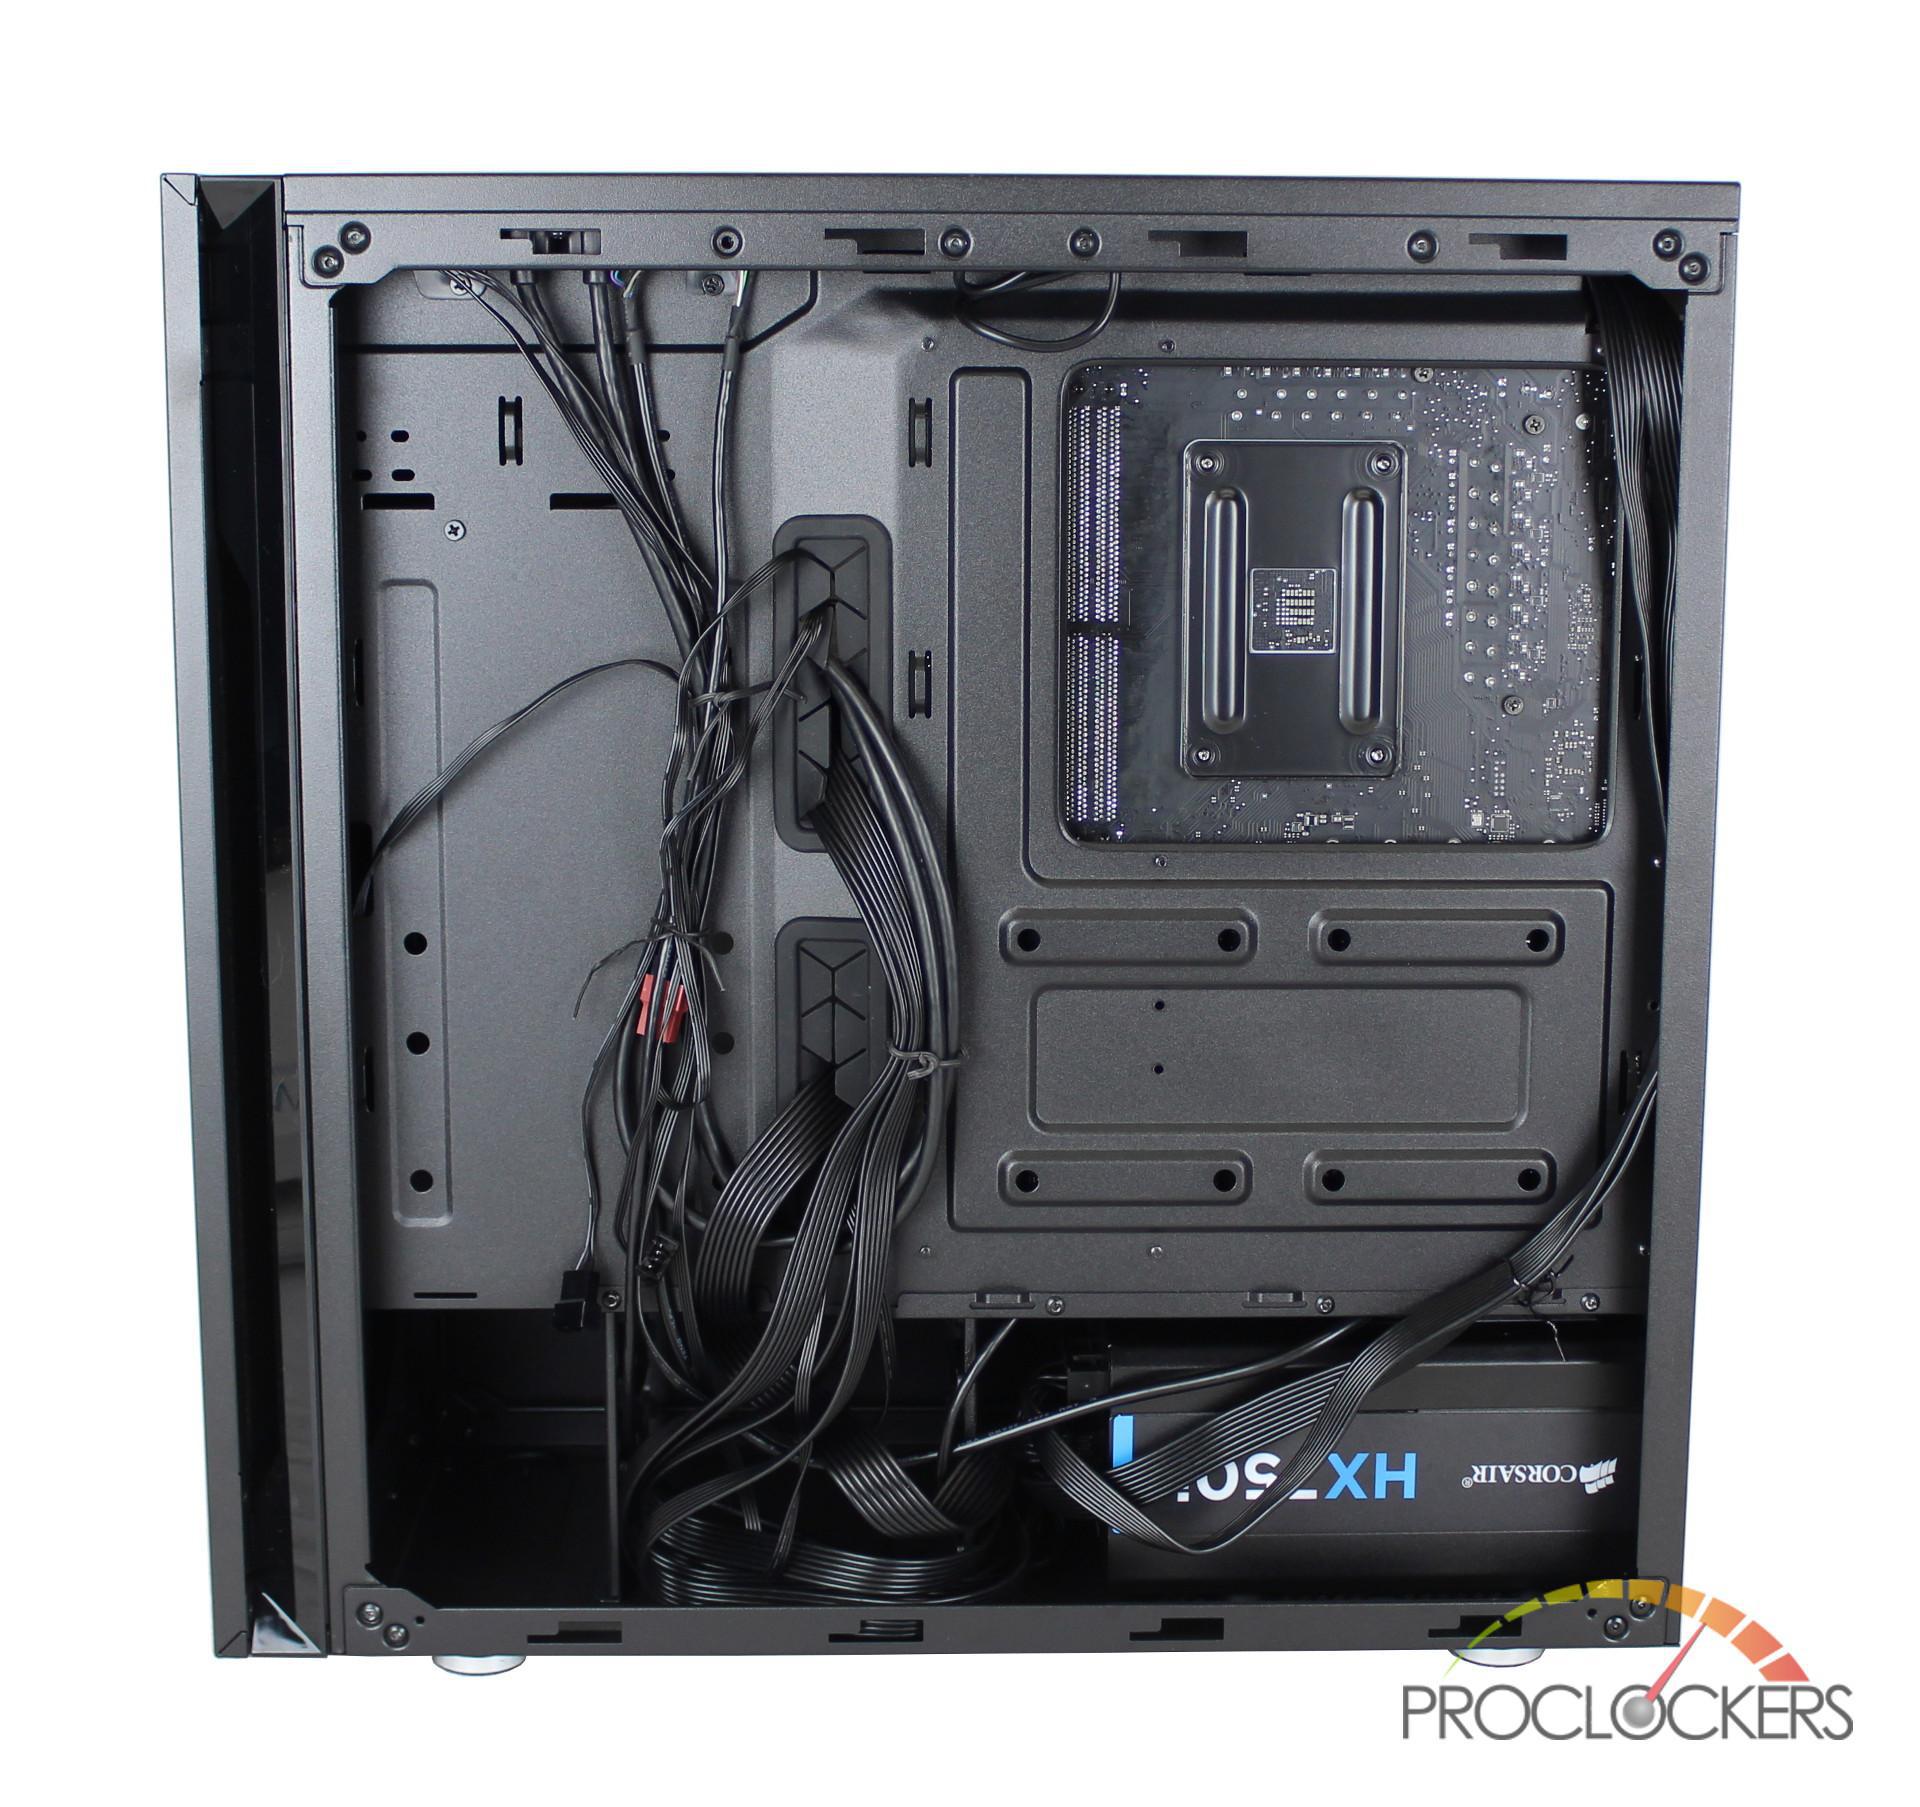
Moving to the back of the S600, when removing the steel panel, we find another sheet of sound dampening foam, which has been adhered to the back of the panel.
Now that the panel has been removed, we see the S600 has various cable tie-downs all around the motherboard tray and included two 2.5” drive mounting point located below the motherboard CPU cutout. Looking below the PSU shroud is a non-removable 3.5” drive bay that has room to install up to 3 drives with the included toolless drive sleds. Looking to the PSU section, the S600 only has room for a 180mm long PSU since the included drive bay cannot be removed.
System Build & Installation
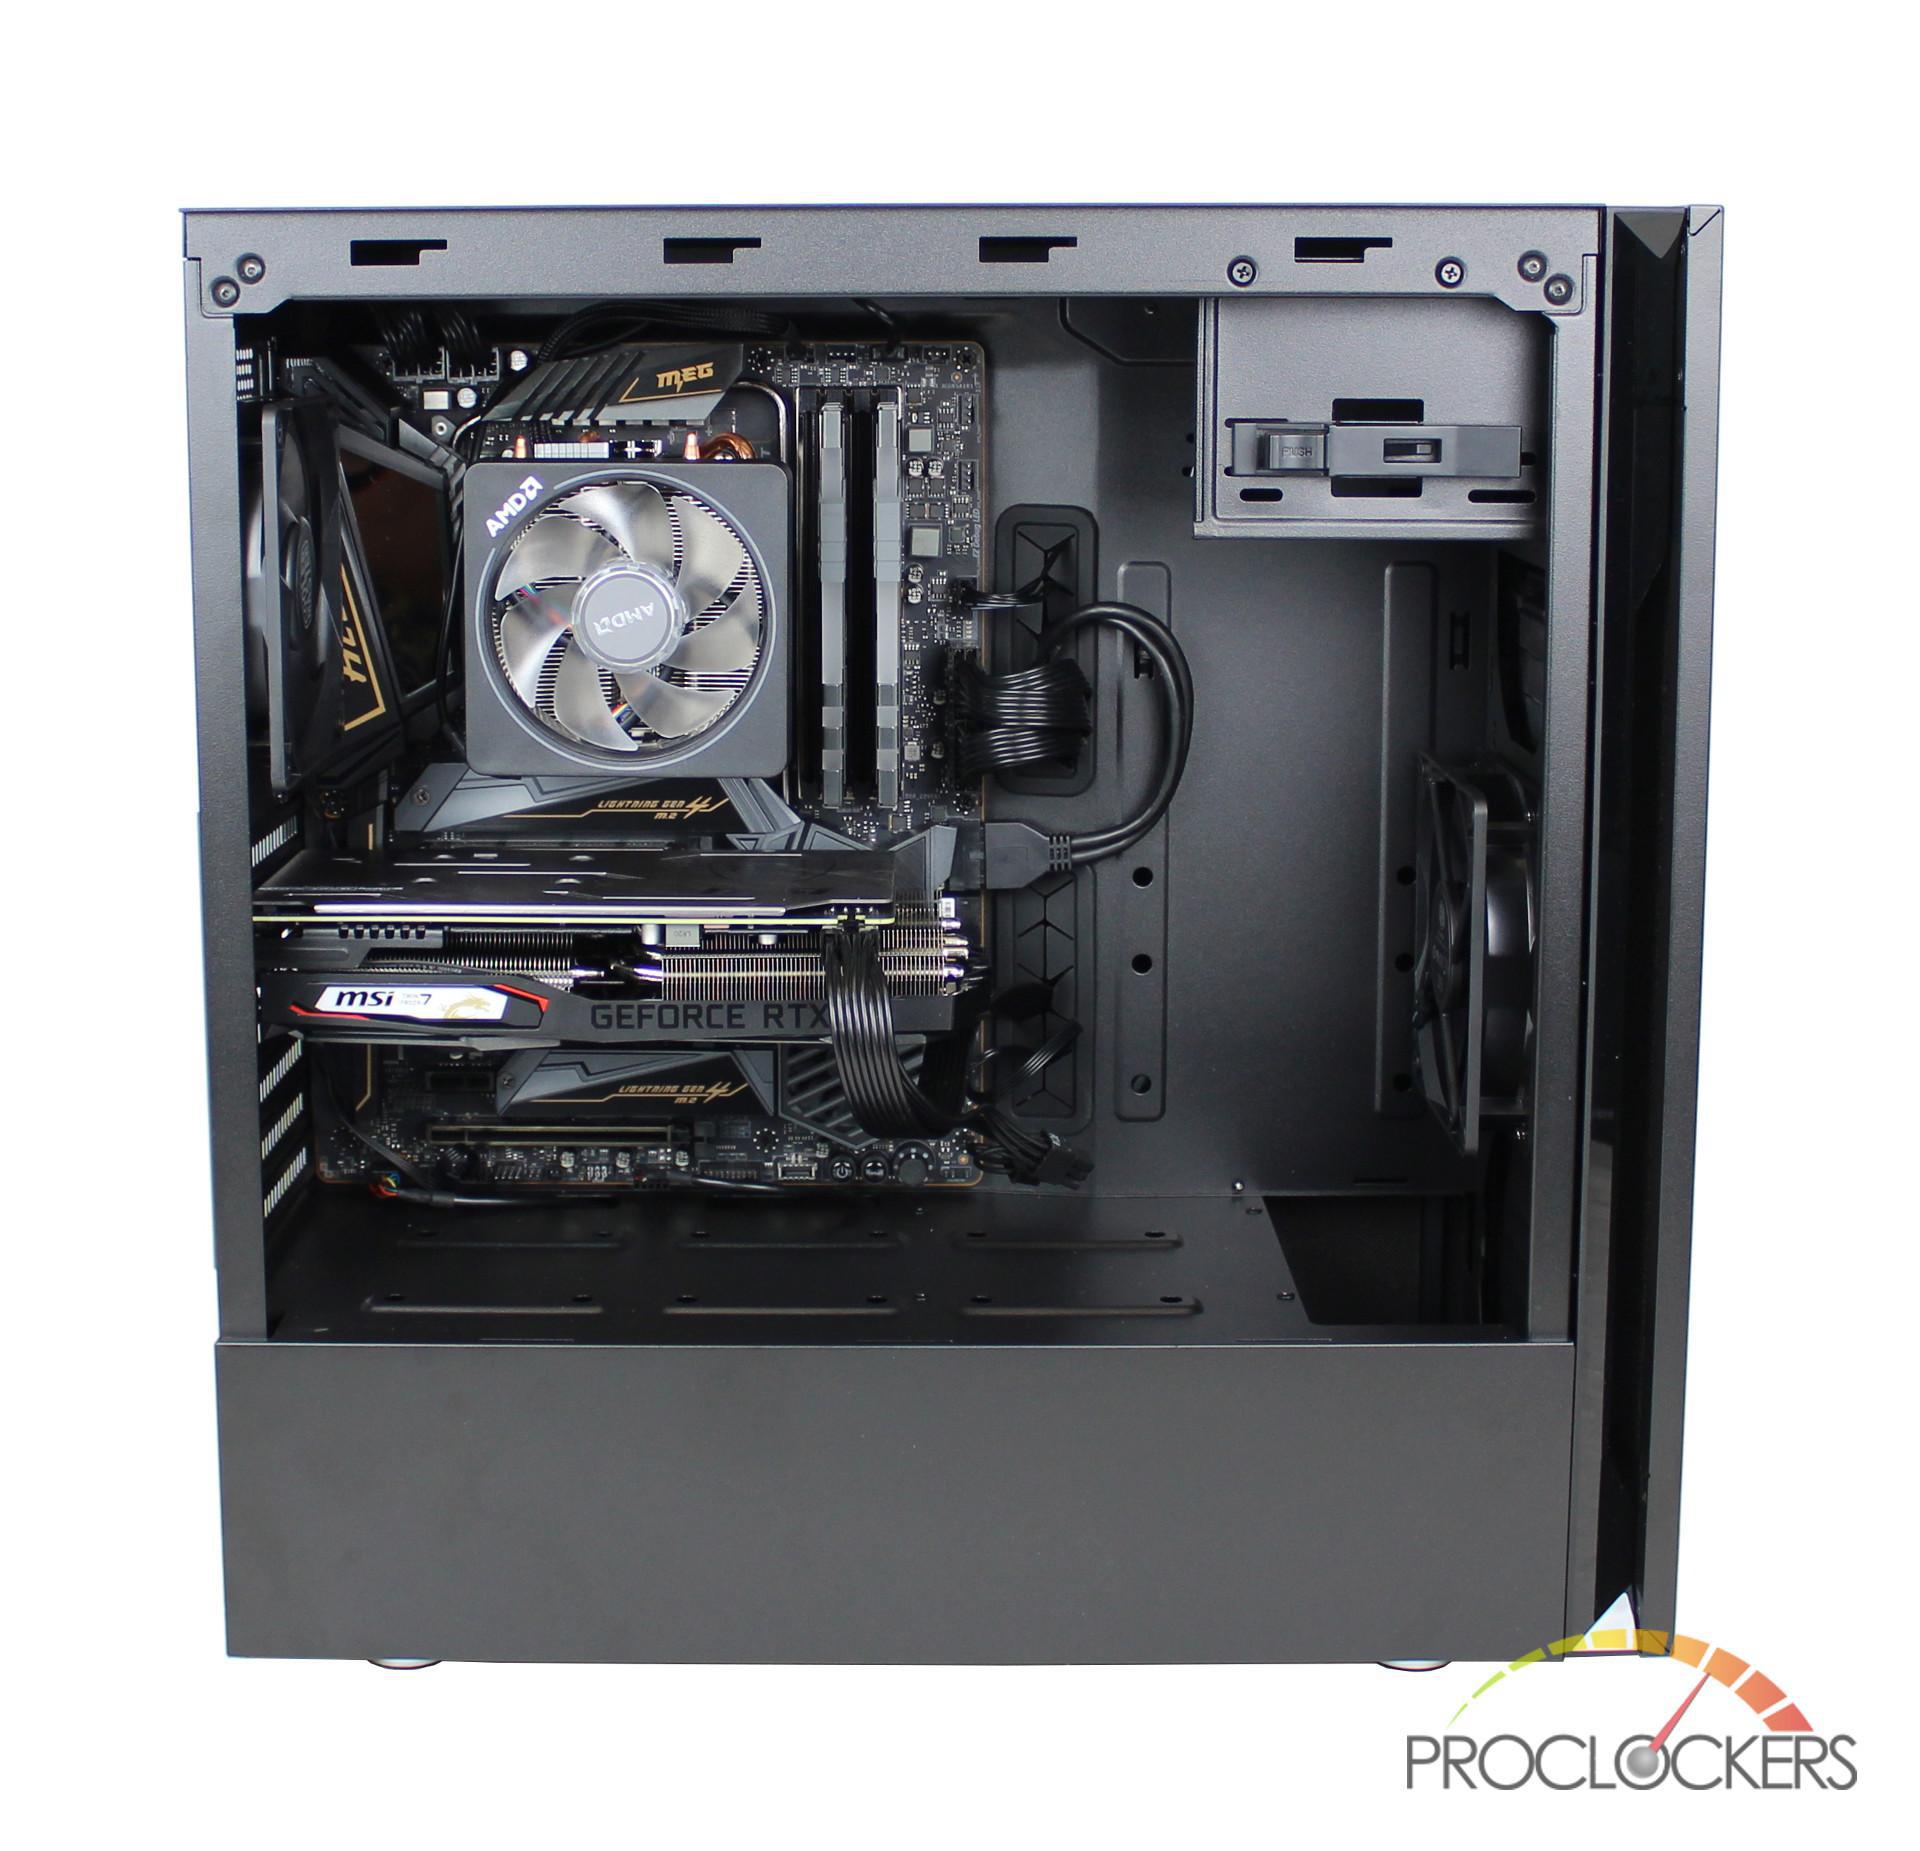
Below is a list of the hardware included in this build:
- MSI X570 MEG ACE
- Ryzen 3900X with Wraith Prism Cooler
- 2 x 8GB GeIL EVO X II 3600MHz DDR4 Memory
- MSI RTX 2060 Super Gaming X
- Corsair HX750i
- Crucial P1000 M.2 Drive
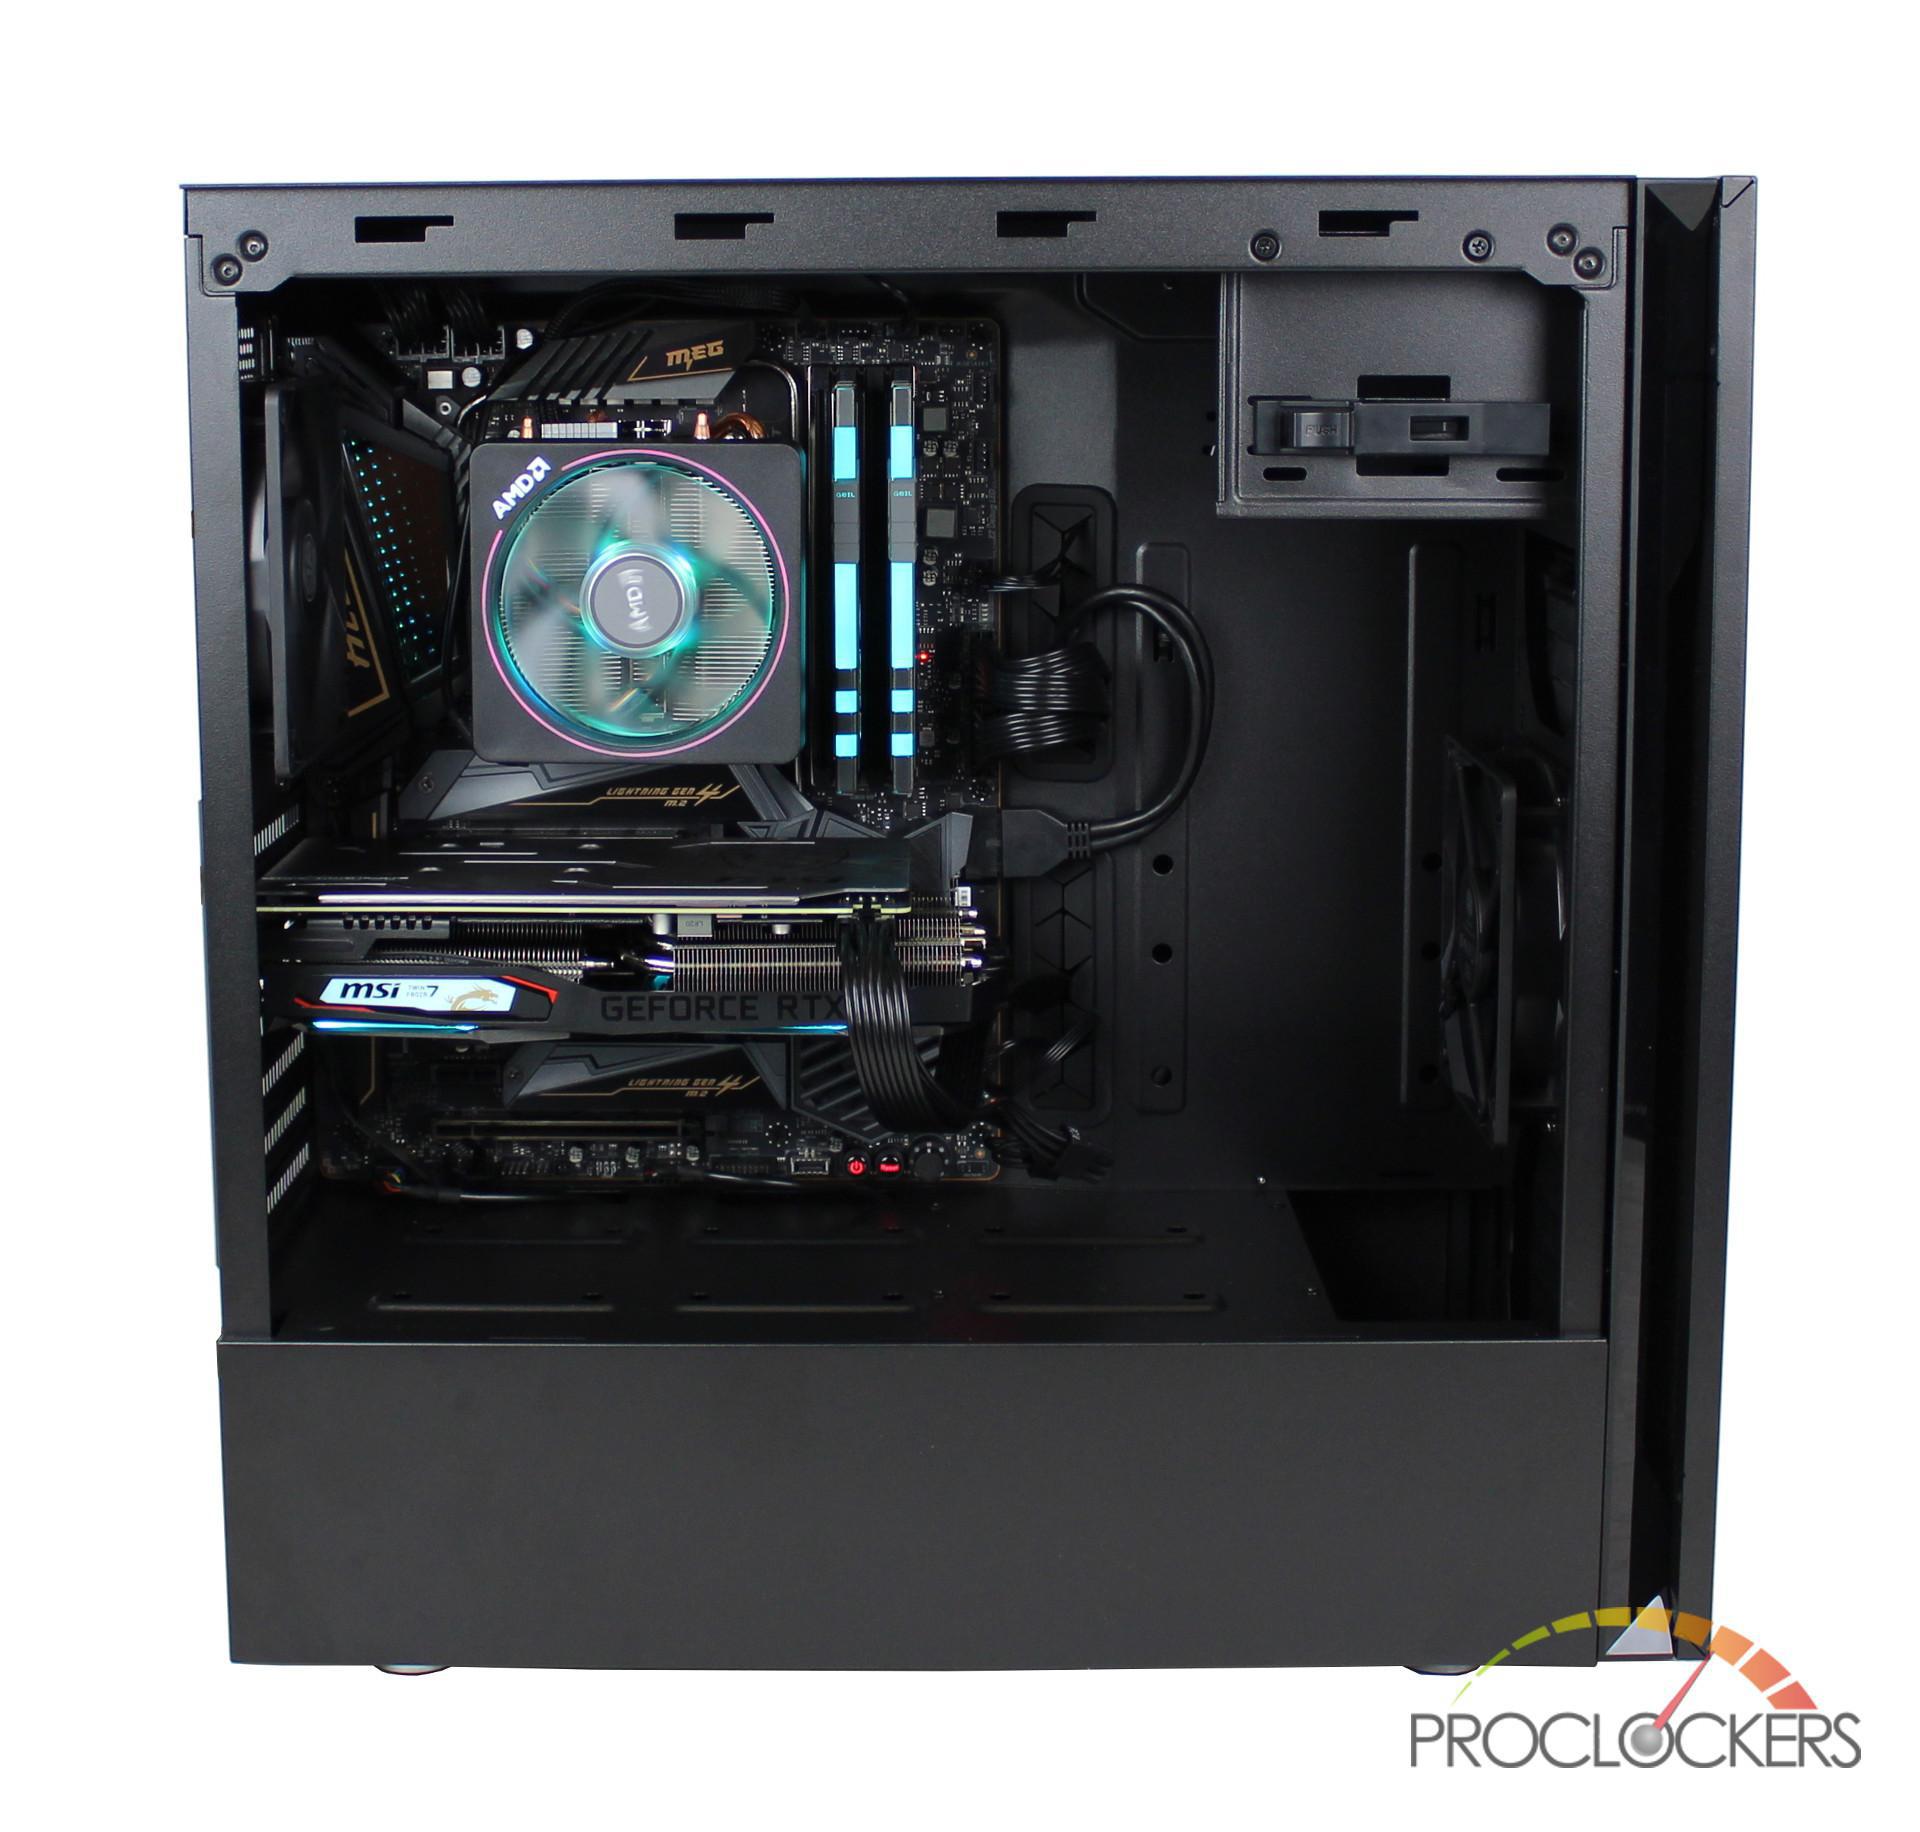
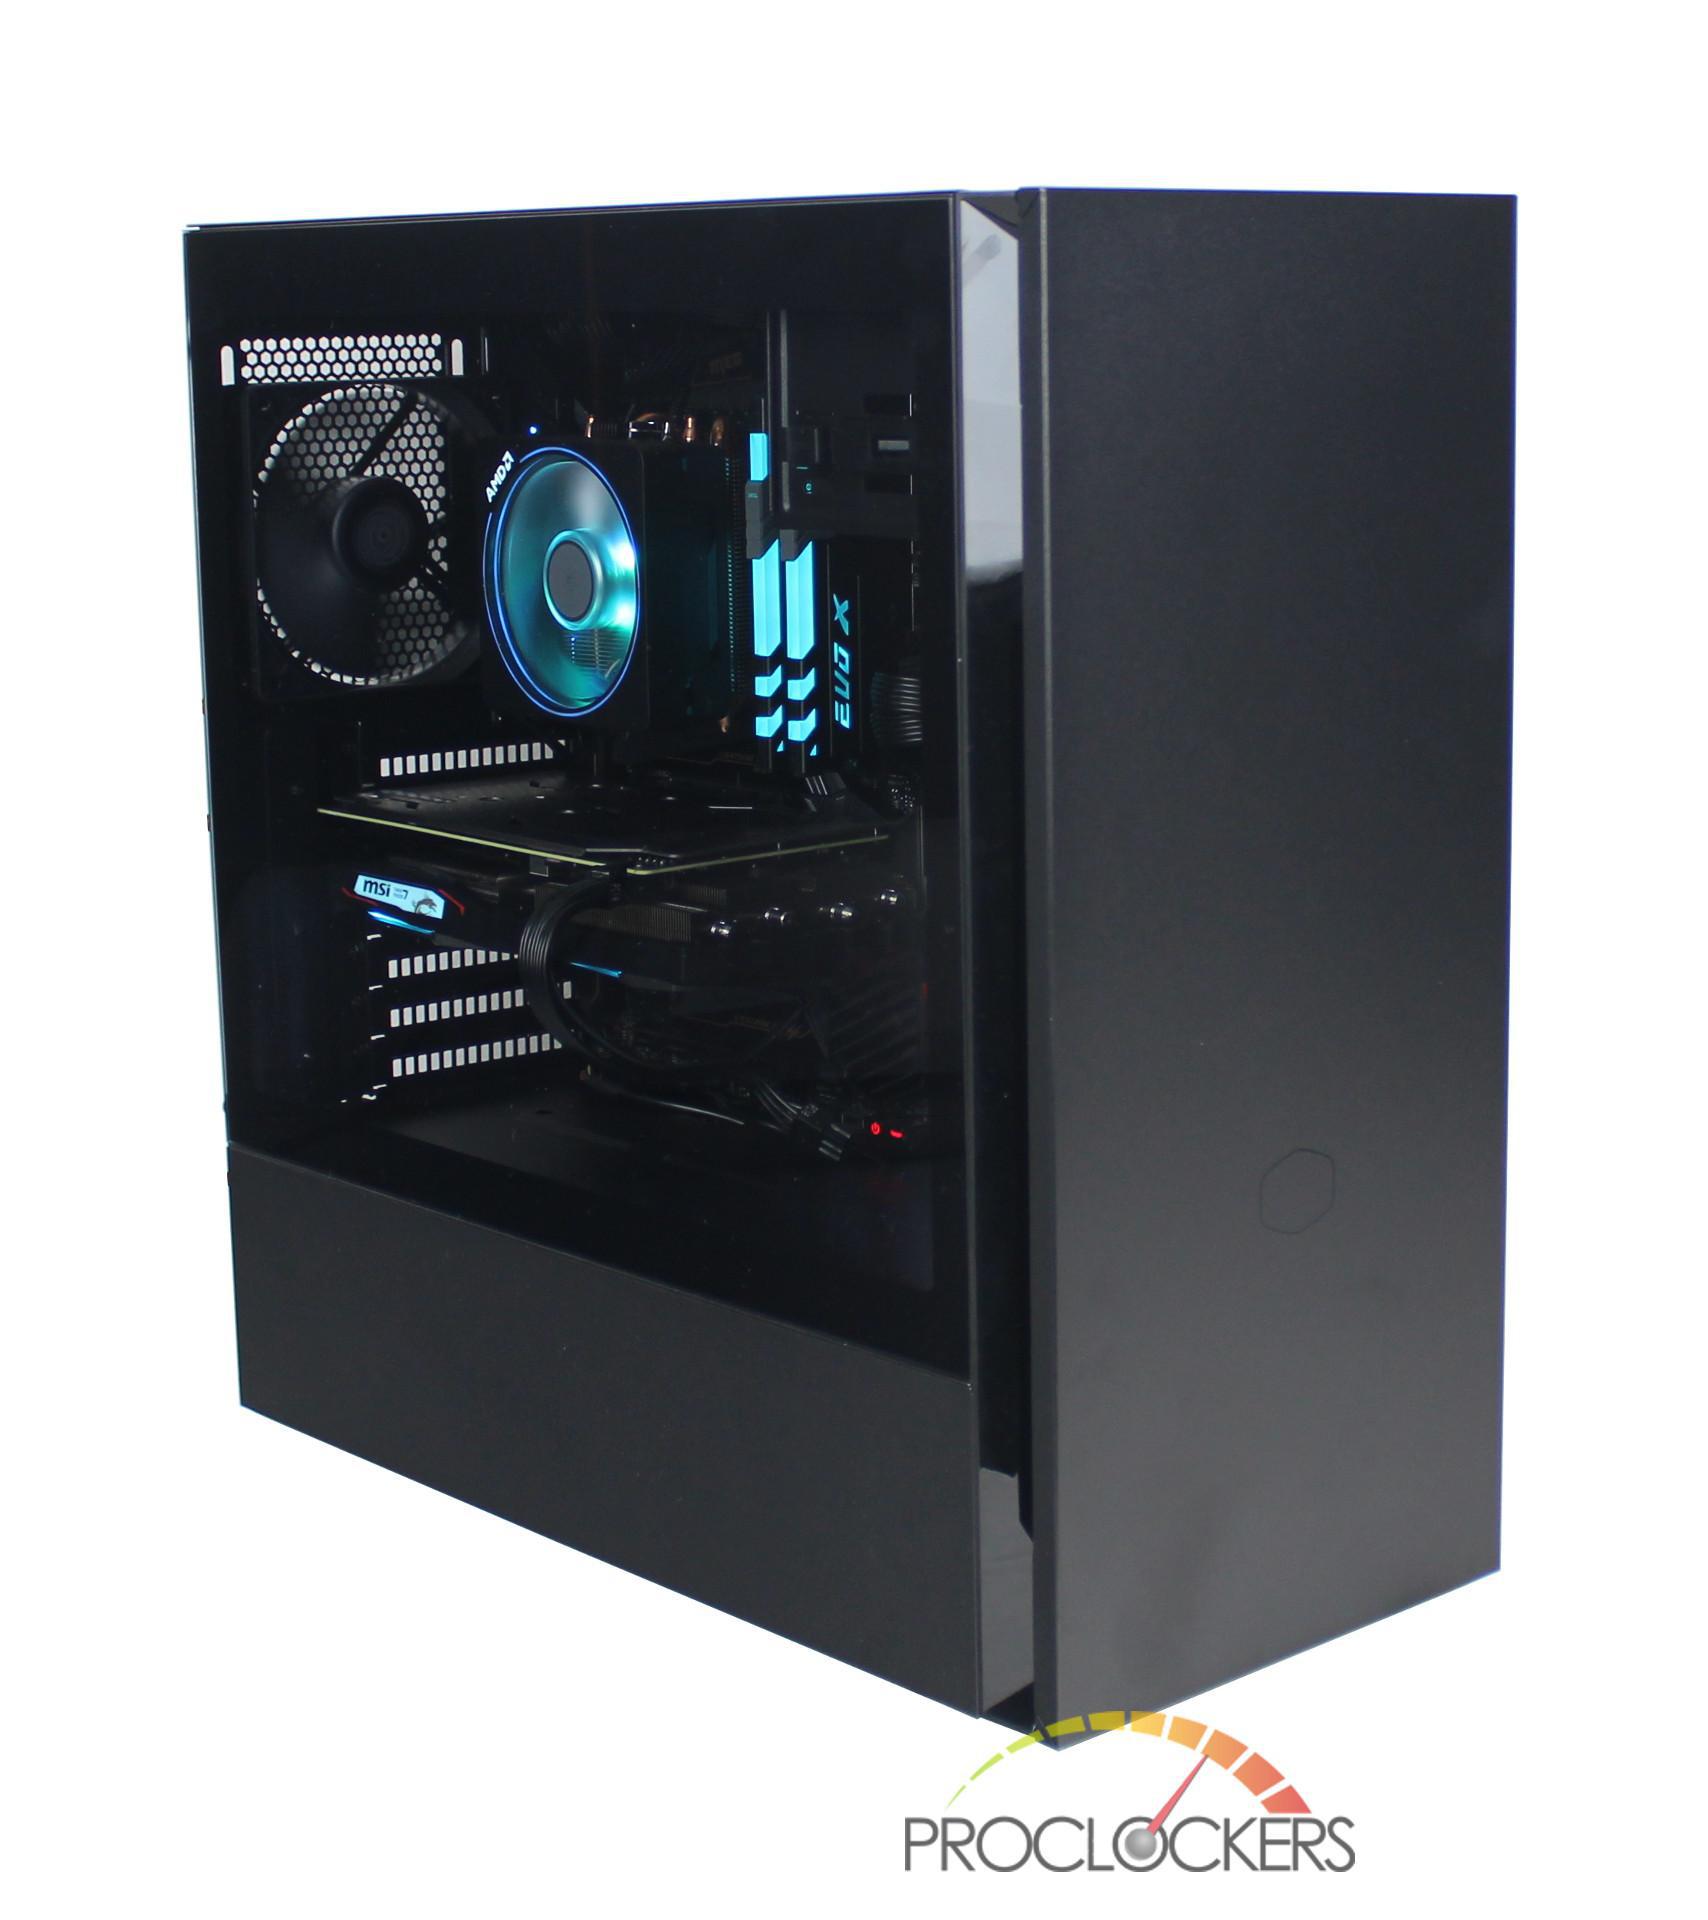
Installing my hardware into the S600 was fairly effortless and I had plenty of room to work when placing my components. Thanks to all the cutouts around the motherboard, running my cables was a breeze and I ended up with an extremely clean build. Out of the two panels I have with the S600, I really prefer the tempered glass so that I can see my build.
Once my build was completed, I did install the top and side steel panels so I could get a sense of how well the sound proofing was done on the S600. After putting my ear around the case, I was quite impressed at how silent the S600 was. With that said, I also did some load testing and found that both the CPU/ GPU became much hotter (around 10-15C) than in my previous build. If you are planning to run the S600 configuration it’s useable but I wouldn’t recommend overclocking the CPU or GPU. I would have to attribute this to the restricted airflow at the front of the case and only having a single intake fan. Even if a second fan was installing in the lower part, it still would provide great airflow and most of it would go under the PSU shroud.
I think if Cooler Master reworked the front of the case by either positioning the fan more inline with the components or remove the 5.25” drive bay and install three fans in the front, it would provide better airflow to lower temps. I did see a little improvement by installing the top mesh filter and would probably recommend this along with installing two more fans at the top of the case. Though by adding the mesh filter and fans, you’re no longer going to have a silent build that the S600 advertises.
Moving to the back of my build, I was able to keep it fairly clean thanks to all the included tie-downs and cutouts in the S600. The only issue I ran into was installing my HX750i PSU into the PSU bay. Since this PSU is on the edge of the maximum allowed length with the cables preinstalled, I really had to wiggle it in. This could have been easily fixed with the 3.5” drive bay was removable and not riveted to the case.
Final Thoughts & Conclusion
My overall experience building in the S600 was quite positive and it went pretty much without a hitch. The S600 had plenty of space to work with and it was extremely easy to create a clean build thanks to the various cutouts/tie-downs. The only real issue I ran into was installing my PSU in the somewhat small PSU bay. This could have been a non-issue if I was able to remove the included 3.5” drive bay that is riveted to the case.
The overall aesthetic of the S600 is extremely clean and in my option looks amazing. I also like that the S600 has the option for either a tempered glass or steel side panel door depending on your preference. Personally, I prefer the tempered glass so that I can show off my components as well as the RGB on the hardware.
One of the big marketing points of the S600 is the effort into making the case as silent as can be. In my testing, the S600 did a great job at not making any noise and even with your ear up to the case it’s barely audible. Though this silence comes at a price as with my build, all my components ran about 10c – 15c hotter than they did in its previous case. I attribute this to the poor airflow at the front of the case which has only a single intake fan. I think this could be mitigated if the front of the case had room for three fans or the current fan mounting points moved more in line with the hardware. Due to this issue, I wouldn’t recommend any overclocking unless you install the top mesh filter with 2 additional fans. Doing this would take away the silent feature of the case which is one of its main selling points.
Overall, the S600 looks great, was easy to build in, and is pretty much inaudible but falls short keeping your components cool. Even though I do love silent builds, the S600 wouldn’t work for me as I like to push my hardware to its limits. That said, if you’re not going to overclock your hardware and looking for a case designed for silence, the S600 is a viable option.


The 25 Best Anime Cats, Ranked
What are the best anime cats? Cats are something you either love with every fiber of your being or vehemently...


The 25 Best Anime Teachers, Ranked
Who are the best anime teachers? With high school being such a prevalent setting in anime, it makes sense that...


The 25 Best Orange Hair Anime Girls, Ranked
Who are the best orange hair anime girls? Orange hair is interesting in anime because it can either be a...