
Hardware
Corsair Crystal Series 680X RGB Case Review
Introduction
Corsair’s Crystal Series of cases have been a staple for builders and is well-known for including multiple tempered glass panels enabling you to see every aspect of your PC.
The newest addition to this popular line is Corsair’s 680X RGB which sports three tempered glass side panels, a high-airflow design, and dual-chamber design. Other standout features include a magnetic hinged side panel, vertical GPU mount, Lighting Node PRO controller, and three pre-installed LL120 fans. With the inclusion of the LL120 fans and the Lighting Node controller, it is no surprise that the 680X commands a slightly higher price tag over other cases from the Crystal Series lineup with an MSRP of $259.99.
We would like to thank Corsair for providing us with the 680X RGB to review.
About Corsair
Founded in 1994, Corsair started by making Level 2 cache modules for OEMs. After Intel incorporated the L2 cache into the processor, Corsair refocused and started making DRAM modules. Fast forward to 2018, and they have become one of the leading names in the high-end PC industry. Over the years, with their groundbreaking technology and innovation, they have expanded their line of products to include high-performance memory, ultra-efficient PSUs, cases, PC and CPU cooling solutions, SSDs, keyboards, mice, and headsets.
Features & Specifications
Notable Features:
Technical Specifications:
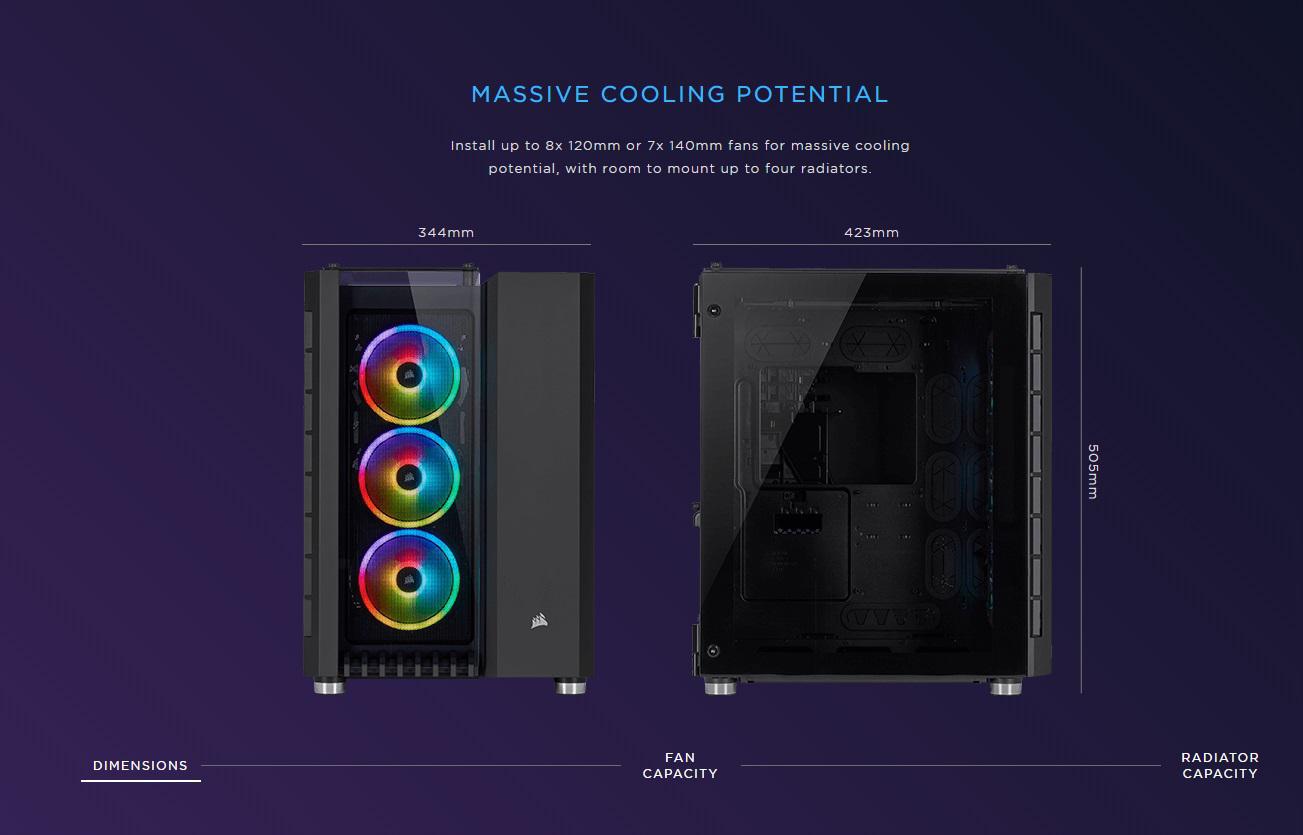
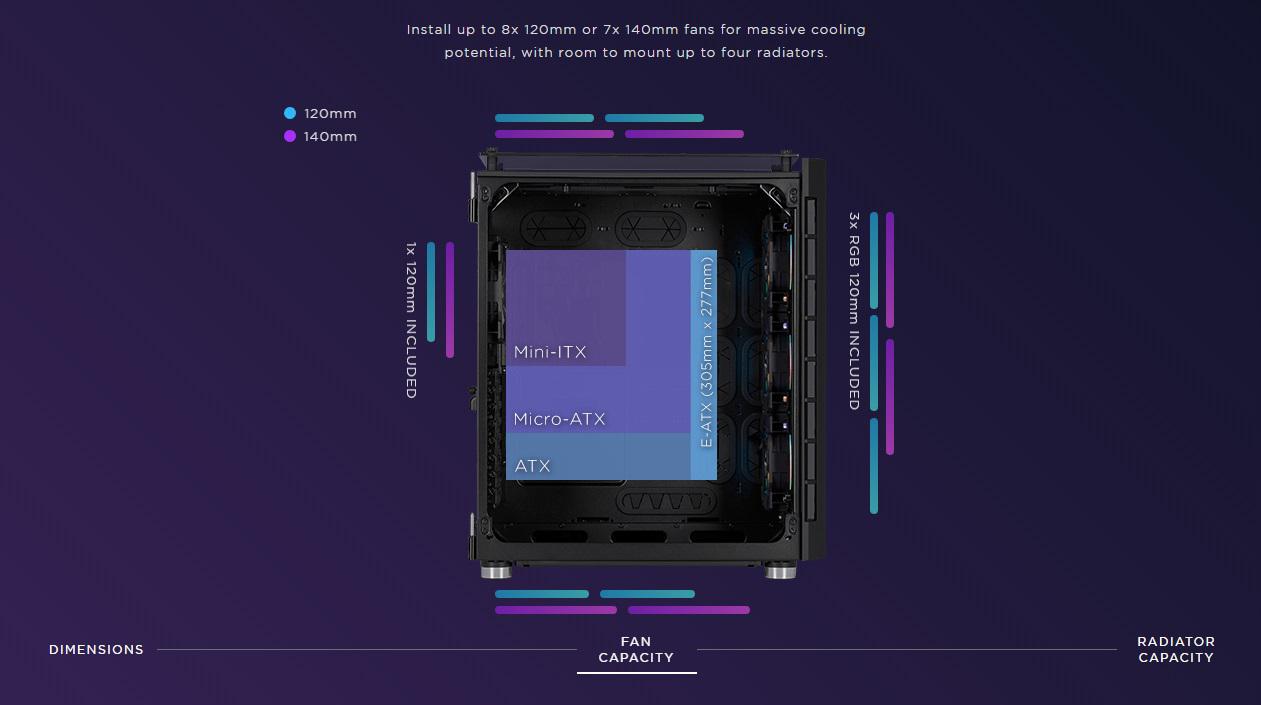
| Case Dimensions | 423mm x 344mm x 505mm |
| Maximum GPU Length | 330mm |
| Maximum PSU Length | 225mm |
| Maximum CPU Cooler Height | 180mm |
| Case Expansion Slots | 8+2 vertical |
| Case Drive Bays | (x3) 3.5in (x4) 2.5in |
| Case Form Factor | Mid-Tower |
| Case Windowed | Tempered Glass |
| Case Warranty | Two years |
| iCUE enabled | Yes |
| Case Material | Steel, Tempered Glass |
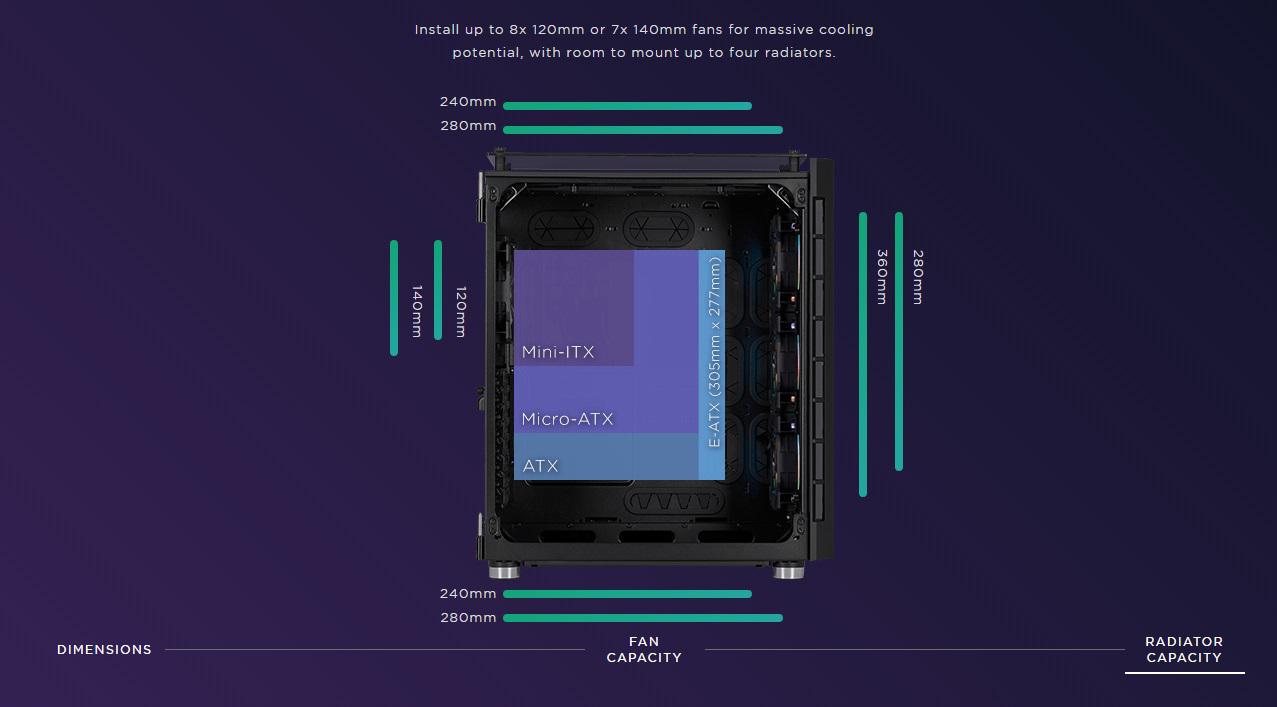
| Radiator Compatibility | 120mm, 140mm, 240mm, 280mm, 360mm |
| Compatible Corsair Liquid Coolers | H55, H60, H75, H80i, H90, H100i, H105, H110i, H115i, H150i |
| Case Power Supply | ATX (not included) |
| Weight | 11.58kg / 25.53lbs |
| Lighting | RGB |
| Case Drive Bays 3.5″ | 3 |
| Case Drive Bays 2.5″ | 4 |
Packaging & Unboxing
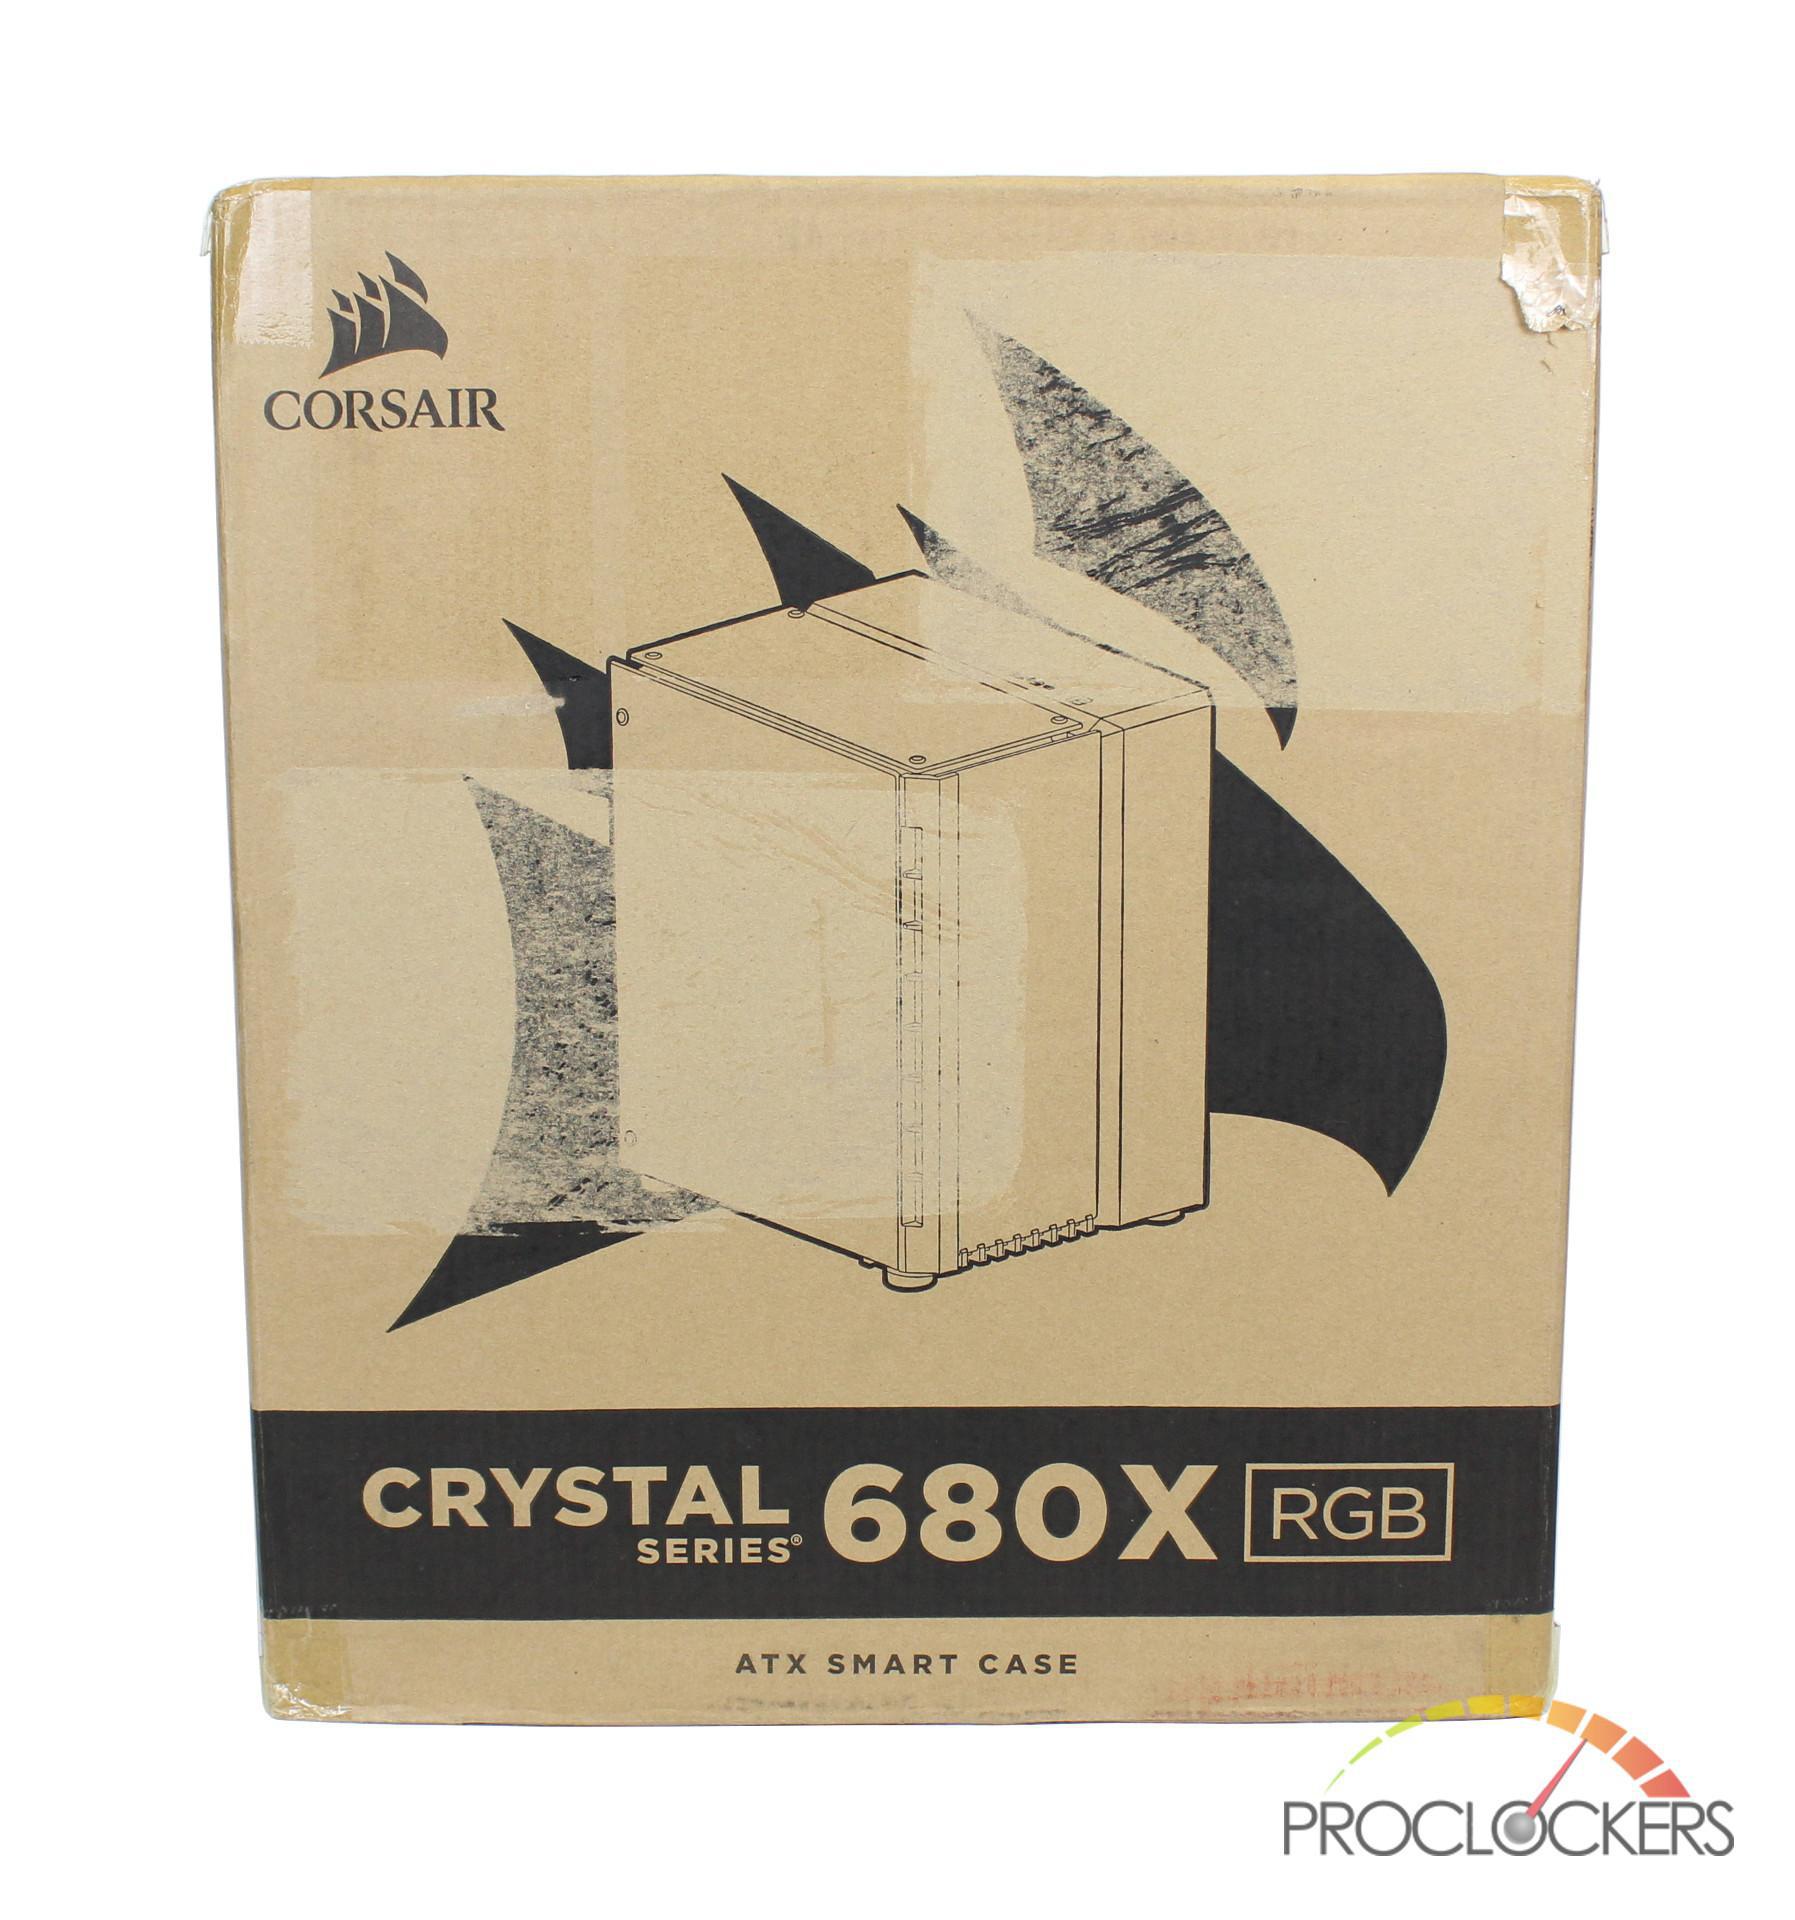
Corsair’s 680X RGB arrives in a large box (425mm x 500mm x 584mm) that has some heft to it weighing in at just above 25 lbs. On the front of the box, we are presented with a profile shot of the 680X with some Corsair branding in the upper left corner and another enlarged logo behind the case drawing.
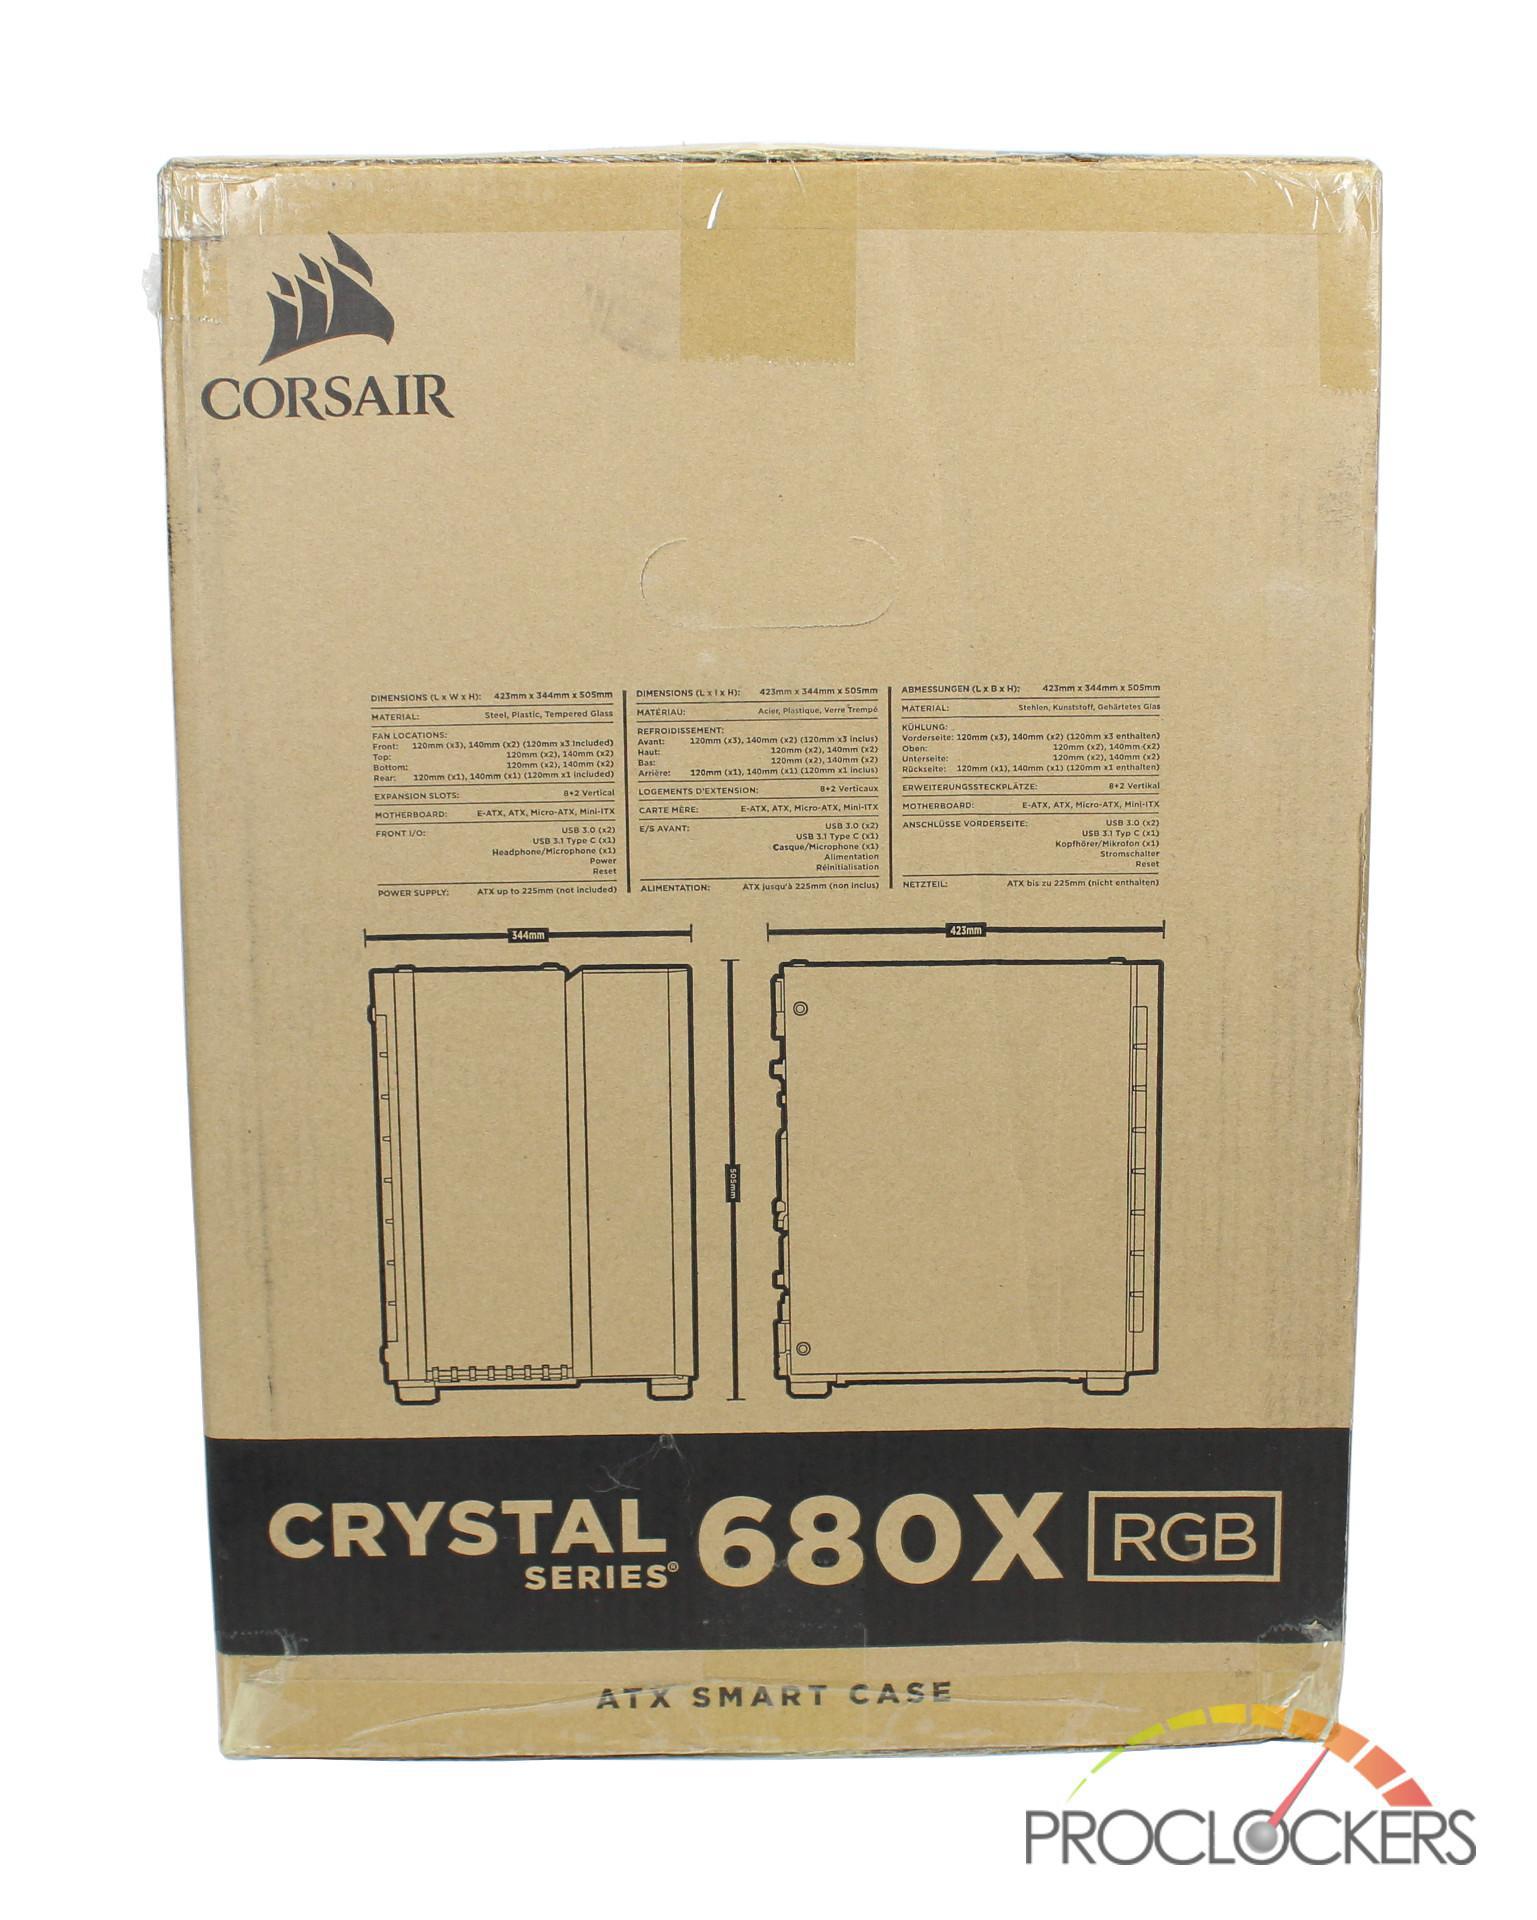
Turning the box to the side, we have more shots of the 680X showing its dimensions as well as some specifications written at the top in 3 different languages.
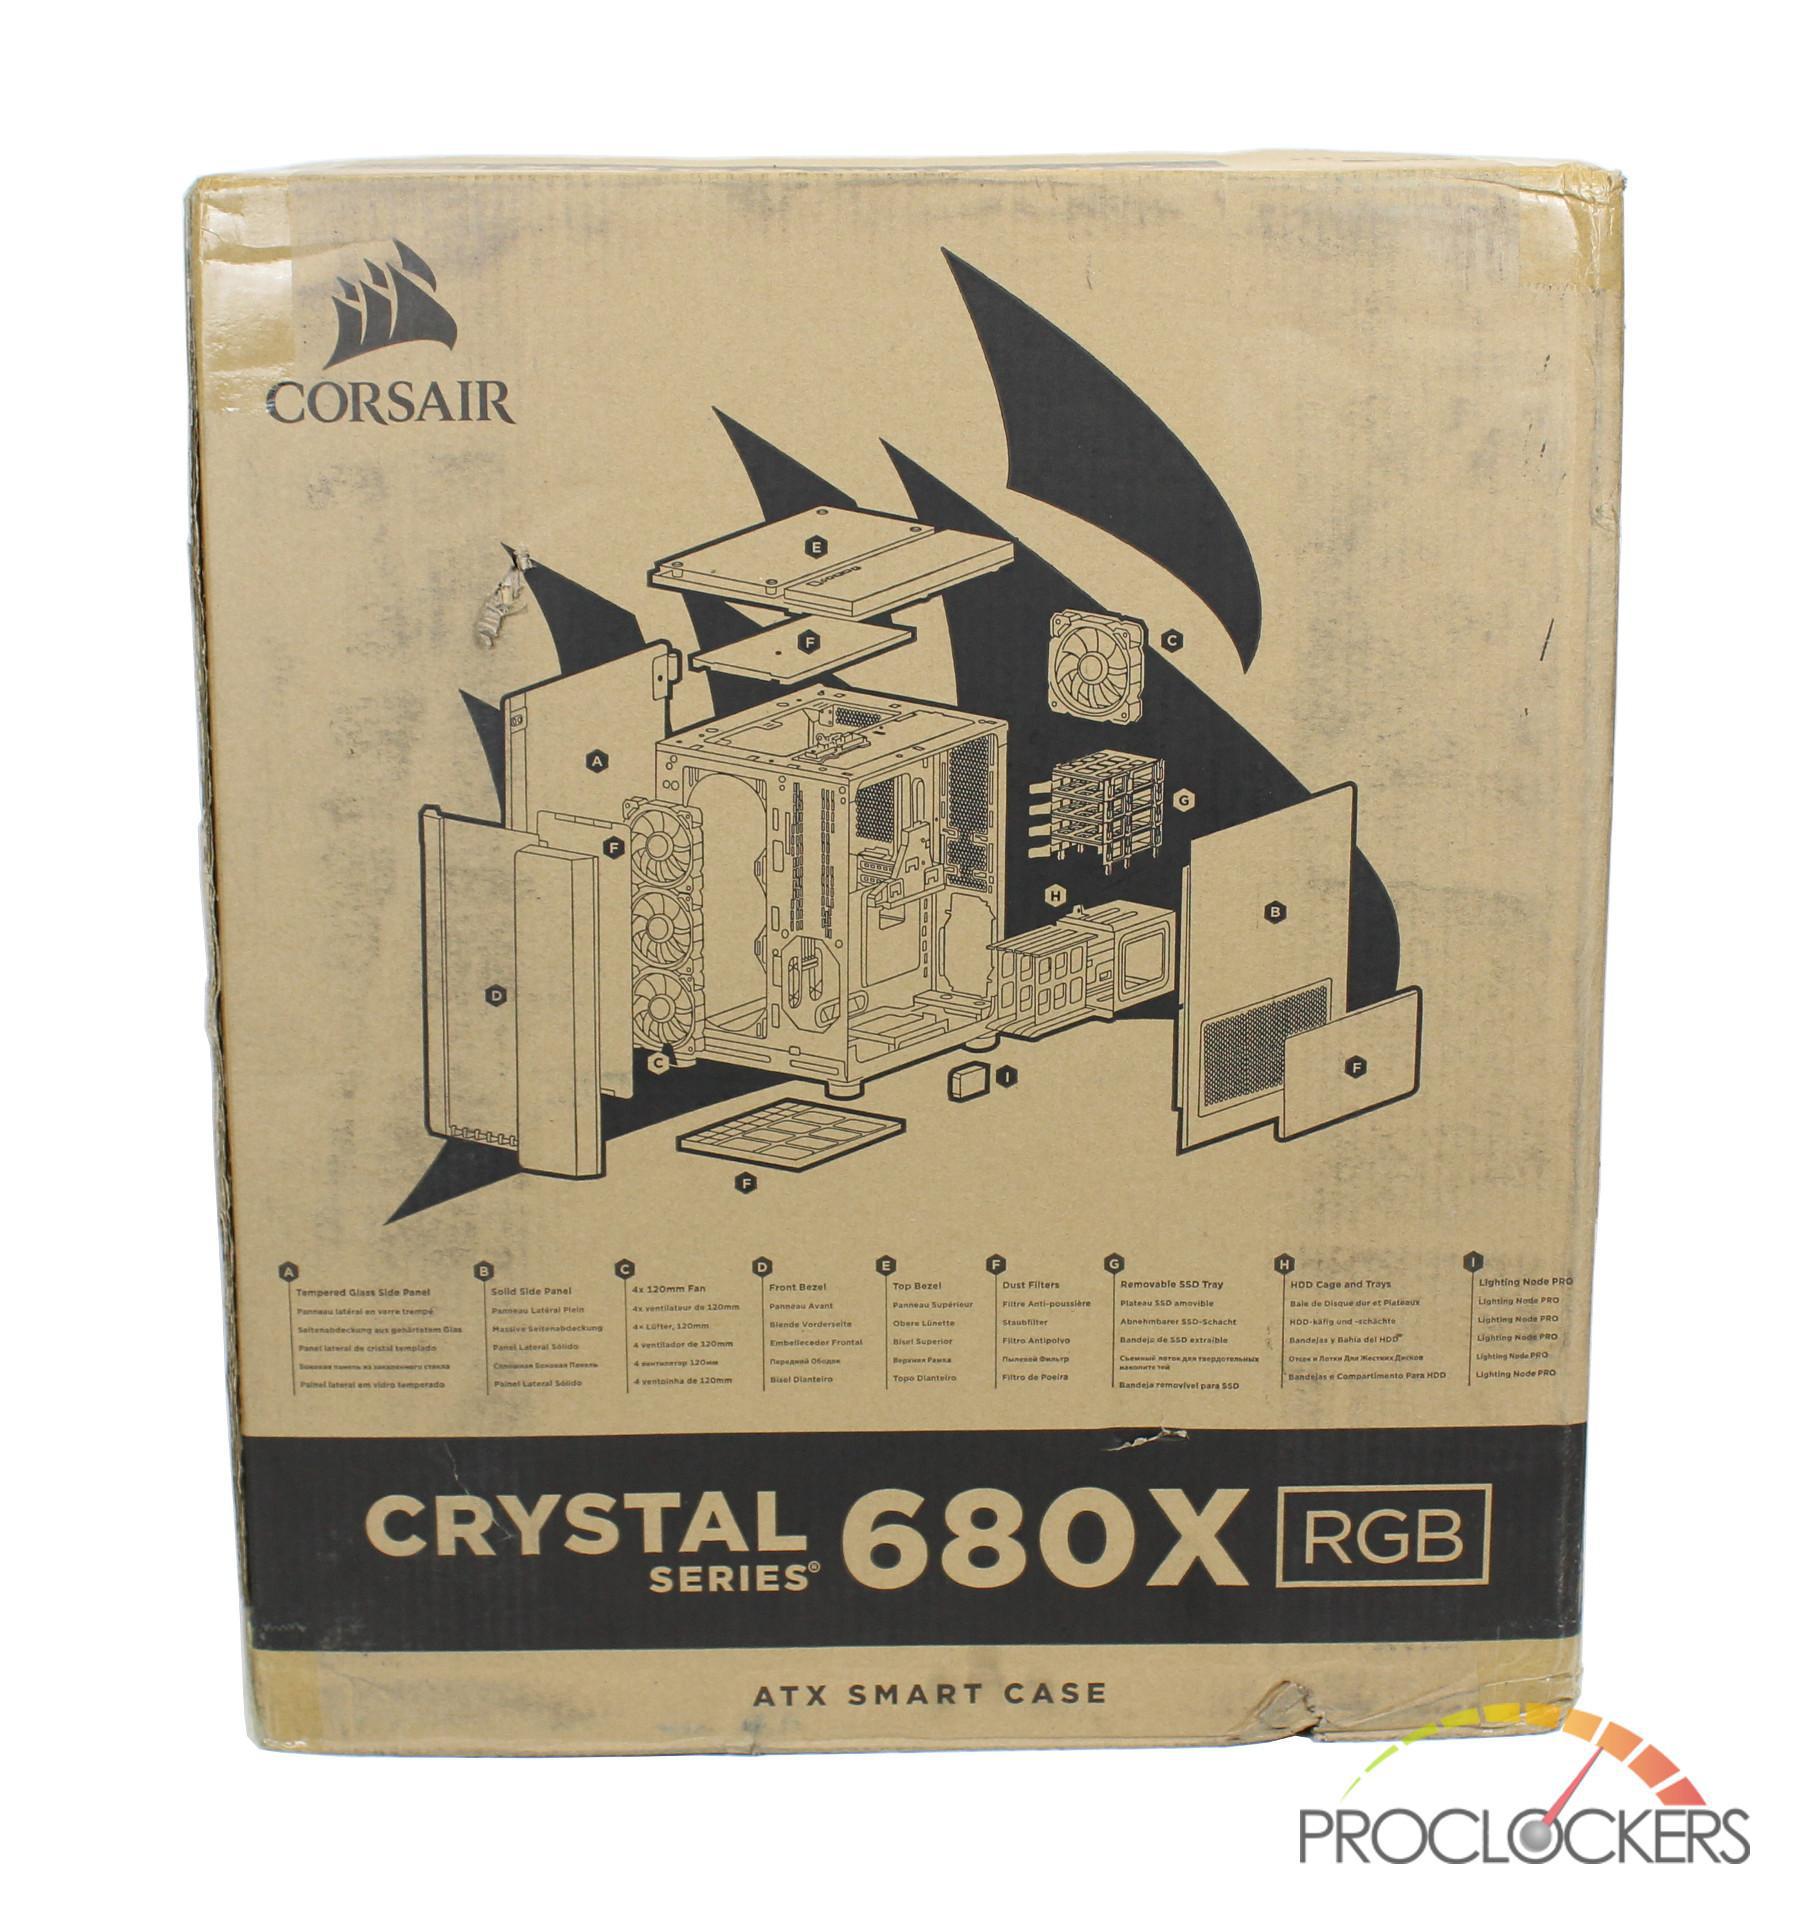
Moving to the back side of the box, we have an exploded view of the 680X with each of its notable features/hardware marked with various letters. You can find a legend for these letters at the bottom of the photo which will go on to describe the feature or piece of hardware.
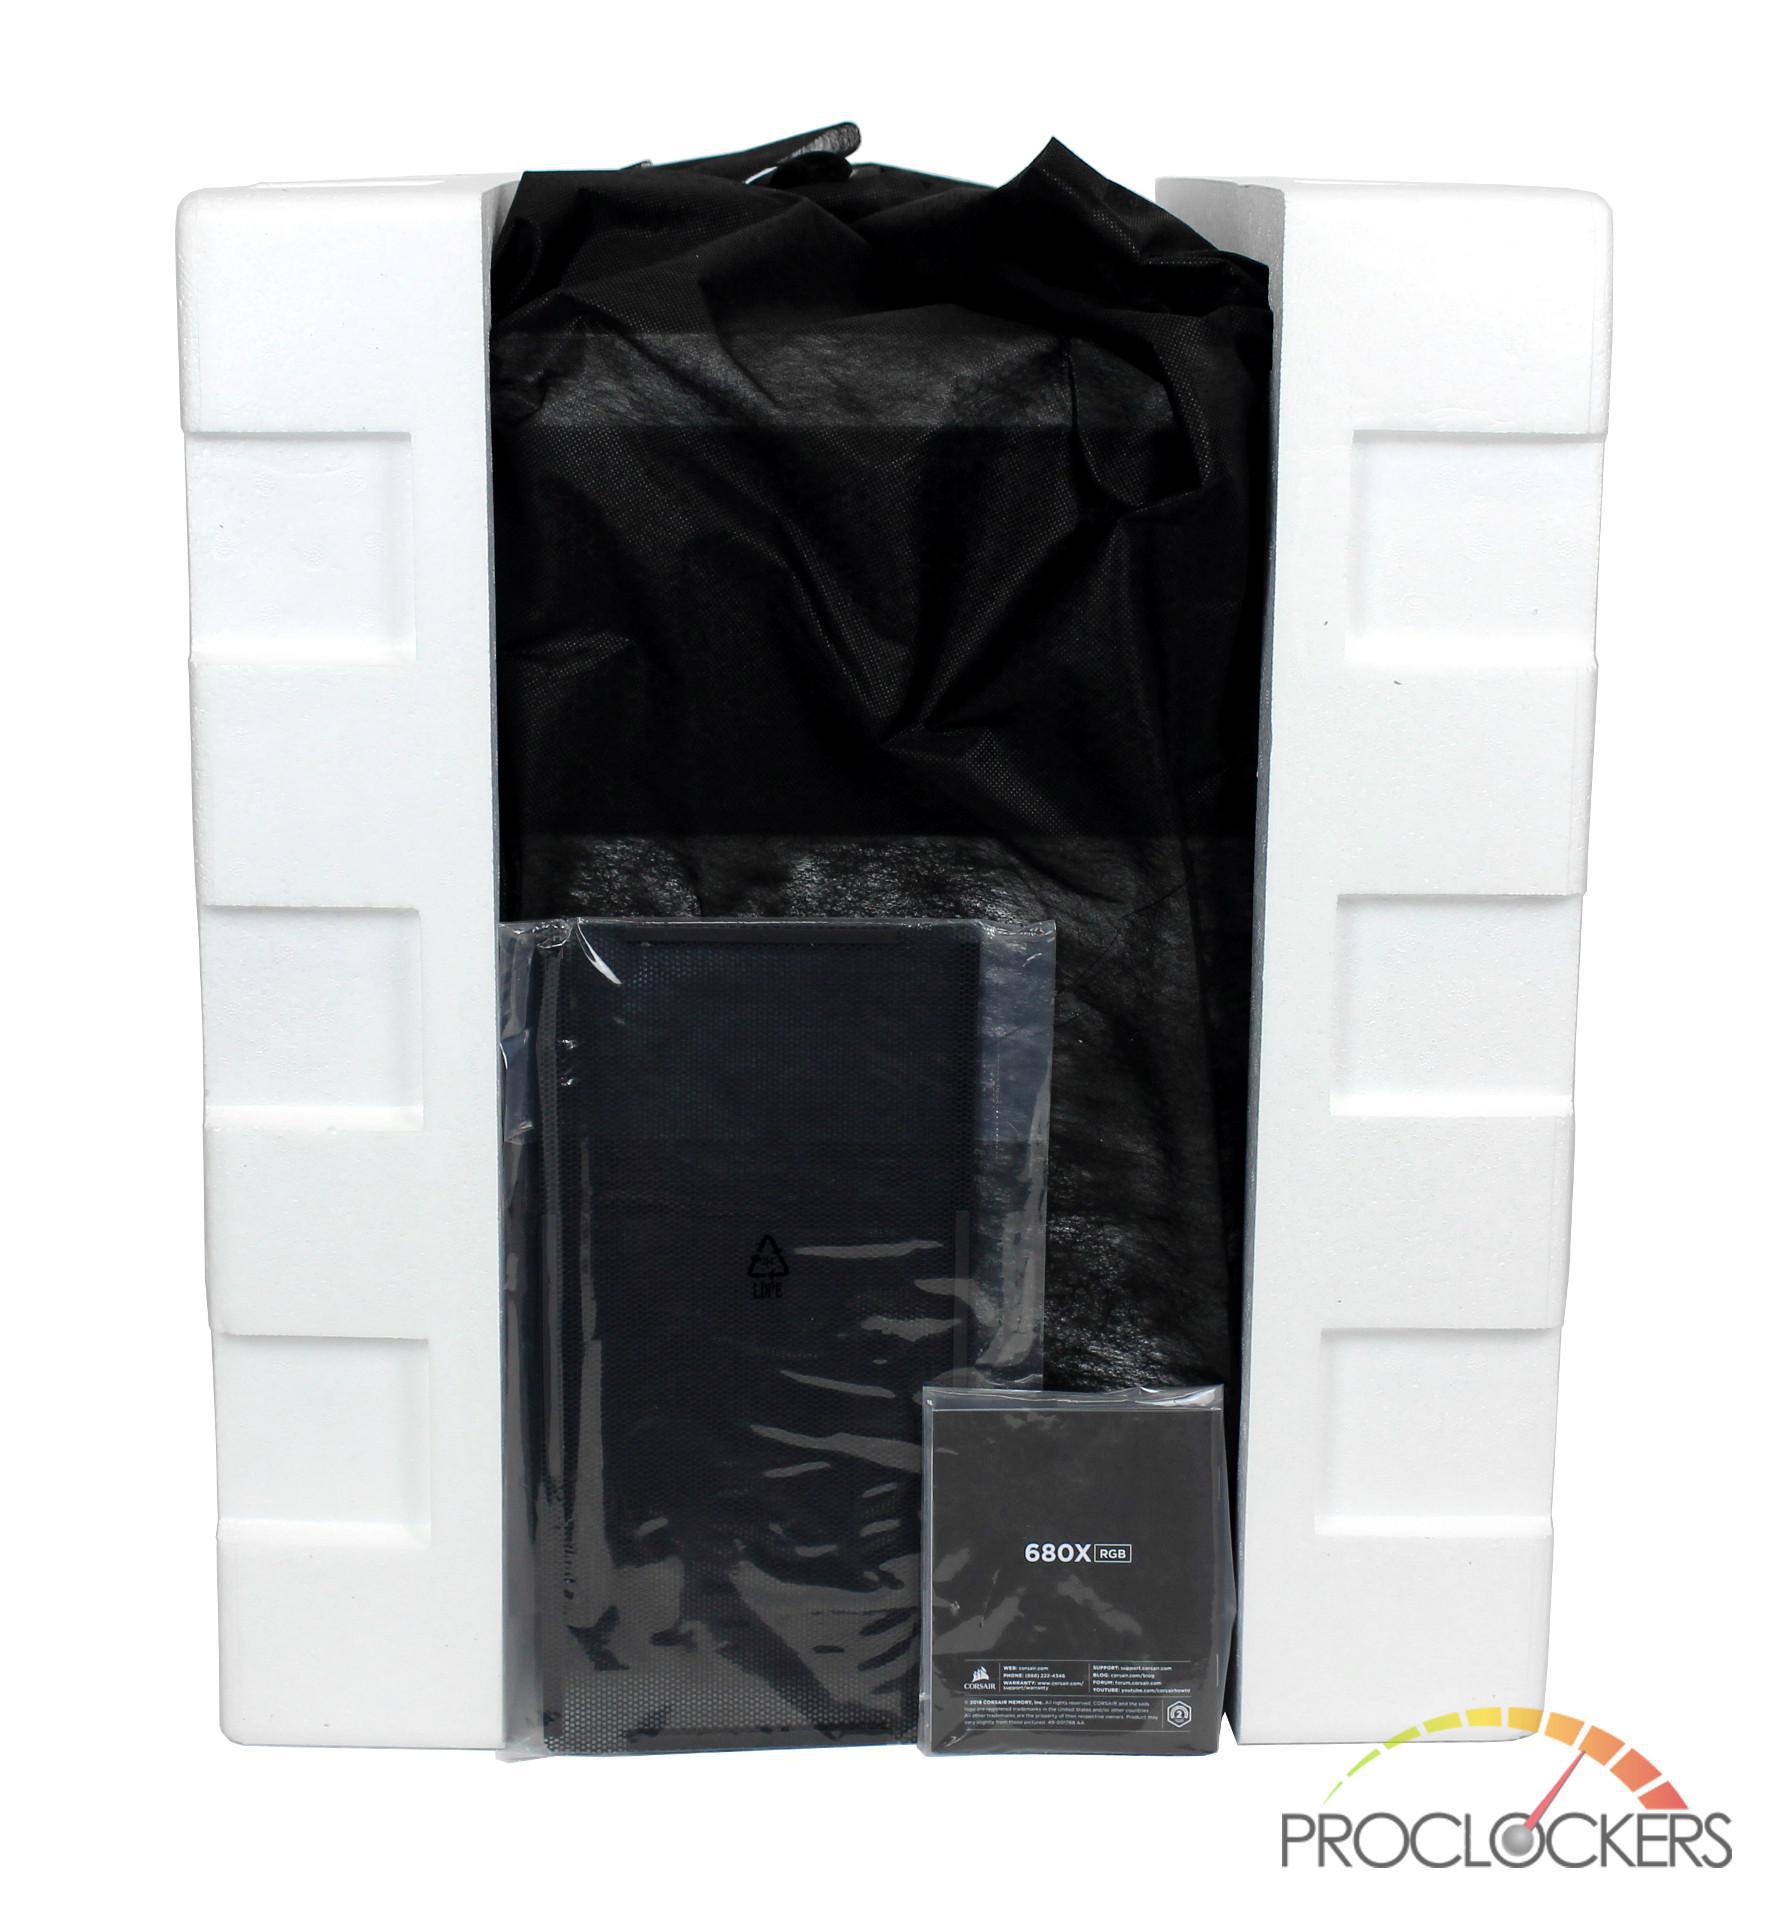
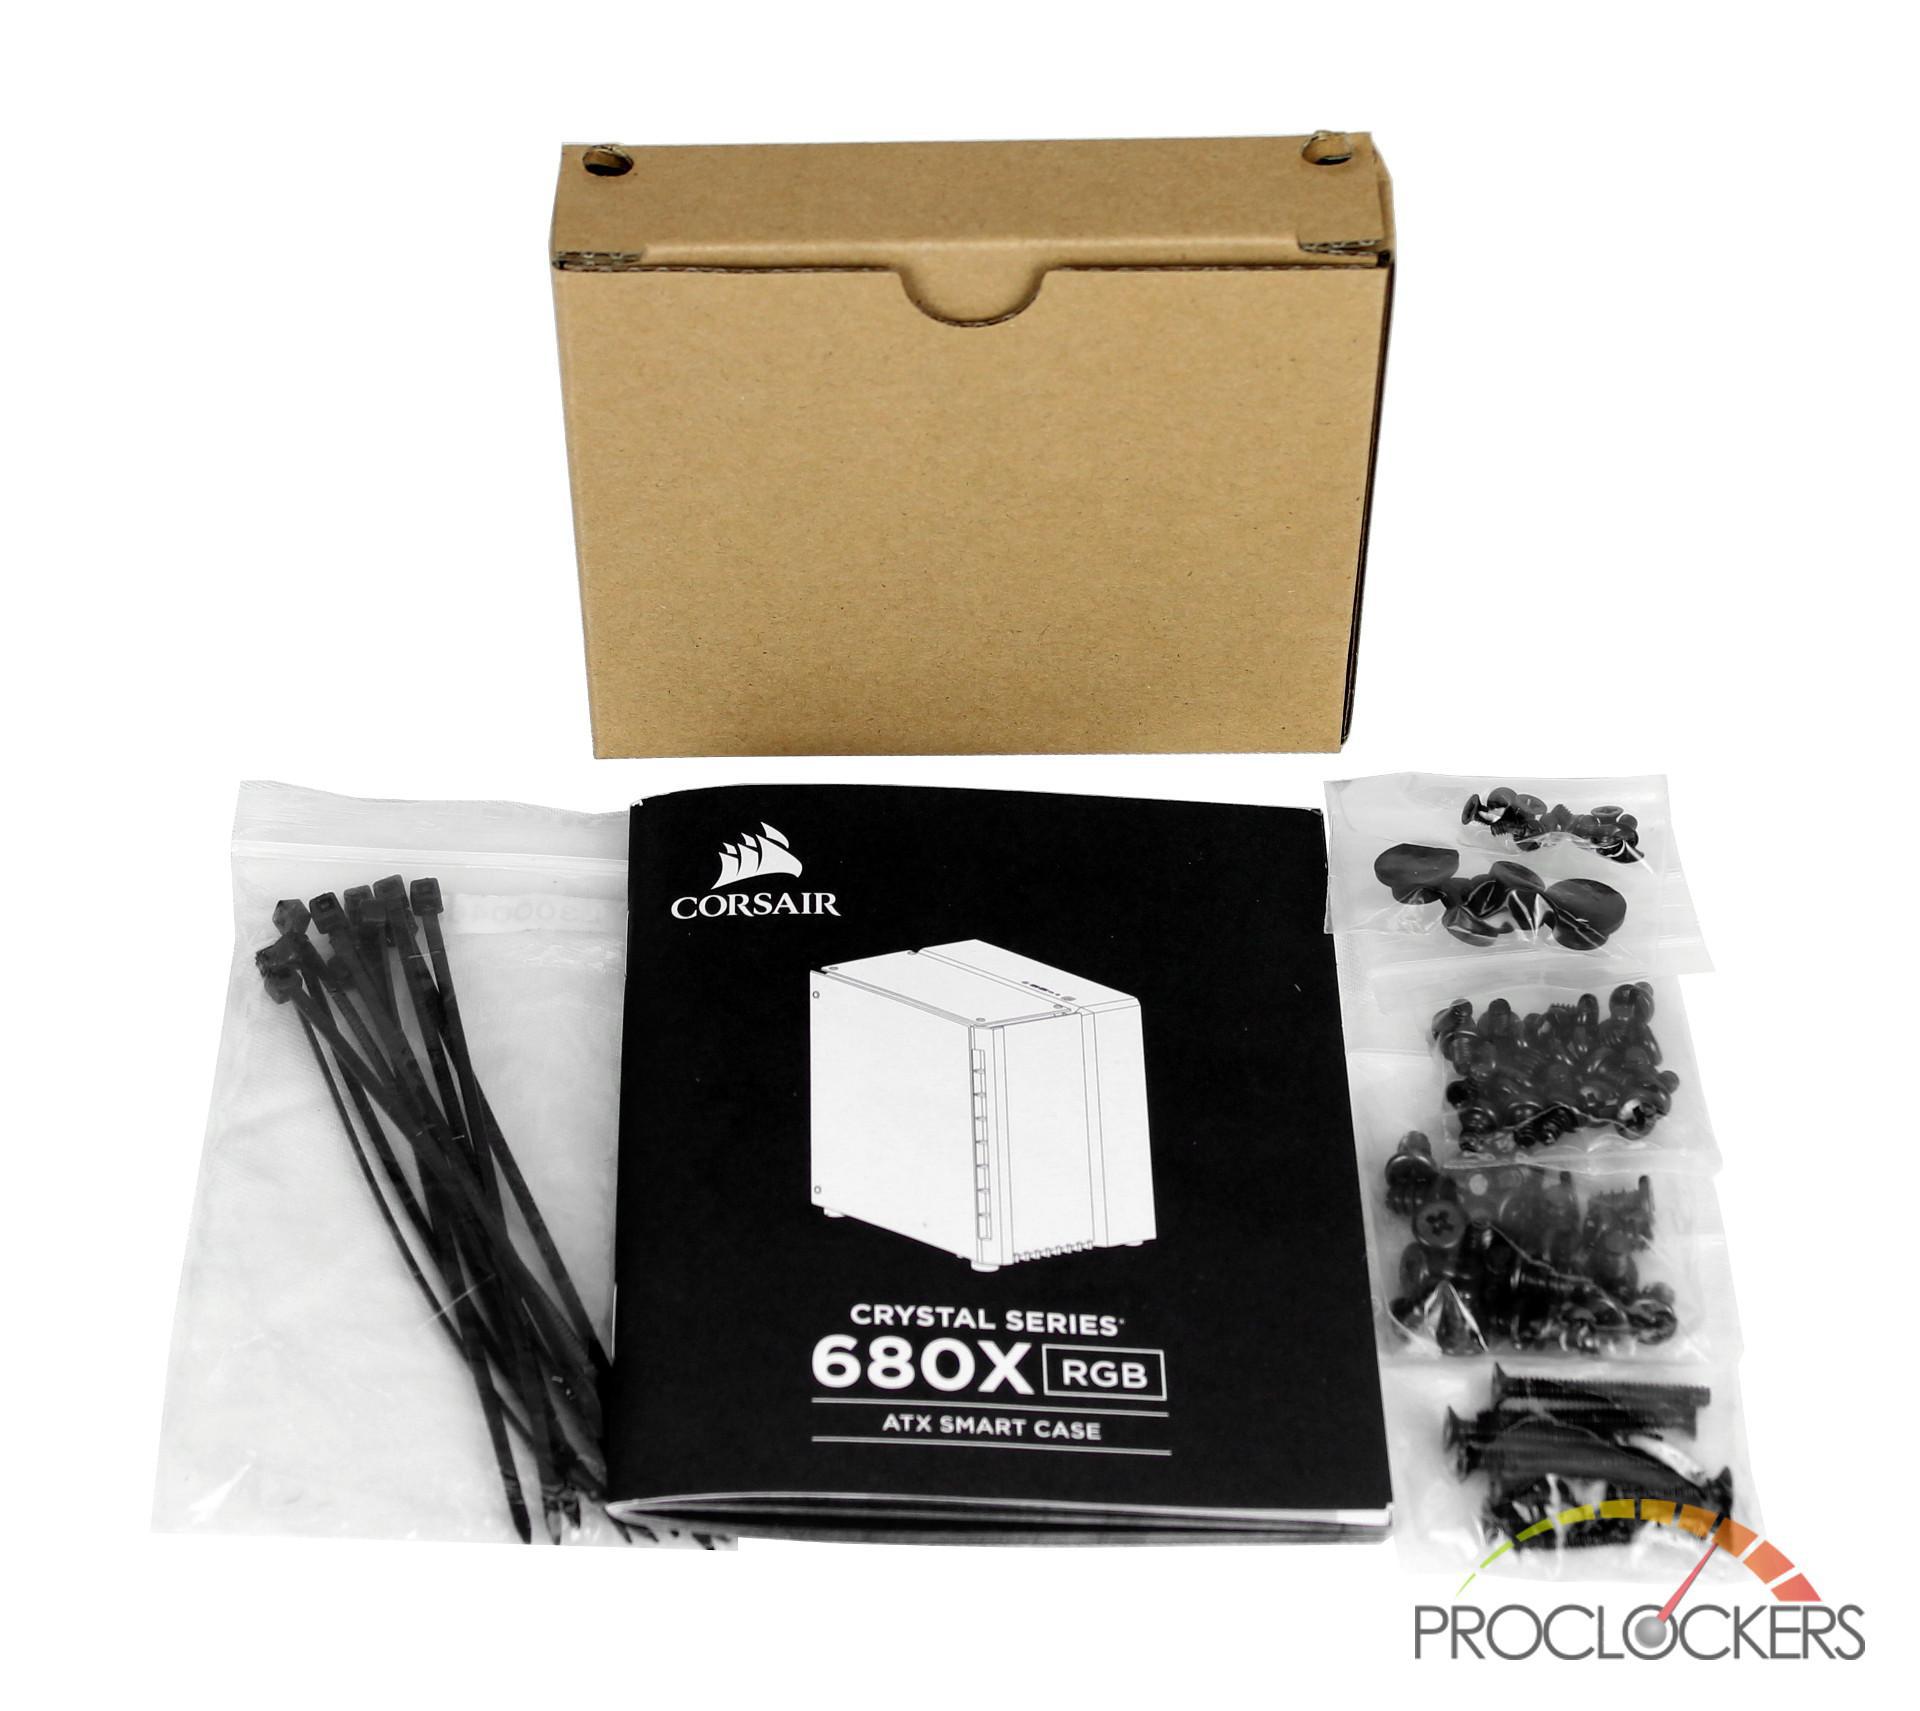
The 680X it is firmly secured in between 2 Styrofoam blocks with the case stored in a black fabric bag. Nestled in the sides of the box was a user guide for the 680X as well as a magnetic dust filter.
Once unpacked, all that is left to do is peel the plastic film from each of the installed tempered glass panels.

Inside one of the HDD sleds of the 680X was an accessory box which includes:
- 12 x zip ties
- 8 x long fan screws
- 24 x short fan screws
- 24 x motherboard/HDD screws
- 12 x ODD/SSD screws
- 4 x short rubber spacers
- 1 x motherboard standoff
A Closer Look: Exterior
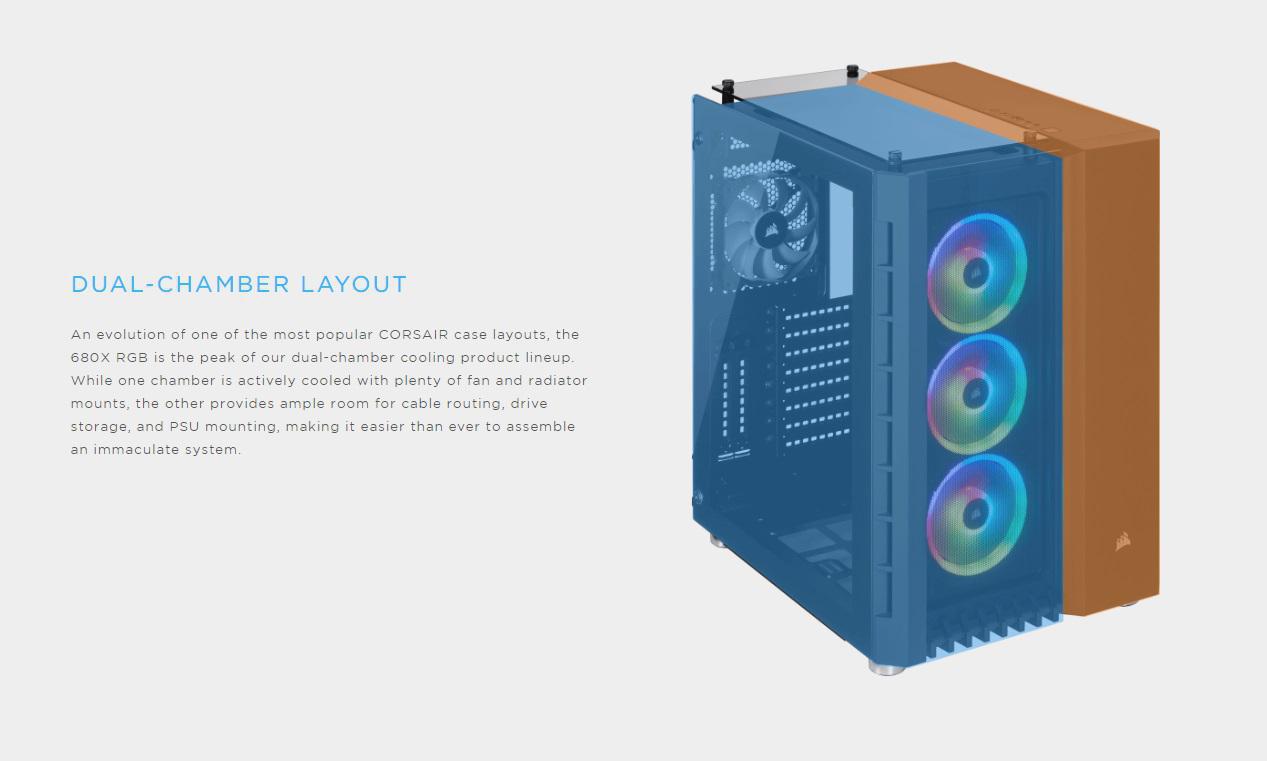
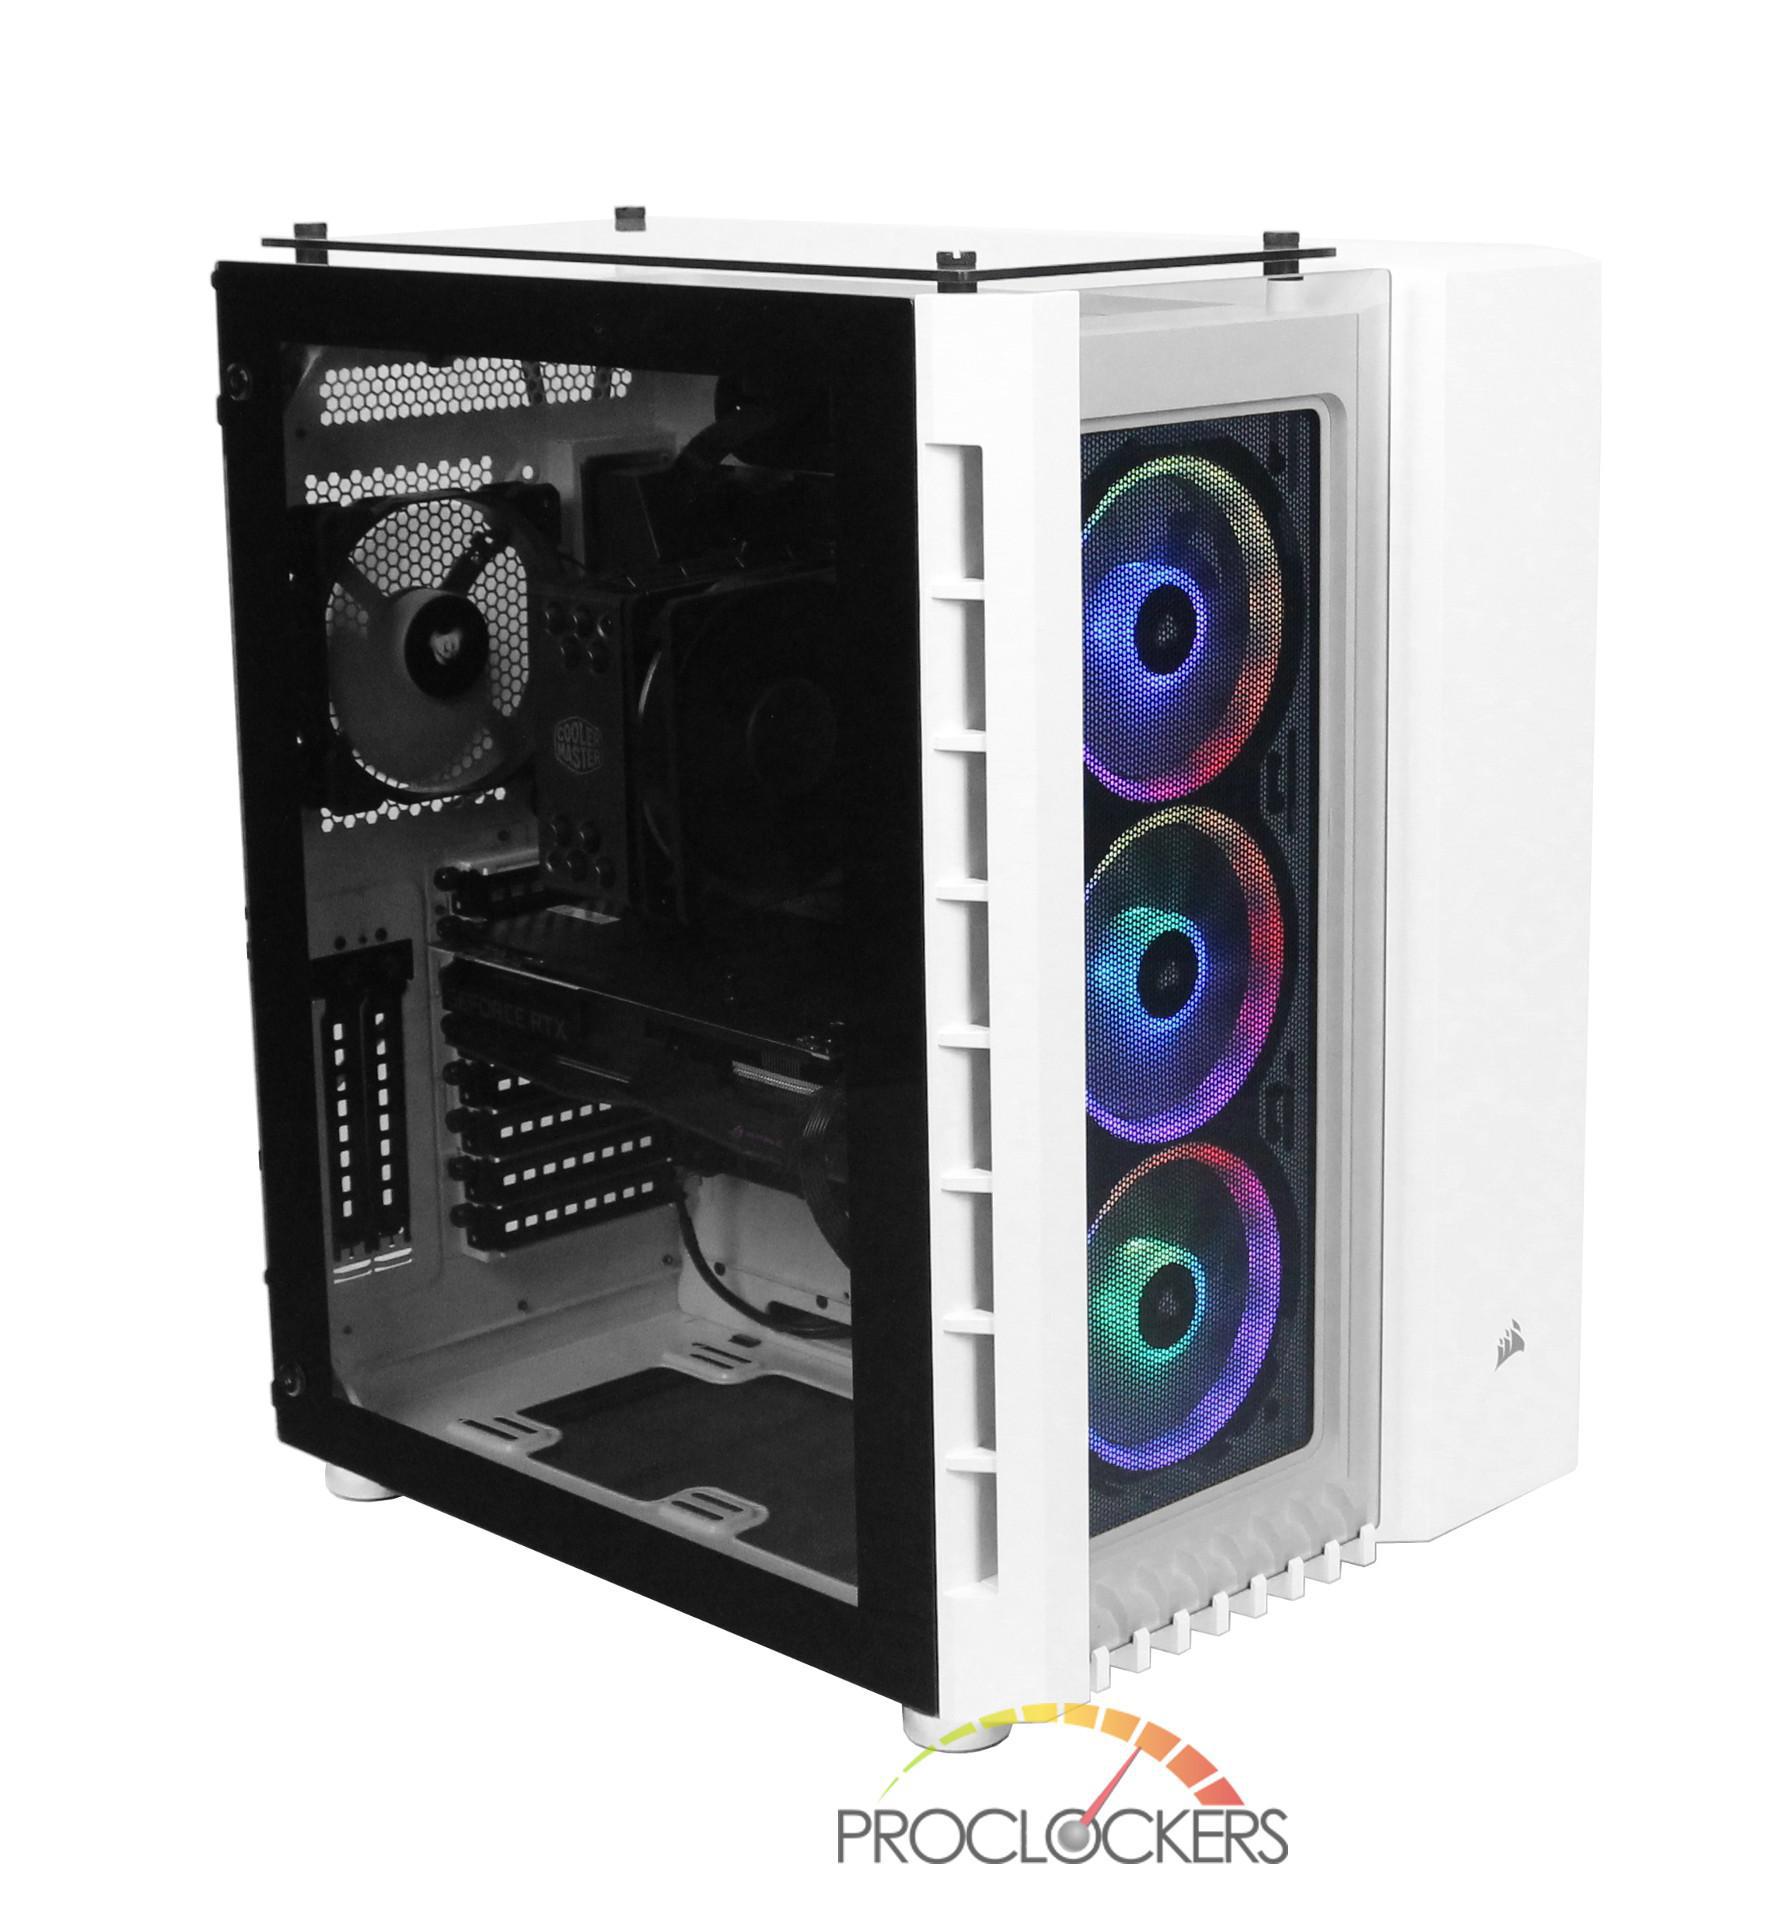
Now that the 680X RGB has been removed from its packaging, I must say I really like its size. The 680X is wider than most cases due to its dual chamber design and front to back is a little shorter as well. In my opinion, this size makes it ideal for placing on top of most desks.
The sample we received has a white finish with some subtle silver accent such as the Corsair logo on the front of the case. If white is not to your liking the 680X RGB is also available in black with the same silver accents. The body itself consists of all steel construction with plastic molds for the front and top panels of the case. Like most cases that integrate plastic with steel, the finishes on these pieces are ever so slightly different hues. Though only a keen eye can see the difference, so it’s a non-issue but worth mentioning.
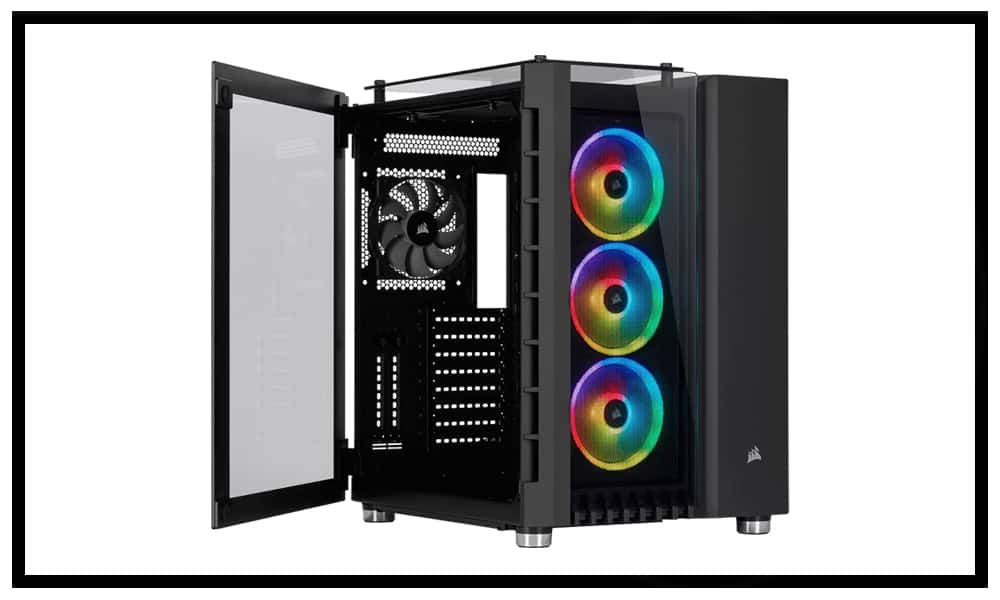
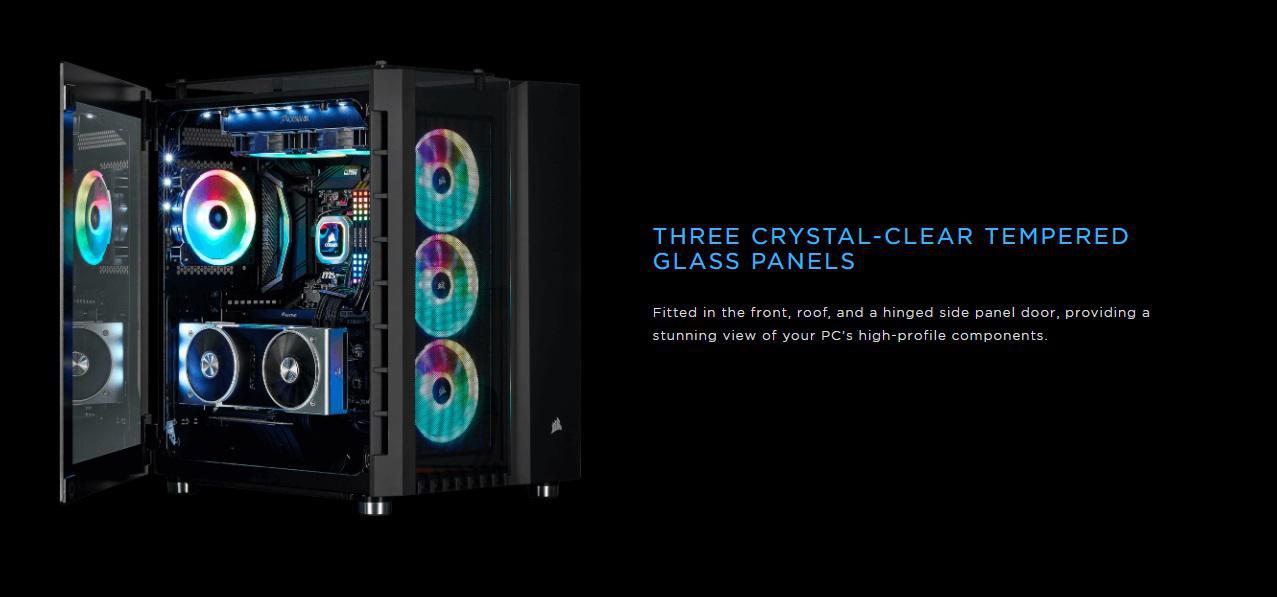
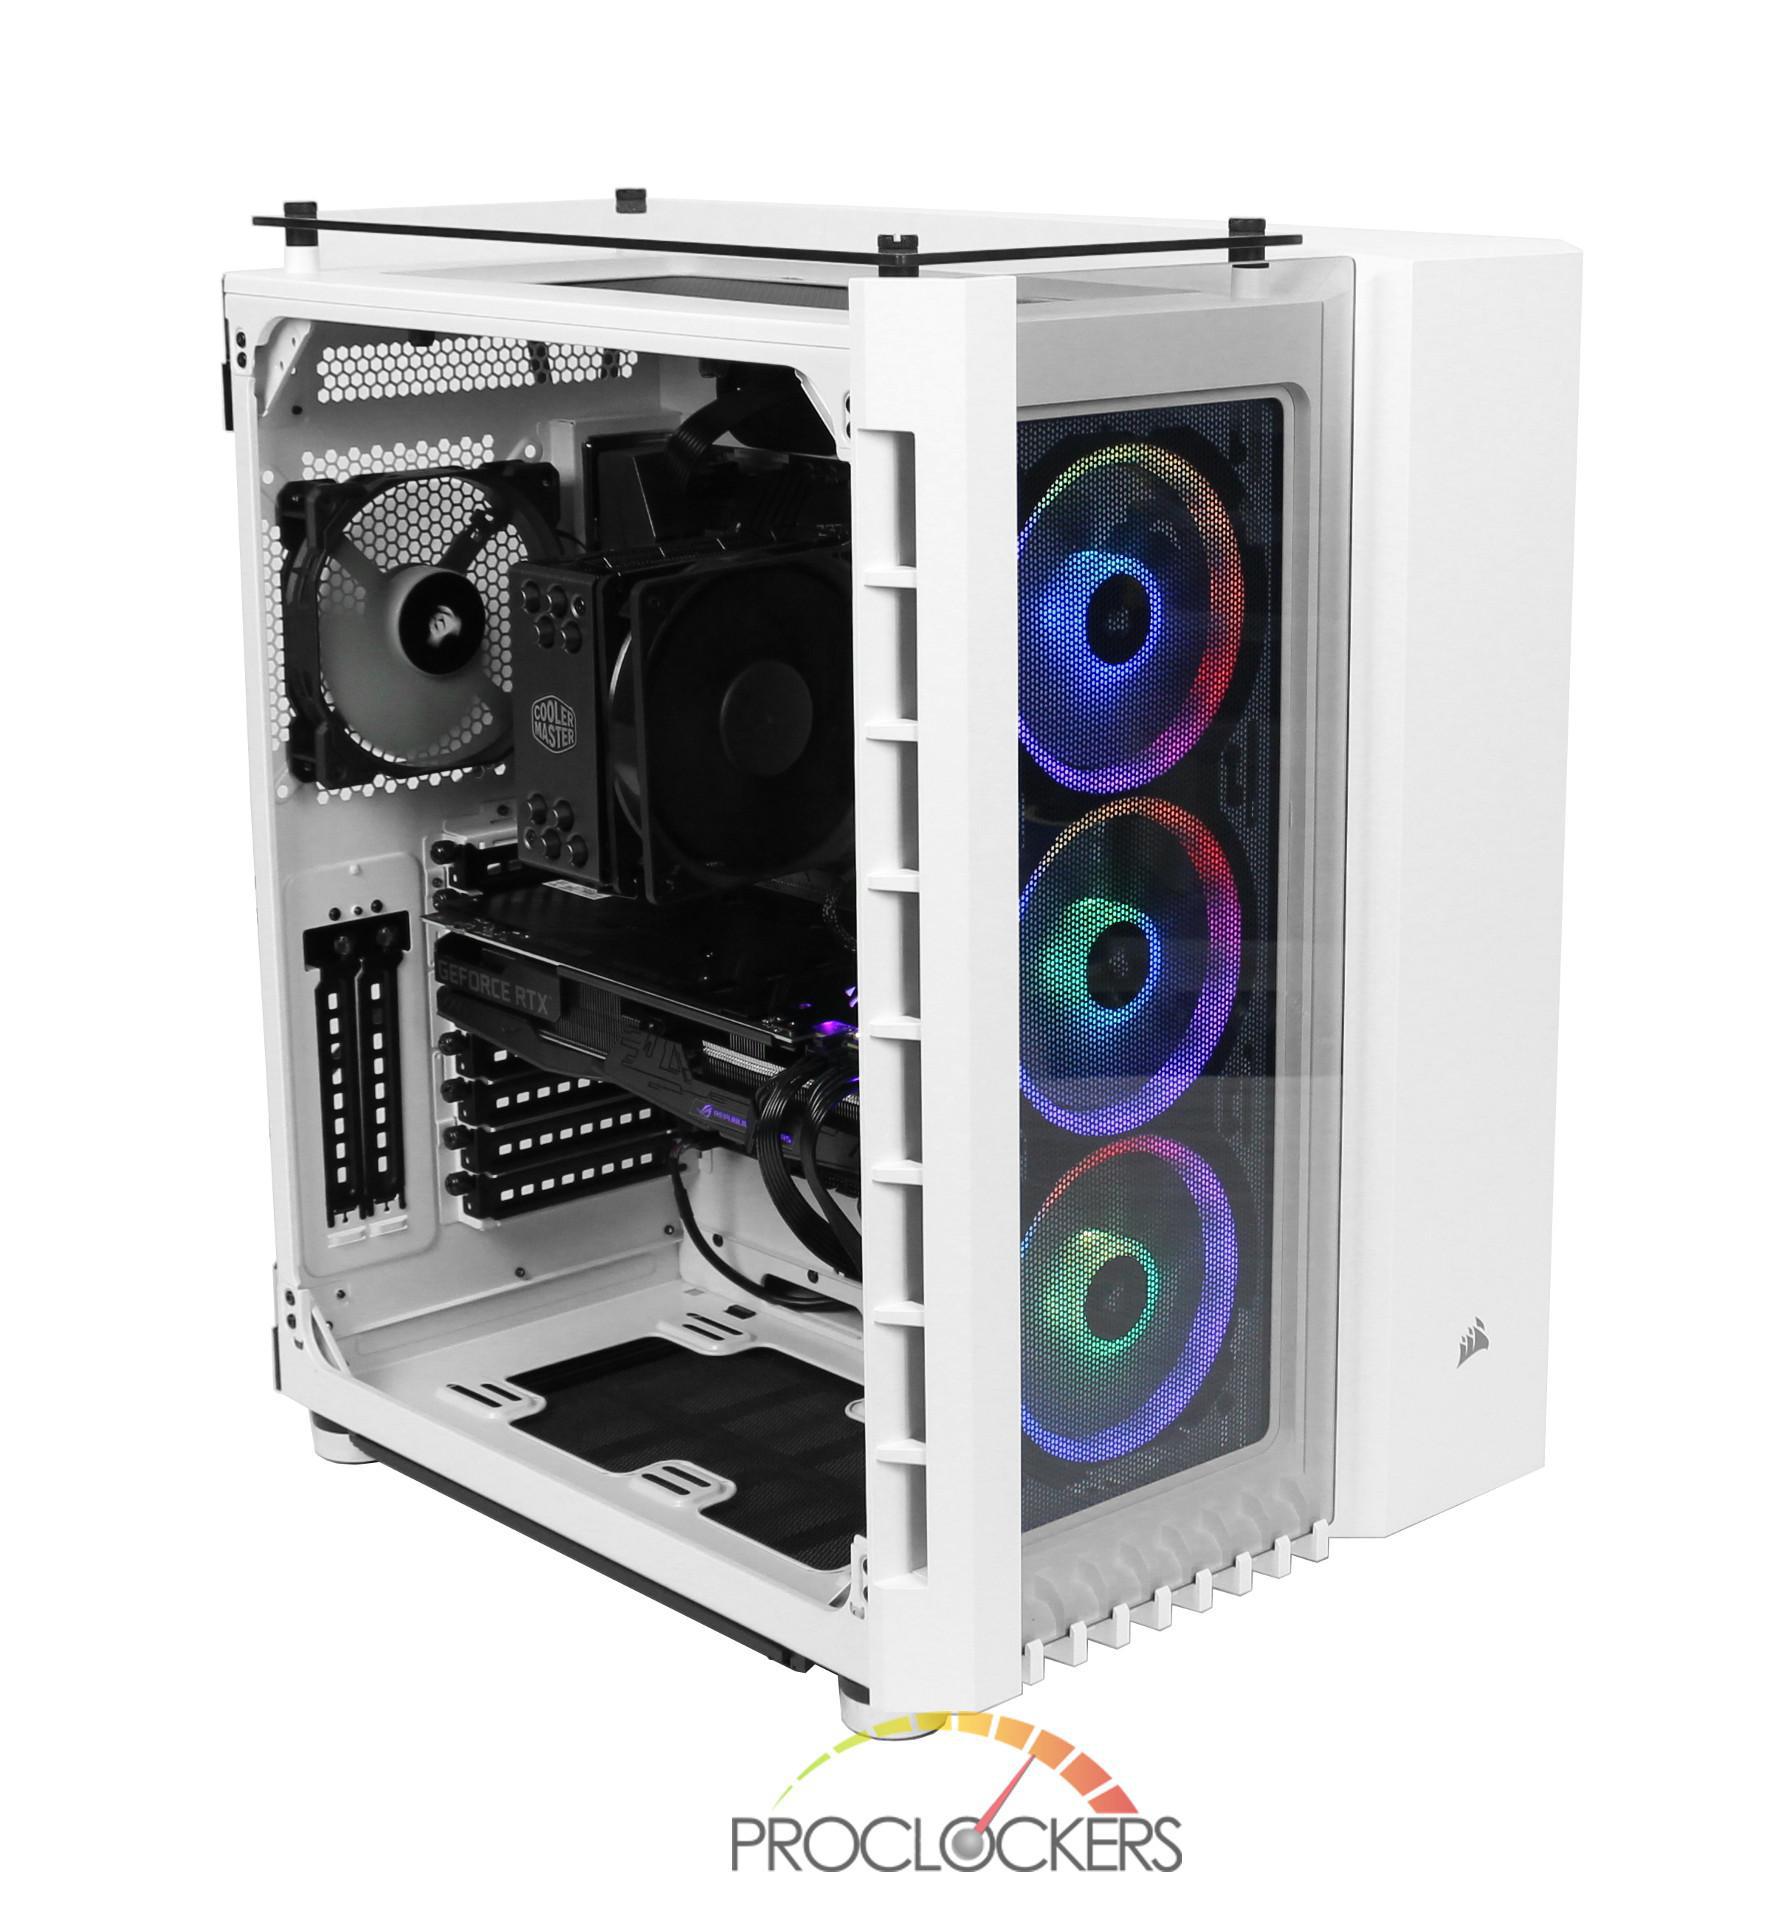
The 680X makes it easy to showcase the internals of your build with a hinged full tempered glass side panel which is held closed via 2 magnets. Towards the front of the case, Corsair has included some large side ventilation to provide good airflow for the included front fans.
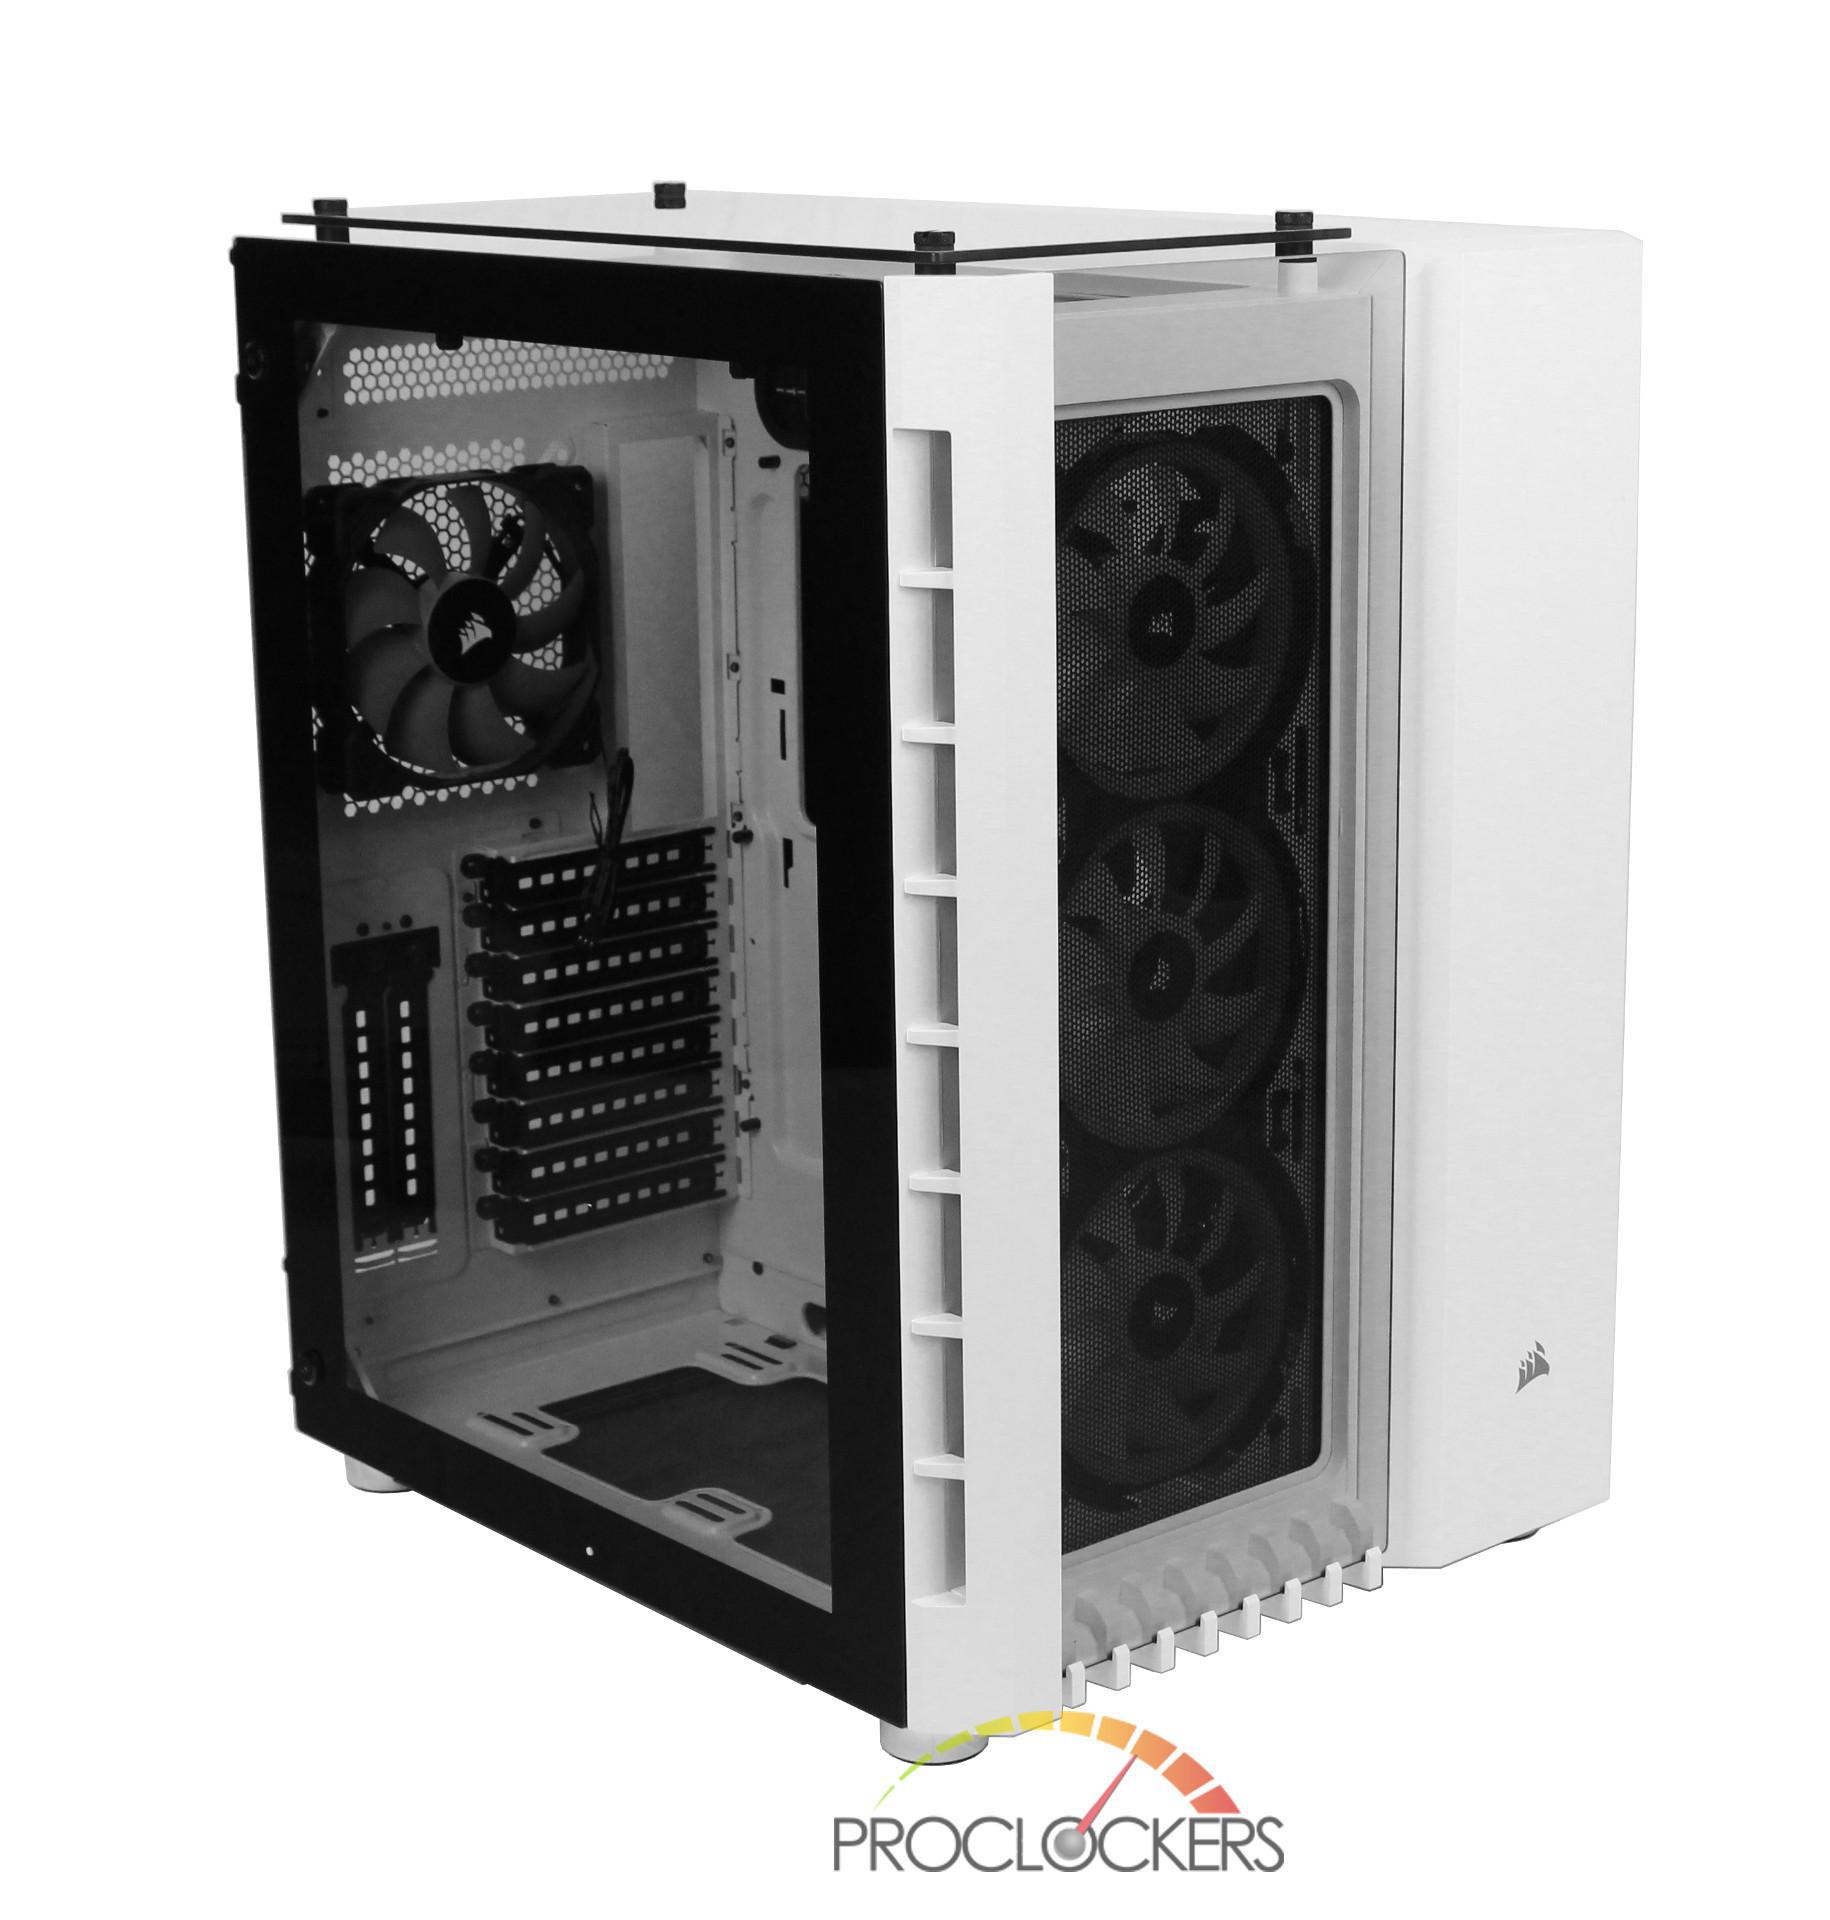
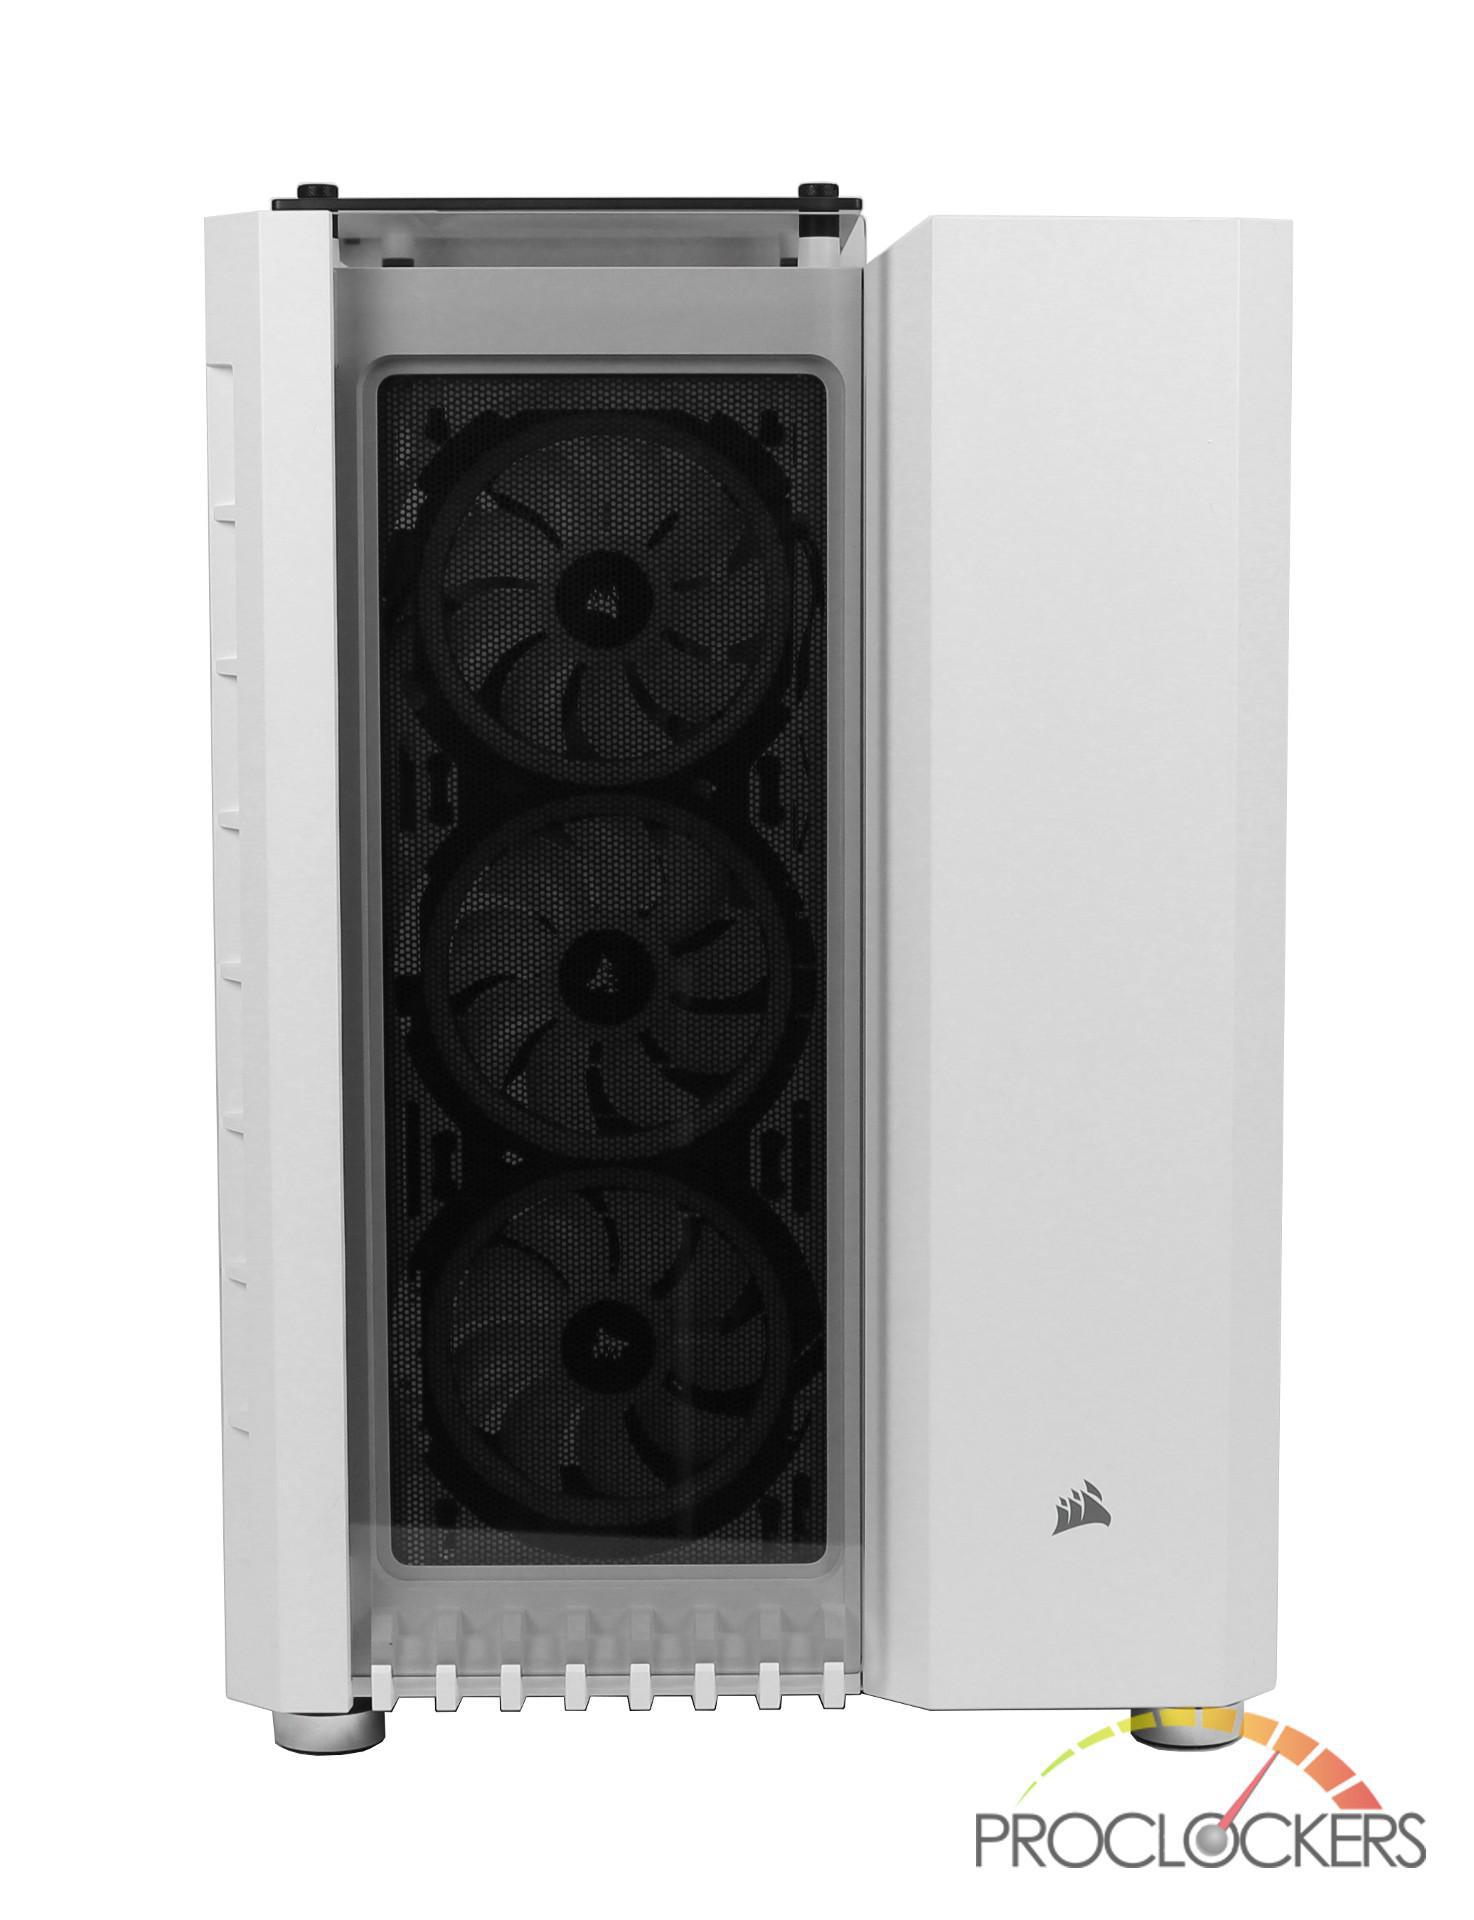
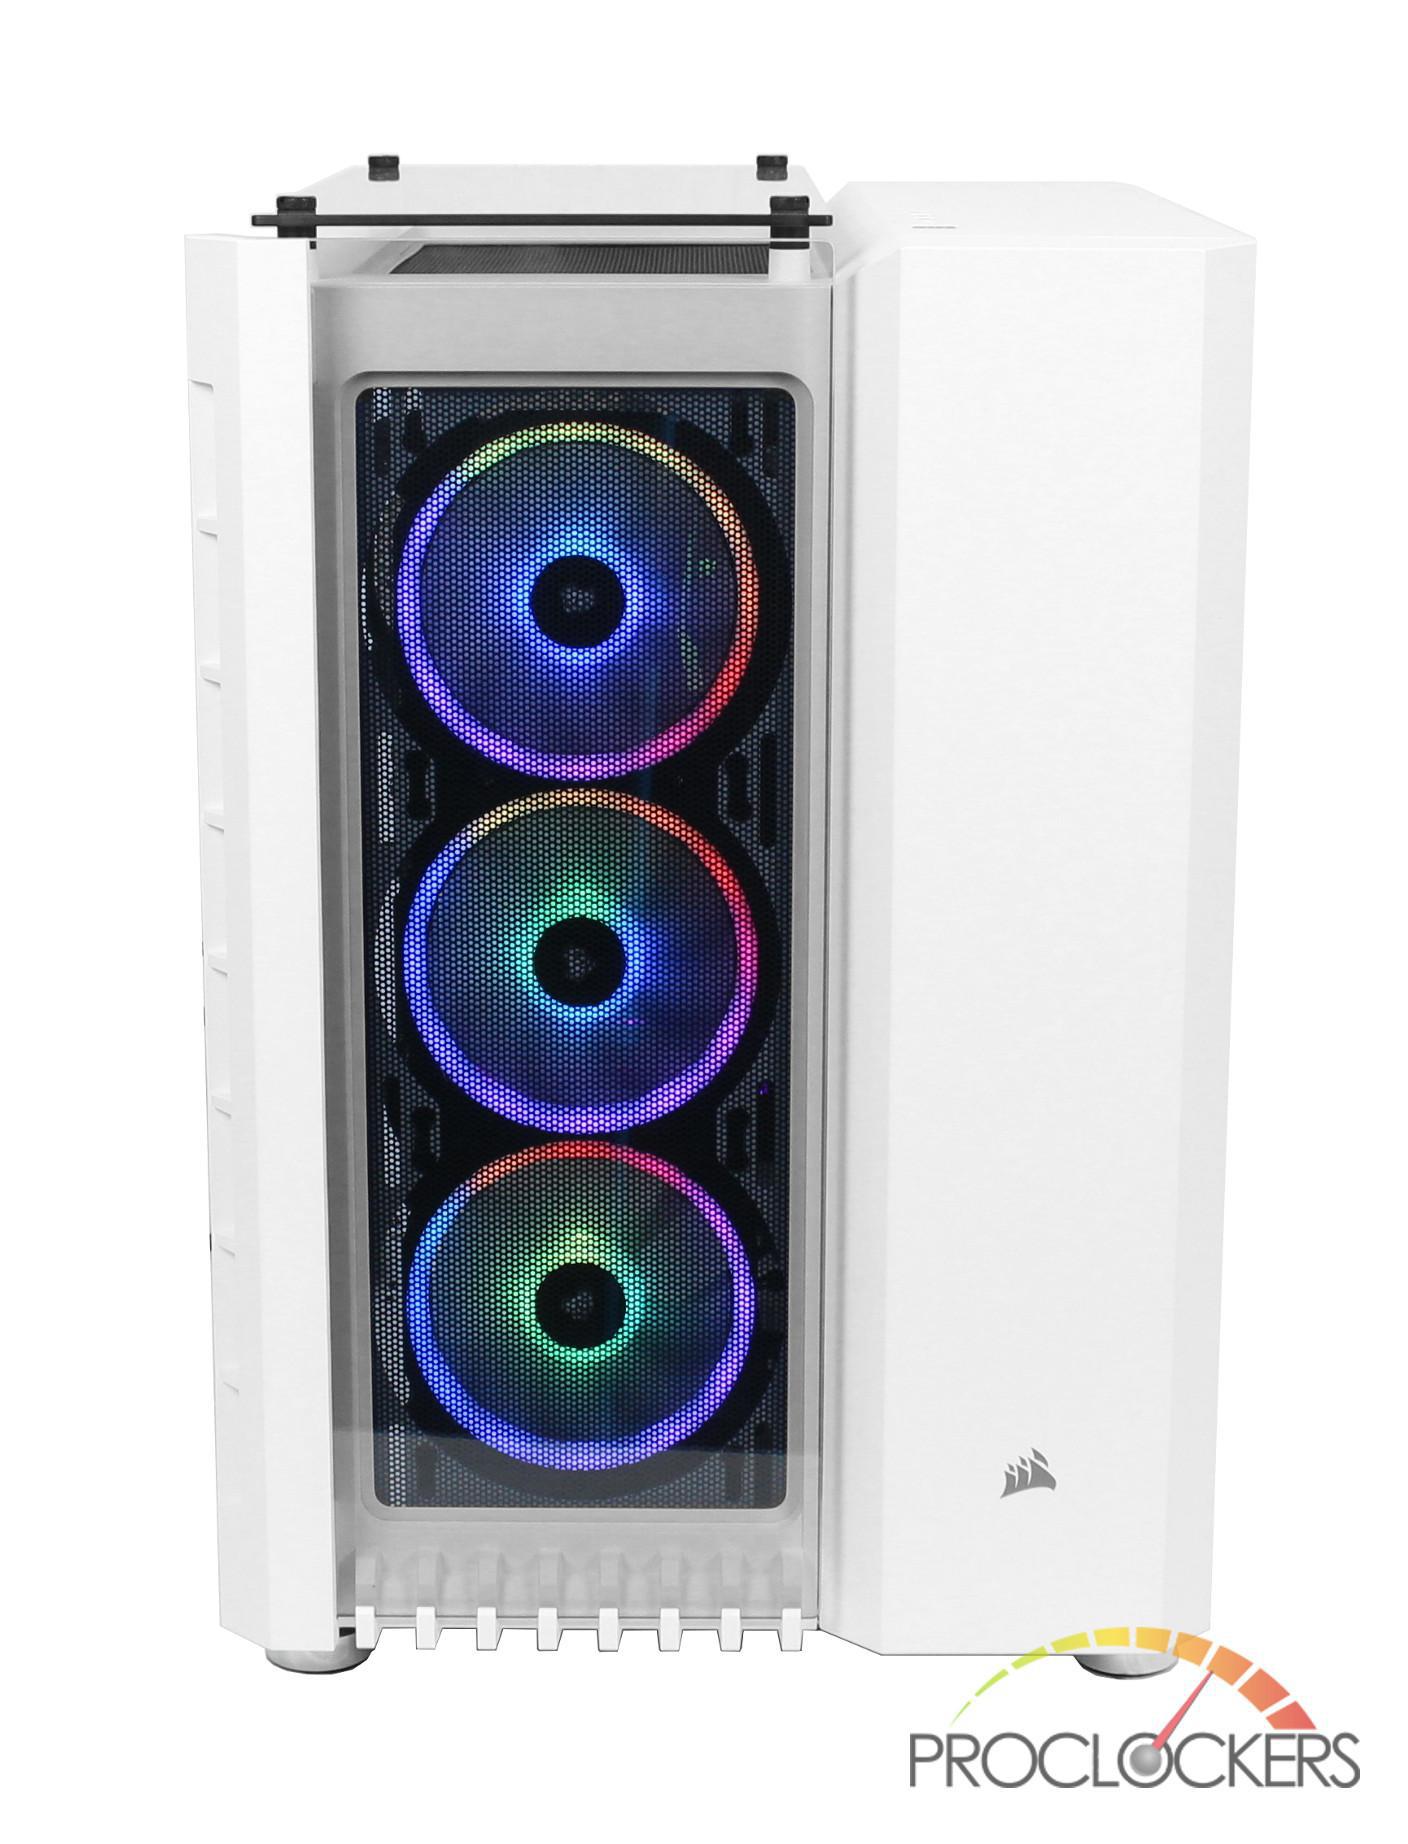
The front of the 680X includes the second of the three tempered glass panels which show off the three pre-installed LL120’s RGB fans. In addition to the side ventilation, there is also a generous amount of room between the tempered glass panel and 680X. The may not give the optimal airflow such as a meshed panel but I believe this is an excellent midground between aesthetics and airflow.
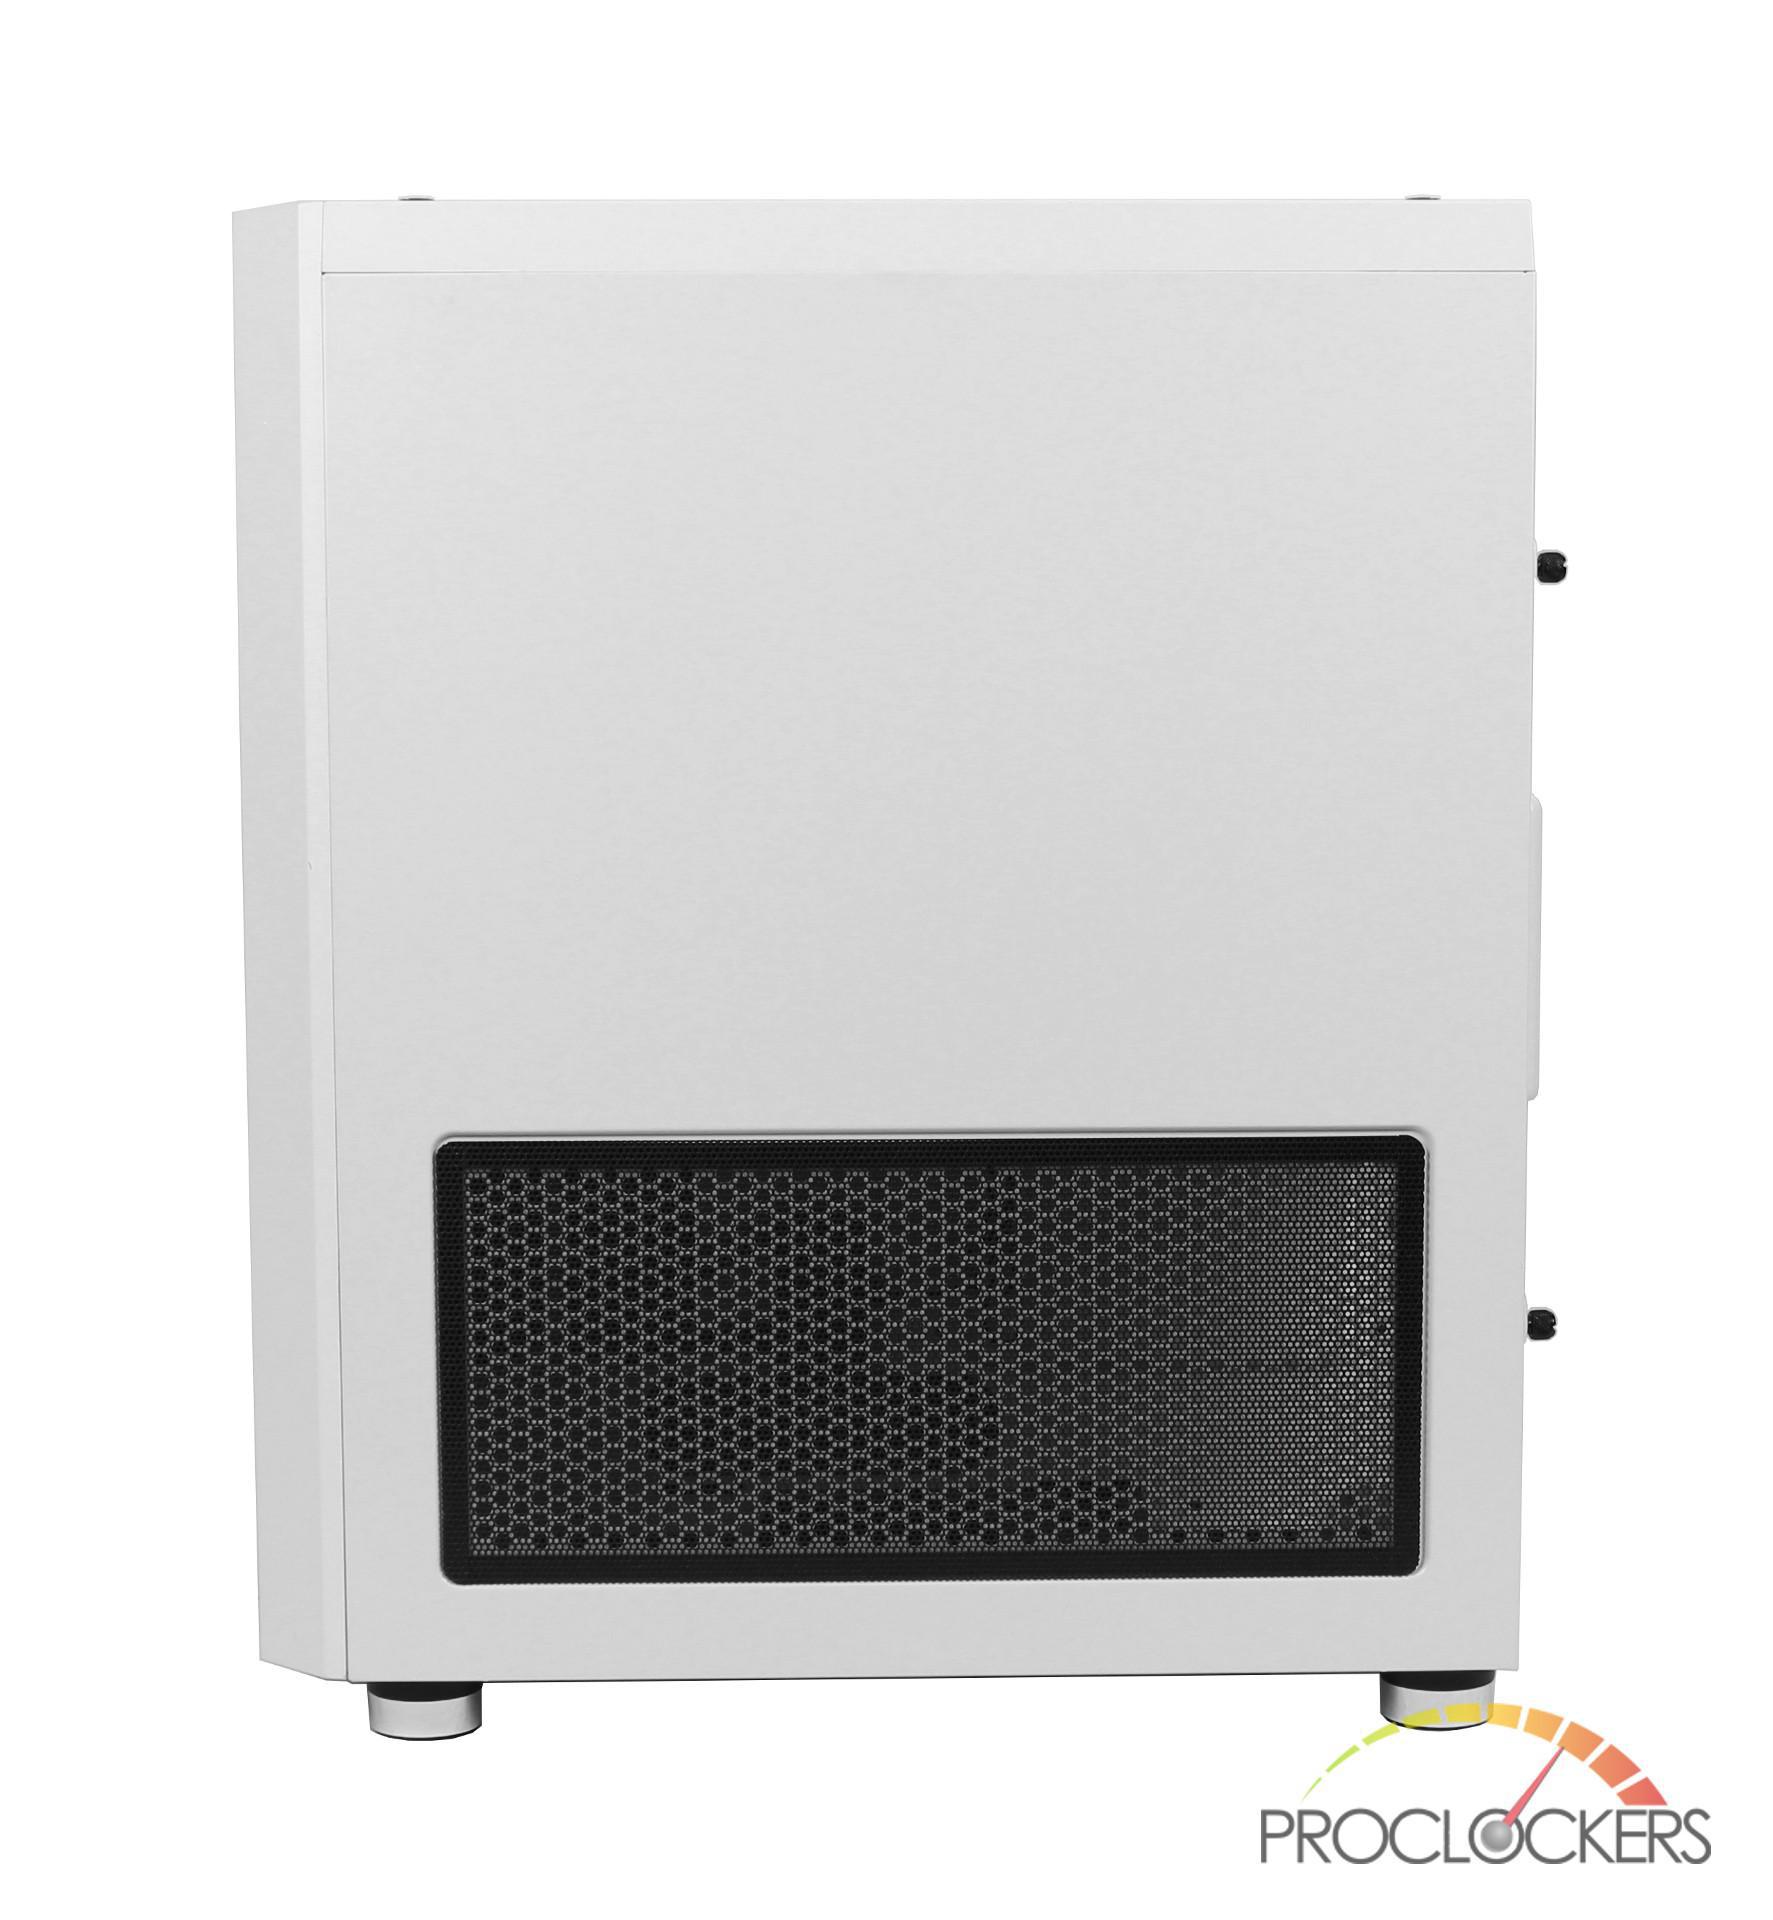
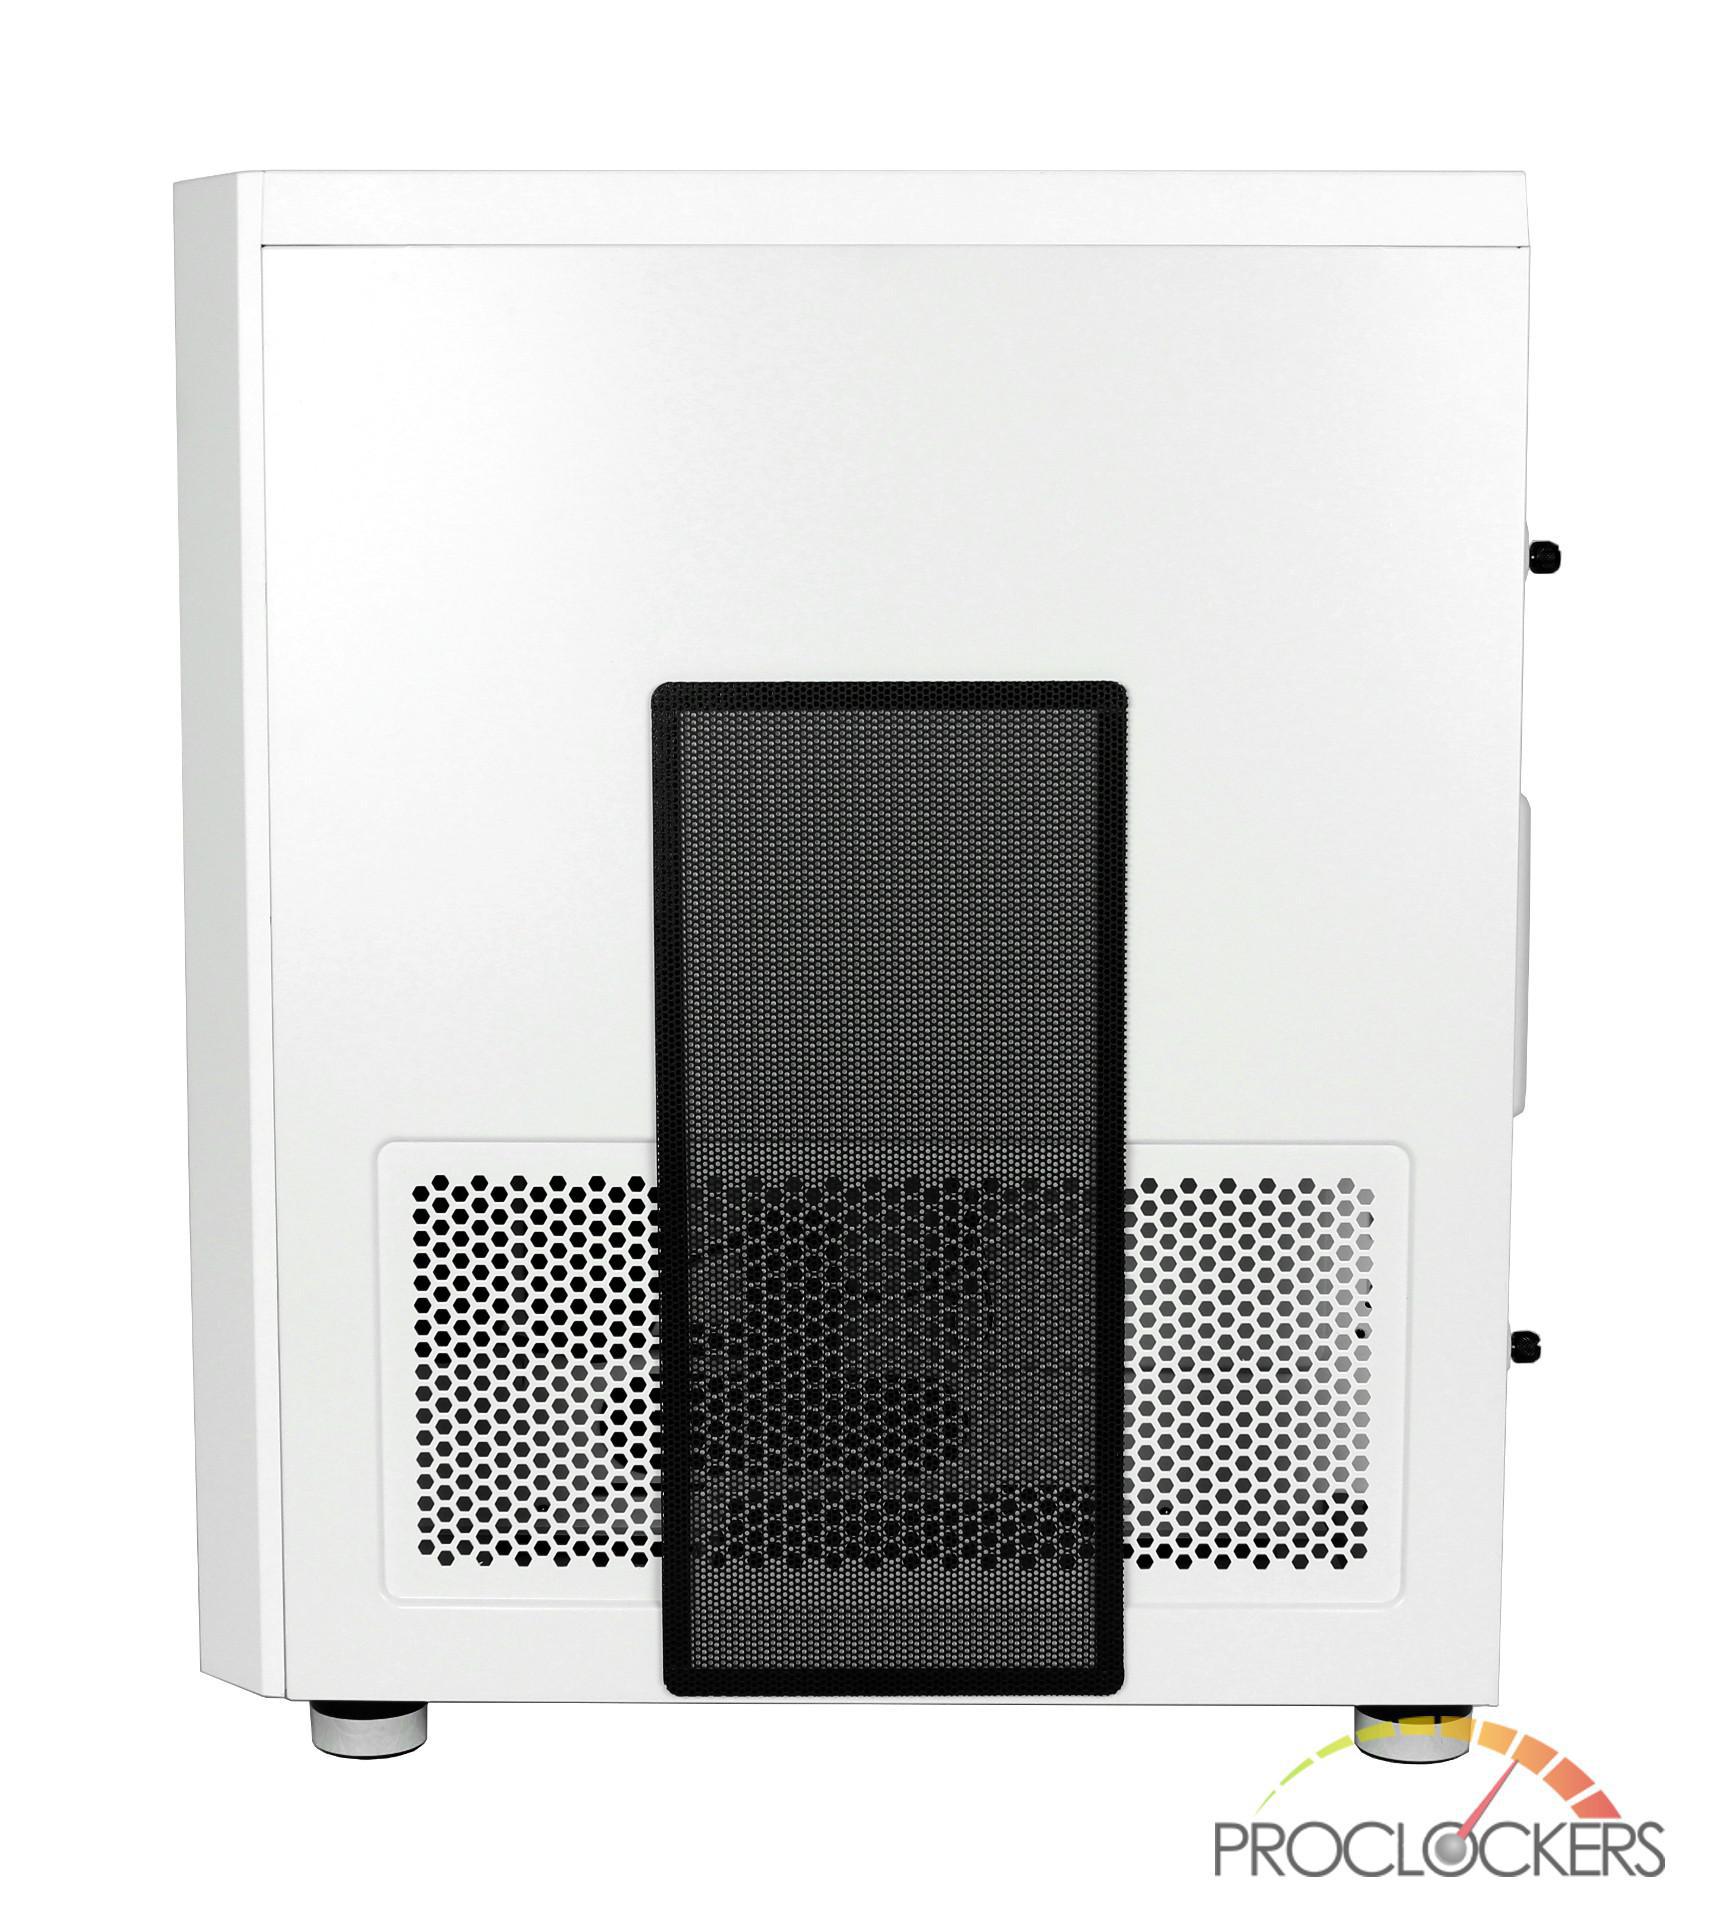
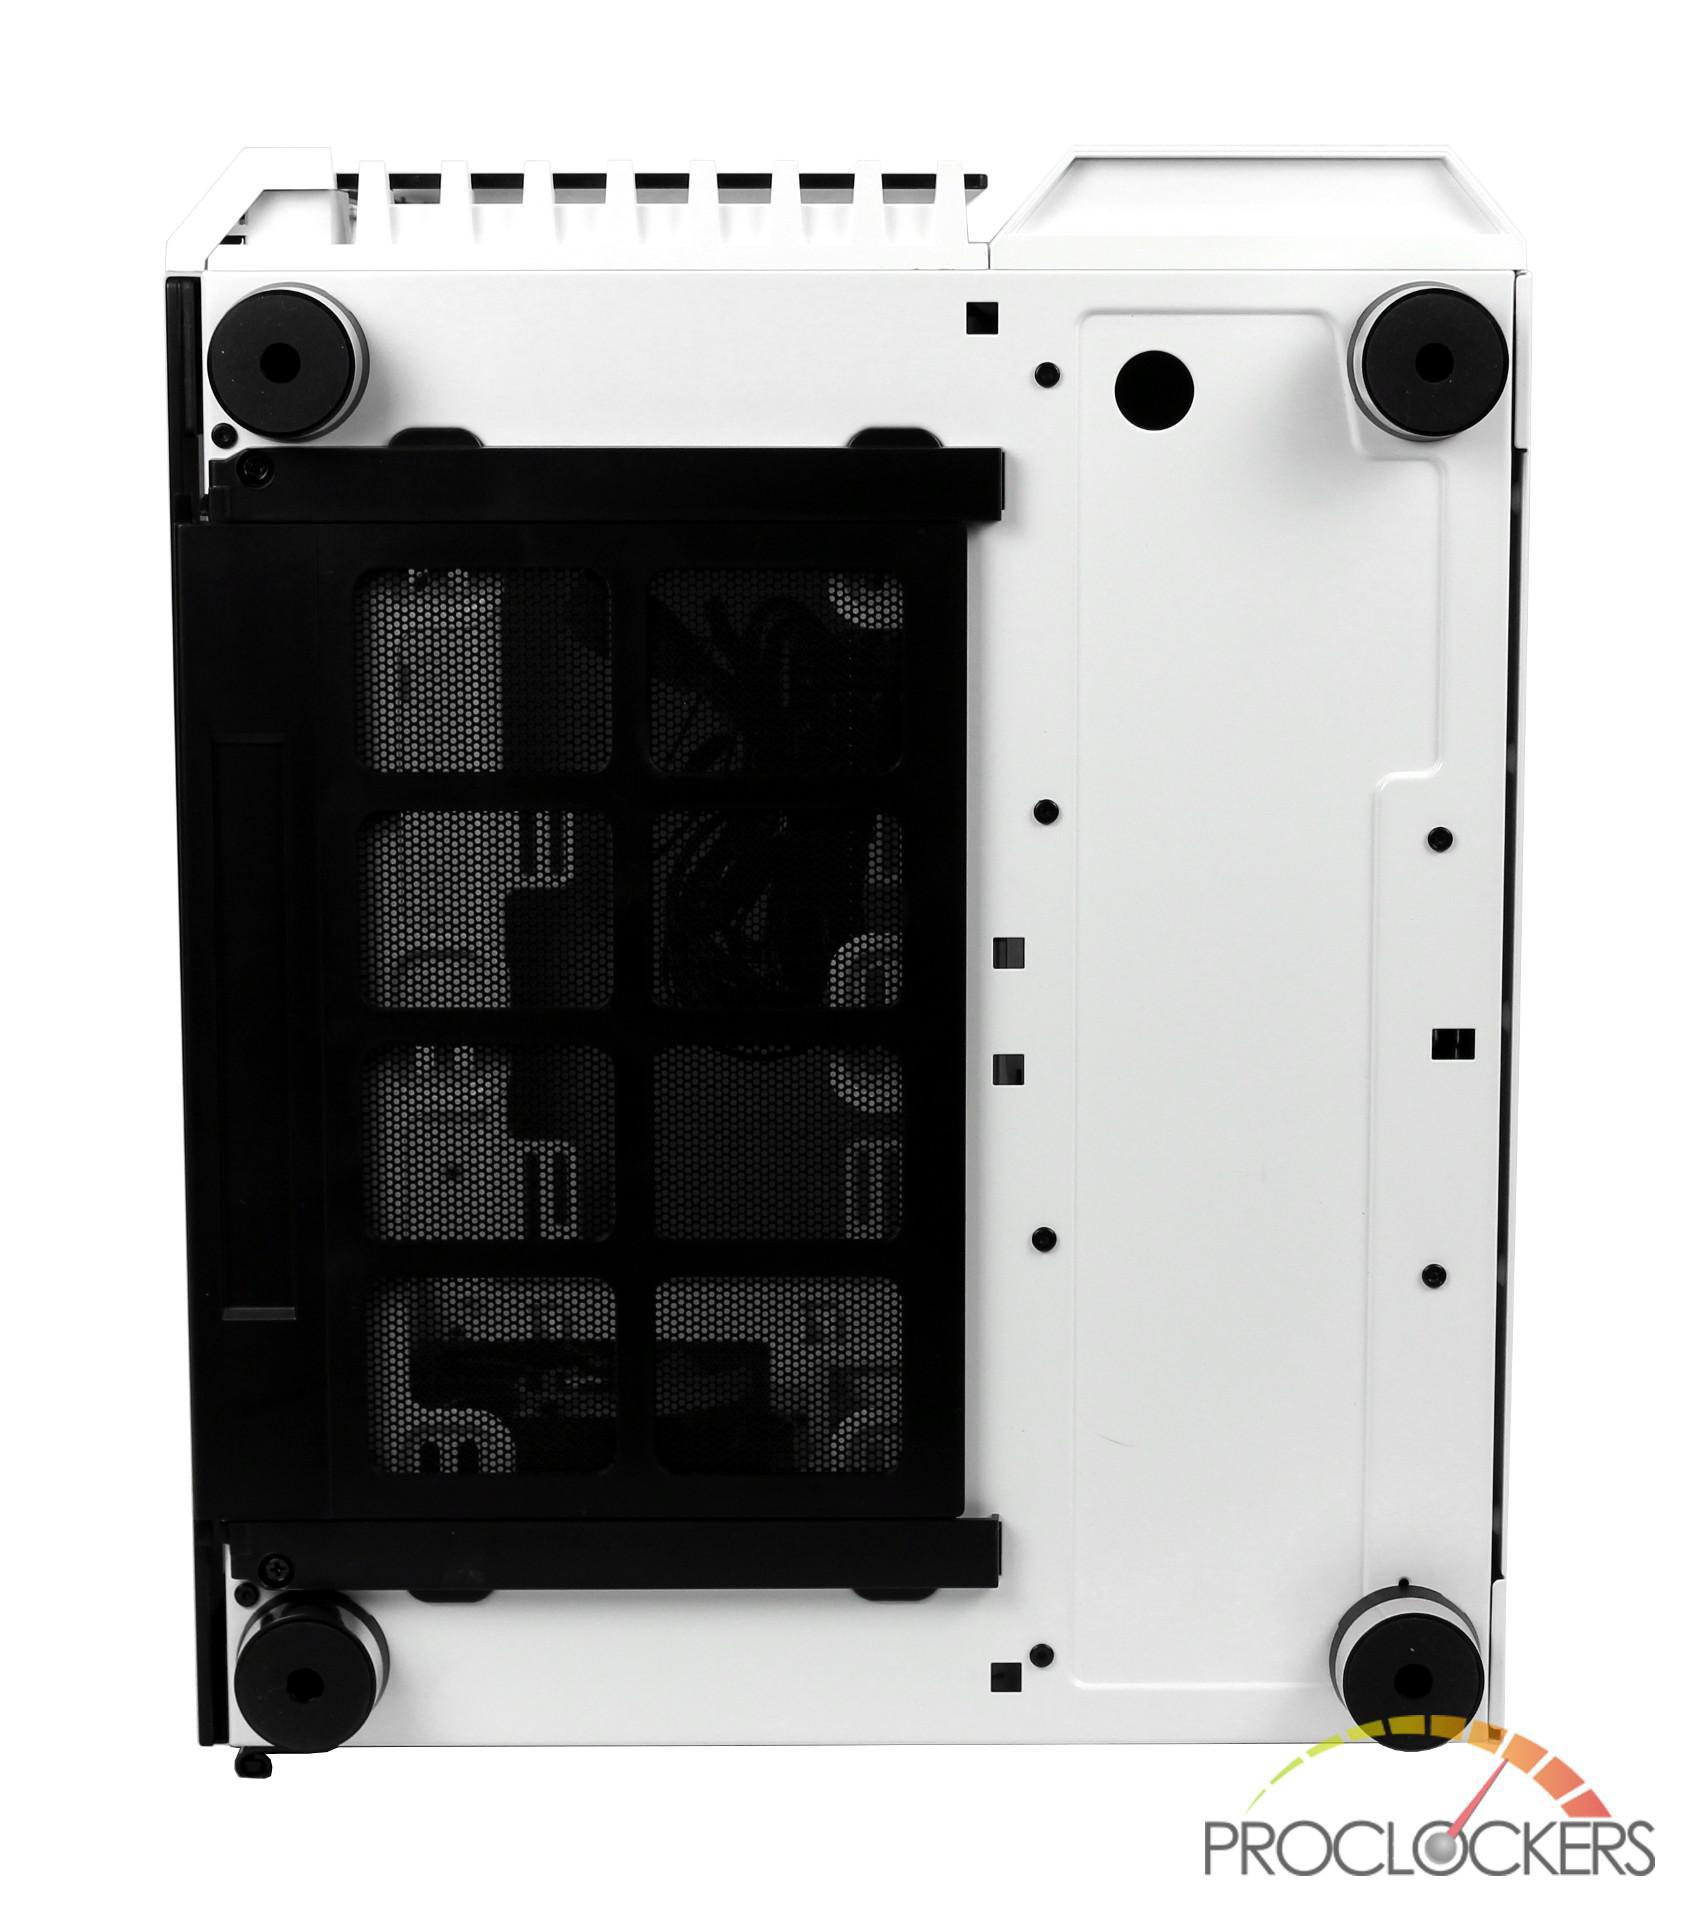
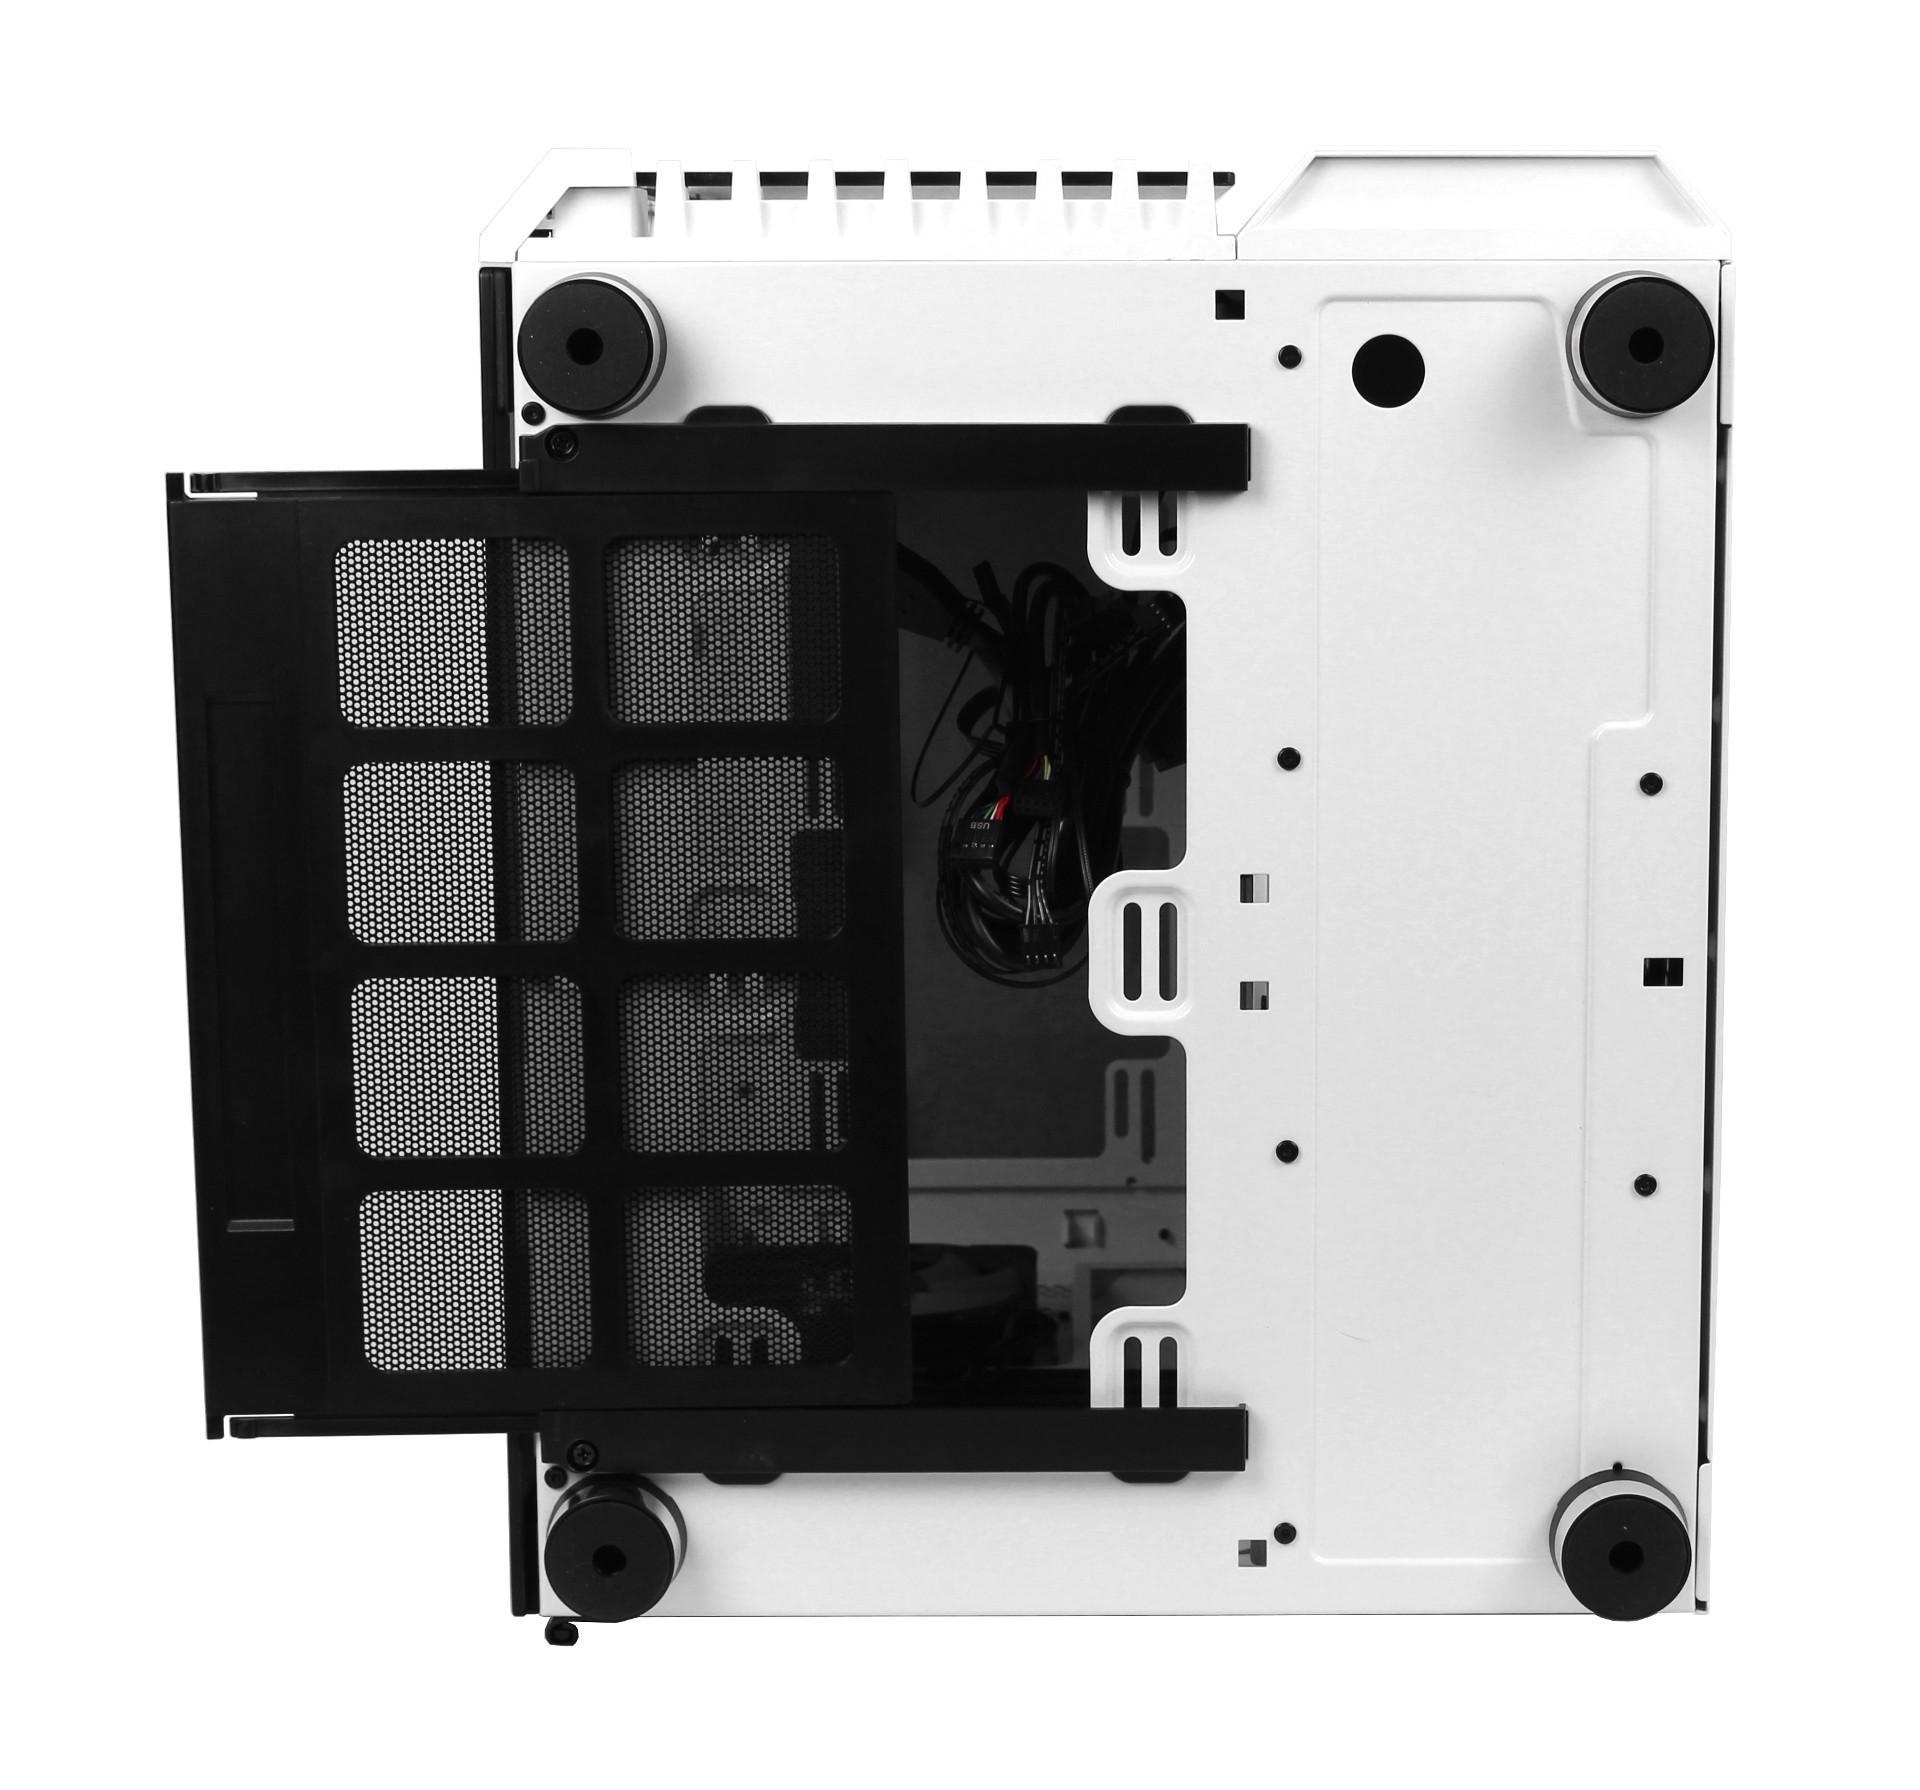
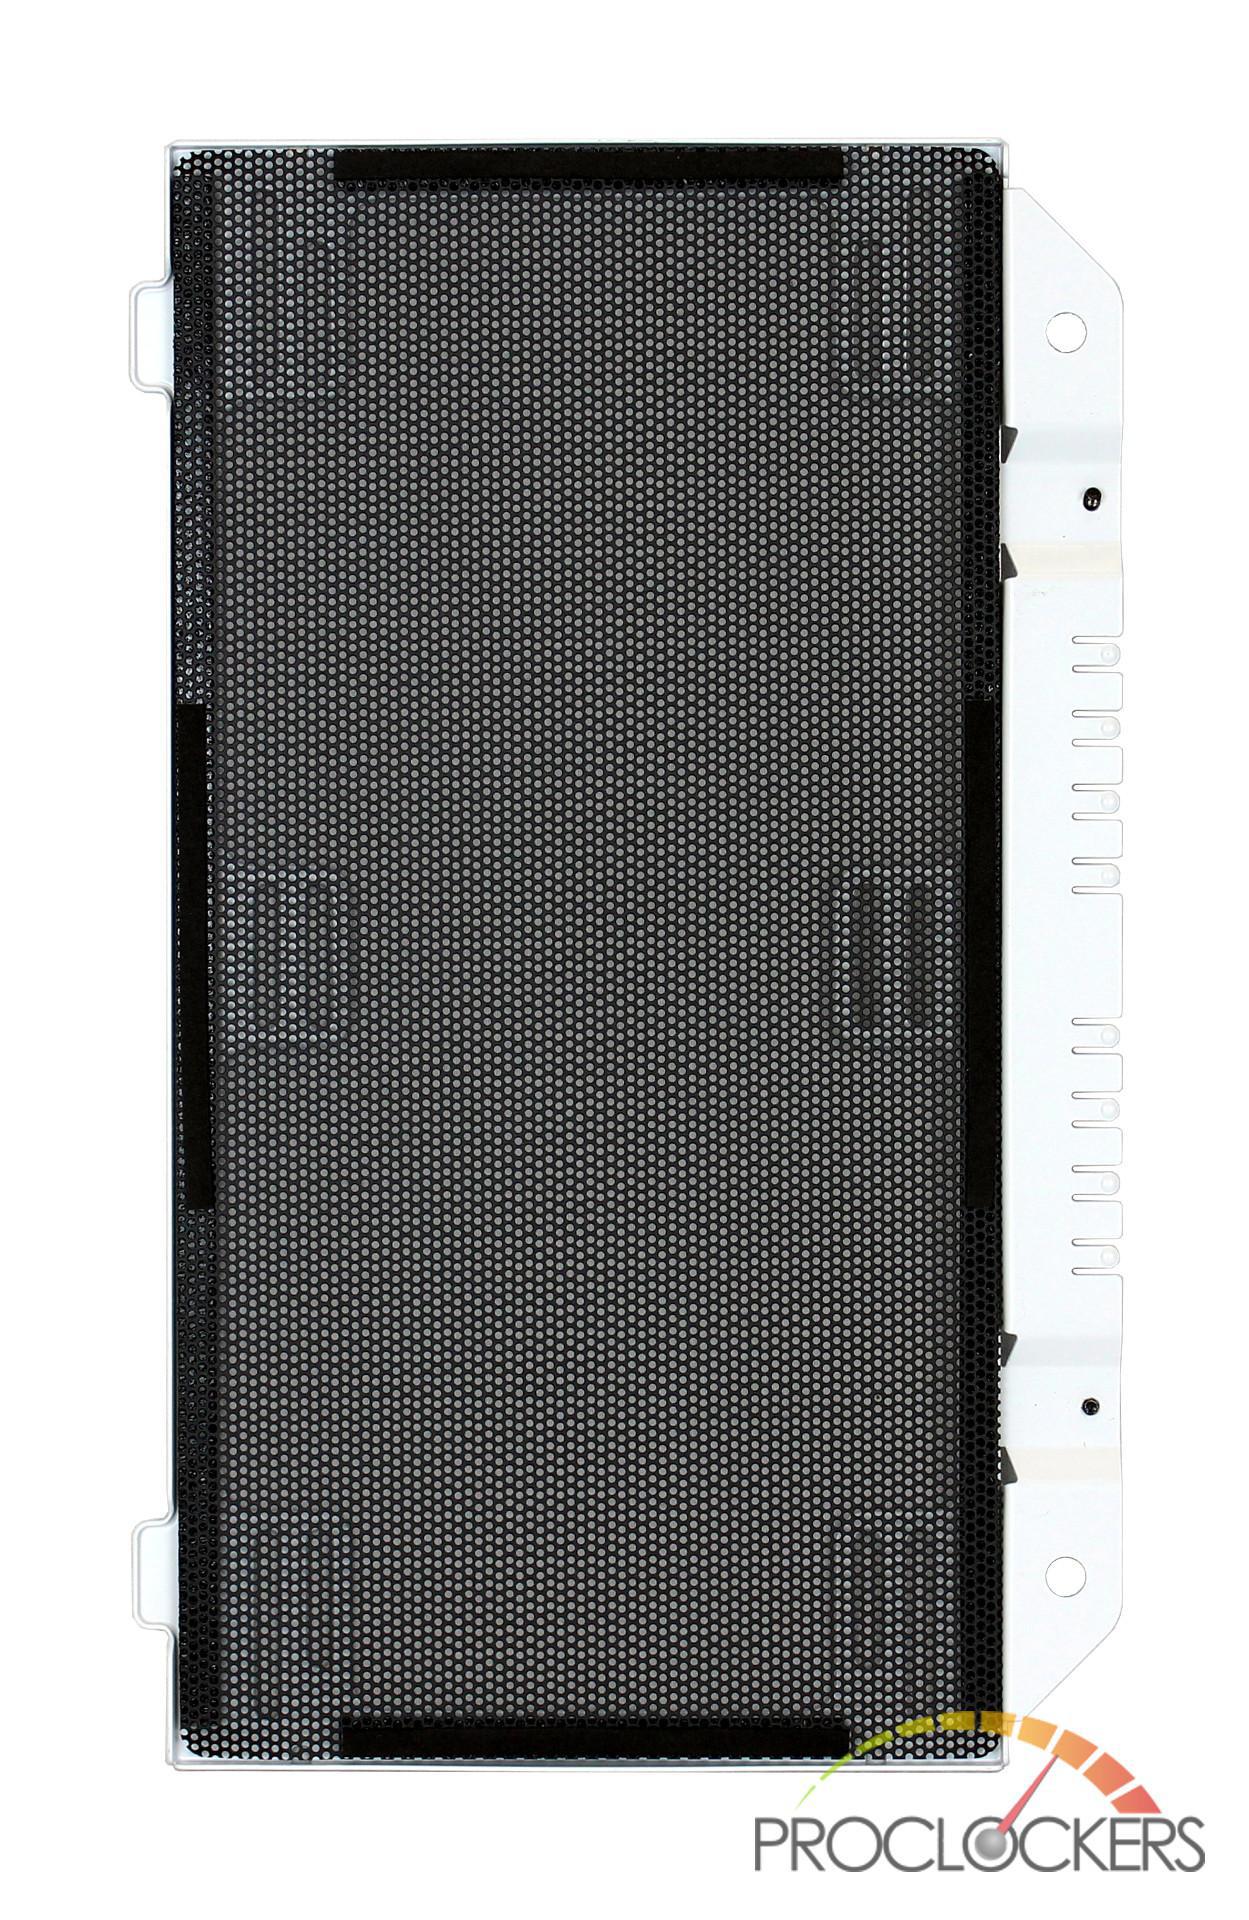
The cable side of the 680X consists of an all steel white panel which has some filtered ventilation on the lower portion. This filter magnetically attaches so it’s easy to remove and clean when doing maintenance on your PC.
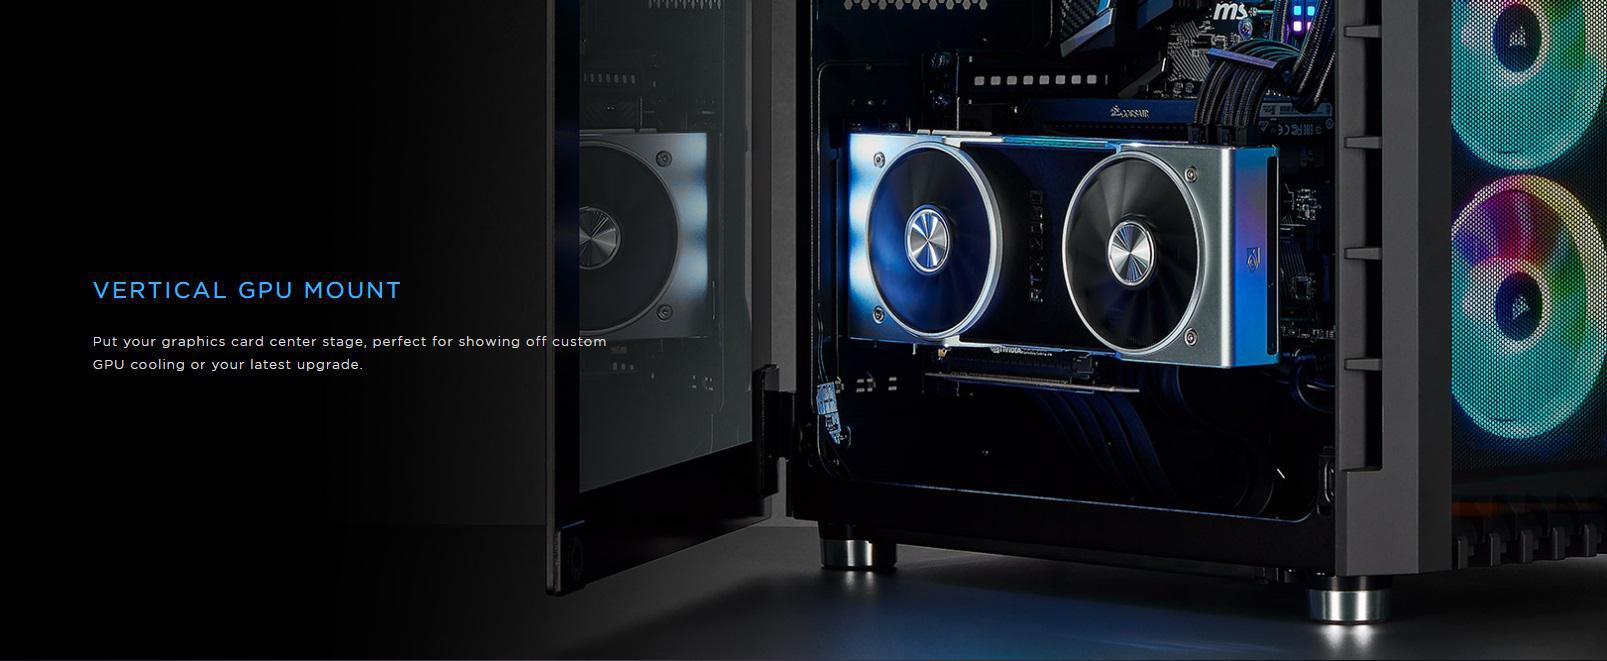
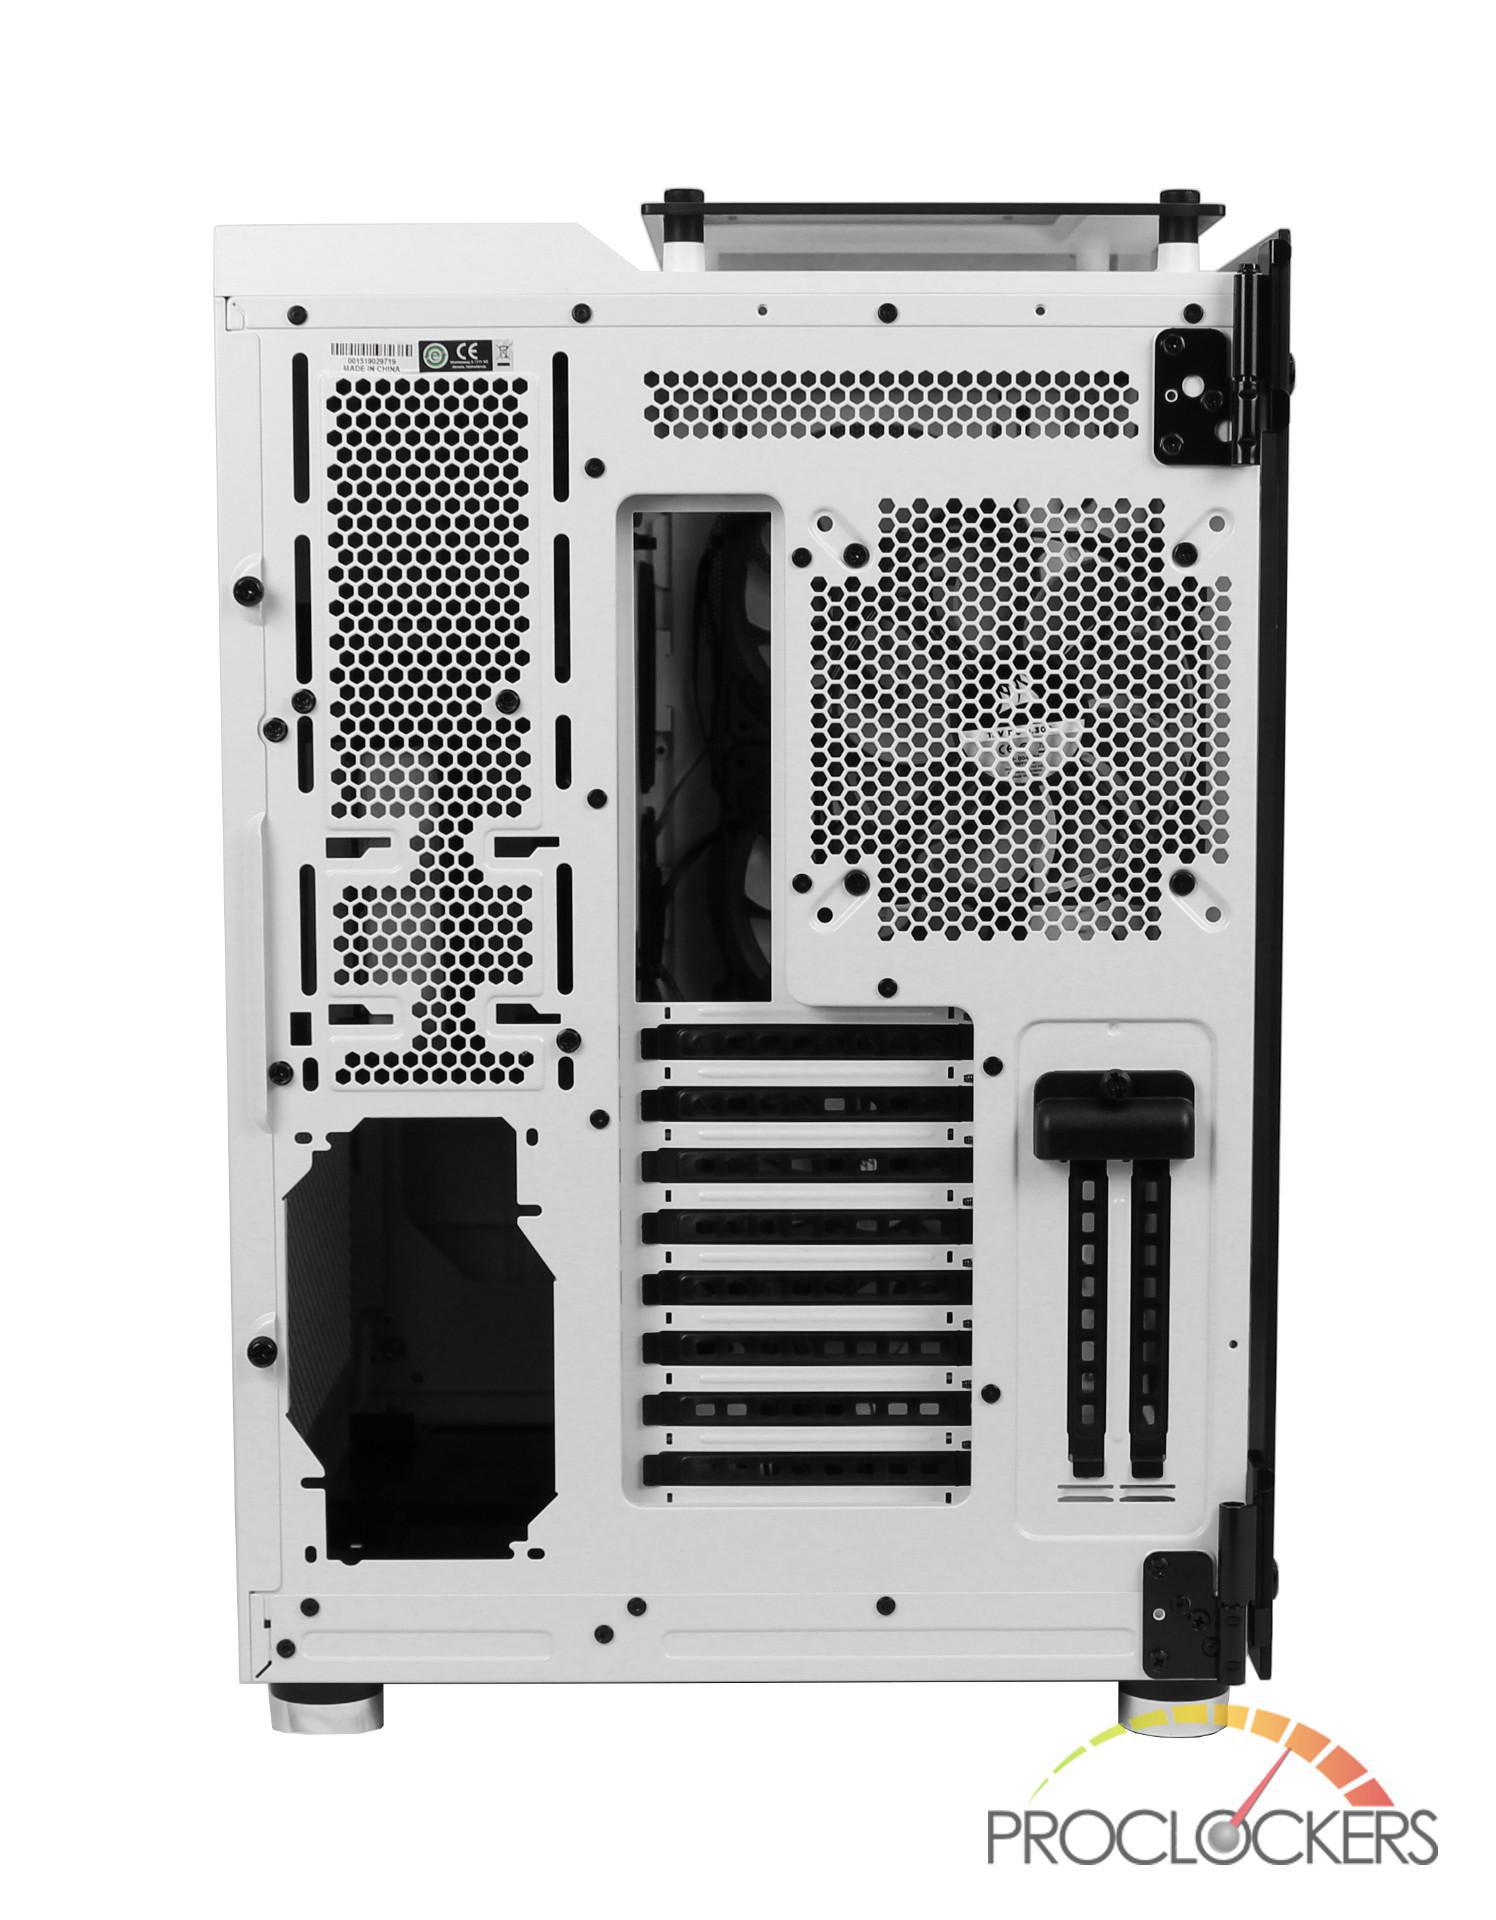
Moving to the back of the case, you’re greeted with your common motherboard I/O cutout and rear exhaust mounting points. The 680X itself provides you with 8 normal expansion slots with an additional 2 if you wish to go vertical with your GPU. One thing you will notice right away is that Corsair has moved the PSU to the left side keeping it isolated from the rest of the case. This is part of the 680X dual-chambered setup which is designed to give you better airflow for your internal components.
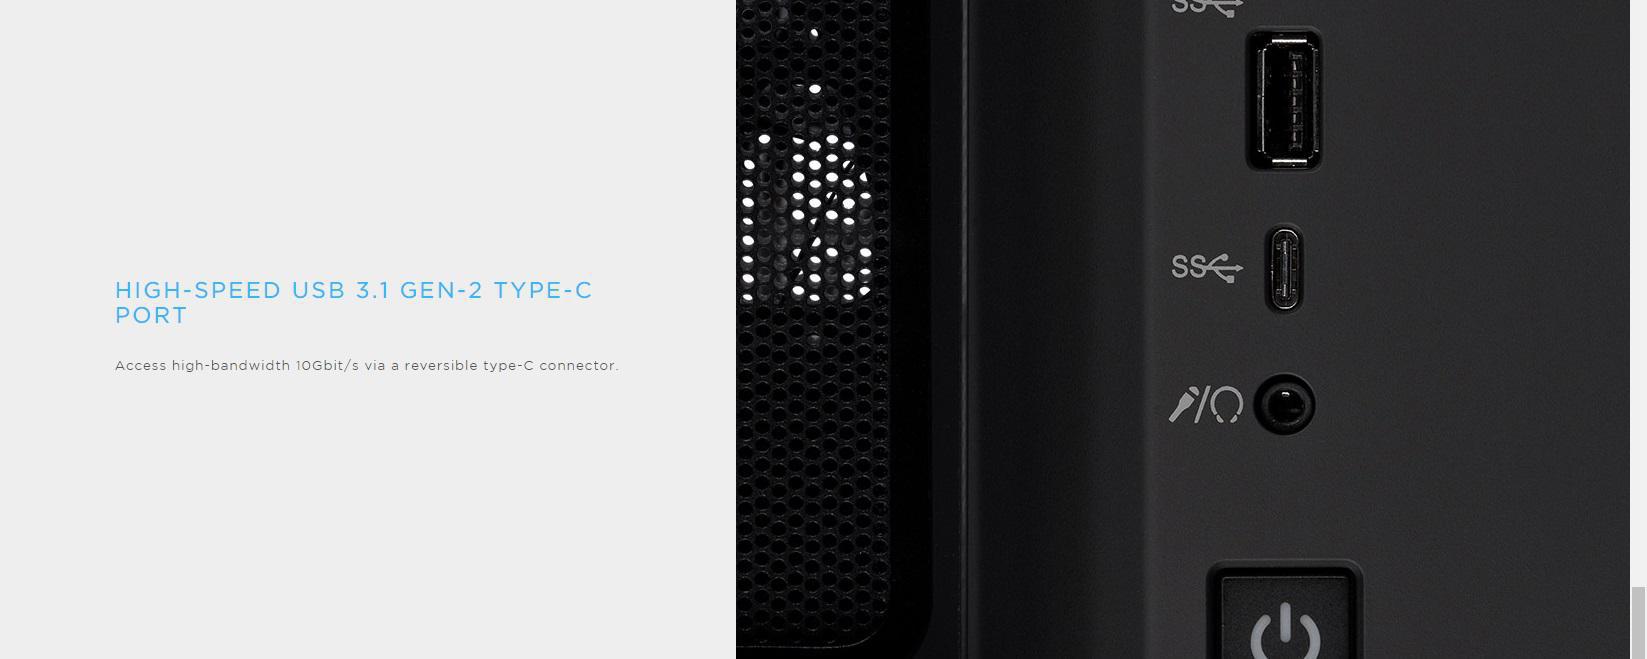
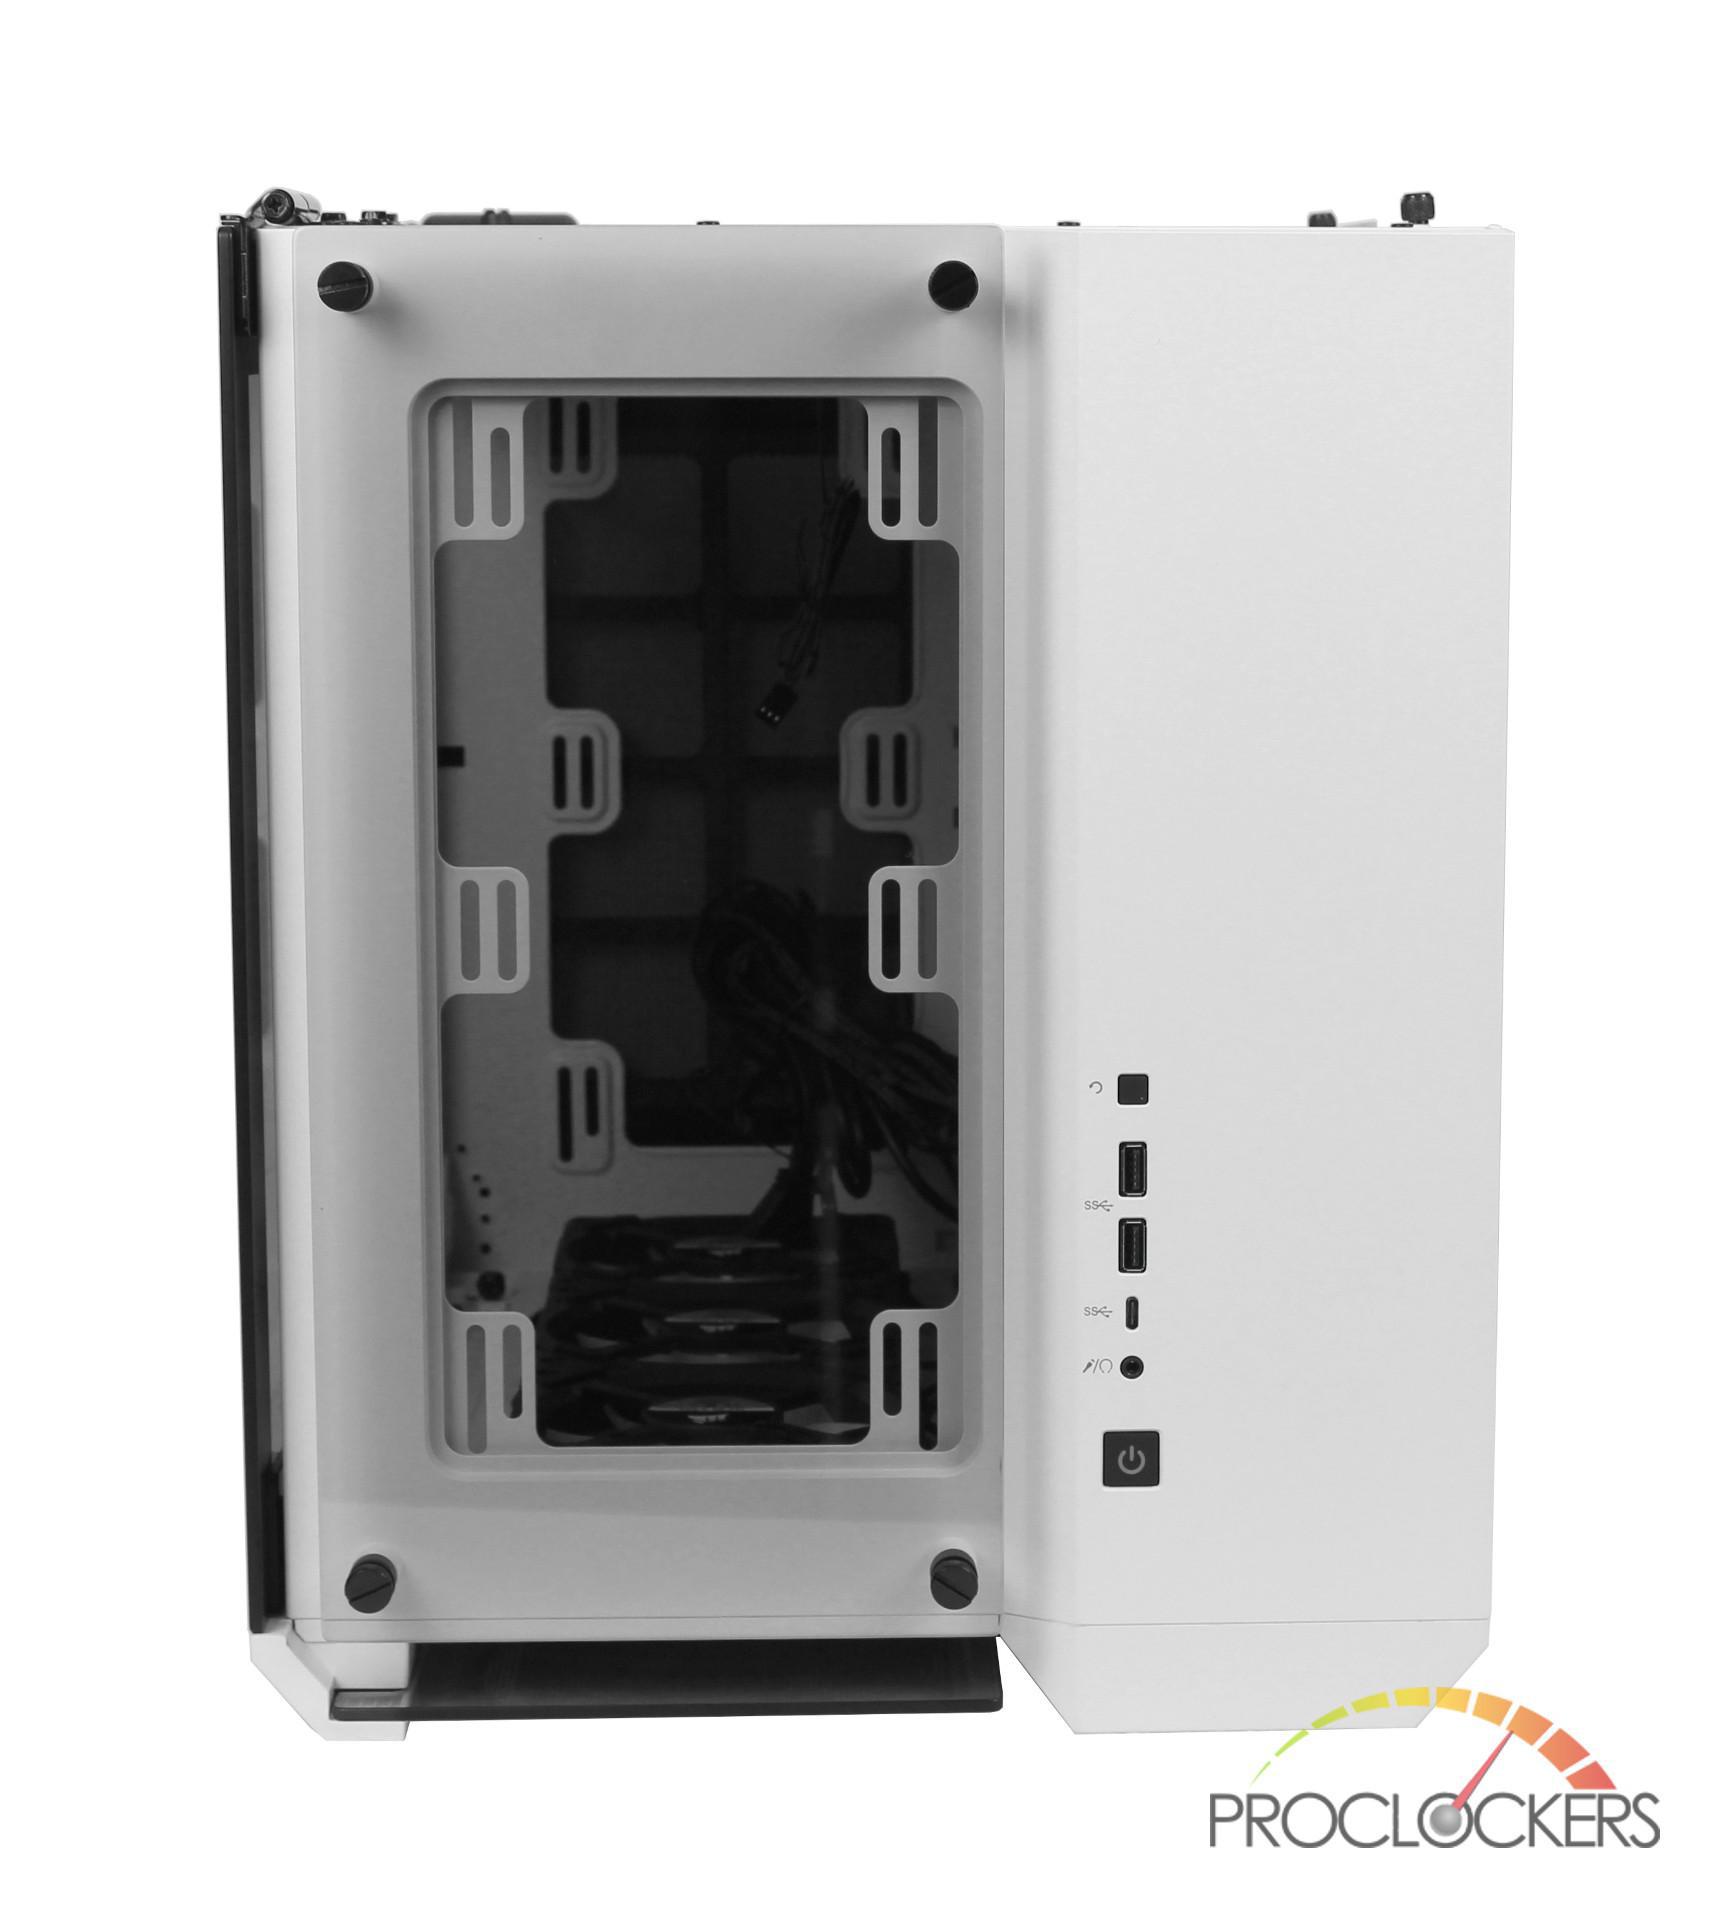
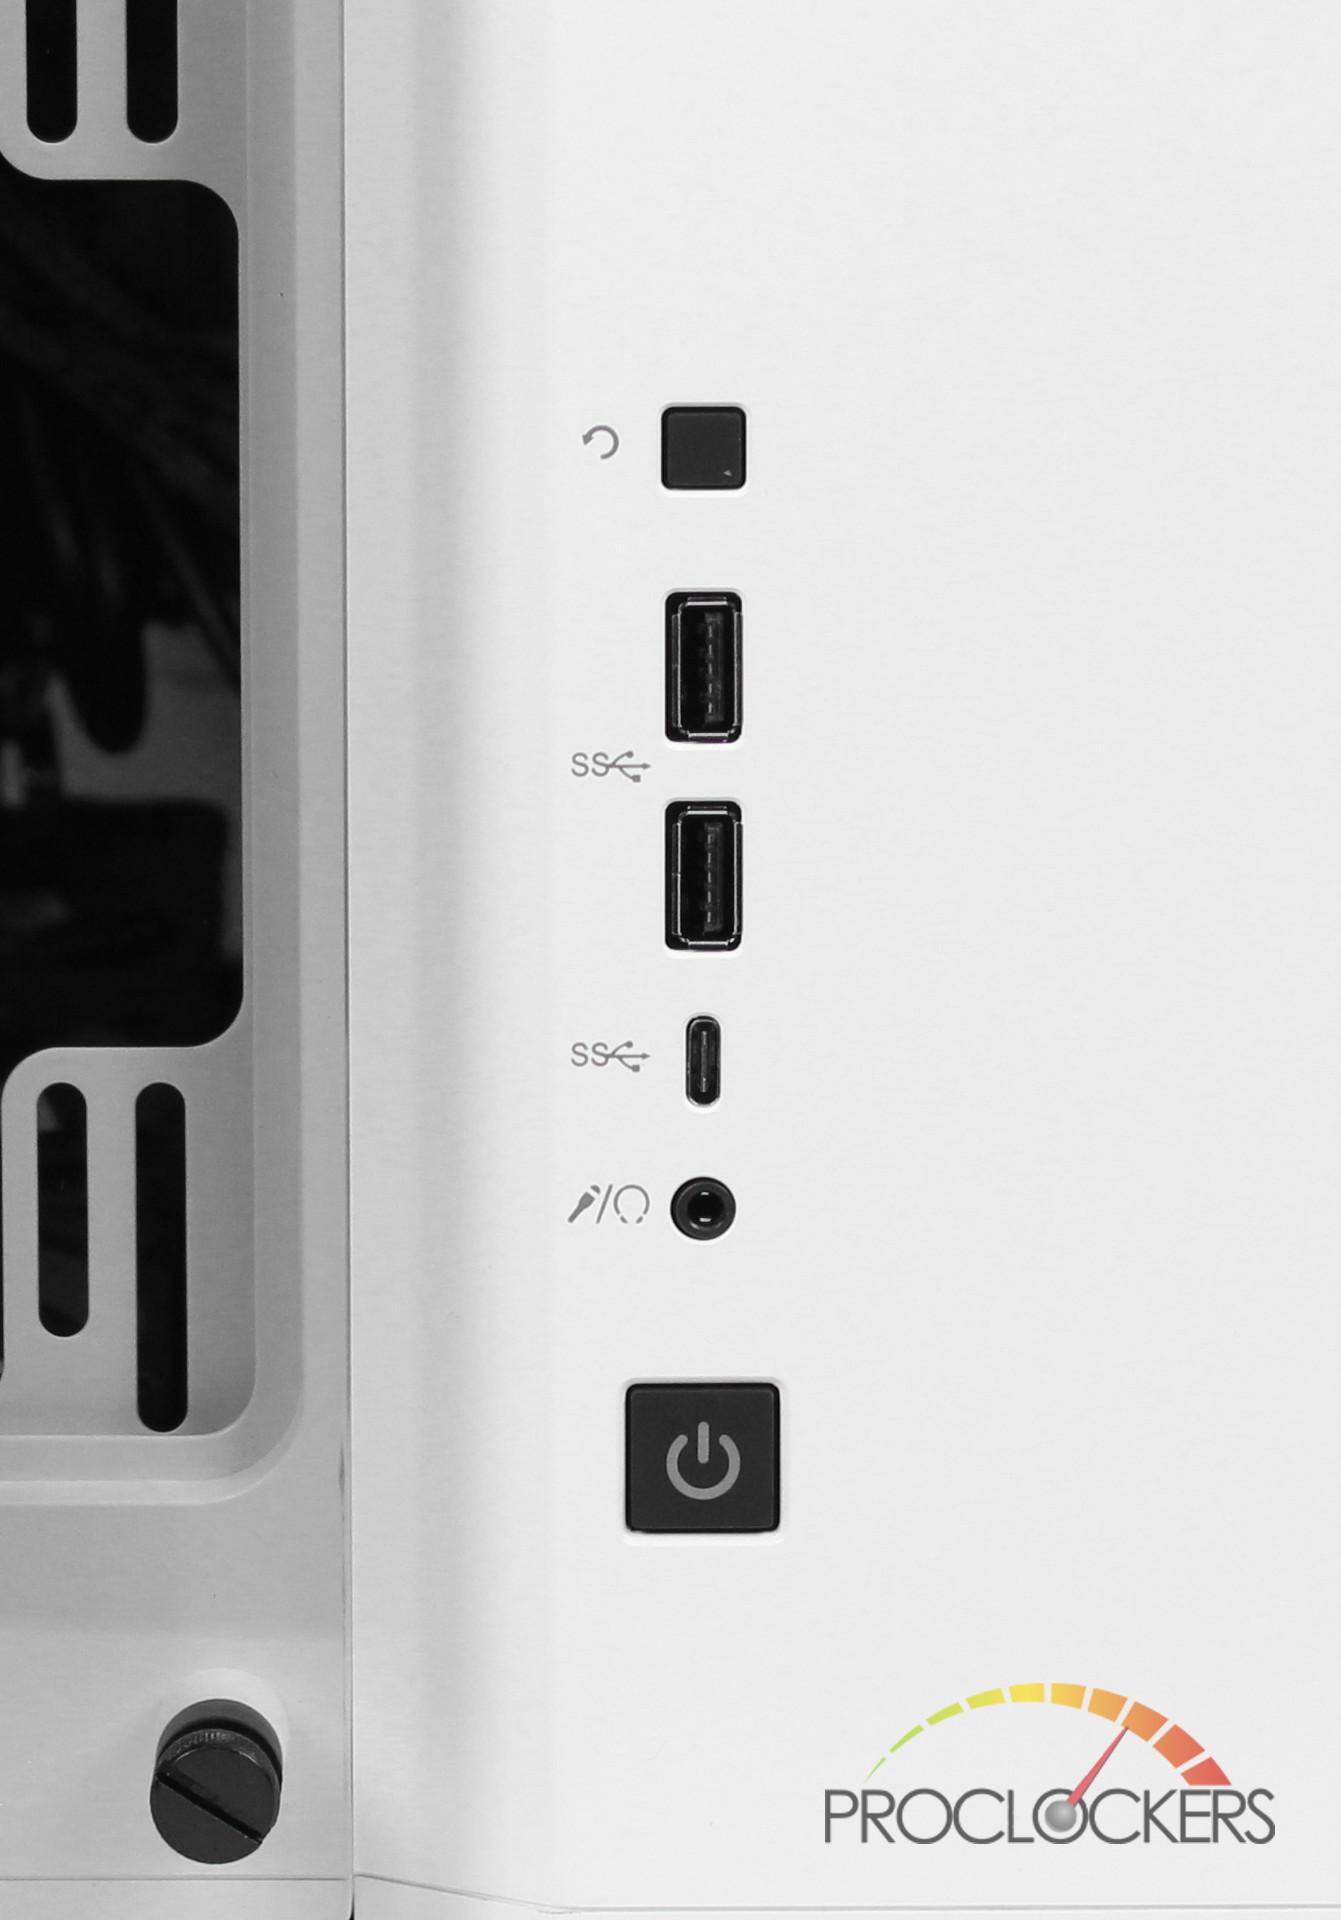
Looking at the top of the 680X, we have our final piece of tempered glass which like the front has plenty of space between the case and glass for air flow. Below the glass is room to install two 120/140mm fans as well as support for up to a 280mm radiator. To the right of the tempered glass is the 680X’s I/O which includes a reset button, two USB 3.0 ports, a single USB 3.1 Gen-2 Type-C port, 3.5mm headphone/microphone jack and a power button.
Placing the case on its bac,k you can get a look of 680X’s bottom which includes rubberized feet in each of its four corners as well as a removable filter. The filter is easily taken out by sliding it out of the side of the case and can be removed while the 680X is standing on your desk or floor.
A Closer Look: Interior
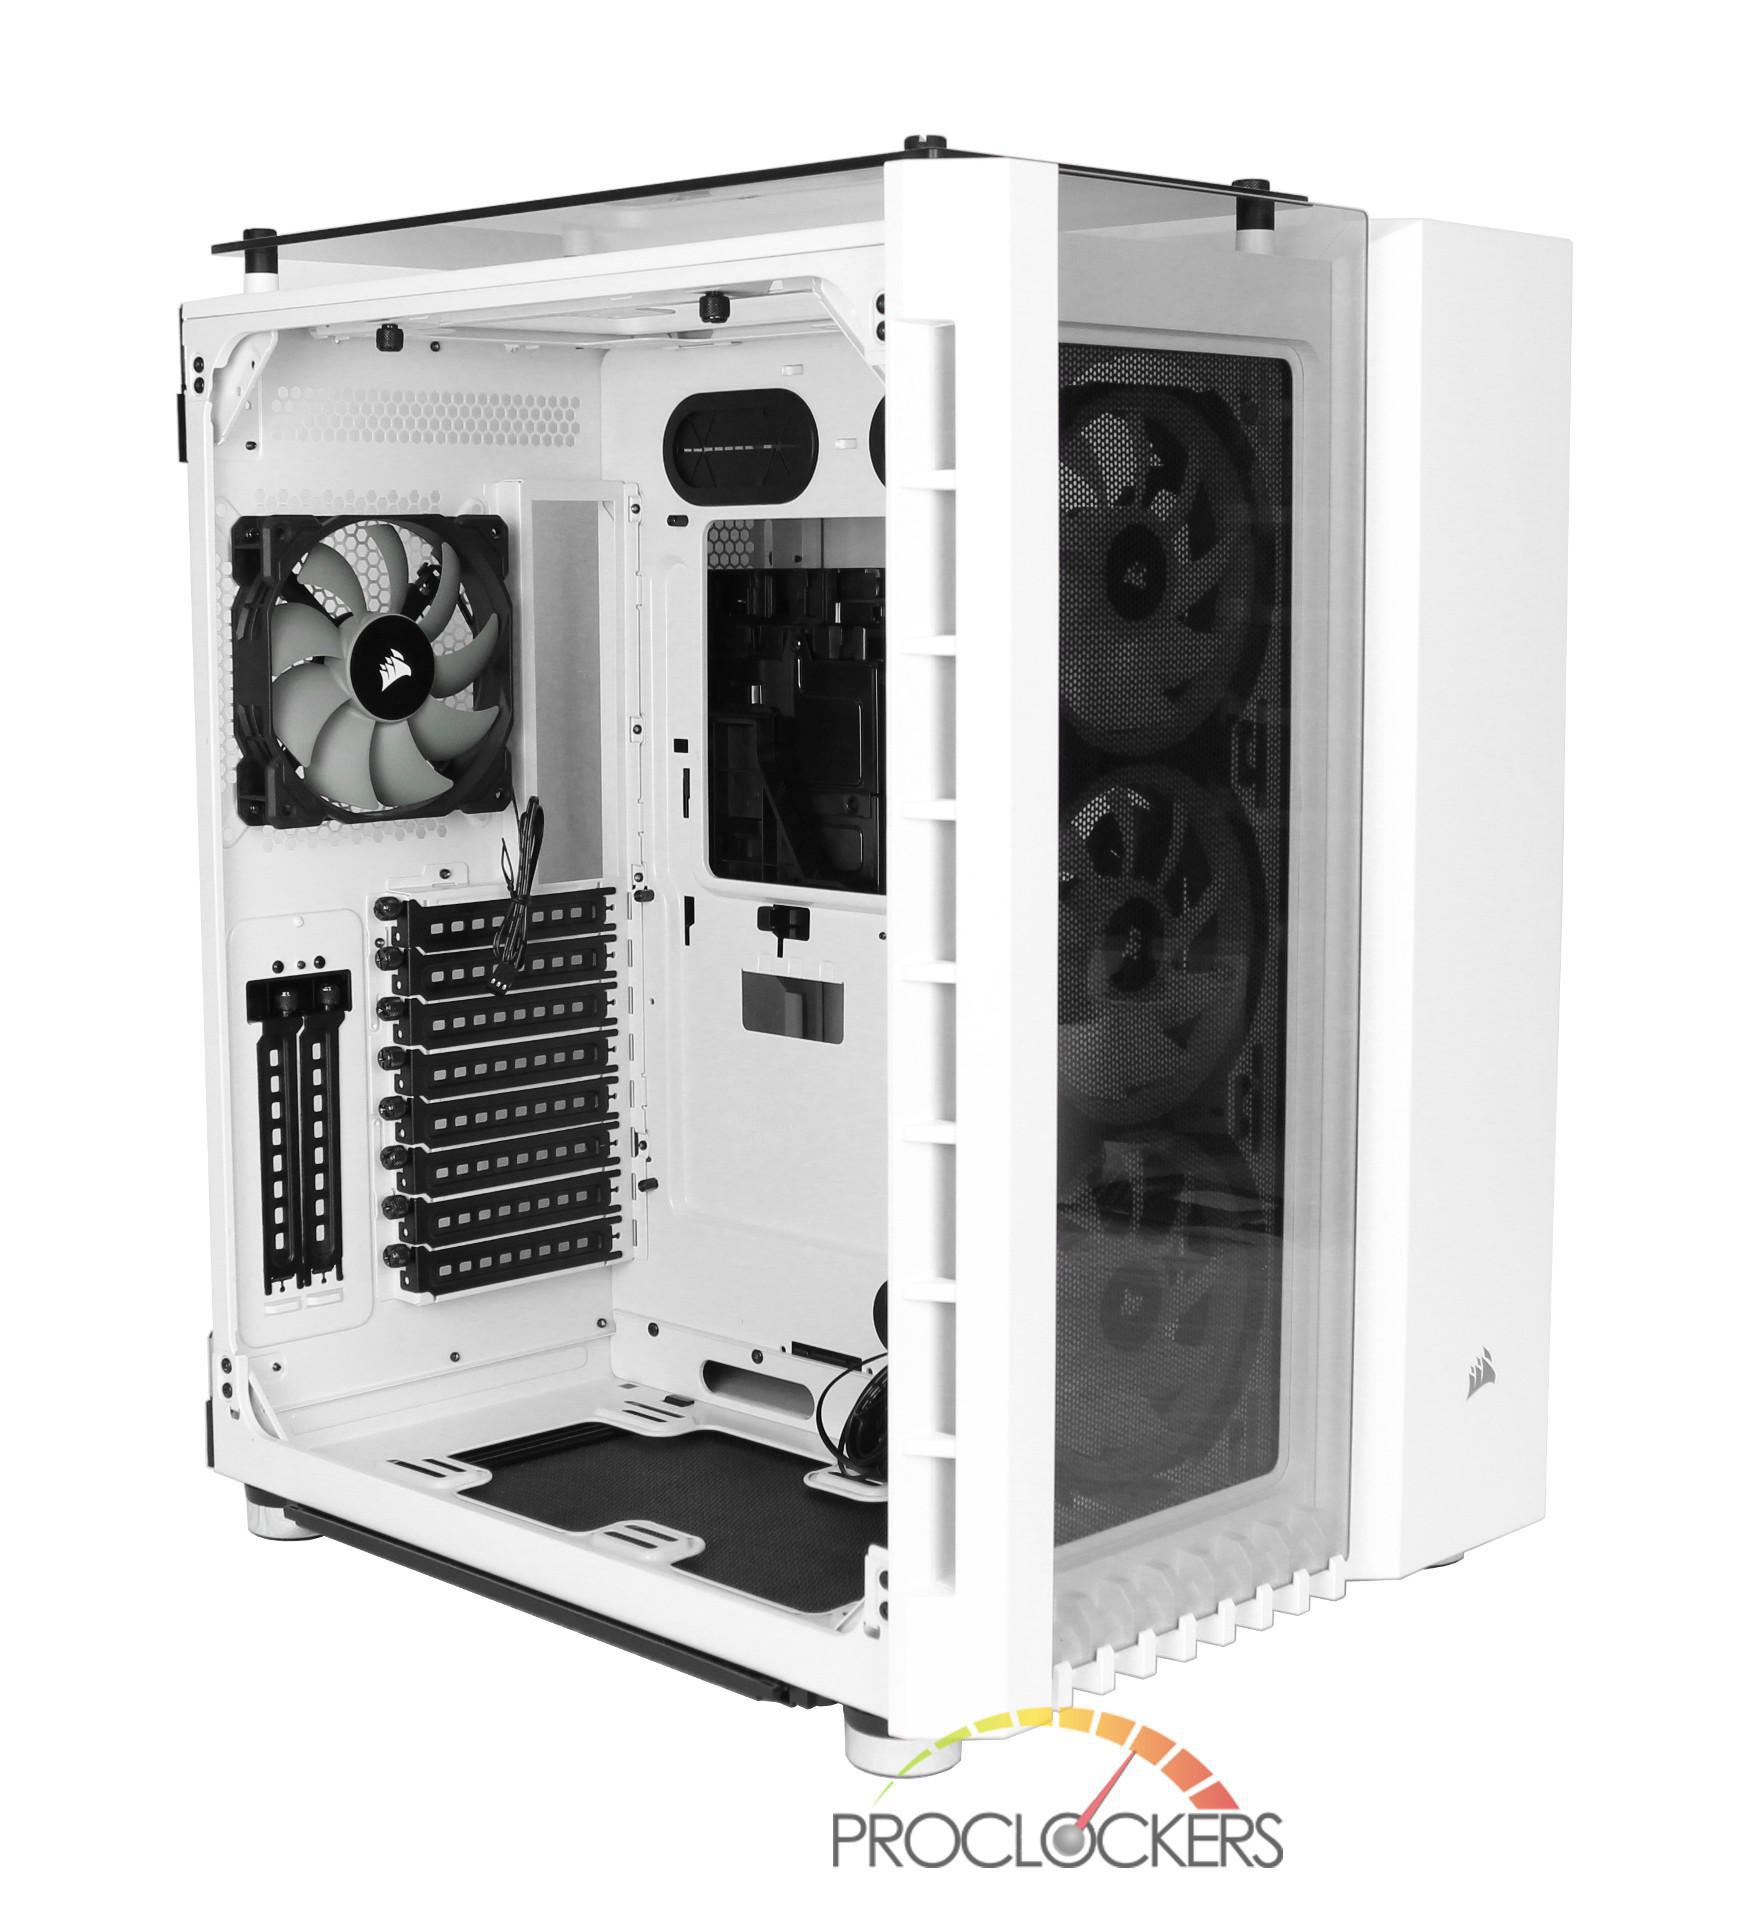
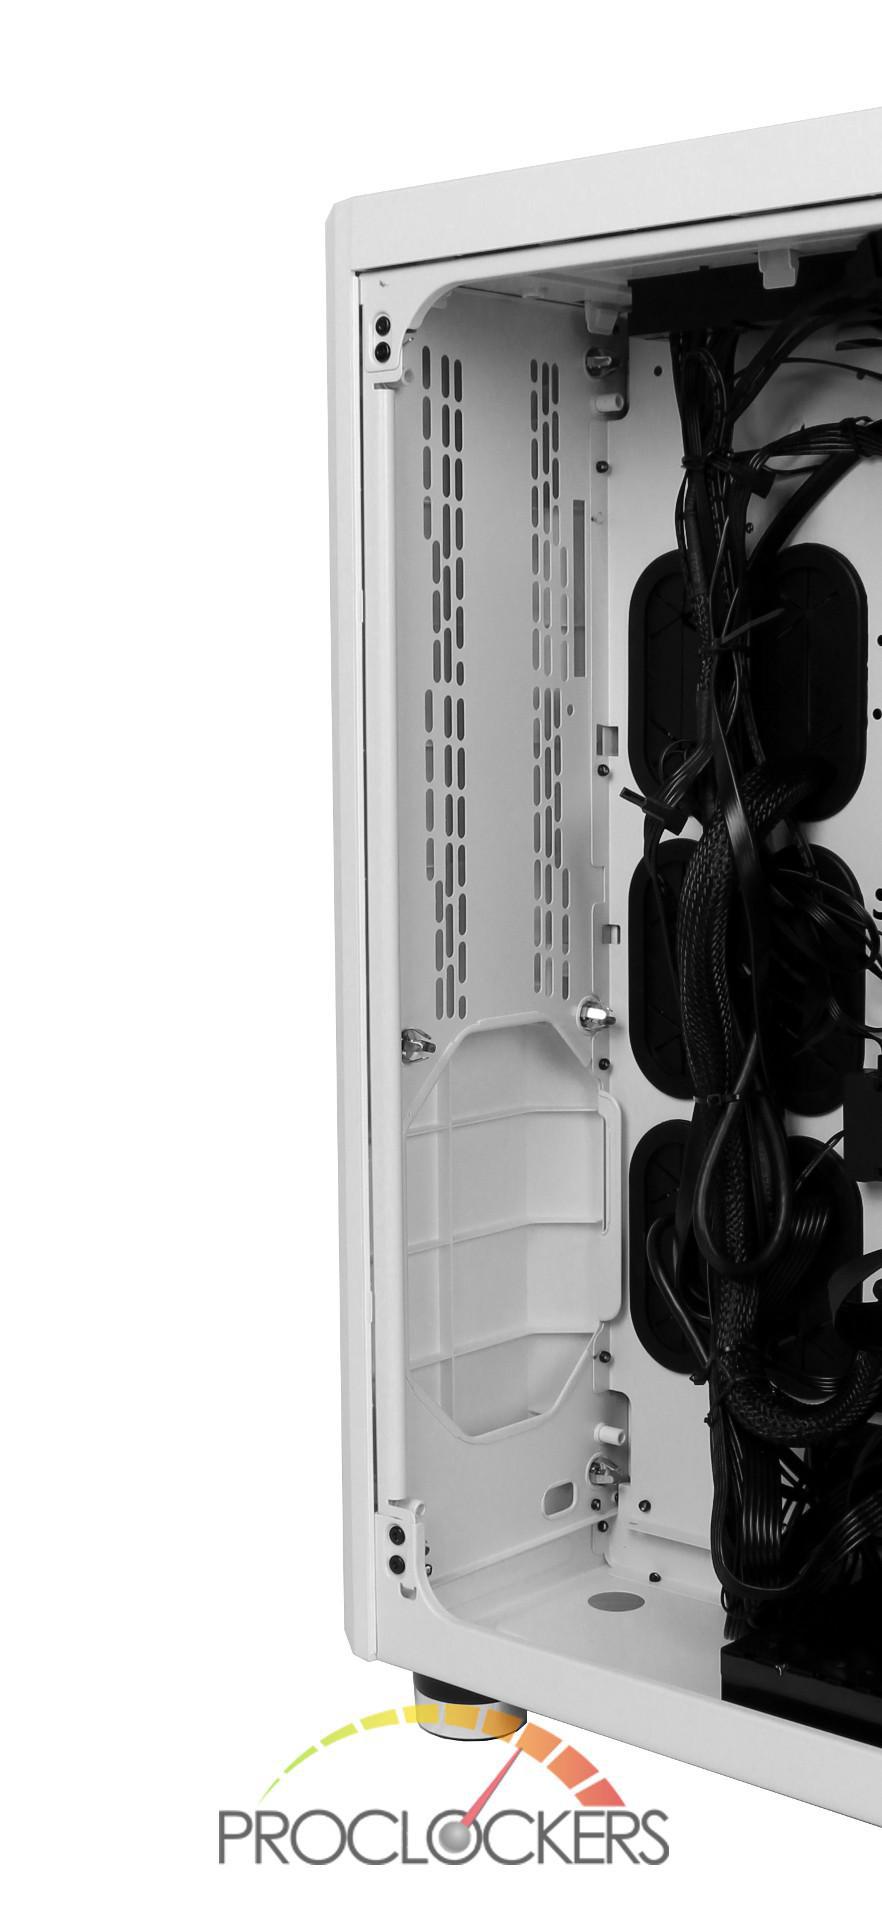
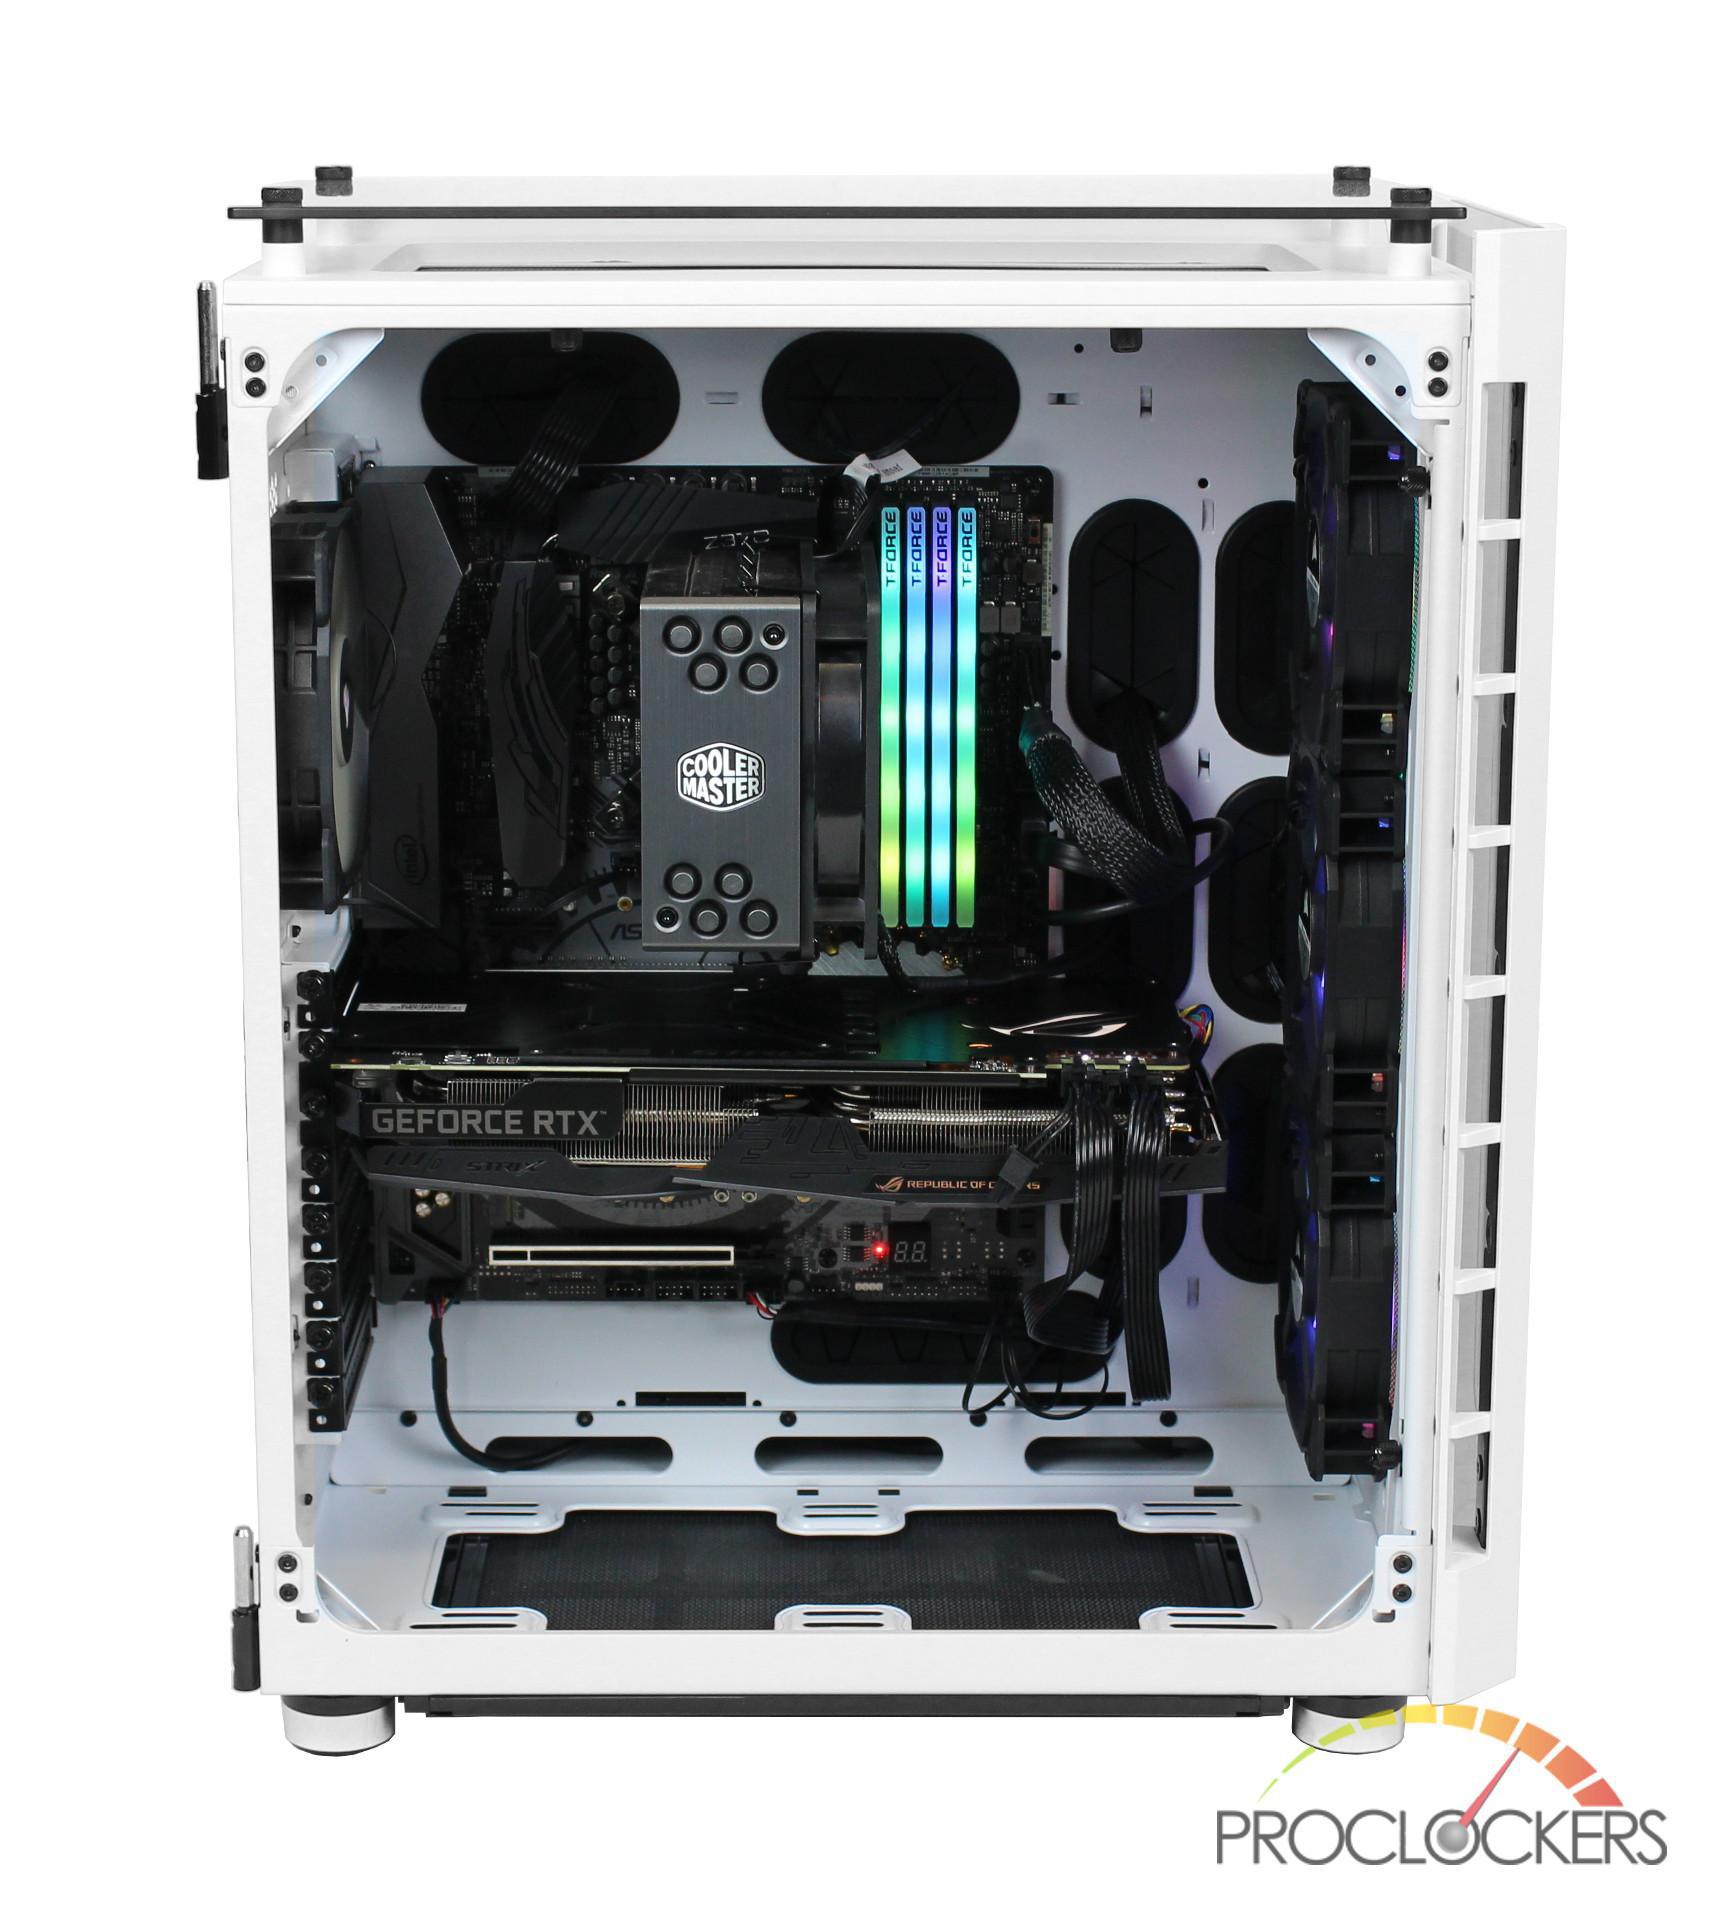
To access the 680X’s interior we went ahead and took off the hinged tempered glass panel by removing a single screw on the top hinge and sliding it off. With the panel removed, the case is much easier to work with and we don’t have to worry about breaking the door. The 680X’s interior continues with the white theme and adds some black accents with the grommets and expansion slot covers.
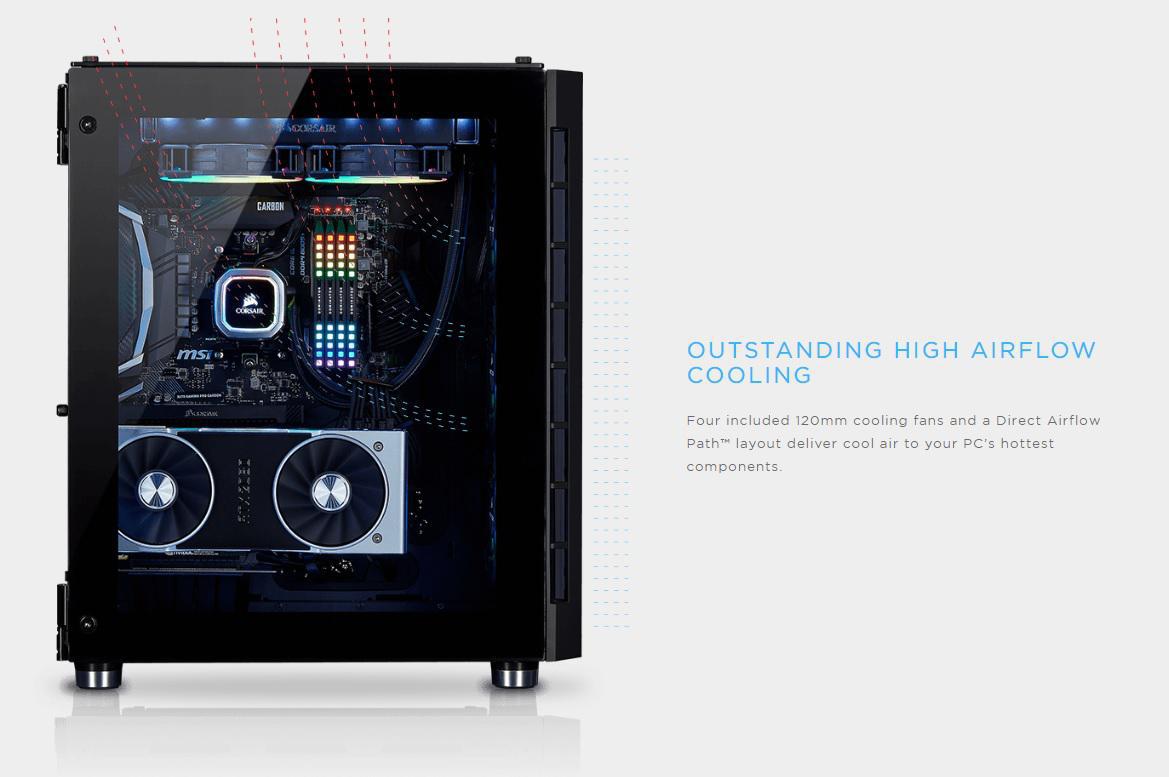
There seems to be plenty of cable routing options with two grommets up top, 6 grommets to the right and three cable slots on the bottom. Since the PSU has been moved to the back of the case Corsair was able to lower the motherboard tray from its typical position. This gives you more room to work above the motherboard if you wished to install any radiators up top. You also have plenty of room in the basement for radiators as well, thanks to not having a PSU in the way.
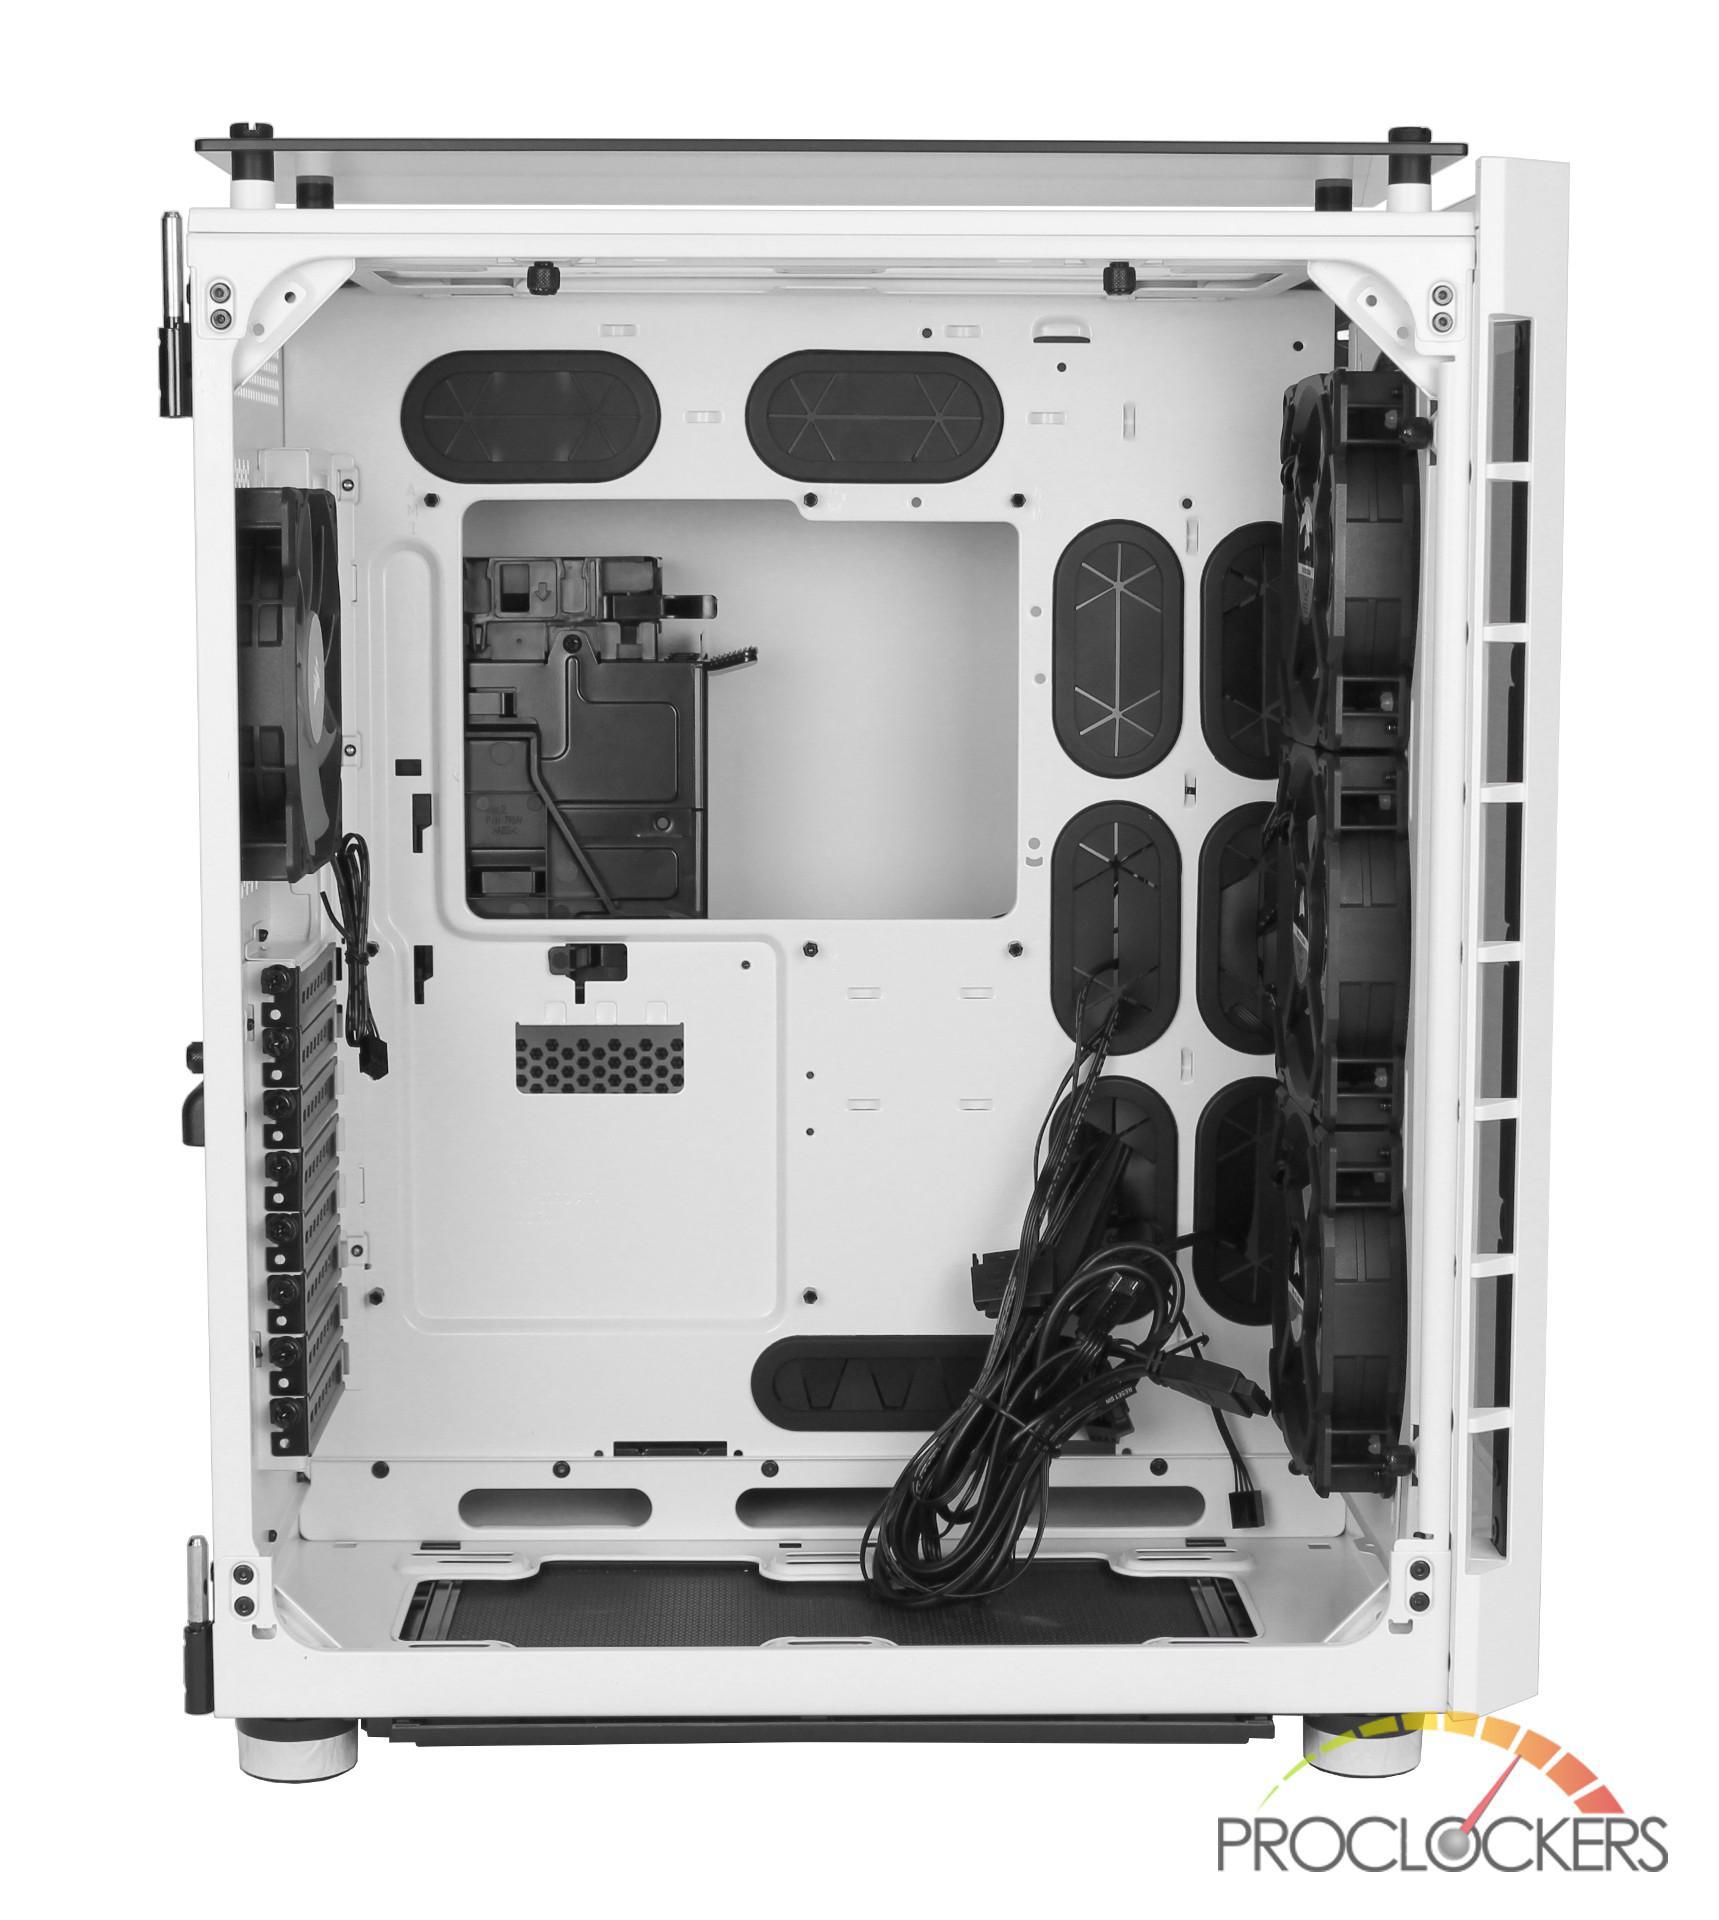
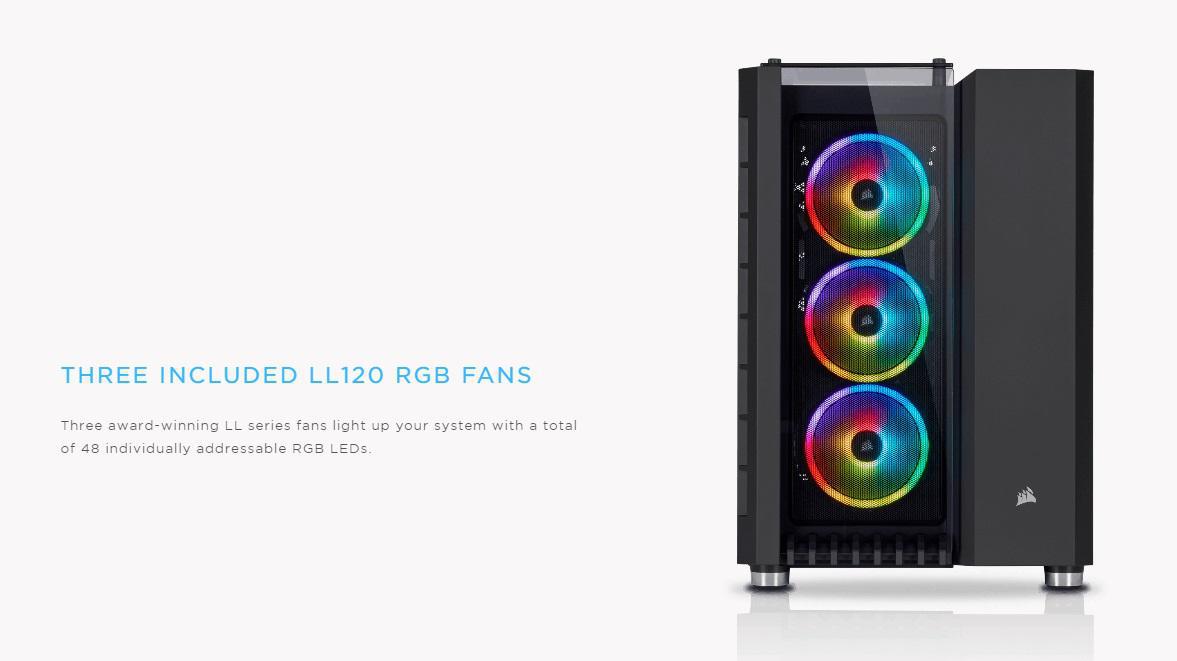
Toward the front of the case, Corsair has included three of their LL120’s fans and has room for up to a 280mm radiator/AIO.
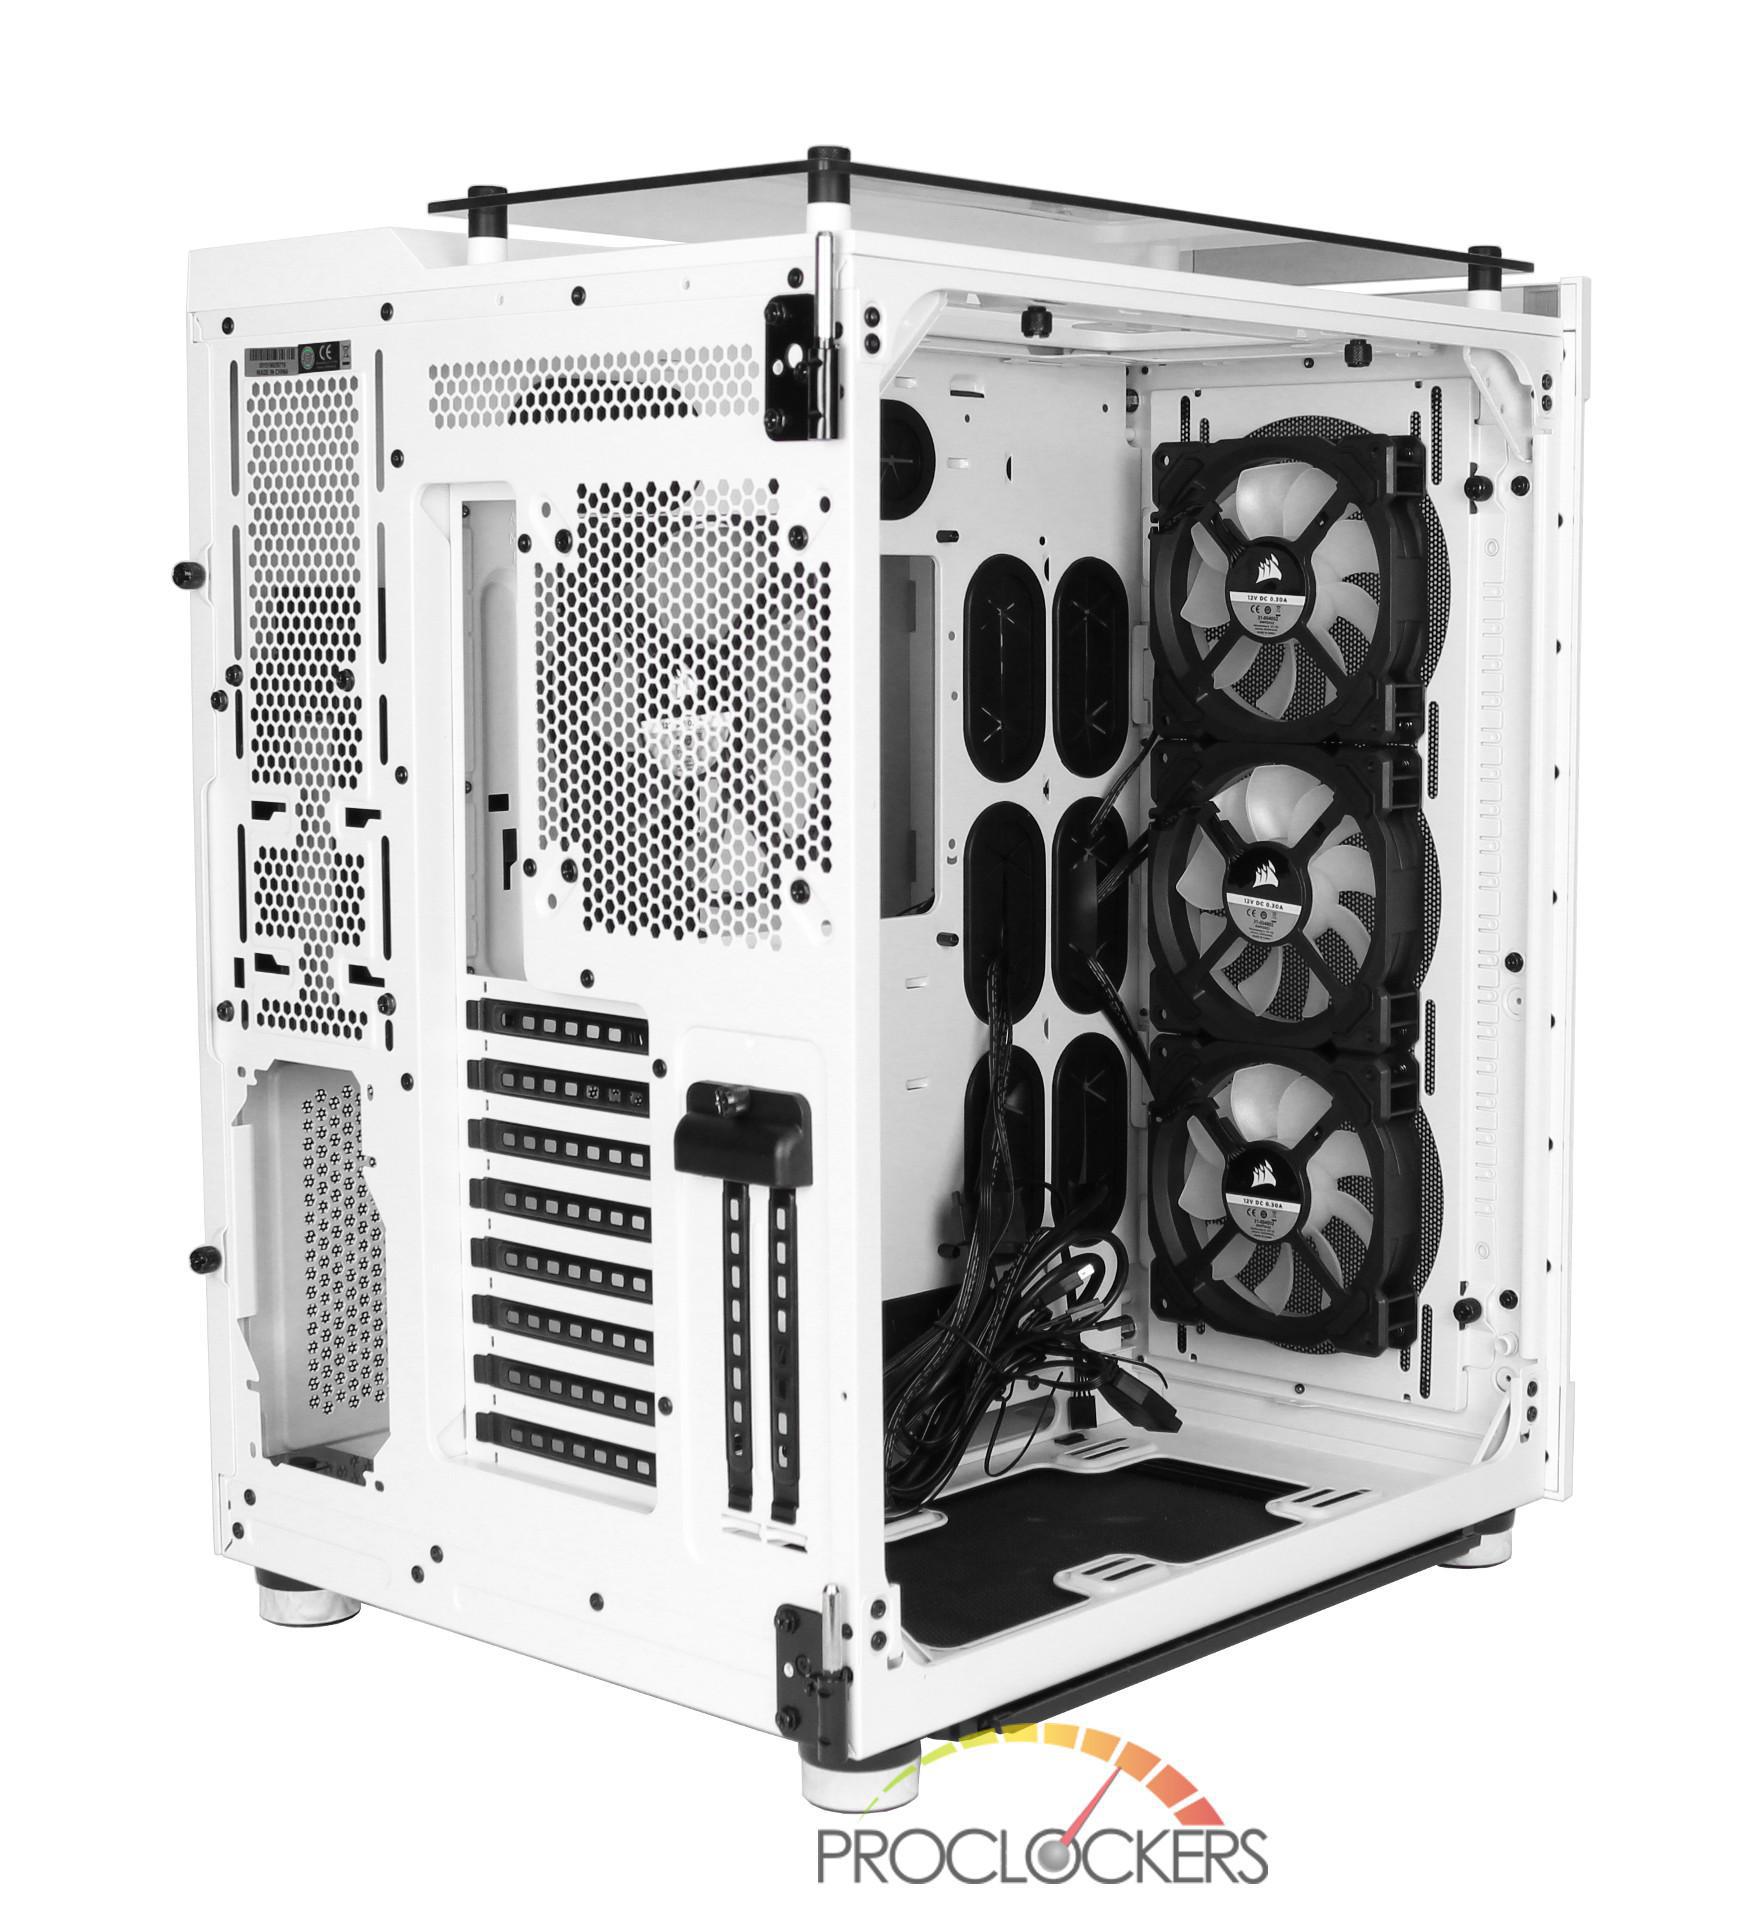
At the back of the case is another 120mm fan, with this one being the non-RGB variety.
At the bottom of the case are mounting rails for up to two 120mm/140mm fans and can also support a 240mm/280mm radiator.
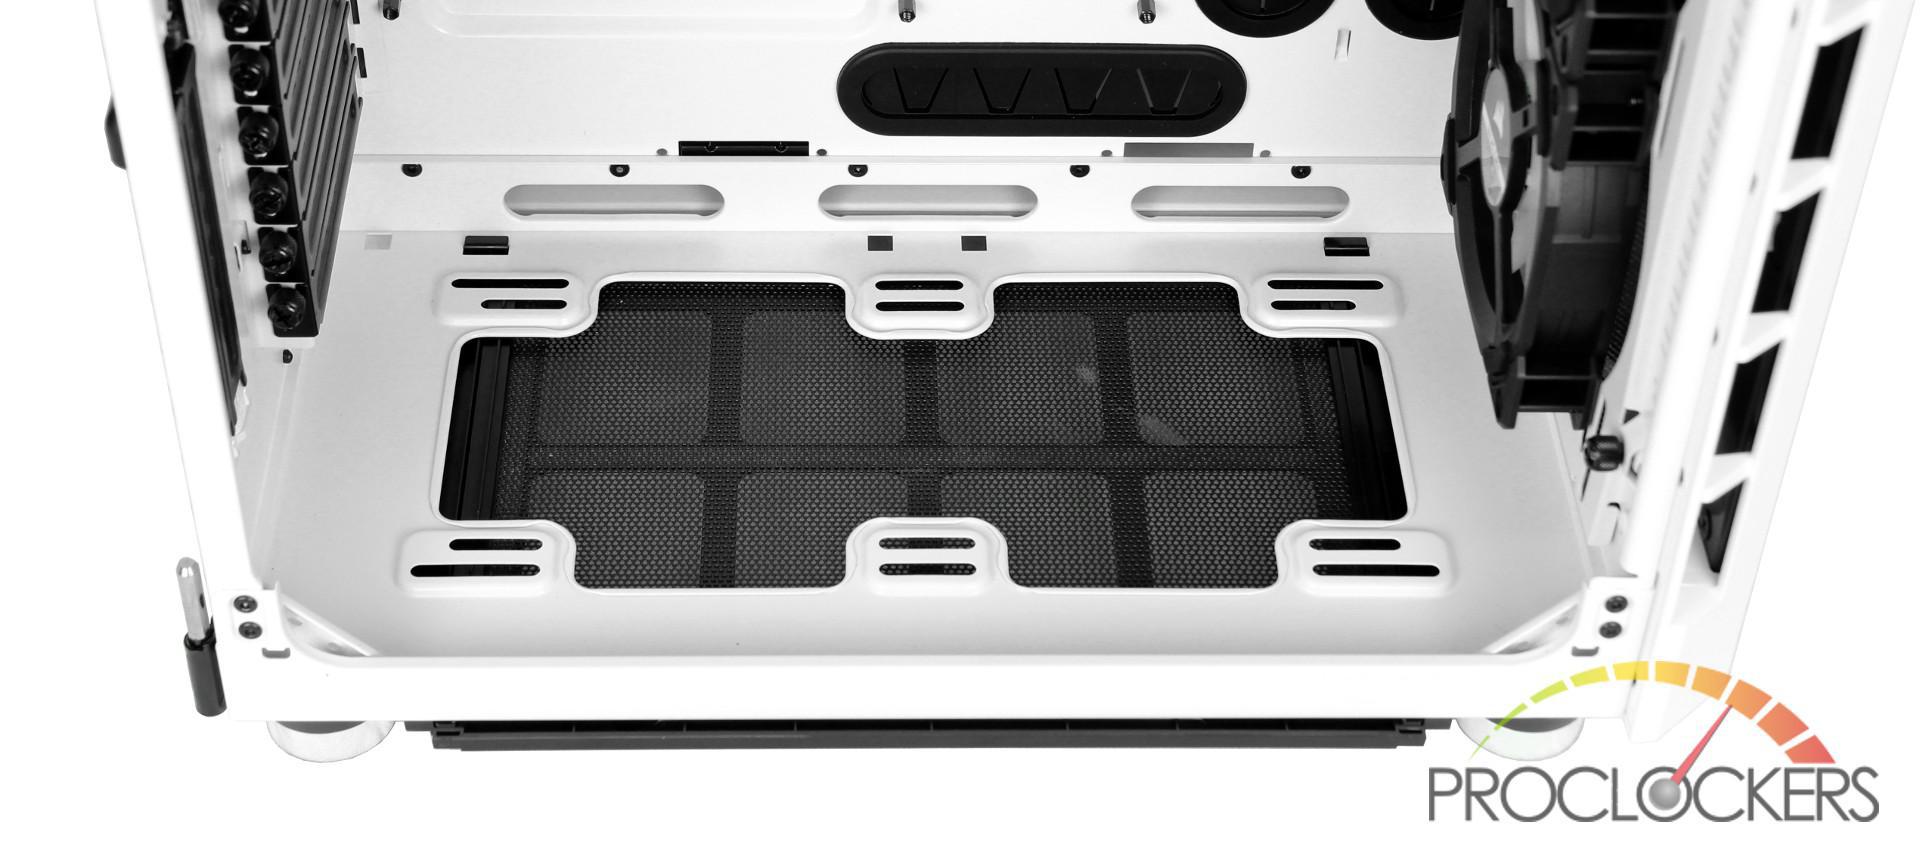
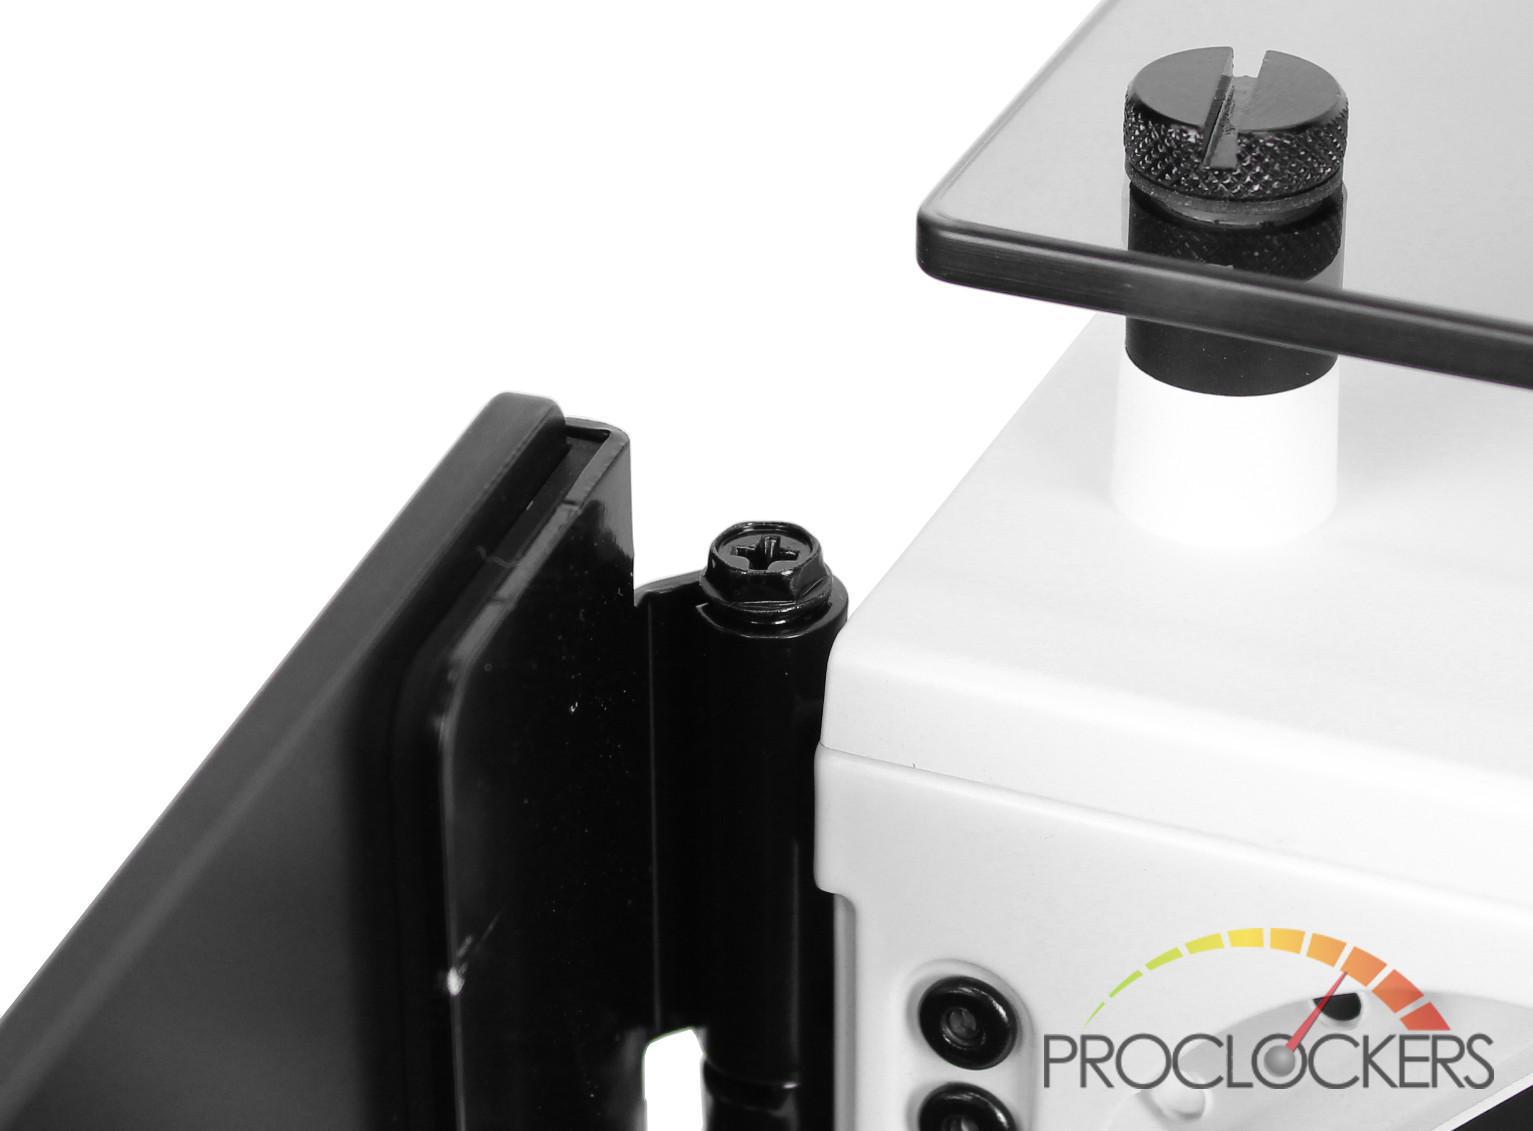
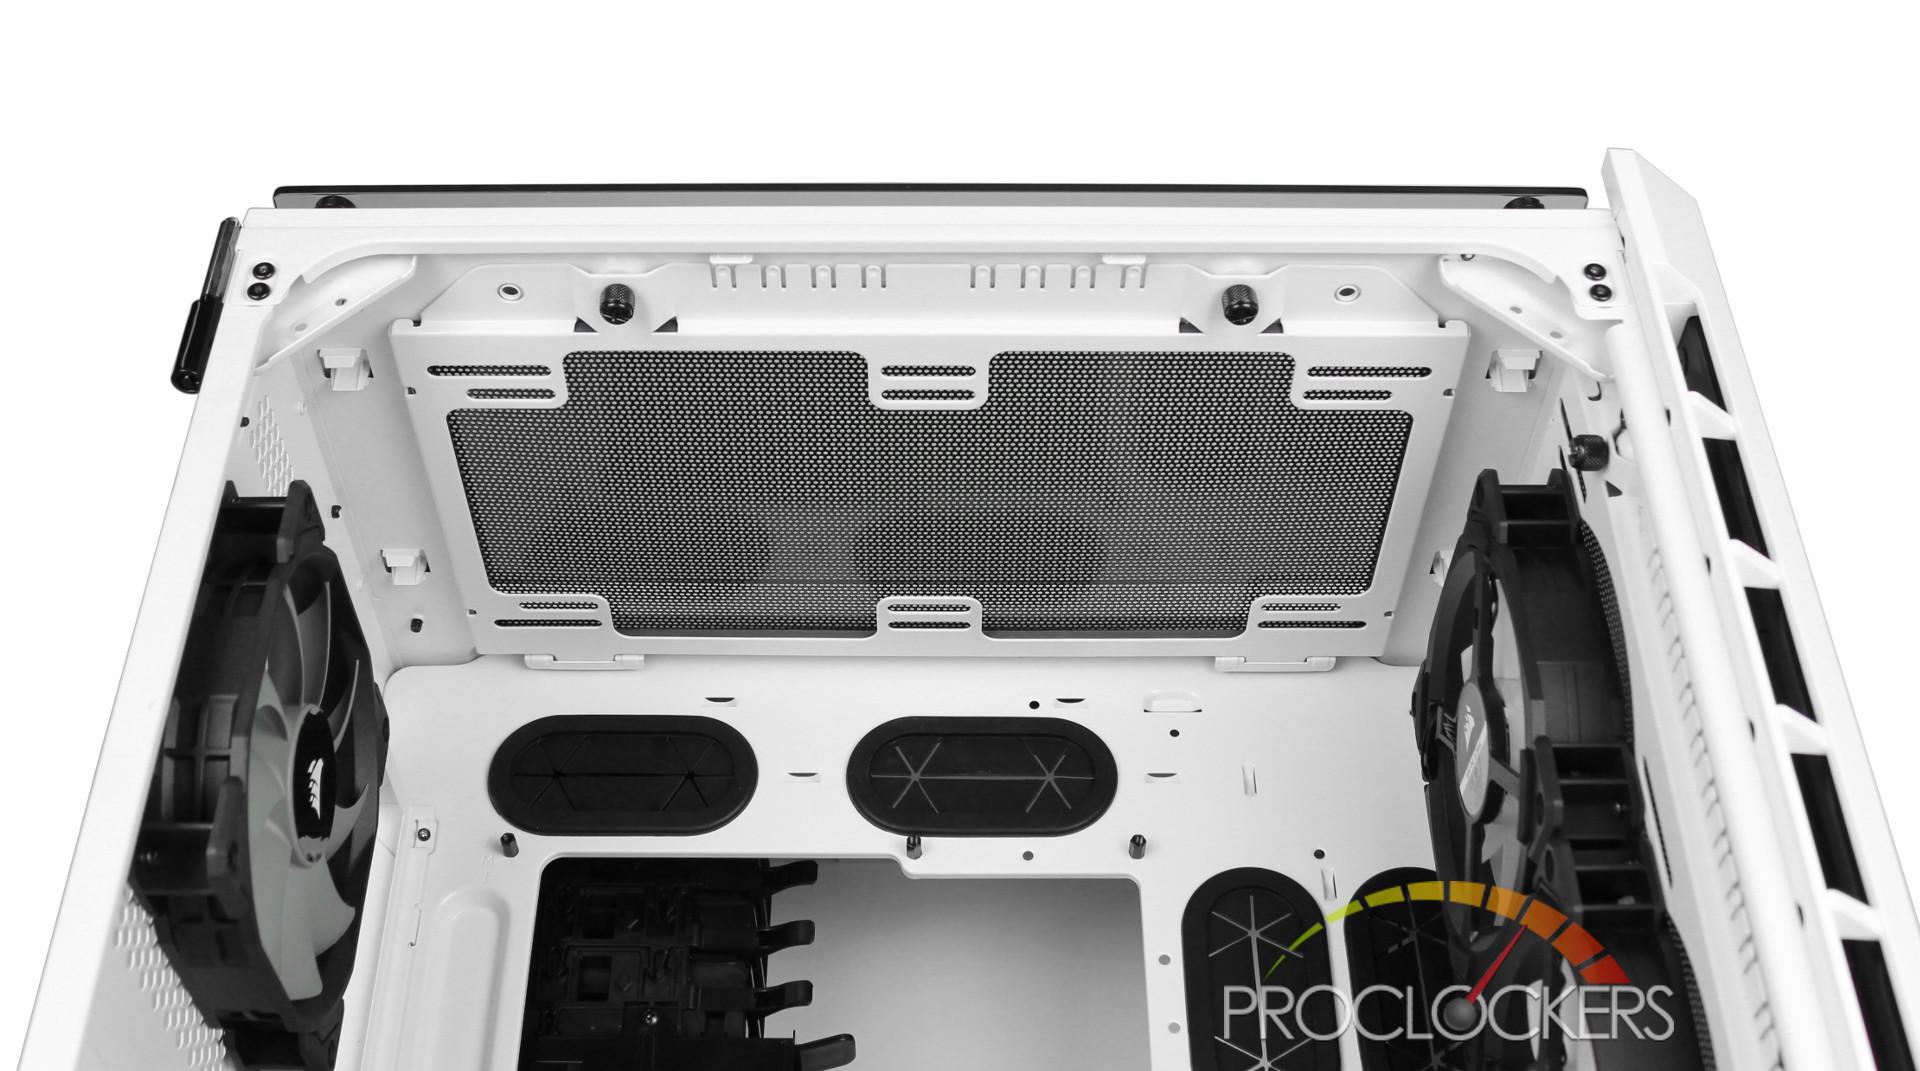
Looking to the top we have some more mounting rails which also support up to two 120mm/140mm fans and a 240mm/280mm radiator. These rails are actually part of a bracket which can easily be removed using the two black thumbscrews toward the front of the case.
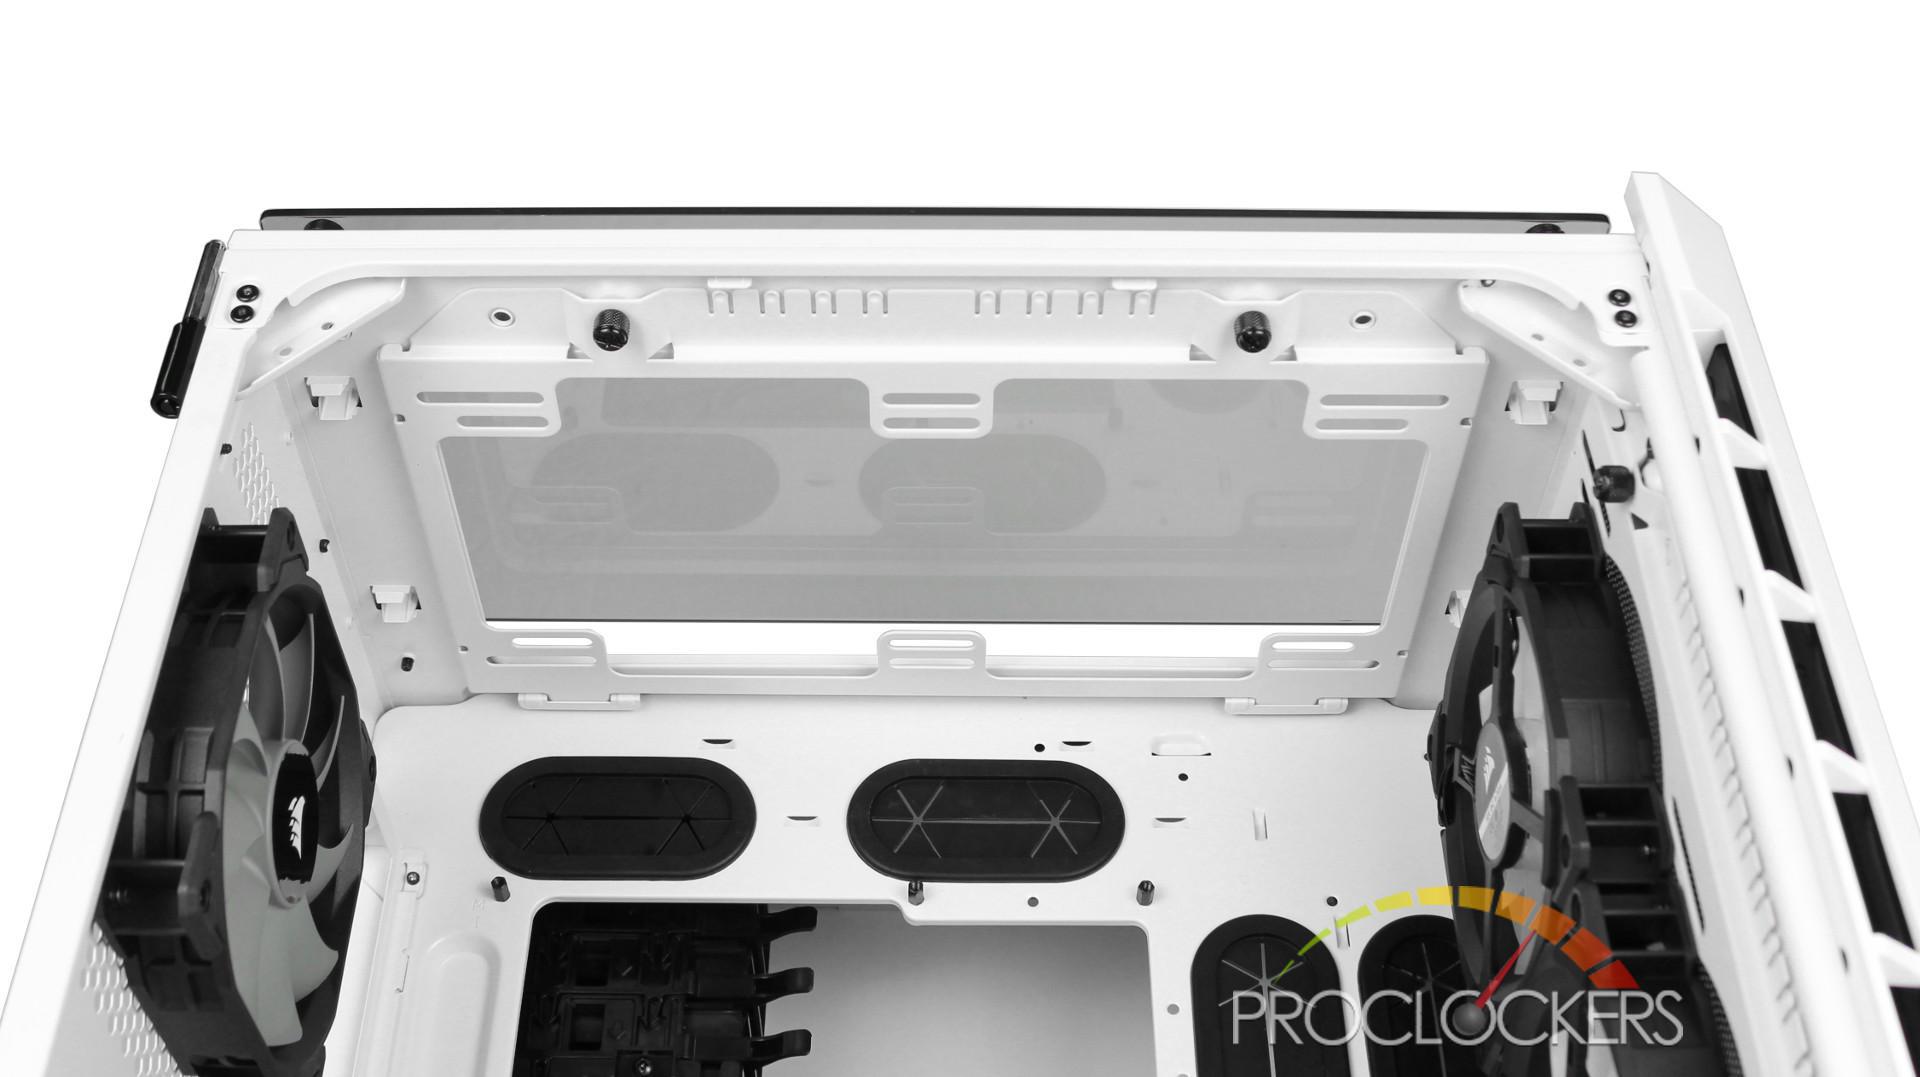
Once removed you can install any fans/radiators as well as attach the included magnetic dust filter.
Moving to the back of the 680X, I must say I really love having the PSU at the back of the case. Not only did this give us a nice amount of room in the front, it has given you over 3x the amount of space at the back to manage all your cables. Also, to help with your cable management are various zip tie points on the back of the motherboard tray. I do think they are a little sparse around the six grommets on the right side. We will see how well it works during our build. It would have also been nice to see some Velcro straps included as I’m personally not a superfan of zip ties.
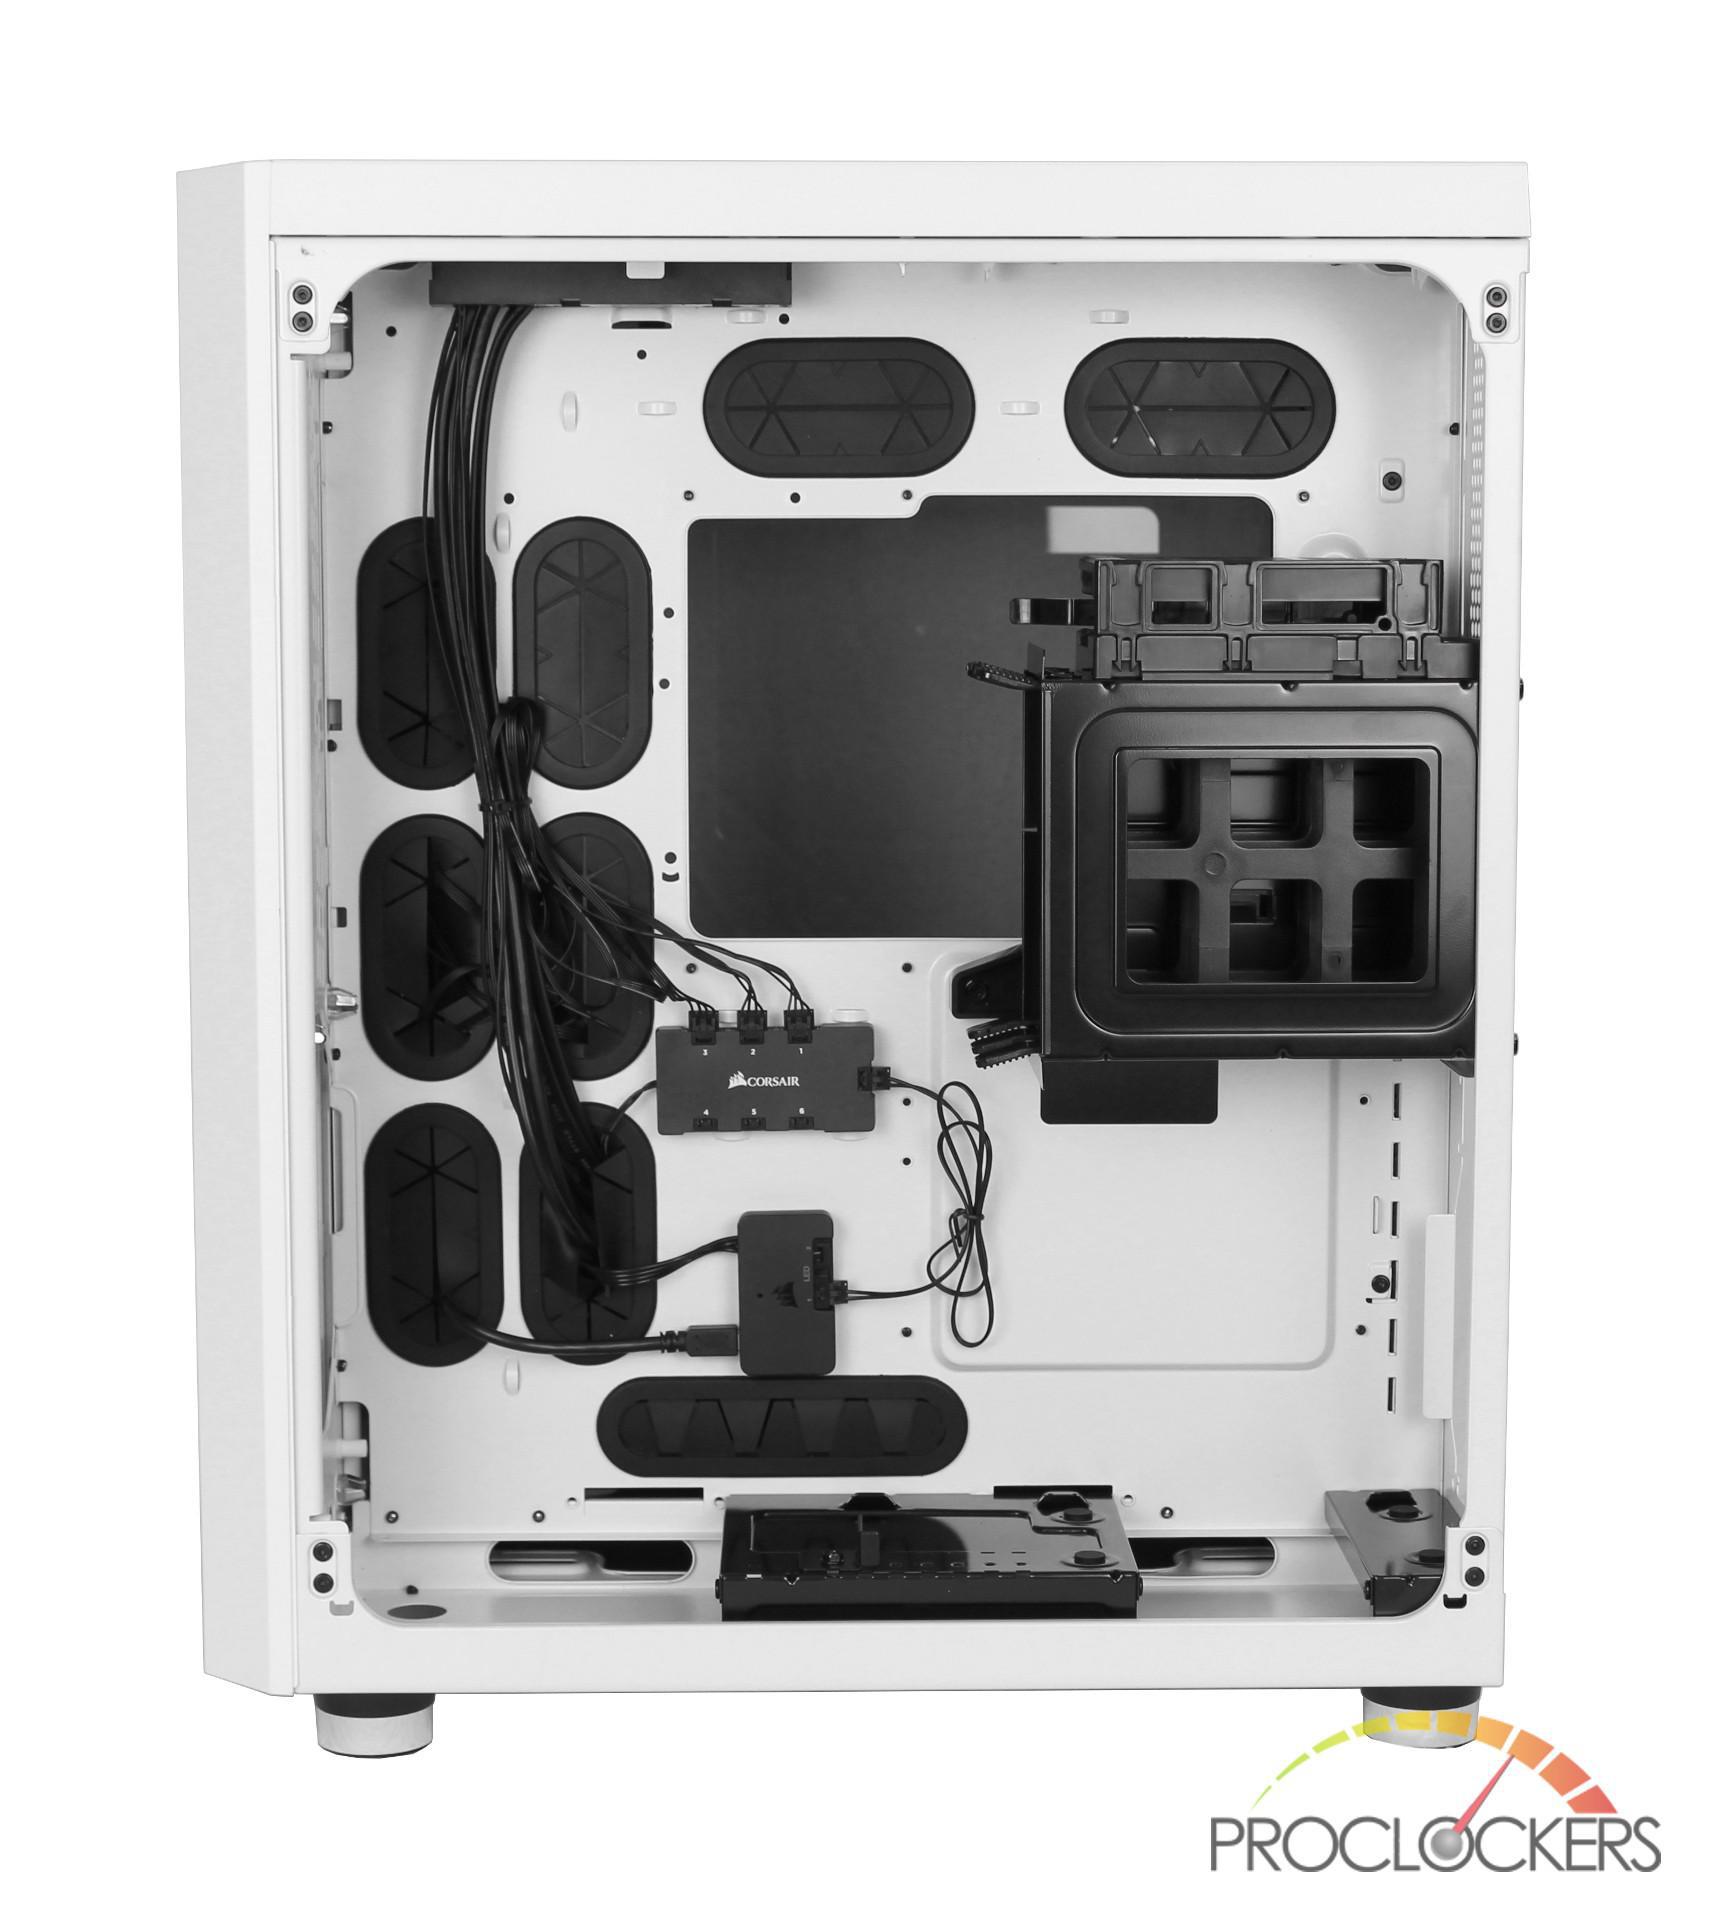
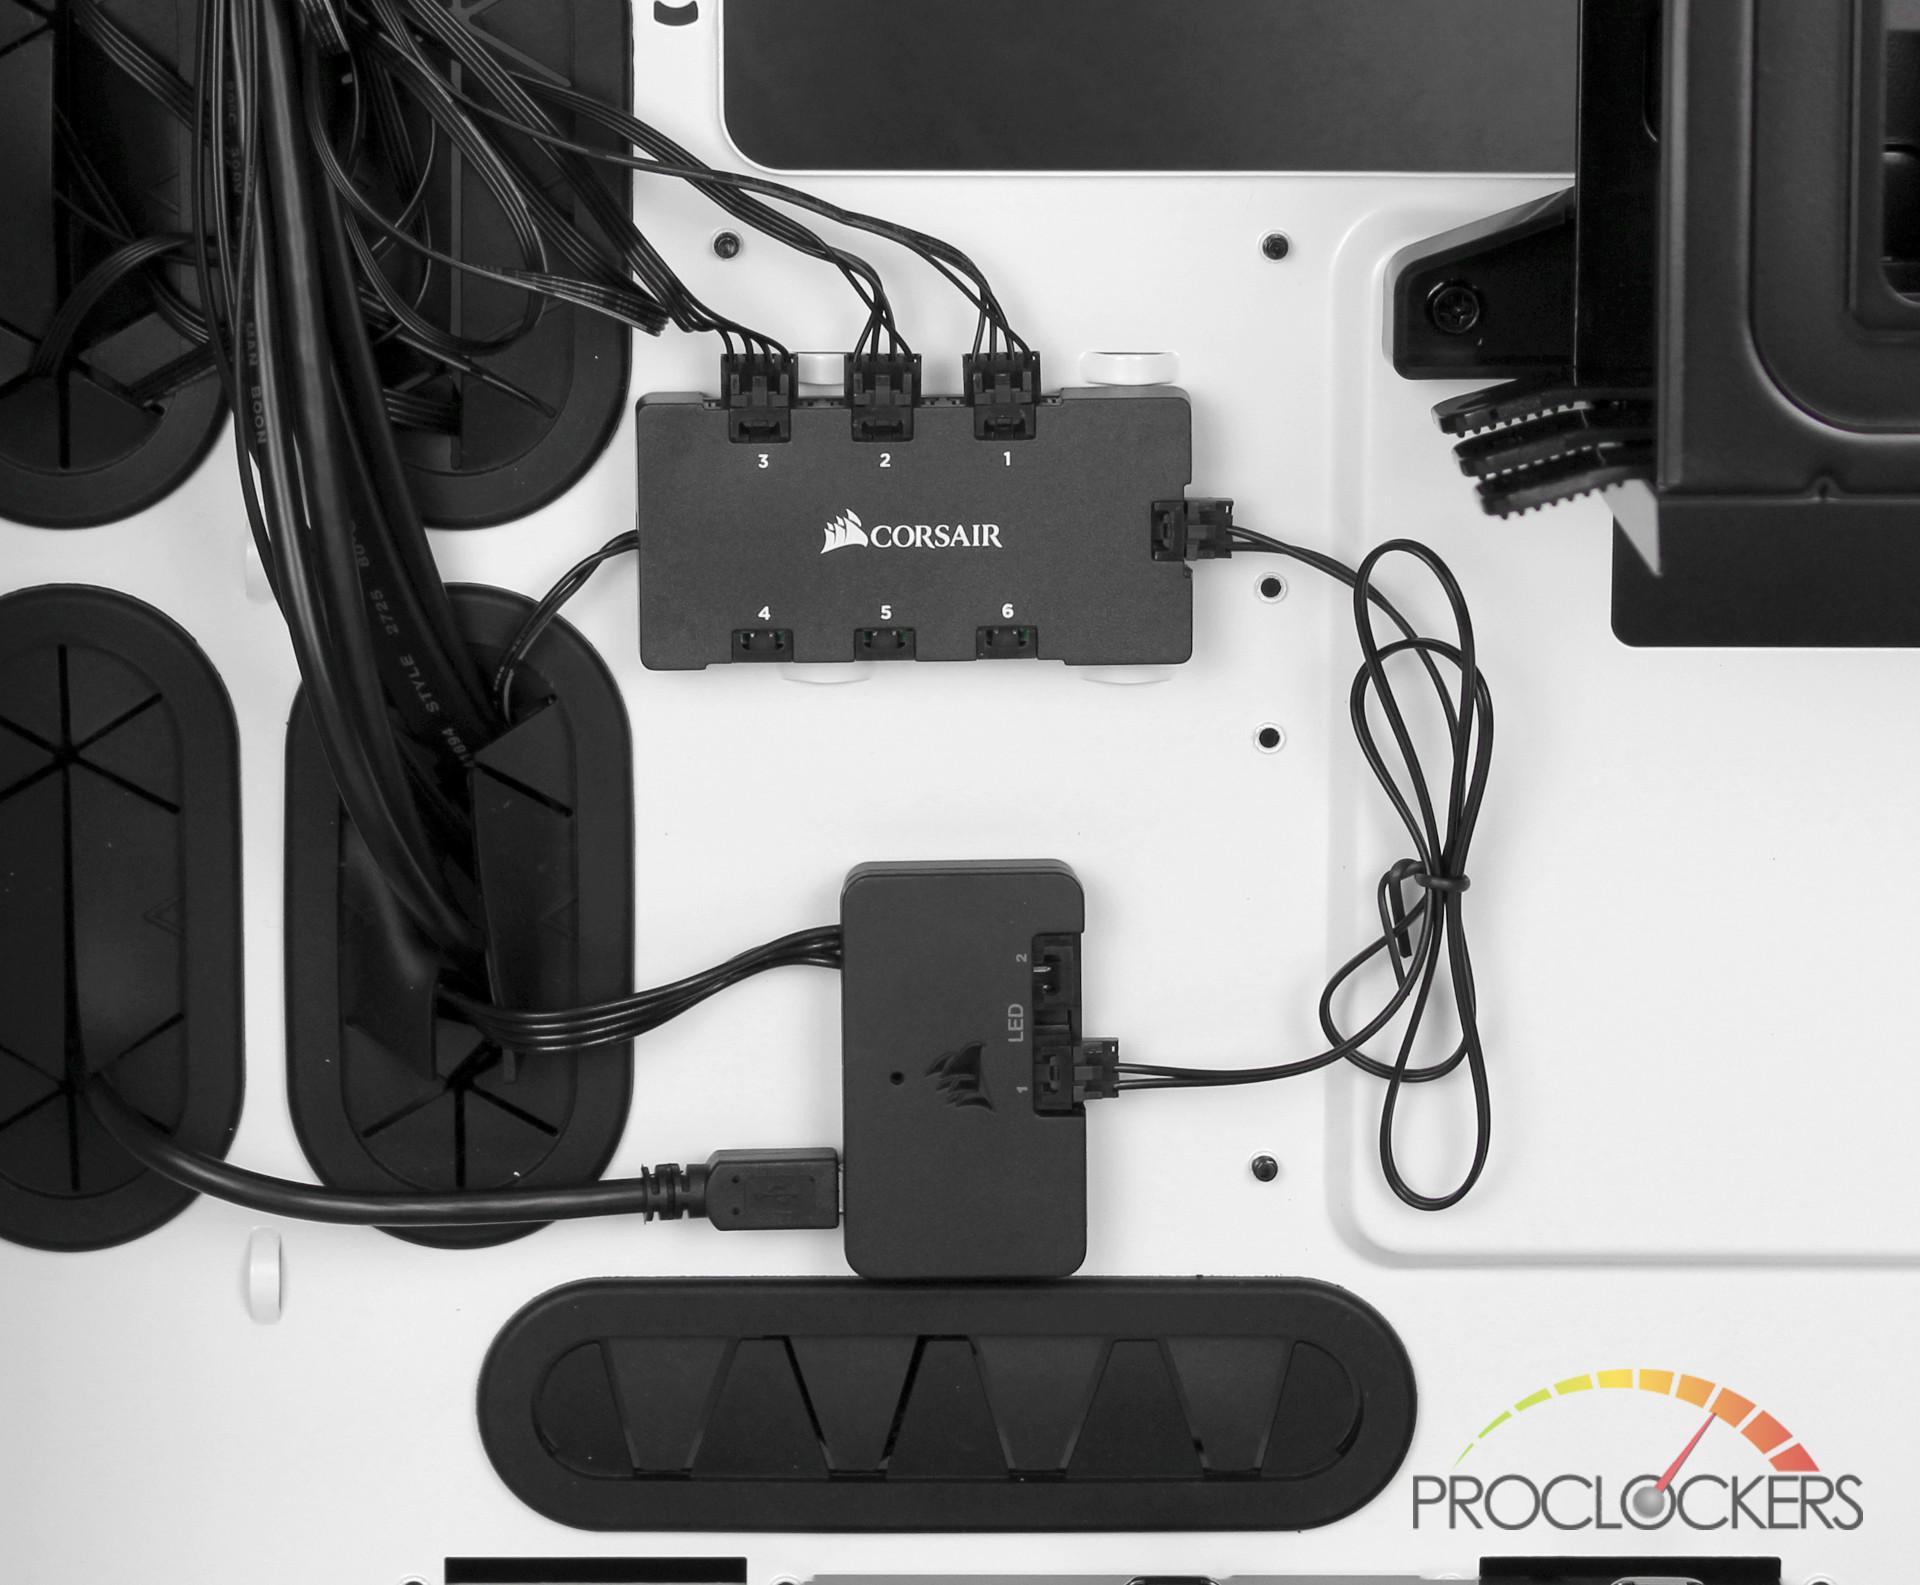
Right below the CPU cutout is the pre-installed LED fan hub along with the Lighting Node Pro to manage the three included LL120 fans.
At the bottom is your PSU mounting platform which includes 4 rubberized contact points as well as an adjustable bracket to secure the PSU from the back.
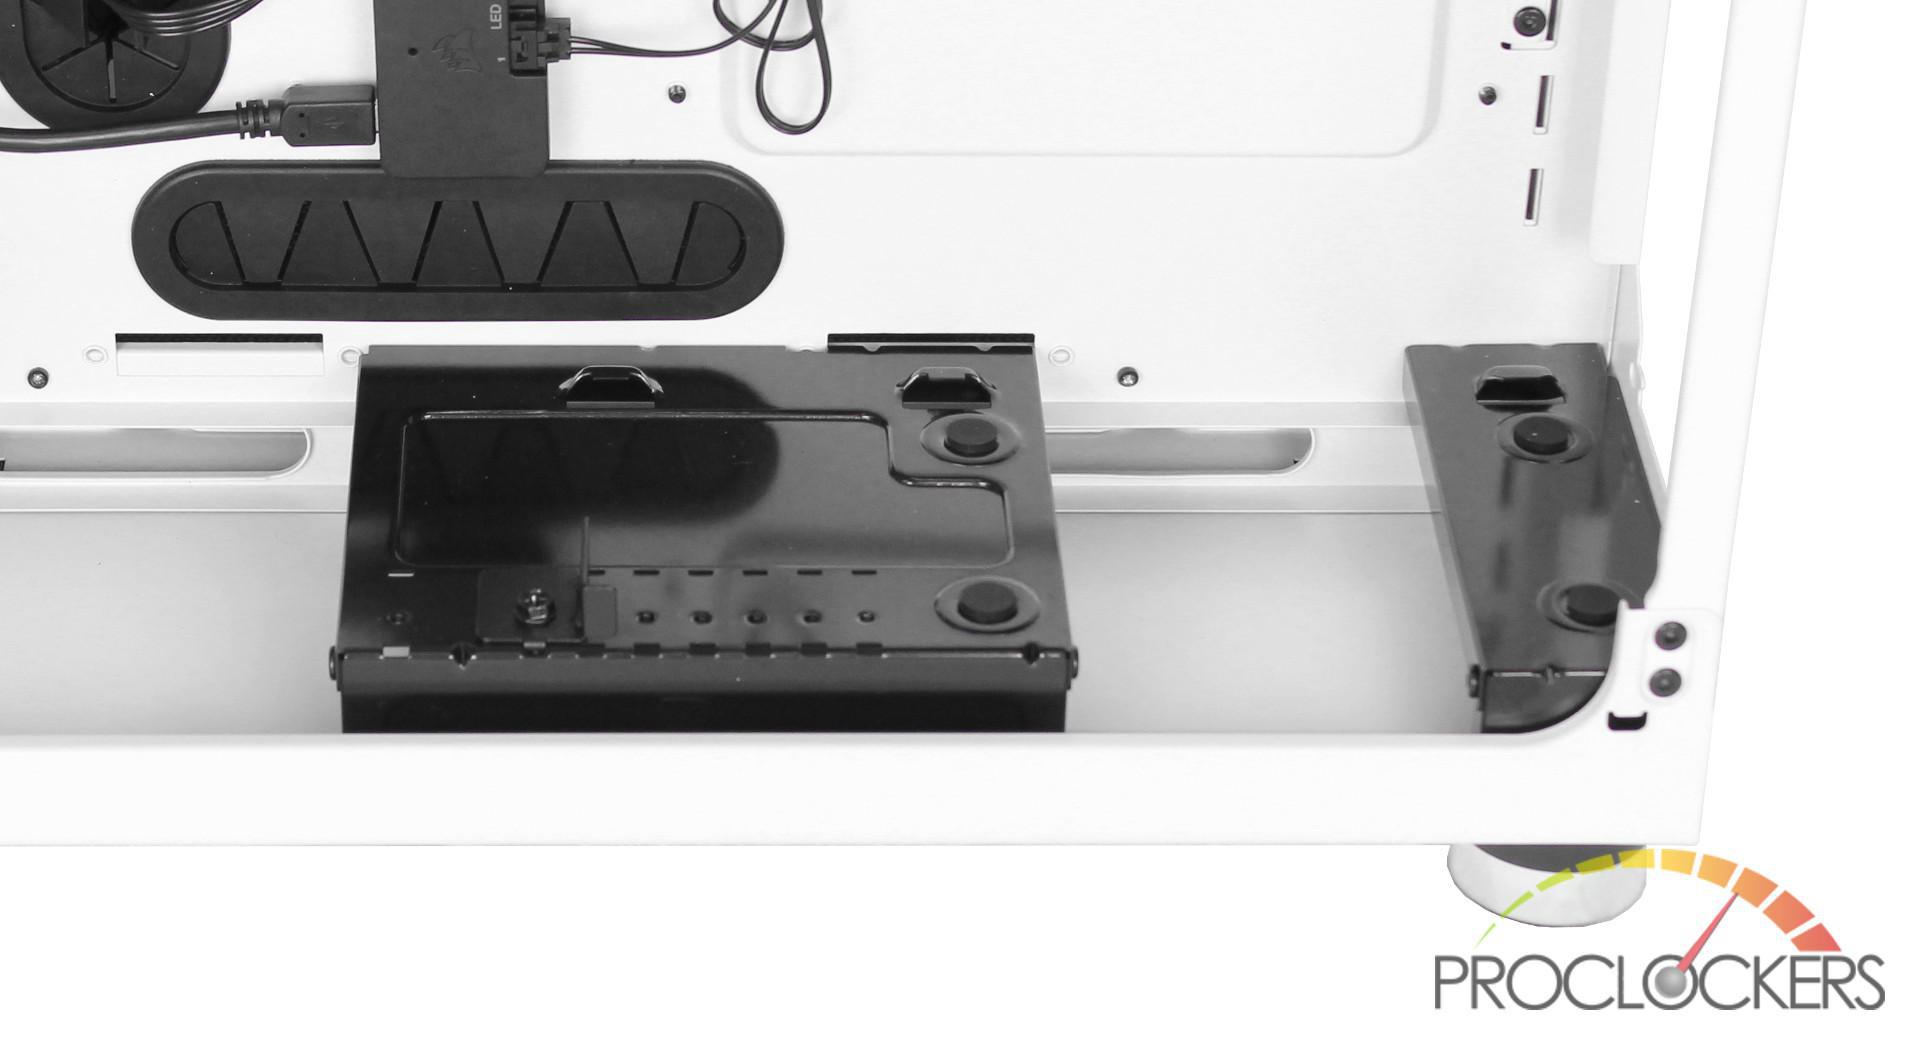
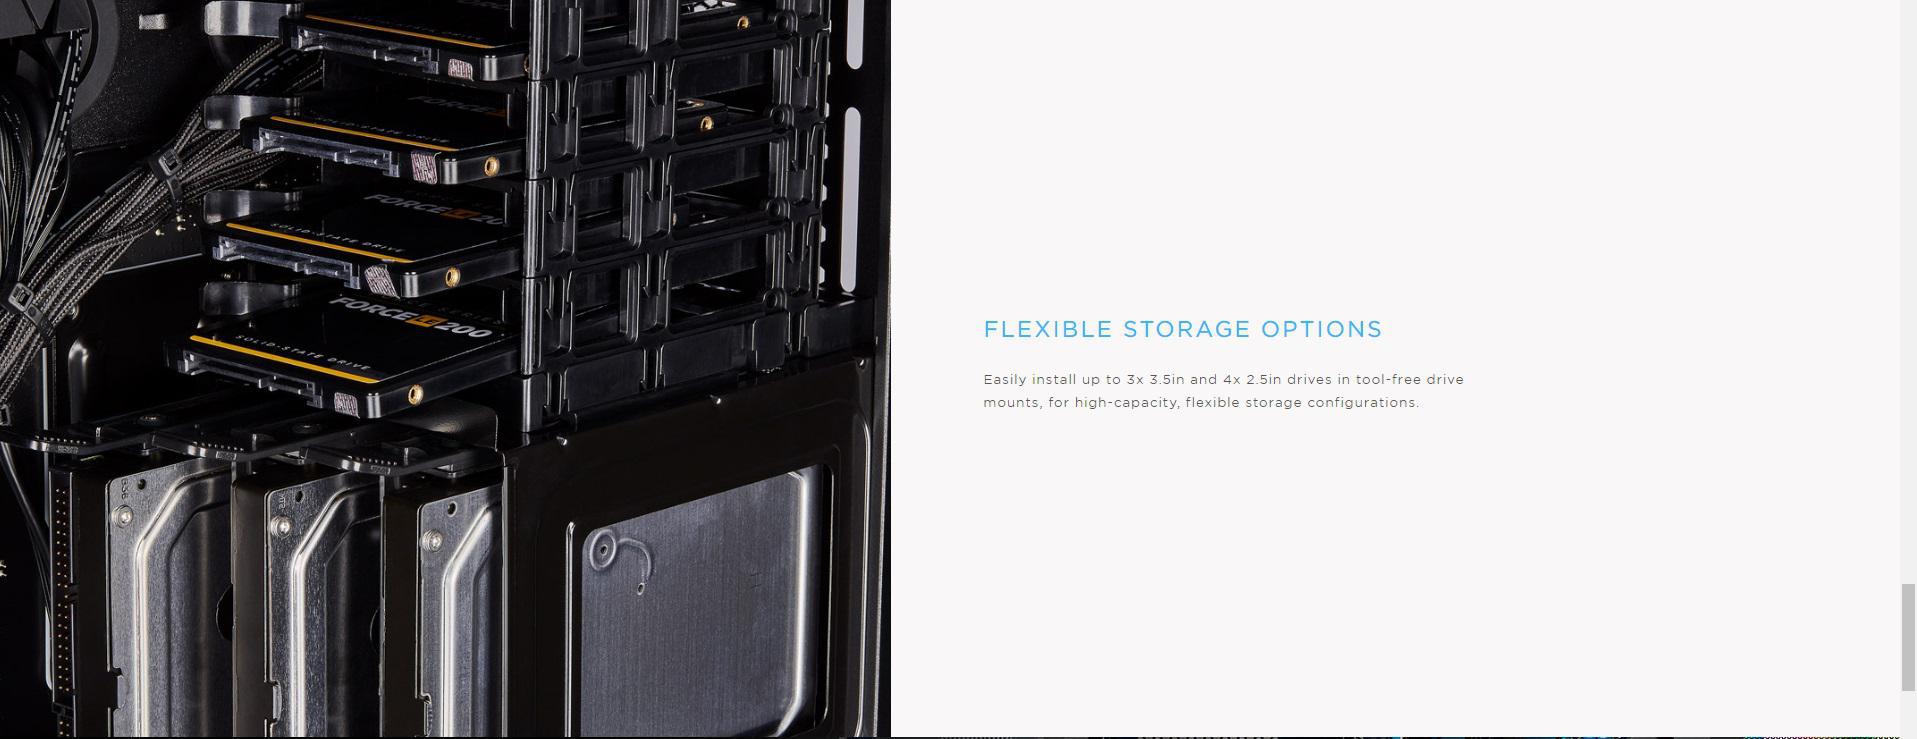
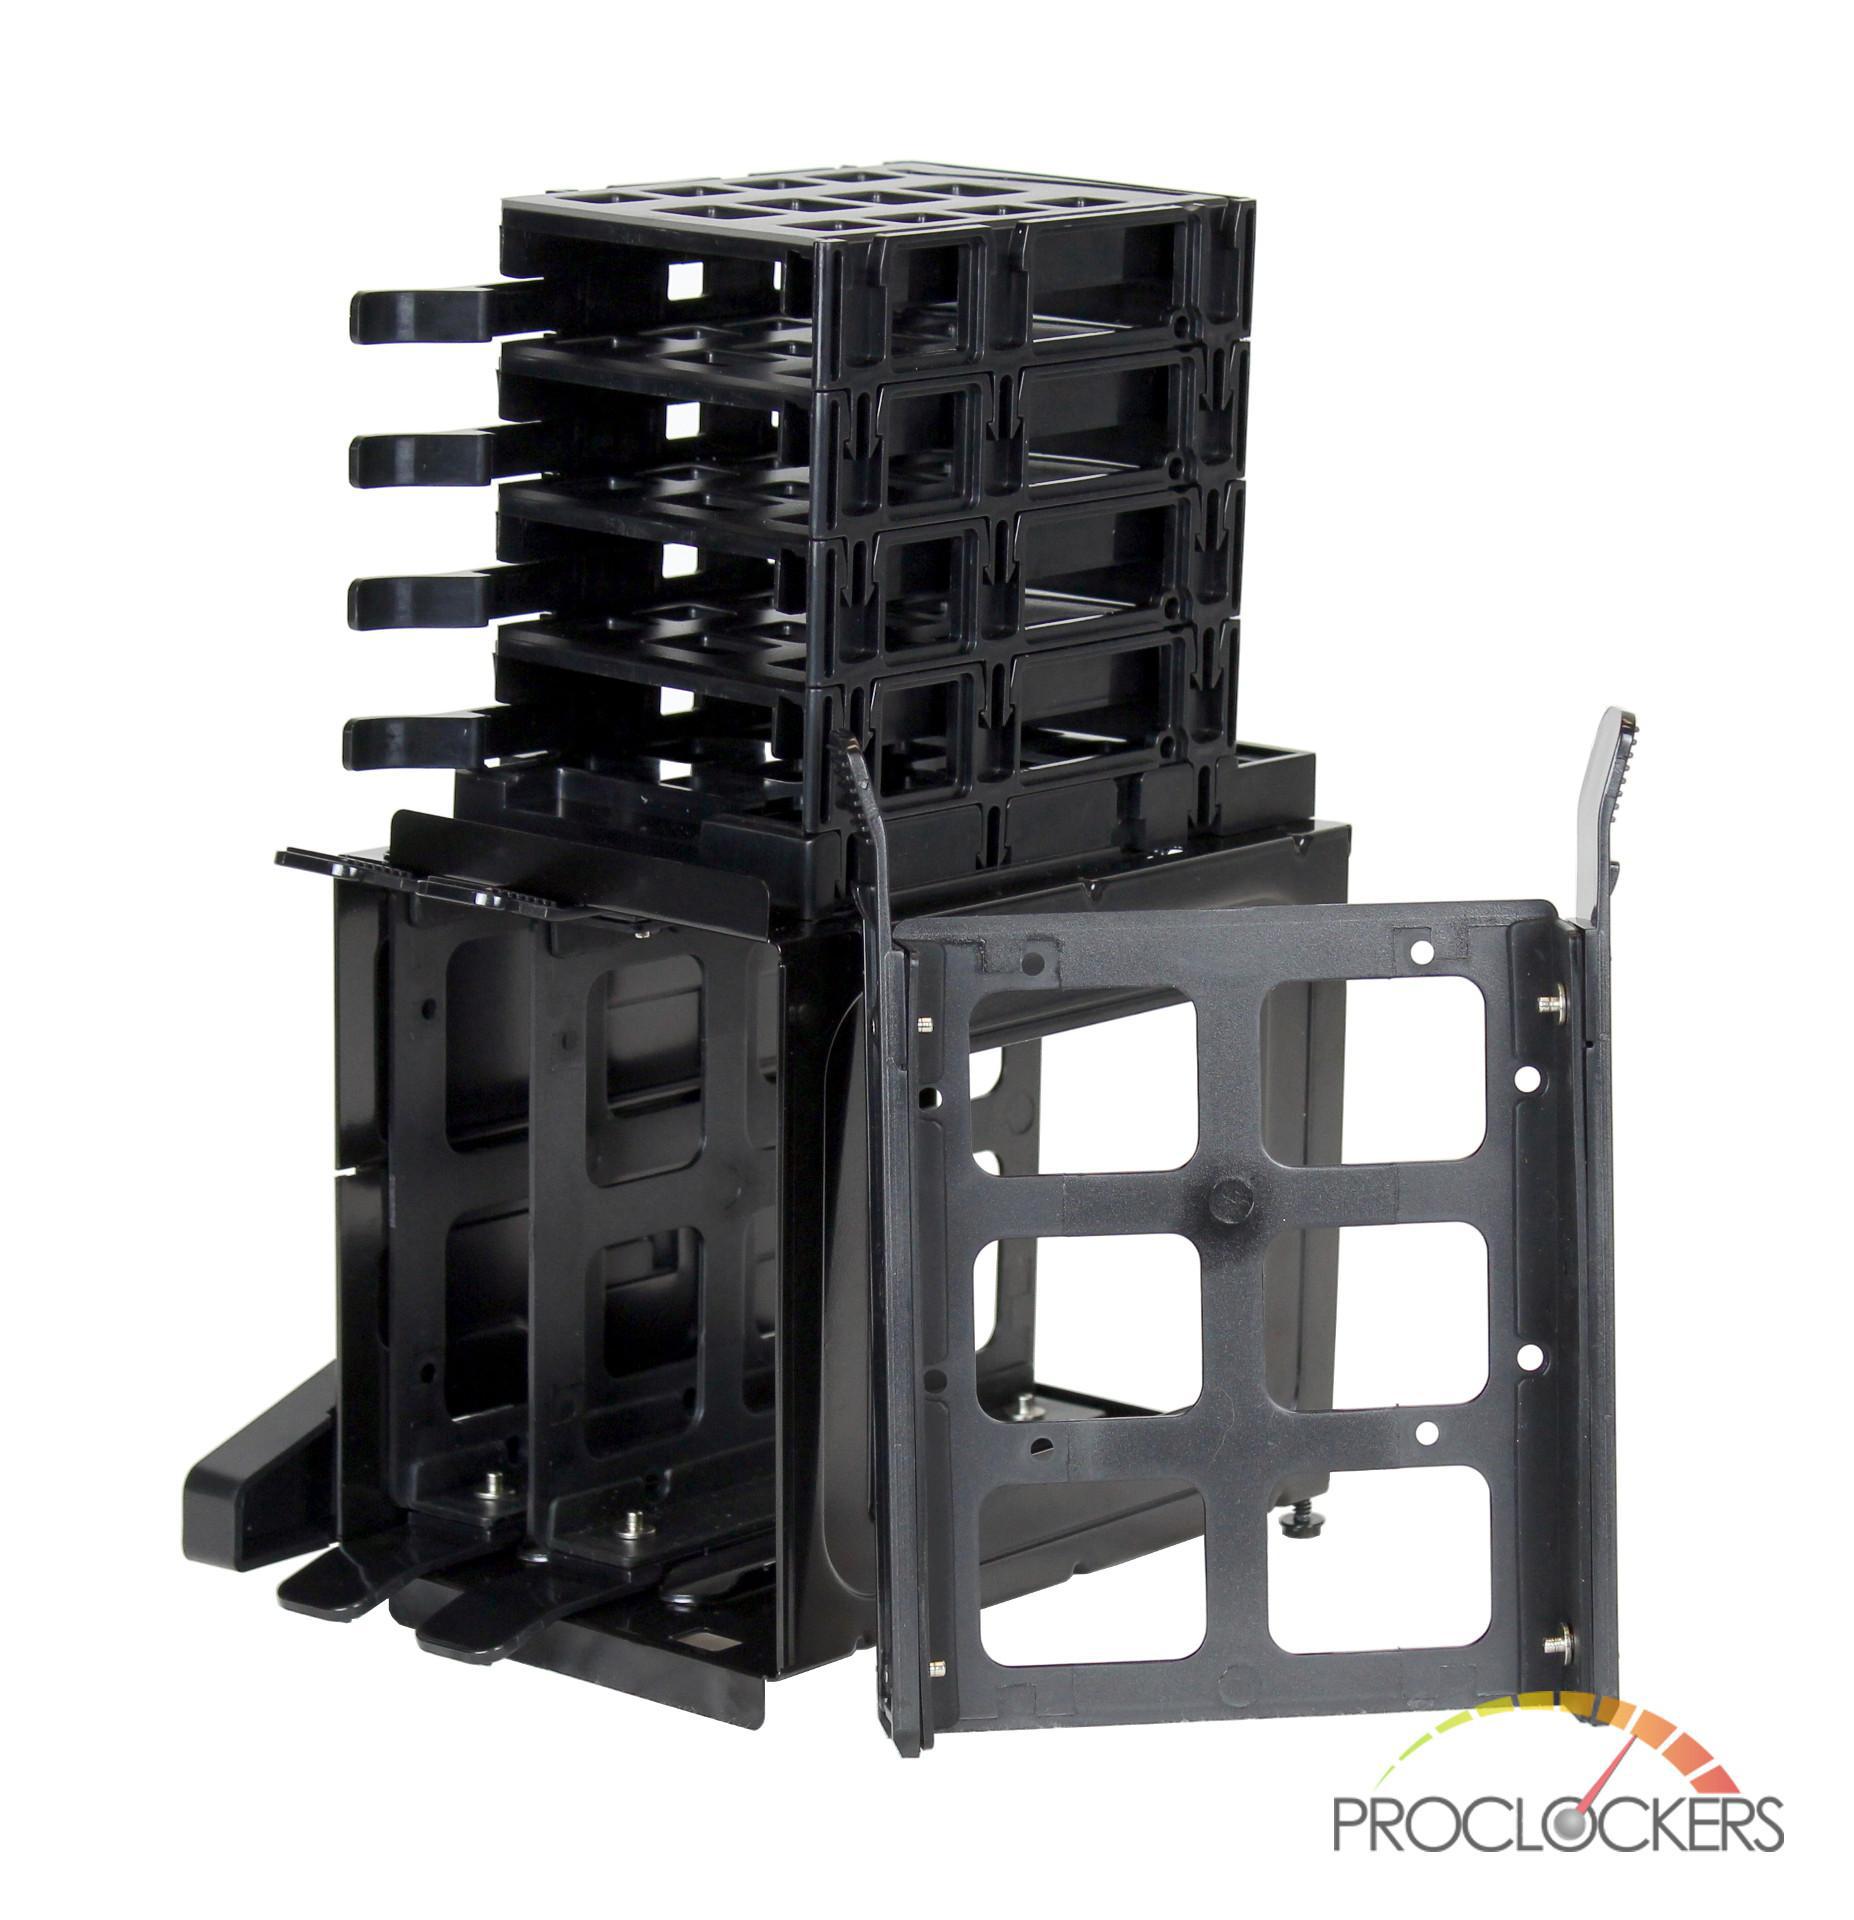
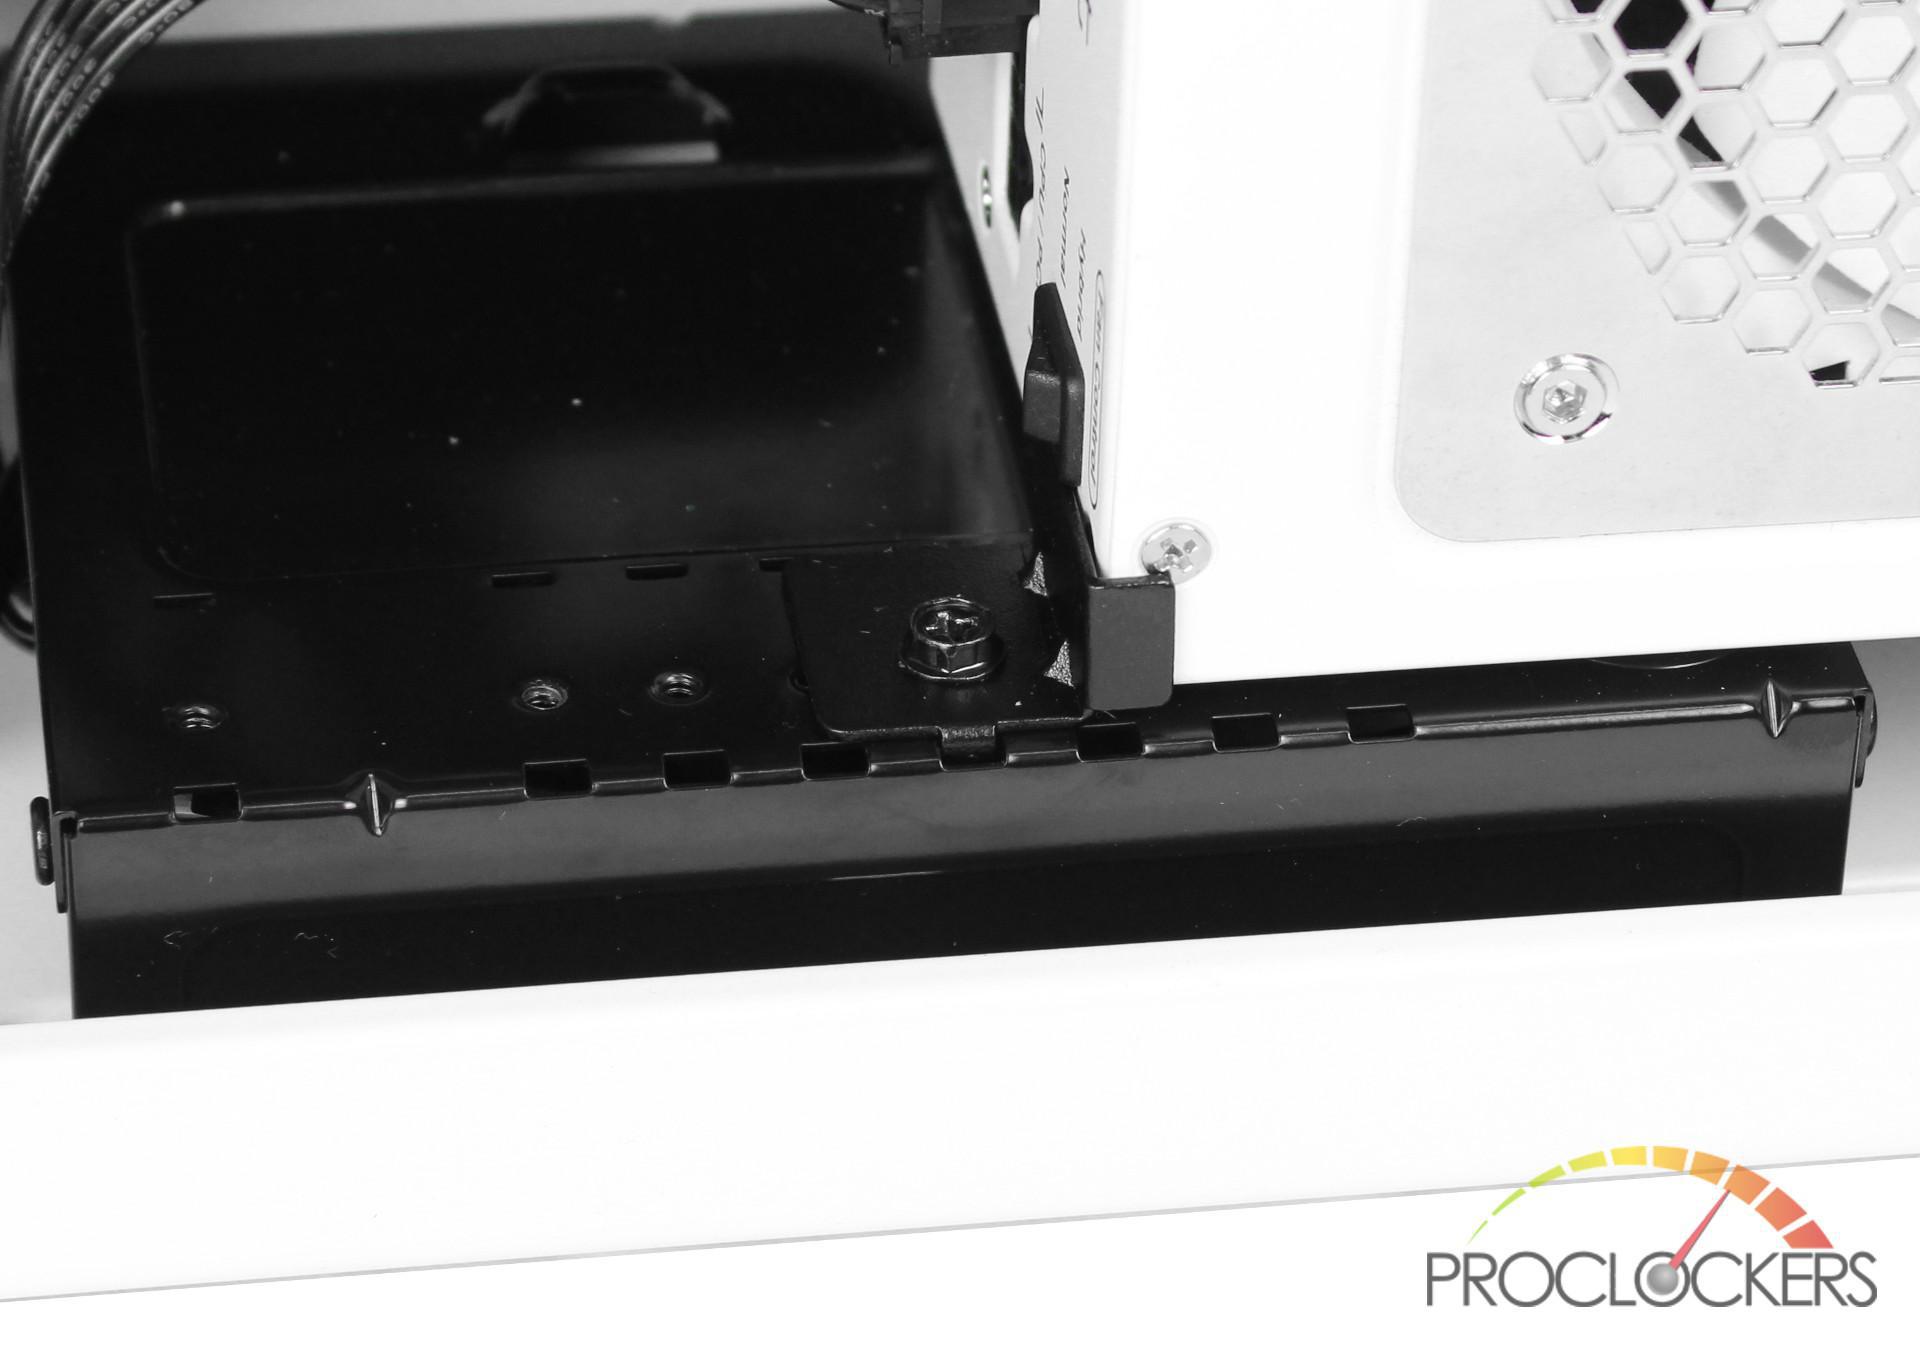
The 680X supports up to three full sized 3.5” drives and an additional four 2.5” using the drive cage placed above the PSU. Depending on how many 2.5” drives you are installing, you can adjust the number of bays by adding/removing them as you see fit.
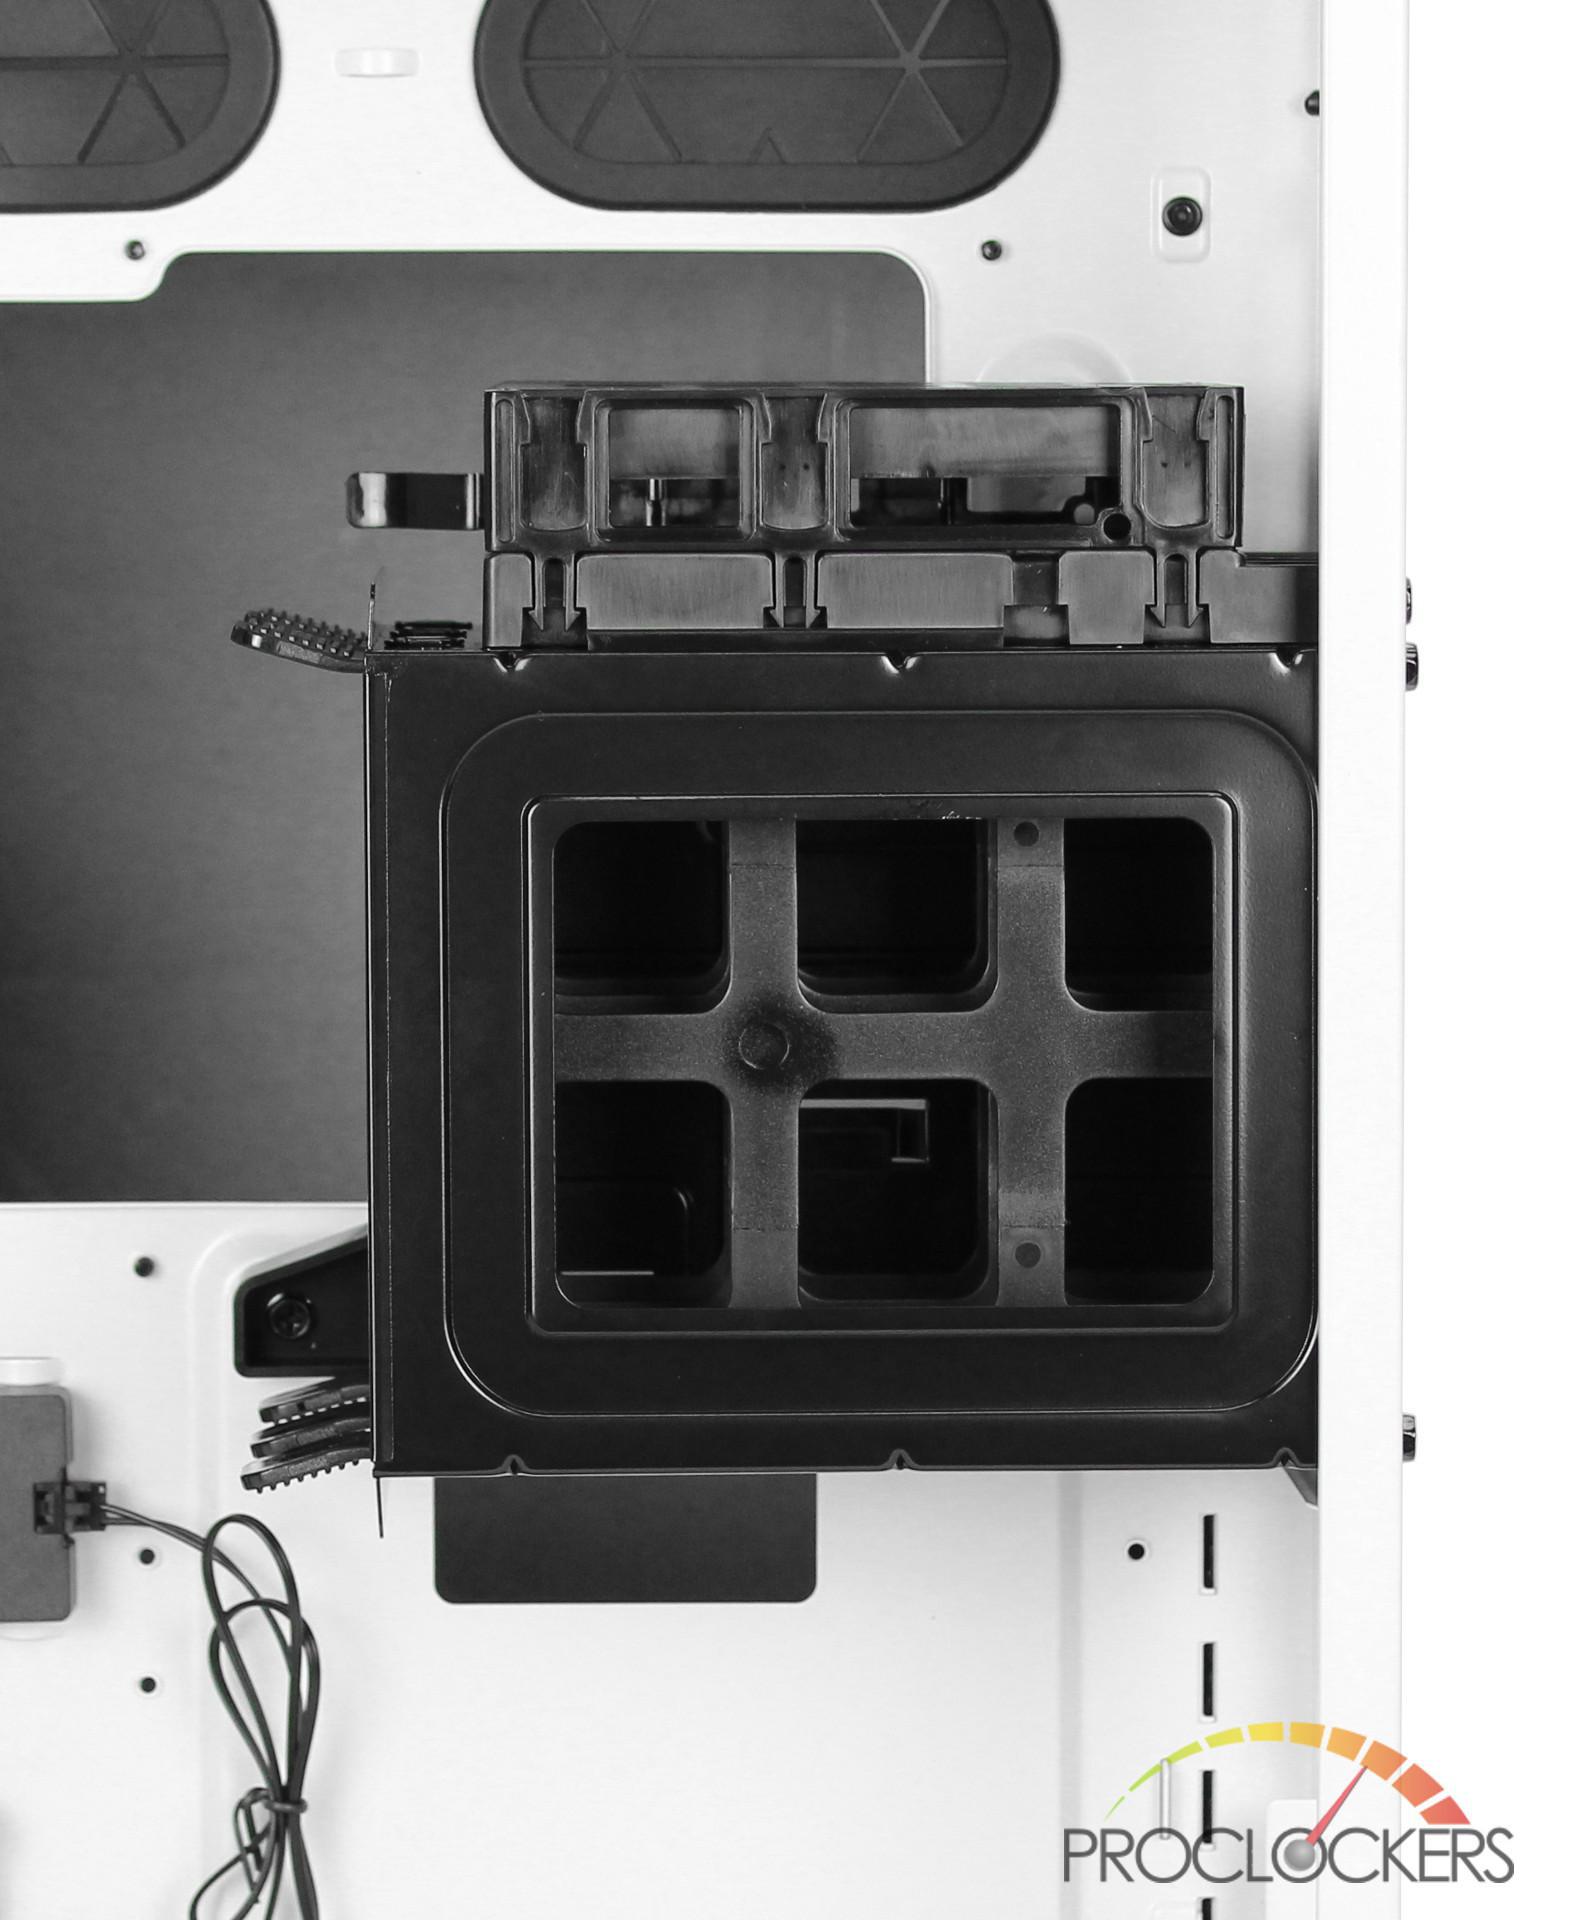
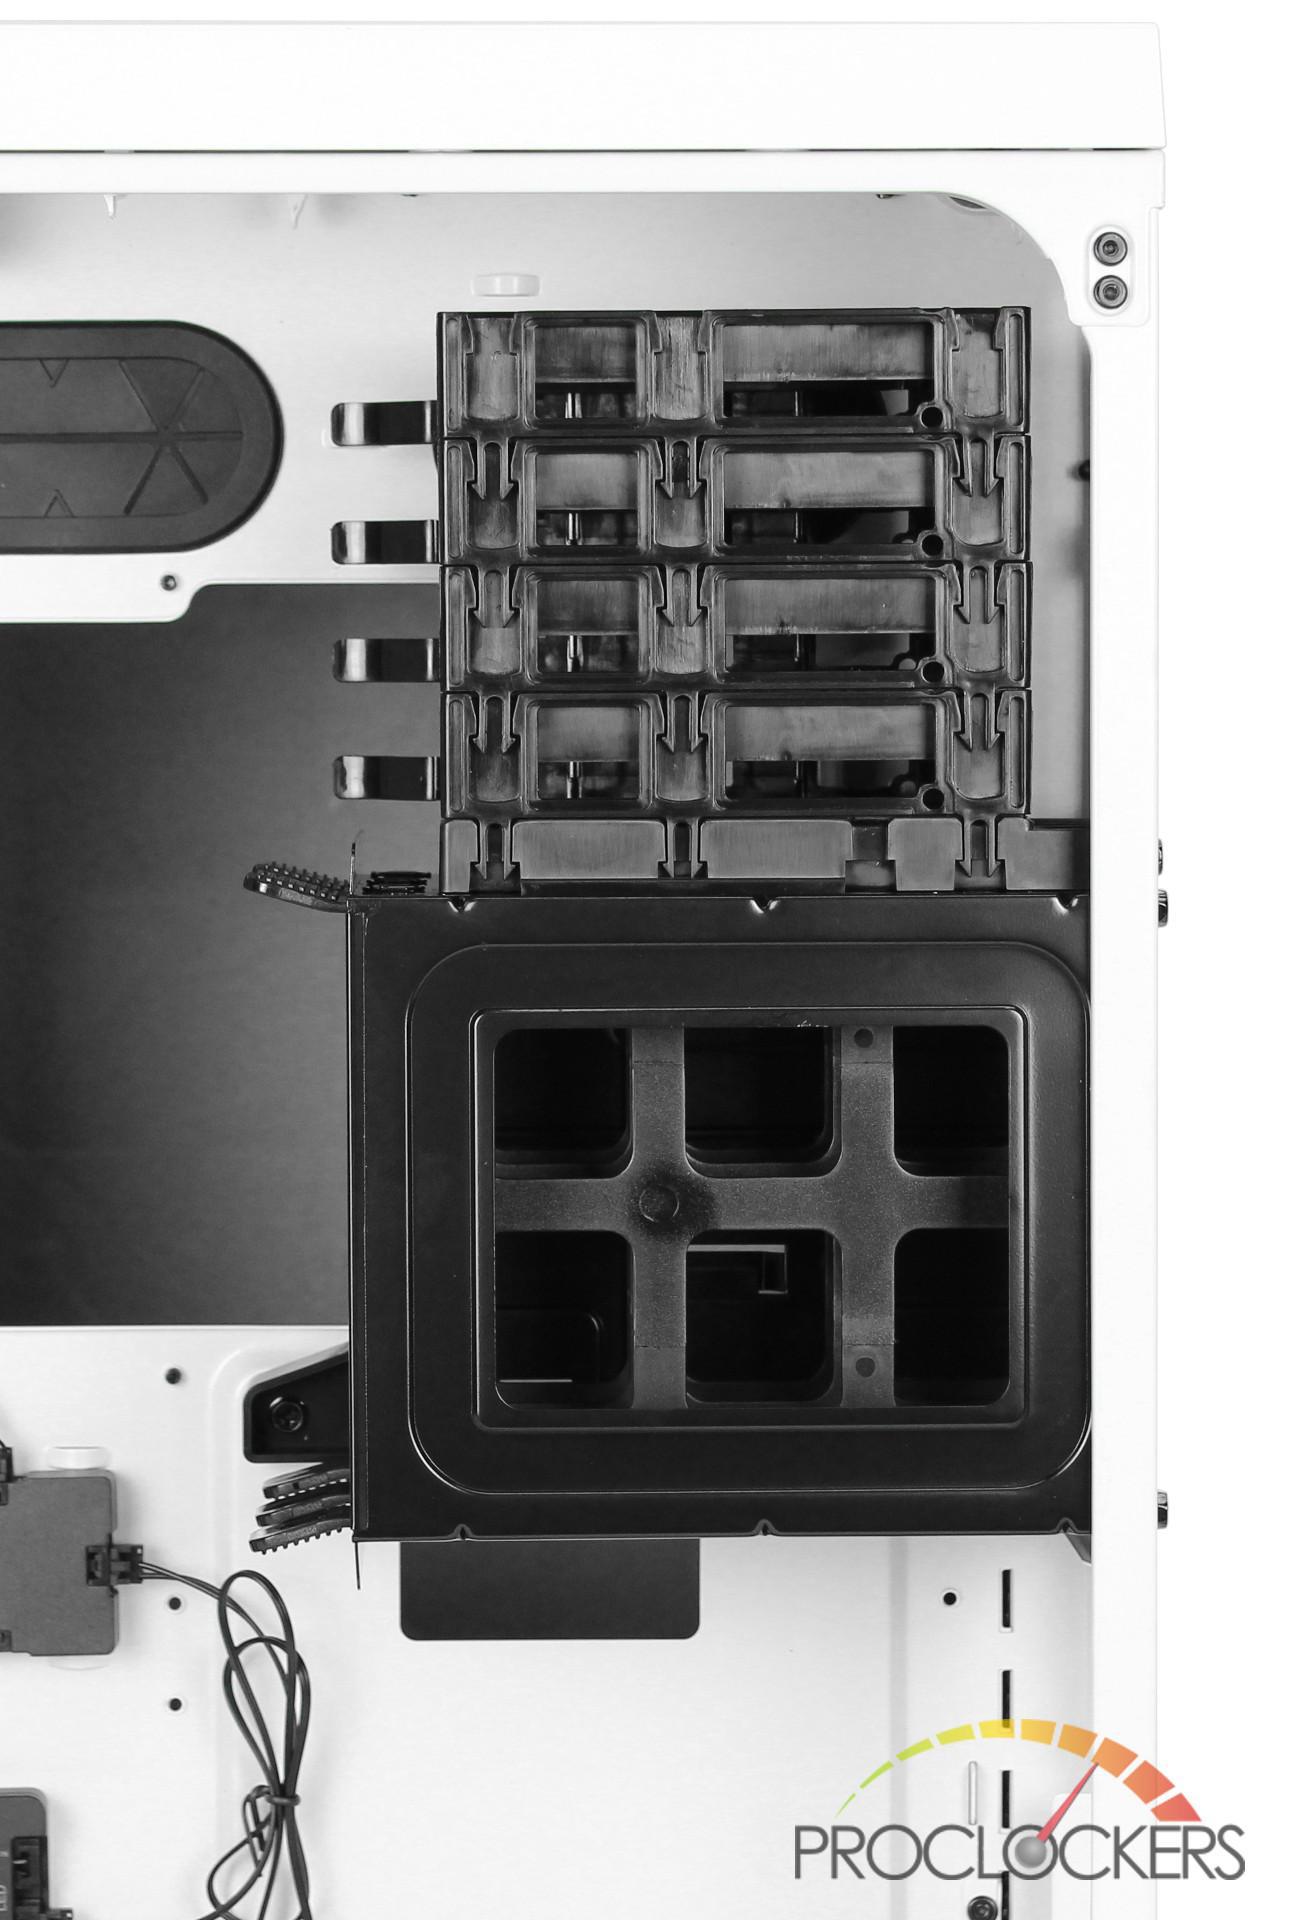
If you wish, you can also remove the 3.5” drive cage that is secured with 5 screws at the back of the case. Note if you do decide to do this you will also lose your 2.5” drive bays as it required the 3.5” cage.
Throughout both the front and the back of the case there isn’t a single mount point for SSD, water cooler pumps or reservoirs on the motherboard tray. This is probably due to the dual chamber design and the case’s unique shape. If you did want to water cool, Corsair did sneak in some mounting rails in the back of the case and even included a drain port on the bottom. This seems like a good spot for a reservoir but you might run into some issues if you have bulkier cables since it’s pretty close to the grommets. You might also want to mount an SSD or two if you did choose to remove the included drive cage.
Software
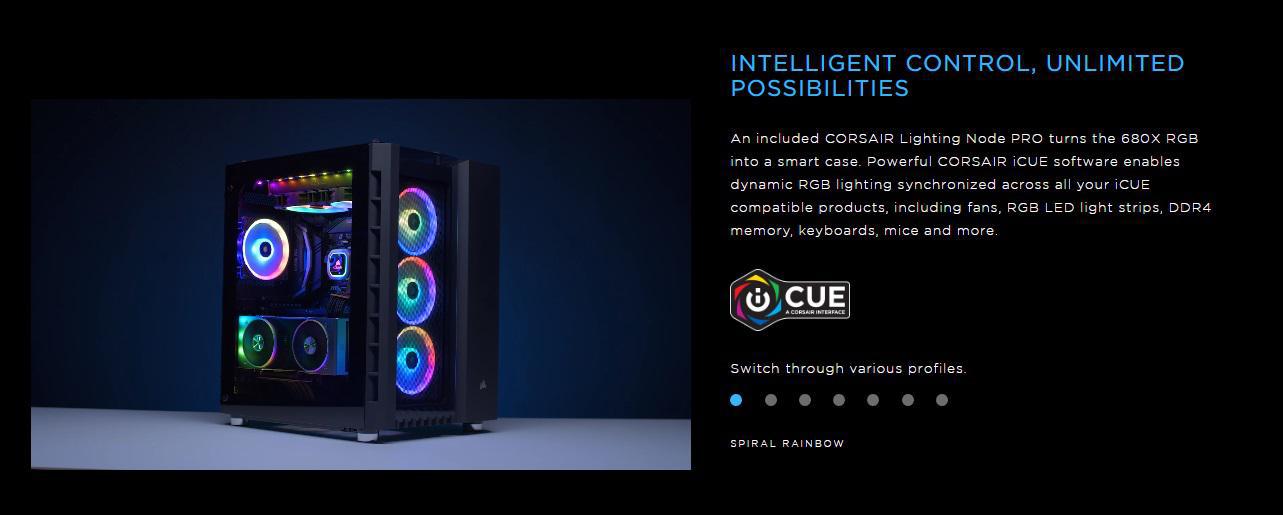
Since the included Lighting Node PRO and LL120 fans are iCUE compatible you can control them using Corsair’s iCUE software. The latest version of the iCUE software can be downloaded from Corsair’s website. For this review, we will focus on the elements of the software that pertain to the Lighting Node PRO and LL120 fans.
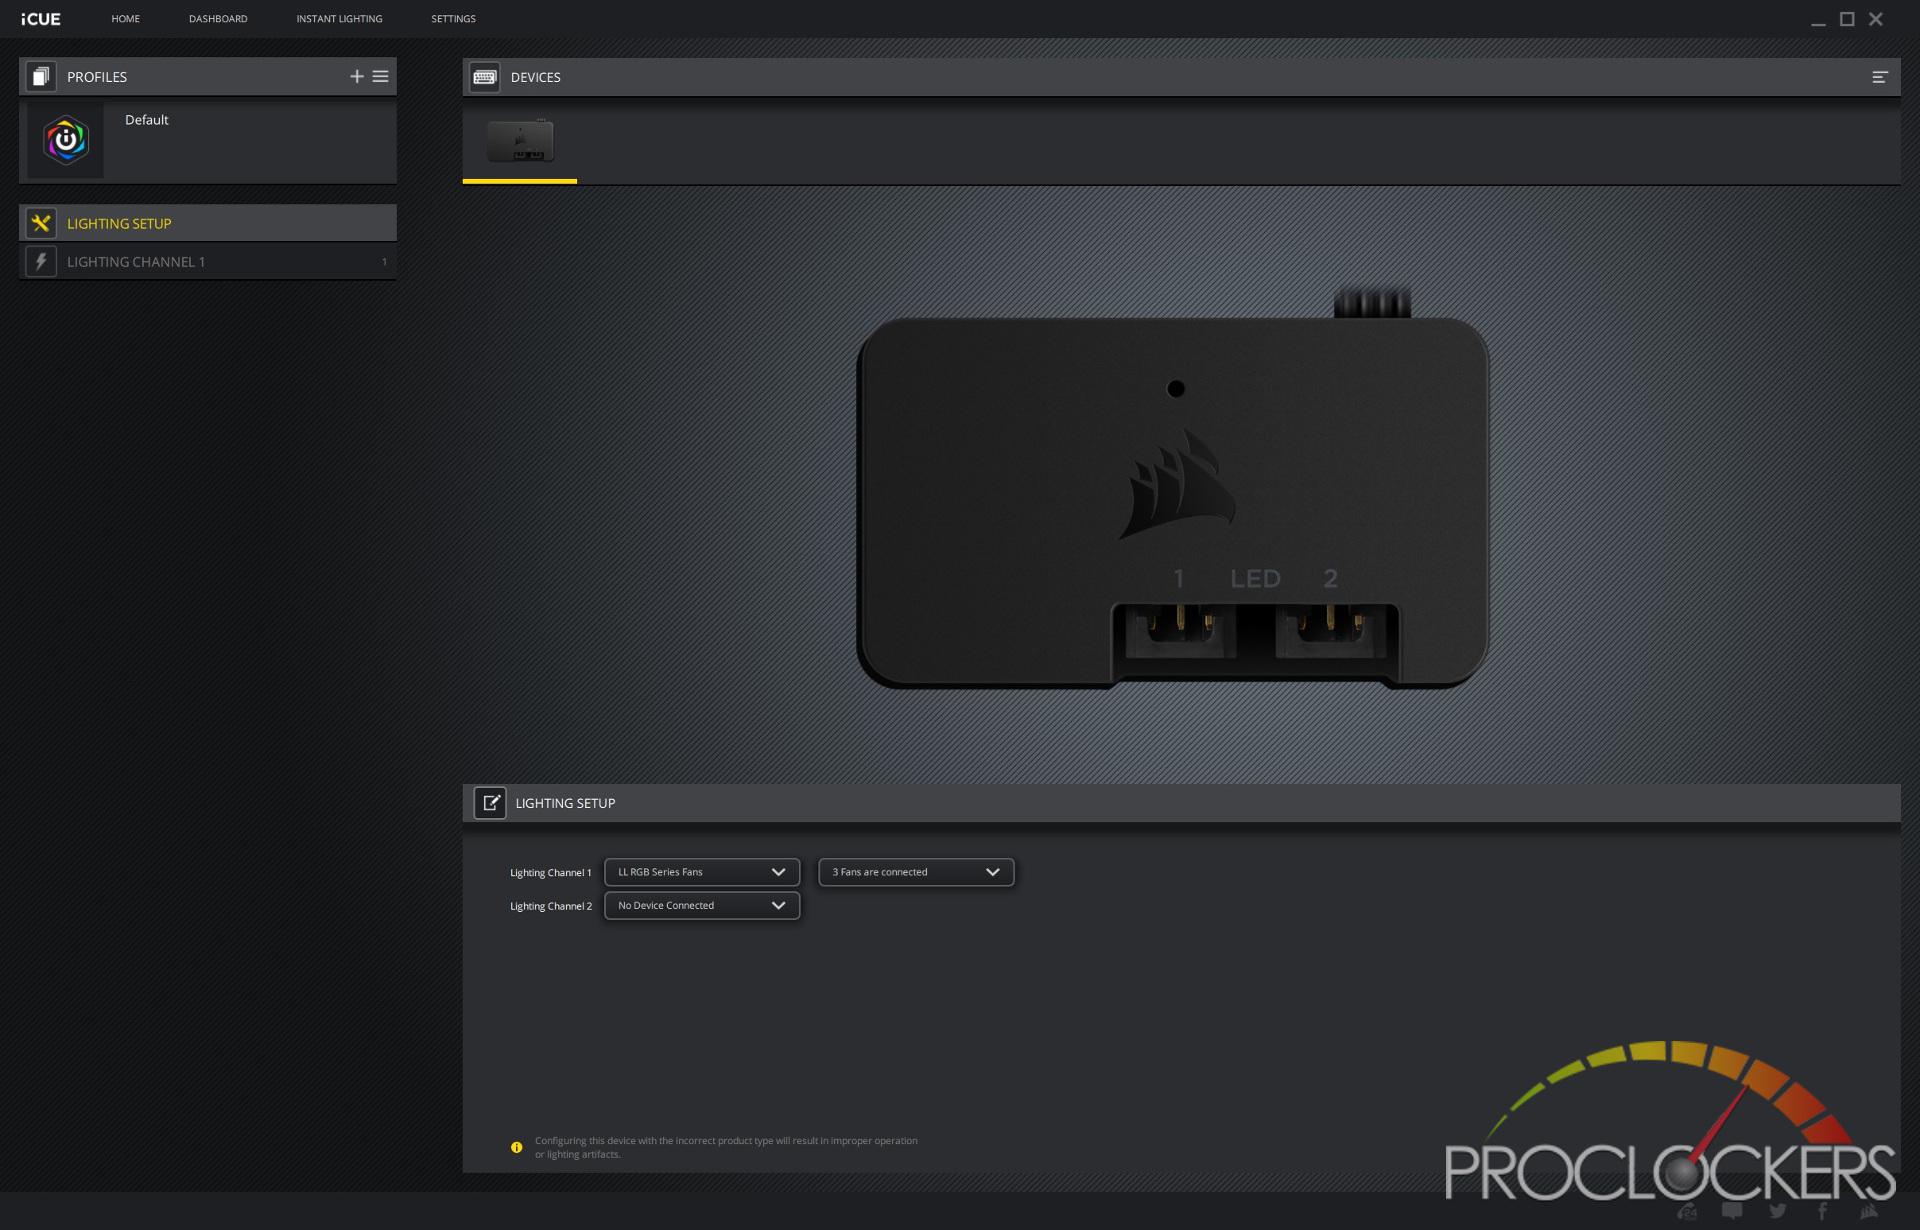
Once you install and run the software, it will automatically detect all your iCUE compatible devices. As you can see, the pre-installed Lighting Node PRO was found. If for some reason you don’t see your device, just shut down and restart the application. We have had this happen in another Corsair review, and a simple restart of the software resolved the problem.

After selecting the Lighting Node PRO from the device list, you get an additional navigation bar on the right to configure the device as well as the lighting for any attached fans. In the left pane, you will notice a photo of the Lighting Node PRO as well as its current configuration below the image. For our 680X, the three LL120 fans are installed on port one so we go ahead and adjust the configuration to reflect this.
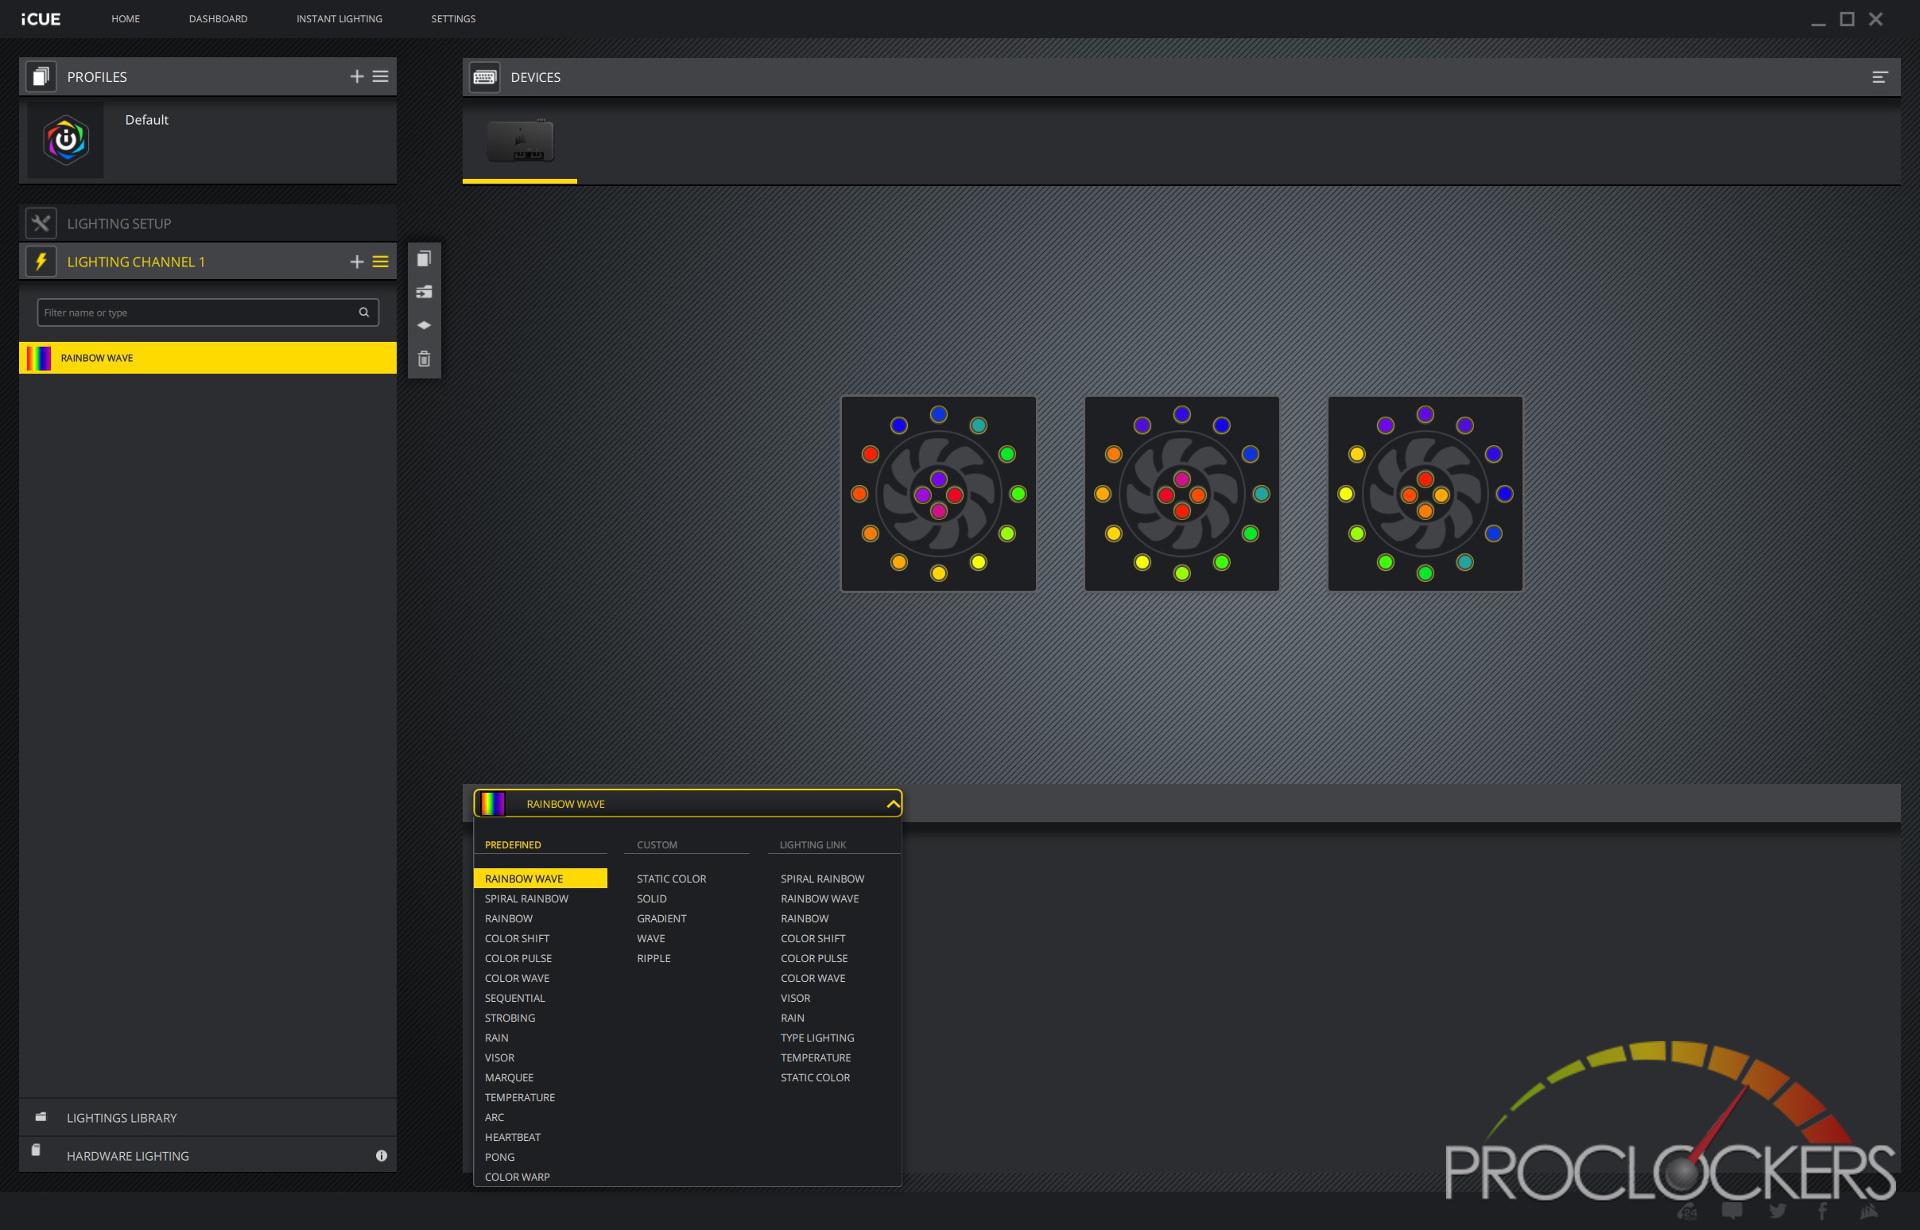
Now that the Light Node PRO has been configured, we can adjust the lighting effect for port 1 using the left navigation pane.
The iCUE comes with a lot of predefined lighting effects that you can additionally configure settings for, such as speed, color, and direction.
Predefined/Lighting Link:
- Spiral Rainbow – Cycling through all the colors of the rainbow in a circular motion
- Rainbow Wave – Cycling through all the colors of the rainbow going left to right
- Visor – Random/alternating colors moving across the LEDs then bouncing off the last one and returning to the start
- Color Shift – Shifting between random/alternating colors
- Color Pulse – Fading random/alternating colors in and out
- Color Wave – Like visor except it doesn’t bounce when hitting the end of the LEDs
- Temperature – Have your key change color based on various temperature sensors
- Sequential – Coloring each LED one by one and then starting over with a different color when reaching the end
- Marquee – Flashing somewhat like a marquee sign
- Rainbow – Fading colors through the color spectrum
- Strobing – Blinking LEDs on/off and changing the color each time
- Rain – Rain-like effect across all LEDs with random/alternating colors
- Arc – LEDs circling in each and changing colors each time it completes the circle
- Heartbeat – Random colors fading in and out resembling a heartbeat
- Color Warp – Changing colors up and down the color spectrum
Custom:
- Static Color – Solid static color that is always on
- Solid – Solid color that can have the occupancy and lighting time configured
- Gradient – Gradient of 2 colors that can have the occupancy and lighting time configured
- Ripple – A ripple effect with a configured color, occupancy, and lighting time
- Wave – A wave effect with a configured color, occupancy, and lighting time
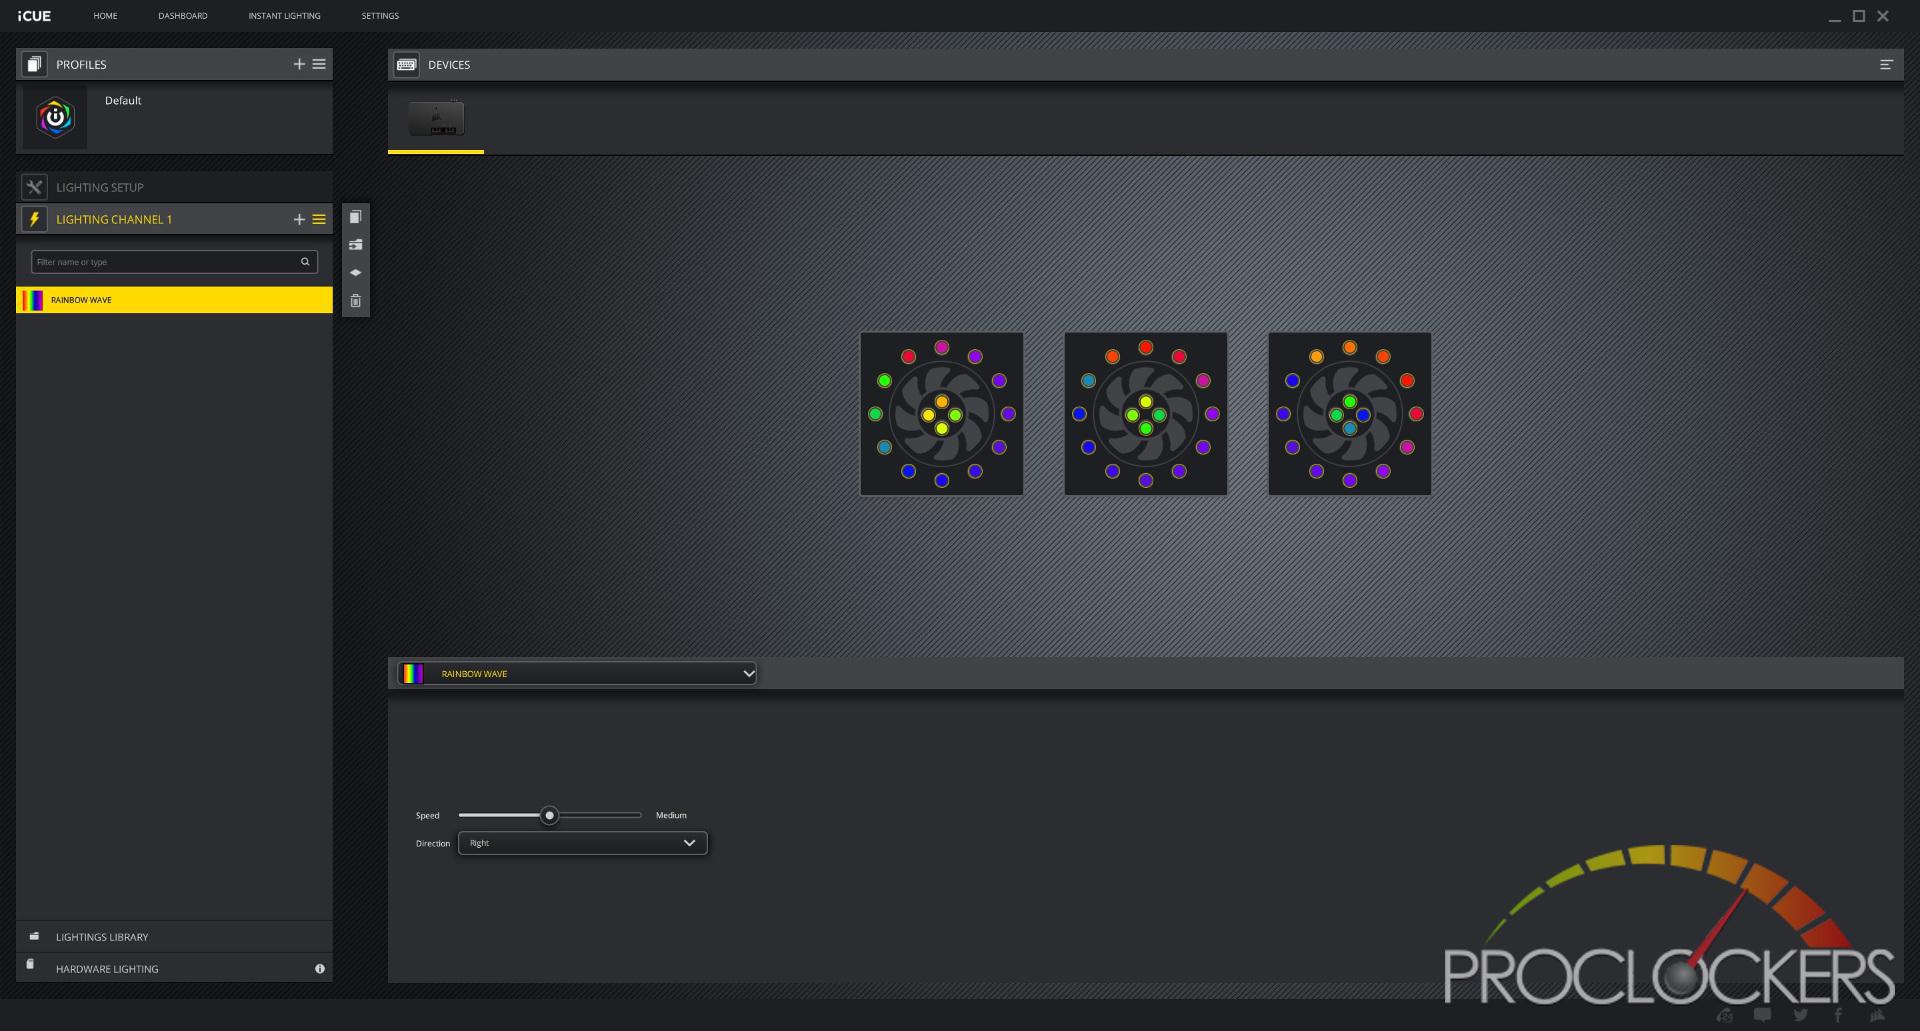
Once you have selected your desired lighting effect, you can see how it will look in the upper right pane. If you which to change attributes such as the speed, direction, and colors you can do this on the lower portion of the screen.
System Build & Installation
The hardware included in this build is:
- ASRock Z370 Tachi Motherboard
- Intel 8700K Processor
- 4 x 4GB Team Group T-Force Delta RGB Ram
- ASUS Strix RTX 2060 GPU
- Cooler Master 212 Hyper Black Edition Cooler
- Seasonic Snow Silent 750W Platinum PSU
Let me start off by saying I absolutely love that the PSU is at the back of the case. This was the first time in a long time where I could install a PSU and not worry about pre-installing the cables beforehand. There is so much room at the back of the case I was able to easily install them one by one near the end of the build. Also, if at any point in the future I need to add an additional GPU/SATA cable ,it will be extremely easy.
In addition to the tremendous amount of space at the back, I really like the amount of room you have to work in the case. Once the motherboard was installed, I was able to maintain a nice clean looking build thanks to the plethora of grommets/cable slots the 680X provides. Even though I just went with a simple air-cooled build, if you wanted to water-cool there is plenty of room both above and below the motherboard for your radiators. The only issue you may run into is that there are no mounting points for a reservoir so you will likely have to mount it at the back of the case or on one of your radiators.
Normally I would have gone with a vertical GPU placement but it looked a little weird with the riser card just floating at the bottom. This is due to not having a PSU shroud to mount the riser card as you normally would. Again, this is just a personal preference and might not be an issue for you.
One thing that really stands out with the 680X RGB is the absolutely gorgeous LL120 fans. Pictures do not do these fans justice and you really need to see them in person.
Working in the back of the 680X was a dream thanks to all the added space. Well doing some cable management, I did find I could have used a few more tie-downs near the grommets and a Velcro strap would have been handy as well. I personally really like the placement on the PSU as it makes adding/removing cables a breeze. Also, the included bracket at the back of the PSU is a nice touch. I’m guessing this helps relieve some of the pressure from the back of the case when pulling out cables from the PSU.
Since my PC only contains a single 2.5” I would have liked another option to mount it without the use of the drive bay. At some point, I may try and mount it on the rails near the front of the case so I can remove the cage altogether.

Final Thoughts & Conclusion
This has been the first Corsair case I have had the pleasure of reviewing and it did not disappoint. I’m a huge fan of the dual chamber design of the 680X, which made it effortless to create a clean build. No matter if I was at the front or back of the case there was tons of room to work in.
One of my favorite features of the 680X RGB is the included LL120 fans and Lighting Node PRO. These fans really make the case pop and thanks to the included fan hub it’s easy to add an up to three fans if you wish. I also really liked the placement of the PSU at the back as it really cleans up the front of the case and made the building of the PC so much easier. Some other features that I really liked were the removable hinged tempered glass side panel, the amount of airflow around the front/top panels, and the included drain port at the back of the case.
During the build, I did wish there were additional SSD mounting points throughout the case and that you could use the 2.5” bays without the 3.5” drive cage. I’m assuming these are the design trade-offs for moving the PSU to the back and keeping the size of the case smaller, which in my opinion is a small price to pay.
Overall, I think Corsair created a really great case with the 680X RGB and I look forward to the other cases the Crystal Series future.
Great Job, Corsair.


The 25 Best Anime Cats, Ranked
What are the best anime cats? Cats are something you either love with every fiber of your being or vehemently...


The 25 Best Anime Teachers, Ranked
Who are the best anime teachers? With high school being such a prevalent setting in anime, it makes sense that...


The 25 Best Orange Hair Anime Girls, Ranked
Who are the best orange hair anime girls? Orange hair is interesting in anime because it can either be a...