
Hardware
Cougar Gaming Dark Blader-S RGB Case Review
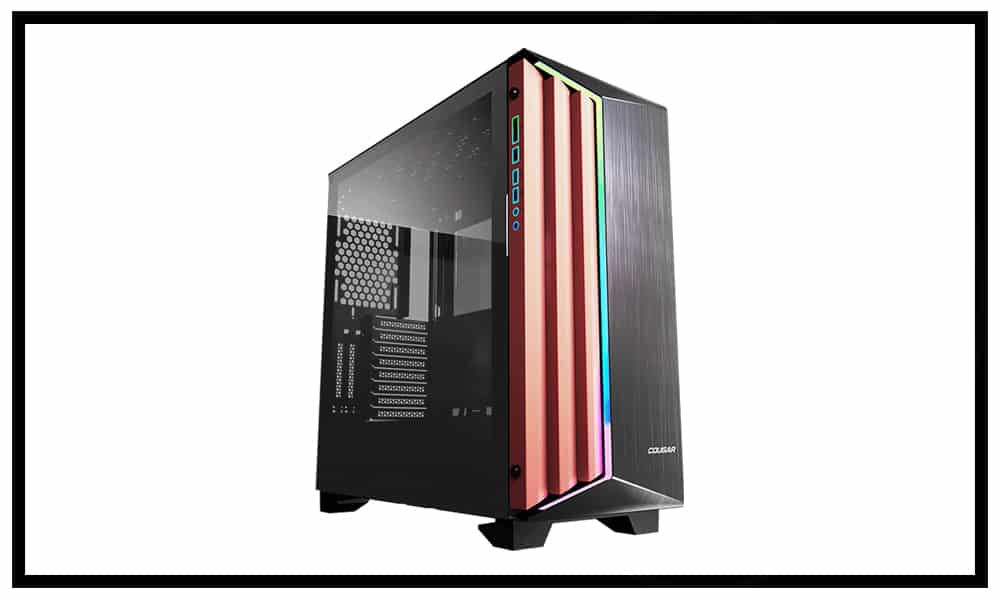
The Dark Blader S from Cougar Gaming offers elegant design, massive visibility, ultimate cable management, and superior cooling, featuring some sleek RGB lighting. Here, we’ll take a closer look!
Cougar Gaming Dark Blader-S RGB Case Specs
Some Specs from Cougar
I am a fan of big cases with plenty of room for complex builds inside. The Dark Blader S has space to let your creativity loose and put together a powerful build. The dimensions of this case give you the freedom to install any mobo from a Mini-ITX up to an E-ATX.
Depending on your build, there is also plenty of space to get creative with your cooling. This case provides maximum cooling capacity with full water cooling support and space for up to 7 fans.
| Spec | Dark Blader S |
| Form Factor | Full Tower |
| Dimensions | 232 x 523 x 518 (mm) 9.13 x 20.59 x 20.39 (in) |
| Motherboard Formats | Mini ITX / Micro ATX / ATX / CEB / E-ATX |
| Expansion Slots | 8+2 |
| Cooling Fan Support | Front: 140mm x 3 / 120mm x 3 Top: 140mm x 2 / 120mm x 3 Rear: 120mm x 1 (pre-installed) 7 Fans Maximum |
| Lighting | Integrated Lighting with Addressable RGB LEDs and Dynamic Lighting Effects in the Front Panel |
Cougar Gaming Dark Blader-S RGB Case Quick Tour
A Quick Tour

Starting on top, the Dark Blader S has a mesh grill panel that allows airflow into the unit from the top, underneath which you’ll find a second, finer, magnetic mesh grill that comes off for easy cleaning and access into the case. Also, you have space to mount three 120mm fans or two 140mm fans for maximum airflow at the top.

In my current setup, I moved the 120mm pre-installed fan from the back of the unit to the top and installed a 120mm RGB fan (also from Cougar Gaming), which I picked up on Amazon for about $25. This fan syncs with the front I/O so you can coordinate your light show. (*I wish I could show you that fan with all of its RGB, but unfortunately, it only lights partially, which is an issue I’m still trying to solve.)
I would also mention that this case can accommodate a water cooling system instead of fans and comes with a water cooling reservoir or pump stand that puts your equipment right upfront.

![]()
![]()
Bringing up the rear, we have a honeycomb-style backplate with 8 stacked horizontal expansion slots and two vertical, side-by-side slots, all with easily removable slot covers.

The Dark Blader-S comes prepared for your big build and bigger GPU requirements; it includes an adjustable graphics card holder and accommodates a vertical graphics card up to 380mm long.

The vertical expansion slots allow for creative building, which is all completely visible through the tempered glass side panels on BOTH sides of the case.

*There is protective plastic on BOTH sides of these glass panes; don’t be like me and realize after your build is together.
These tempered glass sides allow full visibility into the case so you can show off what’s inside. To help keep your cable management on point in this high-vis case, the Dark Blader-S comes with different types of cable management supports, including a flashy brushed aluminum cable management bar that matches the front face of the case. This bar is removable, so you can adjust your cables and complete your setup without it being in the way.
")
The power supply unit chamber is conveniently tucked away under the bottom of the case’s front “display area.” It has room for a PSU up to 7.9 inches long.

The “back” of the case is where you can find the PSU housing and Front I/O connectors, as well as the RGB header for the case. The backside of the case gives you options for how to arrange your SSDs and HDDs, depending on how many you have and/or how visible you want them to be.
There are two horizontal and two vertical 3.5” HDD trays, which are also compatible with 2.5” HDD/SSD, provided you use the provided extra mounting hardware. I have one HDD mounted in the vertical tray and my SSD in the horizontal tray in my unit. There is a cable management cover on this side to keep your cables under control and house the RGB/Fan control interface.

I’ve saved the best for last on this one: the front of the case.

The front of the case is where the style and aesthetic are at in the Dark Blader S. This case promises a distinctive style with elegant design, and it definitely delivers. The orange ridges contrasted with the smooth black on the front face of the case create an aesthetic that I would call elegant but tough-looking.

The front is made of brushed aluminum, and this is where you come to see the built-in light show. 13 built-in lighting patterns can be controlled by the lightbulb button on the front I/O when turned on. The RGB is bright but not glaring, so it doesn’t take away from my screen, even though they’re right next to each other.

Moving your system into Cougar Gaming Dark Blader-S RGB Case
But What About Building?
I will be the first to admit that moving my system into this case was an enormous upgrade for me in terms of both space and aesthetic. I ended up upgrading my motherboard to the Asus E3 Pro Gaming V5 (ATX), not only out of need but simply because I had the space to go that big, and it fits like an absolute glove.

As I mentioned before, I did some fan swapping on this case. Out of the box, the Dark Blader S has a black 120mm fan pre-installed at the back. This fan works just fine and is easily relocated to the top of the case.

Now, allegedly the front panel can be removed by undoing 2 screws on the panel’s interior, but I was not able to get the front panel off for fear of damaging it. Even with the screws undone, the panel doesn’t come off easily, and I didn’t want to risk damaging the I/O cables by yanking on it too hard.
The orange cable management bar is completely removable, which is helpful especially for running your SATA cables to the back where your SSD/HDDs sit.

I give a lot of credit to this bar for how much help it is for a beginner in cable management. I’m not at the point of building where I can finesse any cable out of sight, so having a big piece of metal to hold everything back is helpful, especially for massive PSU cables.
The backside of the case also has some assistance in cable management, and the cable management cover holds the finer cables in the RGB/Fan control system in place.

Personally, my setup has the space to allow my build to sit sideways, which is really the best way to view this case. The orientation of the RGB lighting at the front is best-displayed head-on, and you also get a clear view through to the interior of your build!

In my opinion, this case, given its size, style, and overall aesthetics, has almost endless possibilities when it comes to putting together a build, especially one inspired by RGB. The built-in lighting really gives you a good jump-off point if you are just getting into RGB. If this is your first big build, the Dark Blader S really gives you a lot of space to work with and expand in. I liked that no parts of this case (with the exception of my experience trying to remove the front panel) feel delicate or breakable, including the glass panels. I will note how much weight the tempered glass adds to this case; without them on, the case is relatively light.
Overall, I would rate this case: Friggen’ Neat.


The 25 Best Anime Cats, Ranked
What are the best anime cats? Cats are something you either love with every fiber of your being or vehemently...


The 25 Best Anime Teachers, Ranked
Who are the best anime teachers? With high school being such a prevalent setting in anime, it makes sense that...


The 25 Best Orange Hair Anime Girls, Ranked
Who are the best orange hair anime girls? Orange hair is interesting in anime because it can either be a...